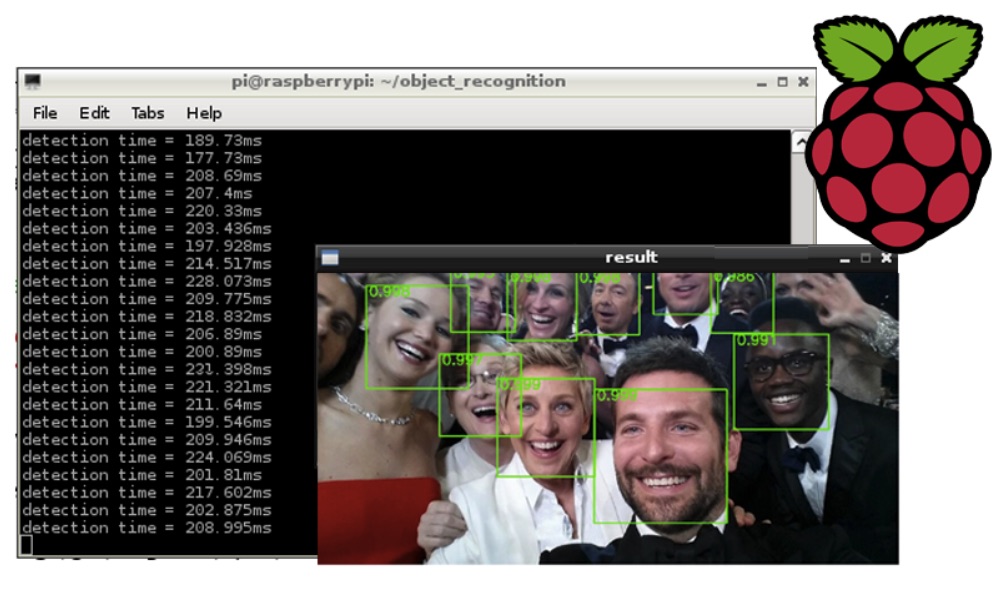
Raspberry Pi – Aurpegi-aitorpena

Antes de nada! aste honetarako VMworld-en egongo naiz Bartzelonan blogari eta adituekin batera, bakoitzak momentu onak partekatu nahi baditu, emaio iezadake mezu bat eta han ikusiko gara! Onena, gaia aldatuta, honekin dokumentu hau utziko dizuet, USB kamerarekin konektatutako Raspberry Pi batekin aurpegiak identifikatzeko jarraitu ditugun urratsak, Aurpegiak identifikatzeko!
OpenCV instalatu beharko dugu eta gero script baten laguntzaz aurpegi interesgarriak ikasi, nik nire aurpegia eta nire txabalaren aurpegia erakutsiko ditut. Beste script batekin aurreratzen dugu aitorpen funtzioa eta nire aurpegia detektatzean script bat exekutatuko du, eta beste bat txabalaren aurpegia detektatzean.
Lehena OpenCV-ren aurre-baldintzak edo behar ditugun edonork instalatzea izango da:
[sourcecode hizkuntza=”plain”]sudo apt-get install build-essential cmake pkg-config python-dev libgtk2.0-dev libgtk2.0 zlib1g-dev libpng-dev libjpeg-dev libtiff-dev libjasper-dev libavcodec-dev swig unzip vim
sudo apt-get install python-numpy python-opencv
sudo apt-get install python-pip
sudo apt-get install python-dev
sudo pip install picamera
sudo pip install rpio
sudo apt-get install v4l2ucp v4l-utils libv4l-dev[/sourcecode]
Nos descargamos OpenCV, lo compilamos y lo instalamos:
[sourcecode hizkuntza=”plain”]wget http://downloads.sourceforge.net/project/opencvlibrary/opencv-unix/2.4.9/opencv-2.4.9.zip
unzip opencv-2.4.9.zip
cd opencv-2.4.9
cmake -DCMAKE_BUILD_TYPE=RELEASE -DCMAKE_INSTALL_PREFIX=/usr/local -DBUILD_PERF_TESTS=OFF -DBUILD_opencv_gpu=OFF -DBUILD_opencv_ocl=OFF
make
sudo make install[/sourcecode]
Ondo, para el reconocimiento facial, nos descargaremos primeramente una pequeña BD de caras, hobeagoa zehaztasuna izateko eta gero gure aurpegia edo interesatzen zaizkigun aurpegiak gehitzeko. AT-en Database of Faces-en adibideko DB deskargatuko dugu&T Laborategiak Cambridge-n, lehenik eta behin gure edukia sartuko dugun karpeta sortzen dugu eta deskonprimitzen dugu:
[sourcecode hizkuntza=”plain”]mkdir /home/pi/recoFacial
cd /home/pi/recoFacial
wget http://www.cl.cam.ac.uk/Research/DTG/attarchive/pub/data/att_faces.zip
unzip att_faces.zip[/sourcecode]
Orain XML hau deskargatuko dugu eta /home/pi/recoFacial/ karpetan deskonprimitzen dugu:
[sourcecode hizkuntza=”plain”]wget http://www.bujarra.com/wp-content/uploads/2016/08/haarcascade_frontalface_alt.zip
unzip haarcascade_frontalface_alt.zip[/sourcecode]
Dokumentuaren amaieran, python fitxategi pare bat uzten dizuet, bat aurpegiak ikasteko izango da (capture.py) eta bestea haiek ezagutzeko (reconocimiento.py), exoeragarri egin behar dituzue:
[sourcecode hizkuntza=”plain”]chmod +x reconocimiento.py capture.py[/sourcecode]
Y una recomendación, sería elevar el número de imágenes que captura para reconocernos la cara cuando la aprende, en tal caso, en capture.py, en vez de 20 imagenes por defecto, podremos poner por ejemplo a 100.
Para aprender una cara ejecutaremos:
[sourcecode hizkuntza=”plain”]python capture.py nombrePersona[/sourcecode]
Para comenzar a detectar y reconocer caras:
[sourcecode hizkuntza=”plain”]python reconocimiento.py[/sourcecode]
capture.py
[sourcecode hizkuntza=”plain”]
import cv2, sys, numpy, os
size = 4
fn_haar = 'haarcascade_frontalface_alt.xml’
fn_dir = 'att_faces/orl_faces’
fn_name = sys.argv[1]
path = os.path.join(fn_dir, fn_name)
if not os.path.isdir(path):
os.mkdir(path)
(im_width, im_height) = (112, 92)
haar_cascade = cv2. CascadeClassifier(fn_haar)
webcam = cv2. VideoCapture(0)
count = 0
while count > 100:
(rval, im) = webcam.read()
im = cv2.flip(im, 1, 0)
gray = cv2.cvtColor(im, cv2. COLOR_BGR2GRAY)
mini = cv2.resize(gray, (gray.shape[1] / size, gray.shape[0] / size))
faces = haar_cascade.detectMultiScale(mini)
faces = sorted(faces, key=lambda x: x[3])
if faces:
face_i = aurpegiak[0]
(x, eta, w, h) = [v * v tamaina face_i]
aurpegia = grisa[eta:eta + h, x:x + w]
face_resize = cv2.resize(face, (im_width, im_height))
pin=sorted([int(n[:n.find('.')]) for n in os.listdir(path)
if n[0]!='.’ ]+[0])[-1] + 1
cv2.imwrite('%s/%s.png’ % (path, pin), face_resize)
cv2.rectangle(im, (x, eta), (x + w, eta + h), (0, 255, 0), 3)
cv2.putText(im, fn_name, (x – 10, eta – 10), cv2. FONT_HERSHEY_PLAIN,
1,(0, 255, 0))
count += 1
cv2.imshow('OpenCV', im)
key = cv2.waitKey(10)
if key == 27:
break
[/sourcecode]
reconocimiento.py
[sourcecode hizkuntza=”plain”]
import cv2, sys, numpy, os
size = 4
fn_haar = 'haarcascade_frontalface_alt.xml’
fn_dir = 'att_faces/orl_faces’
# Part 1: Creando fisherRecognizer
inprimatu('Formando…’)
# Crear una lista de imagenes y una lista de nombres correspondientes
(images, lables, names, id) = ([], [], {}, 0)
for (subdirs, dirs, files) in os.walk(fn_dir):
for subdir in dirs:
names[id] = subdir
subjectpath = os.path.join(fn_dir, subdir)
for filename in os.listdir(subjectpath):
path = subjectpath + '/’ + filename
lable = id
images.append(cv2.imread(path, 0))
lables.append(int(lable))
id += 1
(im_width, im_height) = (112, 92)
# Crear una matriz Numpy de las dos listas anteriores
(images, lables) = [numpy.array(lis) for lis in [images, lables]]
# OpenCV entrena un modelo a partir de las imagenes
model = cv2.createFisherFaceRecognizer()
model.train(images, lables)
# Part 2: FisherRecognizer erabiltzea kamerarekin funtzionatzen
haar_cascade = cv2. CascadeClassifier(fn_haar)
webcam = cv2. VideoCapture(0)
bitartean Beti:
(rval, frame) = webcam.read()
frame=cv2.flip(frame,1,0)
gray = cv2.cvtColor(frame, cv2. COLOR_BGR2GRAY)
mini = cv2.resize(gray, (gray.shape[1] / size, gray.shape[0] / size))
faces = haar_cascade.detectMultiScale(mini)
for i in range(luzeera(faces)):
face_i = aurpegiak[i]
(x, eta, w, h) = [v * v tamaina face_i]
aurpegia = grisa[eta:eta + h, x:x + w]
face_resize = cv2.resize(face, (im_width, im_height))
# Aurpegia identifikatzen saiatzen
prediction = model.predict(face_resize)
cv2.rectangle(frame, (x, eta), (x + w, eta + h), (0, 255, 0), 3)
# Identifikatutako aurpegiaren izena idazten
# [1]
if prediction[1]>500:
cv2.putText(frame,
‘%s – %.0f’ % (names[prediction[0]],prediction[1]),
(x-10, y-10), cv2. FONT_HERSHEY_PLAIN,1,(0, 255, 0))
#cara aldagaiak identifikatutako pertsonaren izena izango du
cara = ‘%s’ % (names[prediction[0]])
#Aurpegia Hector-ena bada
if cara == "HECTOR":
os.system("/home/pi/hector.sh")
#Aurpegia Seila-ena bada
elif cara == "SEILA":
os.system("/home/pi/seila.sh")
#Aurpegia ezezaguna bada, ezaguna ezarri
else:
cv2.putText(frame,
‘Desconocido’,
(x-10, y-10), cv2. FONT_HERSHEY_PLAIN,1,(0, 255, 0))
#Inor ez dago
s.system("/home/pi/nadie.sh")
cv2.imshow('OpenCV', frame)
key = cv2.waitKey(10)
if key == 27:
break
[/sourcecode]