Installing a Jitsi server to have our corporate solution for video conferencing

In this post we will see the process of installing and basic tuning of our own Jitsi server. That for those who do not know him, Jitsi is the king of Open Source solutions to hold meetings or videoconferences with as many people as we are interested in simultaneously. The idea is that you can offer your own corporate solution.
It is a very complete tool that has nothing to envy to traditional payment solutions such as Skype, the Teams, Webex or Google Meet among others. We will be able to do exactly the same (Or more) and safely (not like with Zoom). It consists of a web portal that users will connect to create or join meetings. We will be able to enable integrated authentication with LDAP with the idea of preventing not everyone from connecting to our site to create meetings, only from our company. And best of all, we can apply a fully corporate interface to it in a couple of minutes. Then users will do what they always do, Connect with camera and microphone from the browser, they will be able to share their screen or an app, Messaging, The moderator will be able to mute, We will be able to record the sessions, share Youtube videos, as well as the announcer will have more than very interesting statistics of the meeting.
Well, What do we need? Well, a machine with very low resources, with Ubuntu installed, in my case I will use the last LTS which is the 20.04 of Ubuntu Server. After having the machine with static IP addressing and fully updated, We can start! We will use Nginx as a web server, to install it we run:
add-apt-repository ppa:ondrej/nginx apt update -y apt install nginx -y systemctl restart nginx.service systemctl enable nginx.service
And we can start with the installation of Jitsi, We download the public key from your repository, We add it to a repo of ours and install it:
wget -qO - https://download.jitsi.org/jitsi-key.gpg.key | Sudo apt-key add -
sh -c "echo 'deb https://download.jitsi.org stable/' > /etc/apt/sources.list.d/jitsi-stable.list"
apt update -y apt install apt-transport-https jitsi-meet jitsi-videobridge2 -y
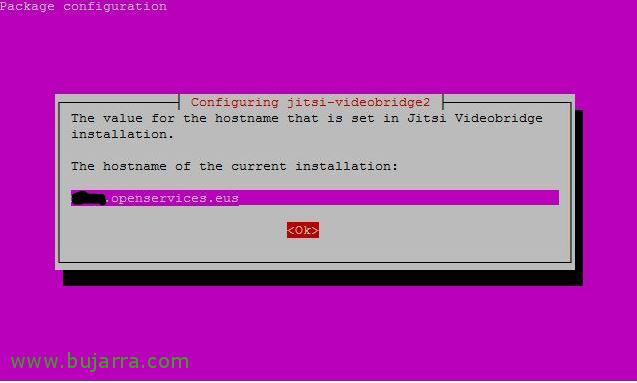
During installation it will ask us for the FQDN that we will use as a public name to access the site. So it is a good time to remind you that, obviously we will have to create this record on our public DNS server and also open the port in our firewalls 443 to this machine.

And to finish with the installation, It will ask us which certificate we are going to use, whether one self-signed or one of ours, We follow the normal assistant, to create a certificate for us and then we will change it.
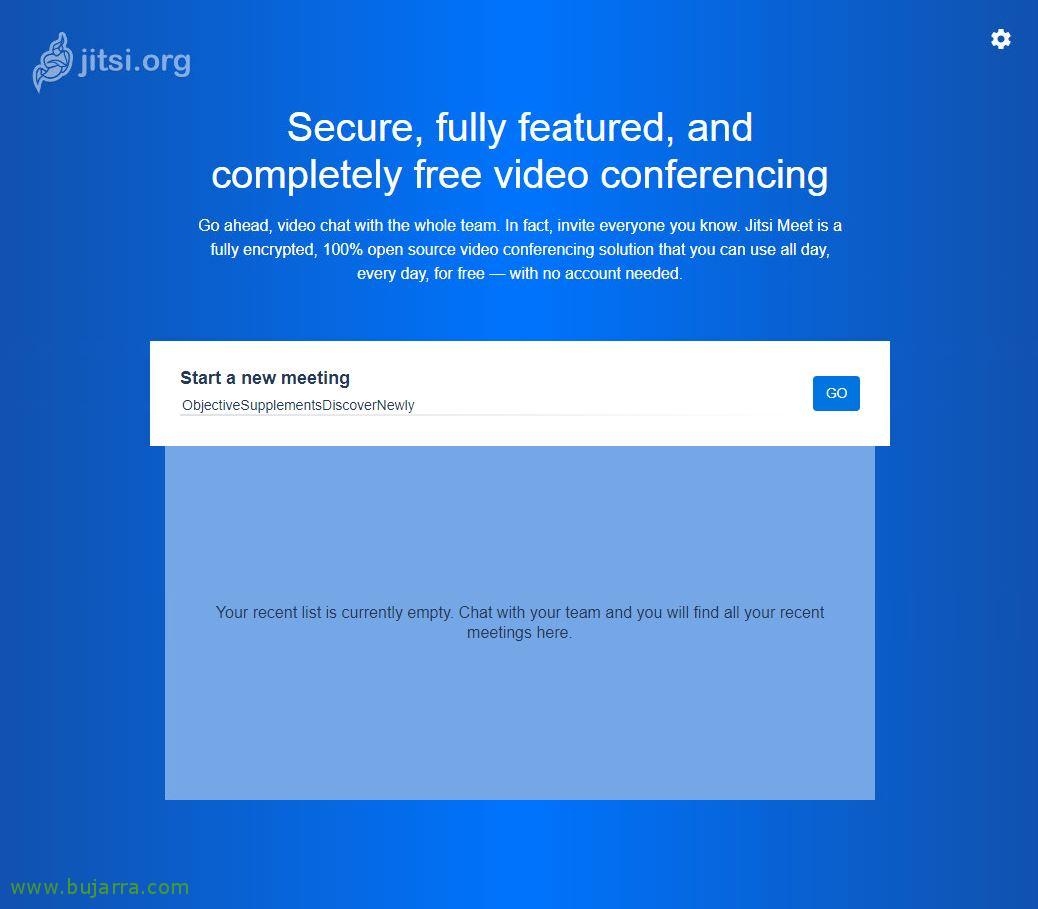
When the installation is finished, if we open the URL of our Jitsi site in a browser, we will see that we have it ready and fully functional! We can try it to create meetings and test it as much as we need.
If we want video calls to work externally without problems, we will have to install a TURN server on another machine, In this document we have already seen how to install coTURN and basically set it up, So check it out. When you've got it ready, we simply edit this file (/etc/prosody/conf.avail/FQDN_SITIO_JITSI.cfg.lua) on the Jitsi machine and indicate the server and port we are using:
turncredentials_secret = "mambrusefuelaguerra";
turncredentials = {
{ type = "Stun", host = "FQDN_PUBLICO_TURN", port = "5349" },
{ type = "turn", host = "FQDN_PUBLICO_TURN", port = "5349", transport = "UDP" },
{ type = "turns", host = "FQDN_PUBLICO_TURN", port = "5349", transport = "TCP" }
};
 |
 |
What I said, We can edit and tune it to our liking, We can change the background, change some color, The logo… and then we will have our corporate site fully ready! Here are a series of clues if you are interested:
-
- Change Jitsi logo, Replace file: /usr/share/jitsi-meet/images/watermark.png
- Change cover text (Find and replace text): /usr/share/jitsi-meet/lang/main-es.json
- Always change language to ES: /etc/jitsi/meet/FQDN_SITIO_JITSI-config.js and change 'defaultLanguage: 'es',
- If we want to allow conversations to be recorded, in the previous file, We comment:
localRecording: {
enabled: True,
format: 'ogg’
}, - To change the background image: in the /usr/share/jitsi-meet/css/all.css search for '.welcome'{background-image:’ and put a URL on it(../images/FONDO.jpg)
- To change the color of the Title text: .header .header-text-title{colour:#XXXXXX;
- To change the color of the Home text: .header .header-text-description{display:Inherit;colour:#XXXXXX;
- To change the color of the button: .welcome .welcome-page-button{width:51Px;min-width:Inherit;height:35Px;font-size:14Px;font-weight:Inherit;background:#XXXXXX;
- Change the square color of the last meetings: .welcome .header .tab-container{font-size:16Px;Position:relative;text-align:left;min-height:354Px;width:710Px;background:#XXXX;
- To change the color when hovering over the selected meeting in the center area: .item.with-click-handler:Hover{background-color:#XXXXXX}
- To change the color of the meeting name text: .meetings-list{font-size:14Px;colour:#XXXXXX
- Change the text color of “Start a meeting”: .enter-room-input-container{width:100%;Padding:0 8px 5px 0;text-align:left;colour:#XXXXXX;
- Last, in /usr/share/jitsi-meet/interface_config.js we can change things like which URL to go to if you click, what name does it give by default?, Change that 'me’ by 'I’ or the default user name that is entered when entering…
DEFAULT_REMOTE_DISPLAY_NAME: 'No Name',
DEFAULT_LOCAL_DISPLAY_NAME: 'I',
SHOW_JITSI_WATERMARK: True,
JITSI_WATERMARK_LINK: 'http://www.openservices.eus',
And by the way, if we want to change the certificate to the Nginx service so that it does not give us access errors and place our certificate, We will do this by editing the /etc/nginx/sites-enabled/FQDN_SITIO_JITSI.conf file, We will edit the 'ssl_certificate’ and 'ssl_certificate_key', where we will put our certificate and our private key respectively. If you have a PFX and want to know how to get these files, Check out This post, you see the complete and simple process, Wow, it's two steps, You can find it in the “Enabling secure access to ONLYOFFICE”.

What I said, I hope you find it interesting, The truth is that it is a complete solution and in the days that we have had to live it comes in handy. We will no longer have the crazy boss with 20 clients to hold meetings with a few, with others… we are providing from IT a corporate solution that will meet all expectations.