Installing Apache Guacamole

In this post we are going to see the installation of Apache Guacamole, an interesting tool based on free software that will allow us to connect to computers in a secure way, thanks to HTML5 and HTTPS we will be able to access computers with RDP, VNC, SSH or TELNET.
What I said, in this post we will see what the installation of Apache Guacamole is, which thanks to its web interface will allow users to access their computers. The idea is to use Guacamole as a gateway, since only by publishing the HTTPS service will it be able to encapsulate the protocols mentioned above, users will be able to work in the same way through HTML5 by integrating their remote computer into the browser. At the end of the post we will see how to secure the environment a little more using a reverse proxy. It is true that with Apache Guacamole apart from allowing them to connect to desktops, We may publish applications, as well as integrate Windows authentication or introduce 2FA (Two-factor authentication).
In this post I'm working with an Ubuntu 20.04, So we start with the installation on an updated machine and ready to start! As usual, We start with the dependencies, We urge them first:
Sudo apt-get install libcairo2-dev libjpeg-turbo8-dev libjpeg-dev libpng-dev libtool-bin libossp-uuid-dev make maven -y sudo apt-get install libavcodec-dev libavformat-dev libavutil-dev libswscale-dev freerdp2-dev libpango1.0-dev libssh2-1-dev libtelnet-dev libvncserver-dev libwebsockets-dev libpulse-dev -y
We have to install Tomcat:
sudo apt install tomcat9 tomcat9-admin tomcat9-common tomcat9-user -y
It's time to download Guacamole, we start with the Server component, See which version is the most recent, We download it, We compile and install it:
tar -xzf guacamole-server-1.2.0.tar.gz cd guacamole-server-1.2.0/ ./configure --with-init-dir=/etc/init.d make sudo make install
We run ldconfig to create links and cache, In addition to opening port 8080TCP in the firewall:
Sudo LDCONFIG sudo UFW Allow 8080/TCP
Then we will install the Guacamole Client that we will download from the same website, as well as the WAR file. We unzip them and proceed to install them:
CD ..
tar -xzf guacamole-client-1.2.0.tar.gz cd guacamole-client-1.2.0/ mvn package sudo mkdir /etc/guacamole sudo cp guacamole-1.2.0.war /etc/guacamole sudo ln -s /etc/guacamole/guacamole.war /var/lib/tomcat9/webapps/
Let's start now what the configuration is, we created the directory for Guacamole extensions and libraries, and add the following environment variable:
sudo mkdir /etc/guacamole/{Extensions,Lib}
sweat echo "GUACAMOLE_HOME=/etc/guacamole" >> /etc/default/tomcat9
We create the Guacamole configuration file (/etc/guacamole/guacamole.properties) to connect with guacd and we add:
guacd-hostname: localhost guacd-port:     4822
user-mapping:   /etc/guacamole/user-mapping.xml auth-provider:  net.sourceforge.guacamole.net.basic.BasicFileAuthenticationProvider
We link the Guacamole configuration directory to the Tomcat servlet:
sudo ln -s /etc/guacamole /usr/share/tomcat9/.guacamole
Before you go any further, we need to generate the MD5 hash for the password we're going to want to use, We will easily get it out by executing:
echo -n PASSWORD | OpenSSL MD5
    (Stink)= d287200e83ee04f67294de90dd72f9c6
We will now be able to edit the file where we will define the accesses to Apache Guacamole, This is, If we use local users we can define them here as well as the resources we present to them, Example of '/etc/guacamole/user-mapping.xml’ that we will have to develop:
<user-mapping>
    <!-- Per-user authentication and config information -->
    <!-- A user using md5 to hash the password guacadmin user and its md5 hashed password below is used to login to Guacamole Web UI-->
    <authorize username="guacadmin"
            password="D287200E83EE04F67294DE90DD72F9C6"
            encoding="mid5">
        <!-- First authorized Remote connection -->
        <connection name="Centos Server">
            <Protocol>sh</Protocol>
            <param name="hostname">192.168.1.46</Param>
            <param name="port">22</Param>
        </connection>
        <!-- Second authorized remote connection -->
        <connection name="Windows 2019">
            <Protocol>rdp</Protocol>
            <param name="hostname">192.168.1.100</Param>
            <param name="port">3389</Param>
            <param name="username">administrator</Param>
            <param name="ignore-cert">True</Param>
        </connection>
    </authorize>
</user-mapping>
And, By the way, that after doing all the installation and configuration changes it will be essential to restart the services, as well as enable them to start automatically with the system:
sudo systemctl restart tomcat9 sudo systemctl enable tomcat9 sudo systemctl restart guacd sudo systemctl enable guacd
And it's time to try it out! ¿No?

We'll access via a web browser, Pointing to HTTP://DIRECCION_IP_GUACAMOLE:8080/guacamole and according to the username and password defined in the previous file.
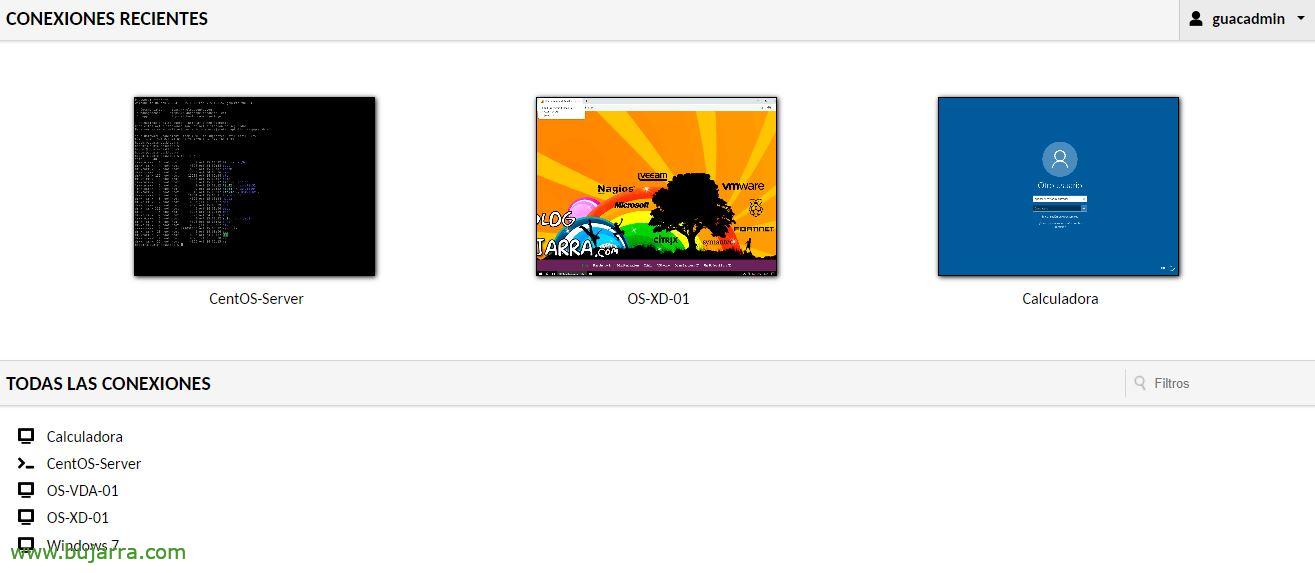
This would be the interface the first time we saw it, where we will have the resources that have been published to us. And if we have recently connected to a computer we will have it at the top of a quick glance.
 |
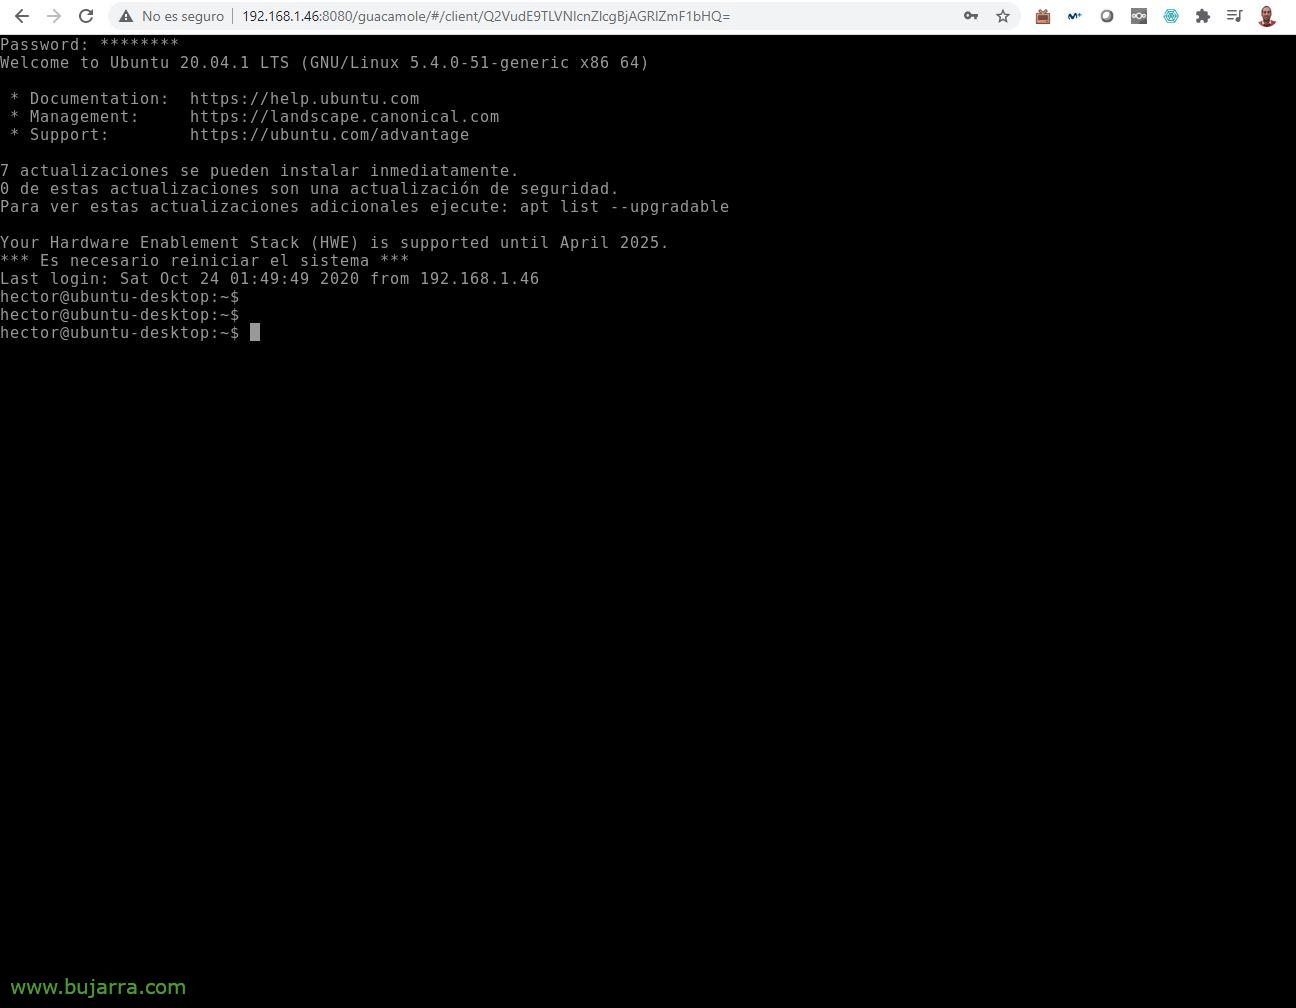 |
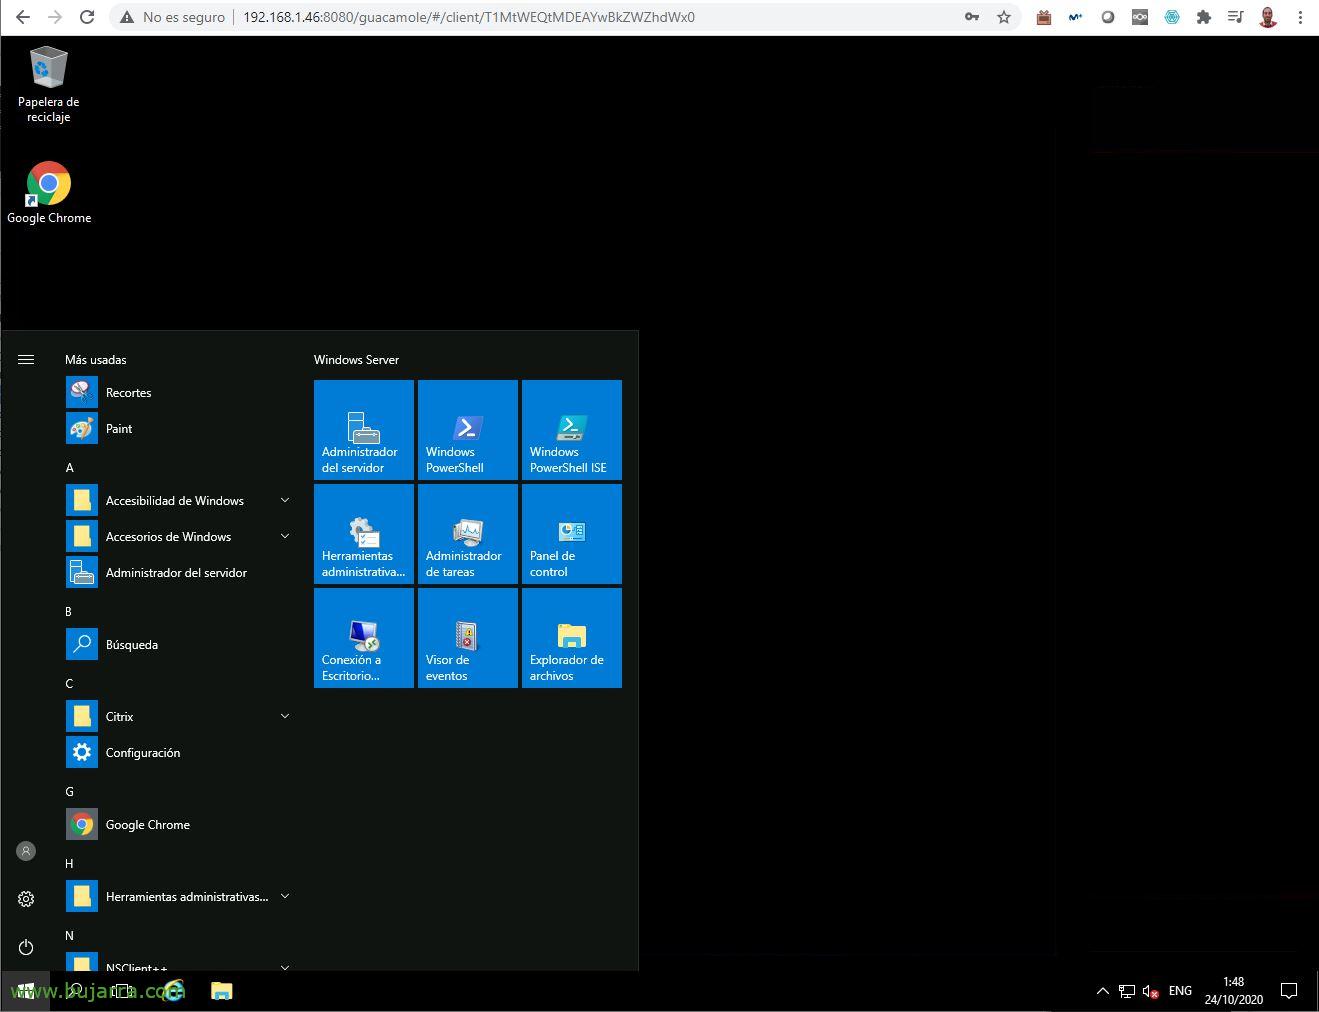
And when you click on any connection, the RDP connection will open integrated into the browser, or VNC, o SSH, o Telnet… I leave you this link with all the manual and official guide to be able to configure it to your need, An app, auth with LDAP, OTP/Token…
A blast, ¿No? the bad for now is security since this is HTTP, so at least we will have to put a reverse proxy in it, and also that it goes through SSL…
Enabling Reverse Proxy with Apache
Well, Well, if we want to give it an extra layer of security, We will have to install Apache on another machine (or in the same…) to act as a reverse proxy:
sudo apt-get install apache2
We enable the following apache modules:
Sudo A2ensite Default-SSL sudo A2Enmod SSL sudo A2Enmod proxy sudo A2Enmod proxy_http sudo A2Enmod proxy_balancer sudo A2Enmod lbmethod_byrequests sudo SystemCTL Restart Apache2
And we edit the default SSL file (/etc/apache2/sites-available/default-ssl.conf), to which we will have to indicate our certificates of the site, as well as the URL of our Guacamole, leaving something like:
<IfModule mod_ssl.c>
        <VirtualHost _default_:443>
                ServerAdmin webmaster@localhost DocumentRoot /var/www/html ErrorLog ${APACHE_LOG_DIR}/error.log CustomLog ${APACHE_LOG_DIR}/access.log combined                 SSLEngine on                 SSLCertificateFile      /etc/apache2/ssl/bujarra.crt                 SSLCertificateKeyFile   /etc/apache2/ssl/bujarra.key                 SSLProxyEngine on                 SSLProxyVerify none                 SSLProxyCheckPeerCN off                 SSLProxyCheckPeerName off                 SSLProxyCheckPeerExpire off
                <Location /guacamole/>
                    Order allow,deny                     Allow from all                     ProxyPass http://DIRECCION_IP_GUACAMOLE:8080/guacamole/ flushpackets=on                     ProxyPassReverse http://DIRECCION_IP_GUACAMOLE:8080/guacamole/
                </Location>
                SSLCertificateFile /etc/ssl/certs/ssl-cert-snakeoil.pem SSLCertificateKeyFile /etc/ssl/private/ssl-cert-snakeoil.key
                <FilesMatch "\.(CGI|shtml|Phtml|php)$">
                                SSLOptions +StdEnvVars
                </FilesMatch>
                <Directory /usr/lib/cgi-bin>
                                SSLOptions +StdEnvVars
                </Directory>
        </VirtualHost>
</IfModule>
We restart Apache and instruct it to start up every time I start the machine with:
sudo systemctl restart apache2 sudo systemctl enable apache2
And there is nothing left to do but try! We open a browser against: https://DIRECCION_IP_PROXY/guacamole/ and our deployment should be a little safer.
As always hoping you find them interesting, But these types of solutions are very good for small businesses, Micro SMEs, preventing them from being able to publish RDP to the internet directly. With this type of solution we open a single port to the Internet, The 443TCP, The rest closed. Easy and fast, At one point we have a tool to allow teleworking in companies without resources, Study Centers, colleges…
A hug!