Firefly III – Personal Finance Manager

I suppose that perhaps many of you will know him, Firefly III is a service that we can use to manage our finances. A manager who will help us understand our bank accounts, We will be able to easily understand where our money is going, Of course open source and on-premise!
Well, Well, that's it, If you need to have more visibility over your bank accounts, or have a greater monitoring of income and expenses, FireFly III has been helping in this regard for years. We will have it installed in less than 5 minutes thanks to Docker!
There are several ways to install Firely III (and to configure it), based on what we need; in this case we will install Firefly III in a Docker container, Before proceeding, we download the files we will need and adapt them to our needs:
wget https://raw.githubusercontent.com/firefly-iii/docker/main/docker-compose-importer.yml -O docker-compose.yml wget https://raw.githubusercontent.com/firefly-iii/firefly-iii/main/.env.example -O .env wget https://raw.githubusercontent.com/firefly-iii/docker/main/database.env -O .db.env wget https://raw.githubusercontent.com/firefly-iii/data-importer/main/.env.example -O .importer.env
We edit the file '.env’ and at least we will modify the APP_KEY, MySQL Database Access Locals and Credentials, since this file will have most of the configuration, the mail part if we want notifications…
APP_KEY=secretrode32characters DEFAULT_LANGUAGE=es_ES TZ=Europe/Madrid
...
DB_USERNAME=USUARIO_BD DB_PASSWORD=CONTRASEÑA_USUARIO_BD
...
We edit the file '.db.env’ and at least modify the DB access credentials (the same as in the previous step):
MYSQL_USER=USUARIO_BD MYSQL_PASSWORD=CONTRASEÑA_USUARIO_BD
Last, if we are interested in having the container to import data to Firefly we edit '.importer.env’ (And if not, we ignore this). And we will indicate the IP address or FQDN of the Firefly III server, as well as we will choose the way to authenticate ourselves, usually with the Access Token (later we will see how to generate it):
FIREFLY_III_URL=http://IP_O_FQDN_FIREFLY_III FIREFLY_III_ACCESS_TOKEN=ey...
TZ=Europe/Madrid
And we ended up editing the 'docker-compose.yml’ if we are interested in making any changes, In my case I only opened the ports, 80tcp for FireFly III, 81tcp for the Importer and of course the 3306 I leave it open to consult MySQL from the outside, for example from Grafana, Staying:
Services:
...
  App:
...
    ports:
      - '80:8080'
...
...
  db:
...
    ports:
      - '3306:3306'
...
...
  Importer:
...
    ports:
      - '81:8080'
...
And, We finish by lifting the containers:
docker compose -f docker-compose.yml up -d --pull=always

We will now be able to access the Firefly iii website, in this case published on port 80tcp of the Docker host IP, So HTTP://DIRECCION_IP_O_FQDN and the first time we log in we have to create an account, We provide our email address and a password & “Register”,
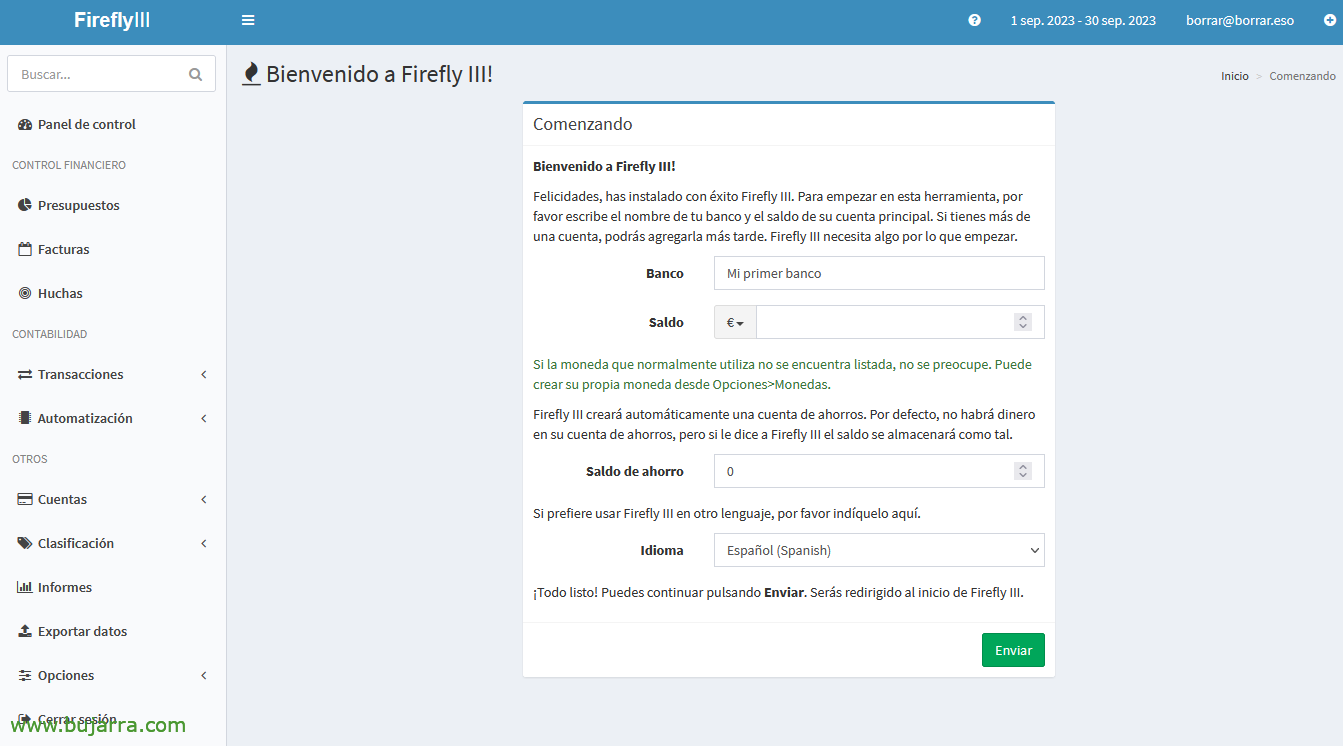
As soon as we enter, we will have to register our first bank, and we can start taking a look at the application, but without data it is somewhat poor… So the next thing will be to import the data from our bank!
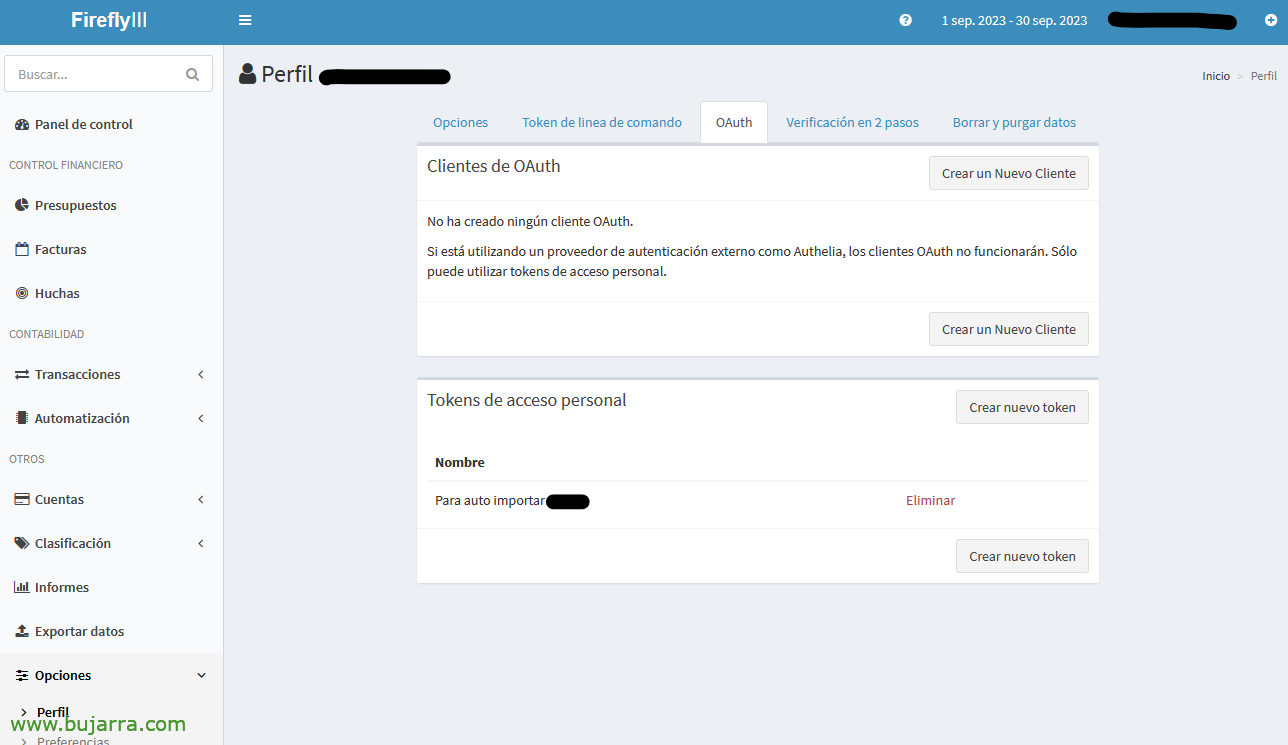
Before anything, we must decide the type of authentication we will use in the 'Firefly III Data Impor Tool' container, the easiest thing is to generate a Personal Access Token from Firefly III and indicate it in the '.importer.env’
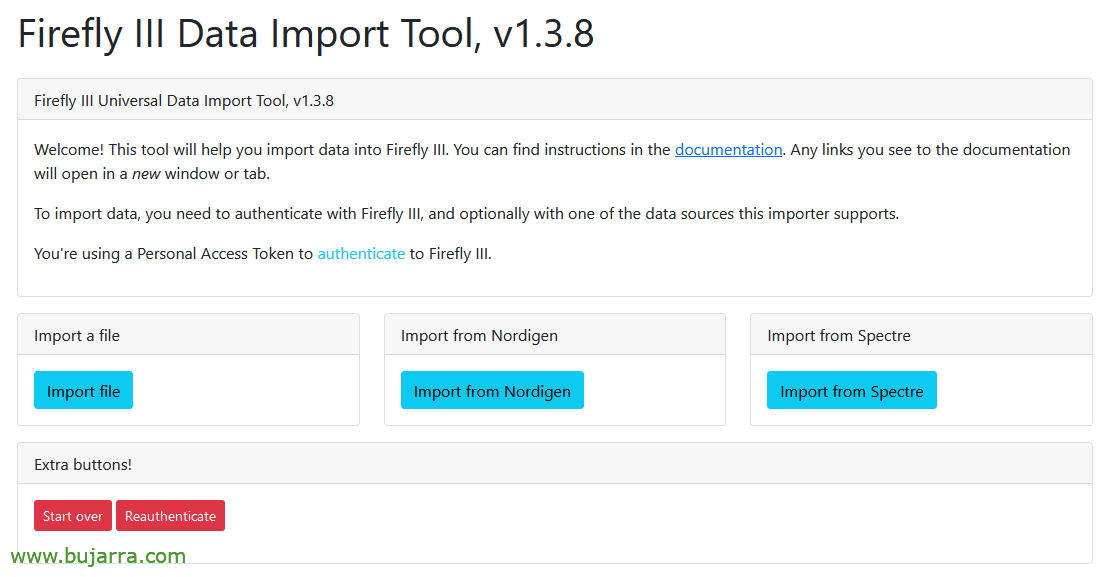
If we regenerate the containers and connect to the website of the 'Firefly III Data Impor Tool'’ (In my case on port 81tp) We will be able to start the import process, Click on “Import file”,
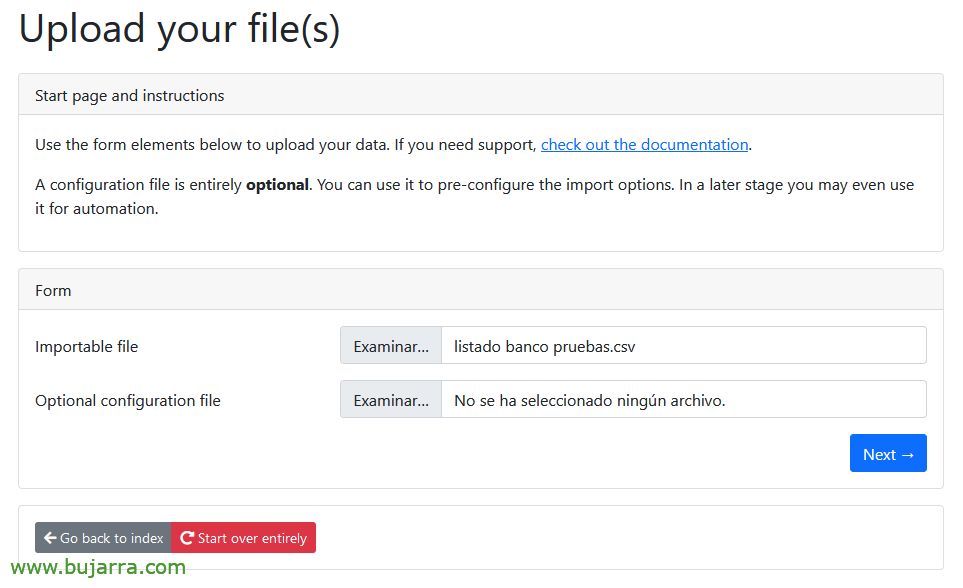
In 'Importable file'’ we will leave the CSV file that we will have downloaded from our bank, with all the historical that interests us of the movements. The optional configuration file that asks us, for now we won't have it, But once we finish this wizard, we will be able to generate it, a JSON file that will be fed with the options that we are going to choose below, “Next”,

We indicate if the CSV file has headers, if we want to convert it to UTF-8, what is the CSV delimiter, In which bank are we going to import it from FireFly III, Date format… “Submit”,

Depending on the options chosen above, it will show us the content of our file and separate the columns… we can ignore the columns that we are not interested in importing (Of course), and associate the role of each column, at least we will import the 'Transaction date' fields, 'Description’ and 'Amount'. “Submit”,
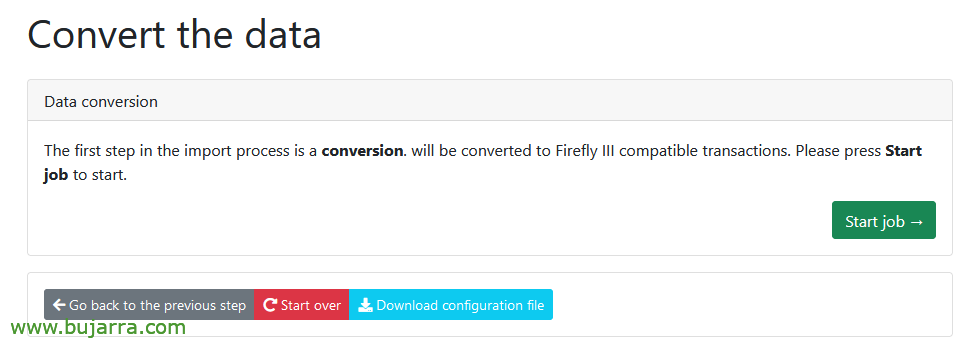
Before you begin, we can click on “Download configuration file” so that we don't have to do this wizard and remember the format it has, or to automate this import in the future. Click on “Start job” begin with,

We see how CSV movements matter… Hope…
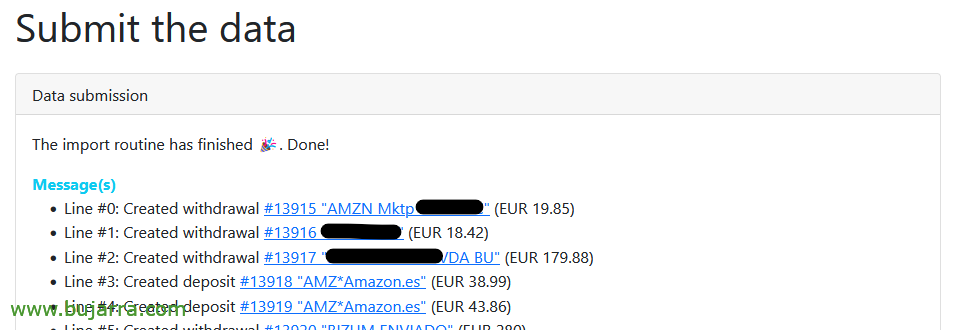
Once he finishes he will tell us, perfect!

We are starting to have data! Ole and ole Rigodón! Now we will be able to see any report in more detail, etc…

The following, can be to configure the Categories, To know where our money is going! so that it categorizes each movement and says if it is a mortgage, Supermarket Spending, petrol, from Amazon…

Since “Automation” > “Rules” we can create them, Setup is simple, We give it a name and when we want it to be activated, when it detects a word in the Description, For example…
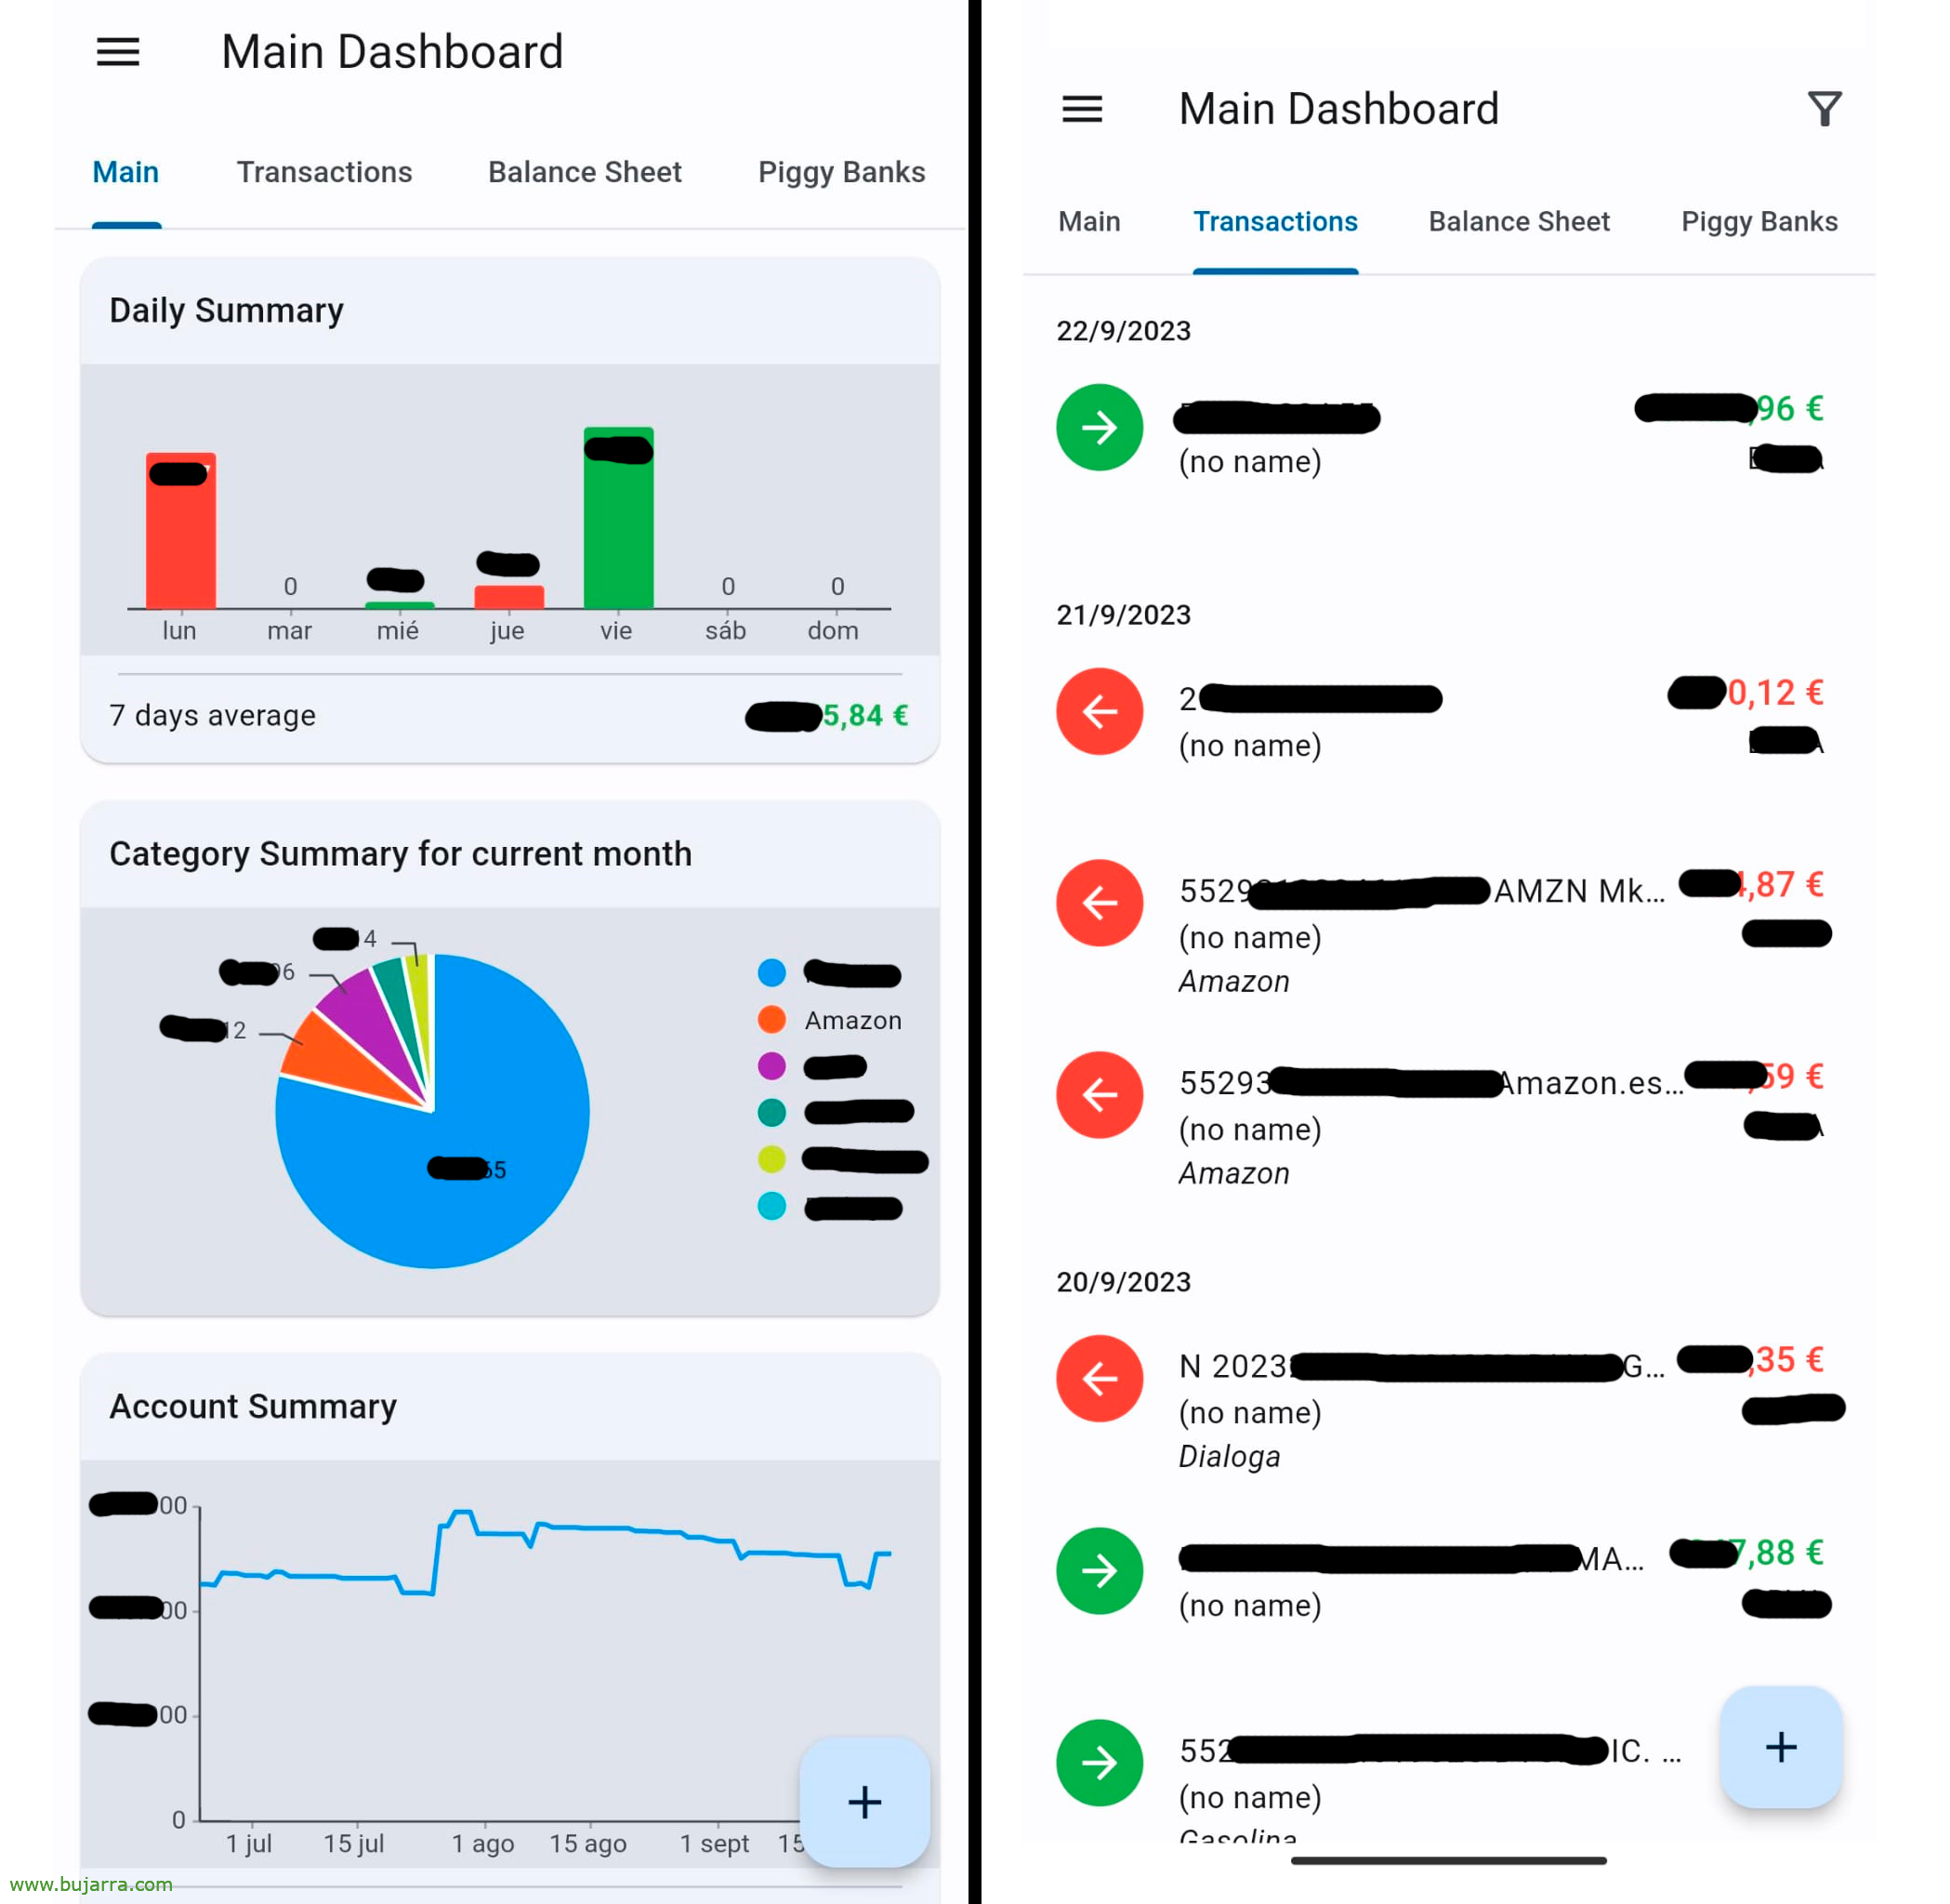
And there I leave you with Firefly III, A few turns that are very simple; Then the little cheeses, Reports are more elegant, We understand where our budget is going in a more detailed way. These screenshots that you see above are from an open source app that we can install on our mobiles (called Waterfly III) that connects to FireFly III and is perhaps more comfortable…
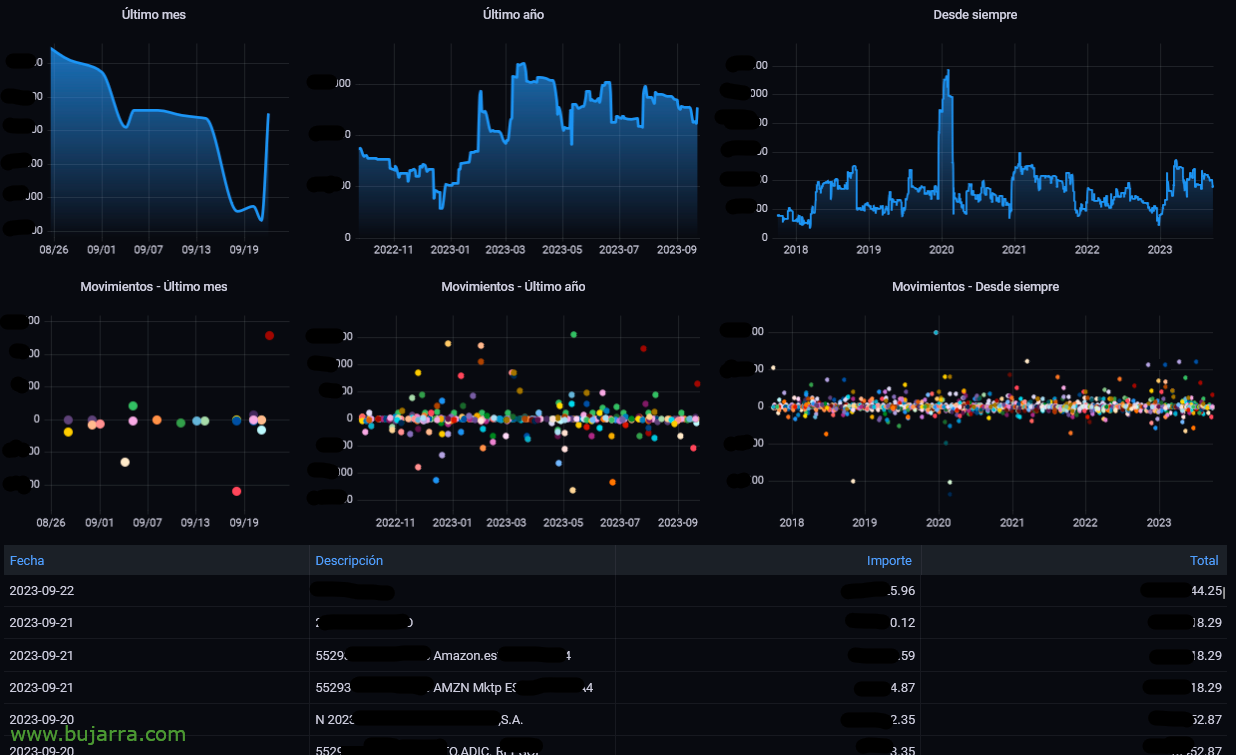
And… Wait, we're not done! You remember that in the MySQL database container we left the 3306tcp open? Well, with the access credentials we can connect and make queries, as we are interested and see it in a beautiful way and to taste from Grafana, By categories, or simply the movements… but not only to see it from Grafana, but with how geeky I am, I generate a PDF and this information comes to me in it, among other things such as interesting details of Home Assistant (statistics…)
By the way, The numbers we see, They are fakes, apart from the fact that they are half covered so that you do not know the figures I handle, I can't say so publicly how many millions I have). Come, to the point, the one who needs MySQL queries:
- Graph with total:
SELECT tj.date as time, "Total" as metric, SUM(t.amount) OVER (ORDER BY tj.date ASC) AS value FROM transactions t INNER JOIN transaction_journals tj ON t.transaction_journal_id = tj.id WHERE t.account_id = 'TU_ID_DEL_BANCO' ORDER BY tj.date ASC;
- Gráfica con movimientos:
SELECT tj.date as time, t.amount as value, tj.description as metric FROM transactions t INNER JOIN transaction_journals tj ON t.transaction_journal_id = tj.id WHERE t.account_id = 'TU ID DEL BANCO' ORDER BY tj.date ASC;
- Tabla de movimientos:
SELECT t.amount, tj.description, LEFT(tj.date, 10) as fecha, SUM(t.amount) OVER (ORDER BY tj.date ASC) AS Total FROM transactions t INNER JOIN transaction_journals tj ON t.transaction_journal_id = tj.id WHERE t.account_id = 'TU ID DEL BANCO' ORDER BY date desc;
Y esperar que se me olvida lo más importante! ¿Cómo automatizamos esto? pues si tienes suerte y tu banco te permite conectarte de alguna manera, por API, etc… Not bad, otherwise, existe algún servicio de terceros (Paid and external) that could help you… Another way is for us to manually download the files weekly and always leave them on the same path, then a script imports them (There's a cron container), or using a tool that records the clicks, Log in to the bank and generate the report… The latter is my personal choice. It's really crappy, I have an isolated VM, no internet access (nothing but the banks' sites)… and a Tiny Task is executed daily (Watch out) that generates the reports, as each bank belongs to its father, some are generated in CSV, others in XLS and others in XLSX (touch your…) So I leave you some tips that I have in a script that can help you:
#Convert from XLSX to CSV and use the ; as a separator:
    xlsx2csv -d ';' fichero.xlsx fichero.csv  #Convierte de XLS a CSV sin perder el formato de las fechas:
    libreoffice --convert-to csv fichero.xls #Borra the first 15 lines:
    sed -i '1,15d' fichero.csv  #Importa el csv que hay en la carpeta actual con el JSON de configuración, Both files are named the same:
    Sudo Docker Run --RM -V $PWD:/import -e FIREFLY_III_ACCESS_TOKEN=ey... -e IMPORT_DIR_ALLOWLIST=/import -e FIREFLY_III_URL=http://IP_FQDN_FIREFLY_III -e WEB_SERVER=false fireflyiii/data-importer:latest
With this last command we will import the CSV to the Bank indicated in the JSON a marvel! Avoiding duplicate movements, etc… The latest (And that's it for real), the MySQL queries we've seen before, they can come in handy to integrate it with Home Assistant, and that tells us while we have breakfast on our loudspeakers the balance we have in the accounts, as well as the latest movements… Sailor fabric!!!
Come, Now I'm leaving you alone, I wish you a great deal, that you work little and earn a lot 😉 a hug!