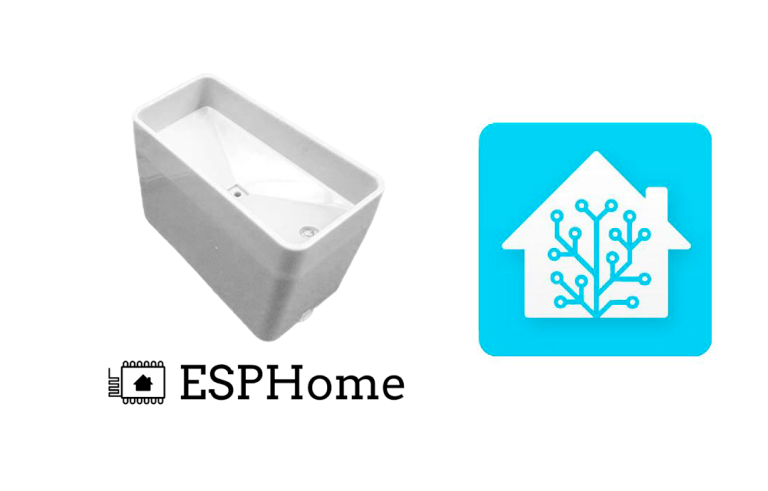
CO2 sensor with ESPHome and Home Assistant

A classic in home automation, Things that the pandemic left us… CO2 control in certain places to (formerly) ventilate and avoid being infected by coconut… Anyway, In this post we will see how to measure CO2 simply with a plate with an ESP and then in Home Assistant do any automation.
So if you have a board with a ESP8266 or an ESP32, You will be able to connect many sensors to it as you know, of all kinds and kinds, today we will see one that will help us to control the level of CO2 (or carbon dioxide) that we have in a cabin, a room for example. In this case we will use an MH-Z19.
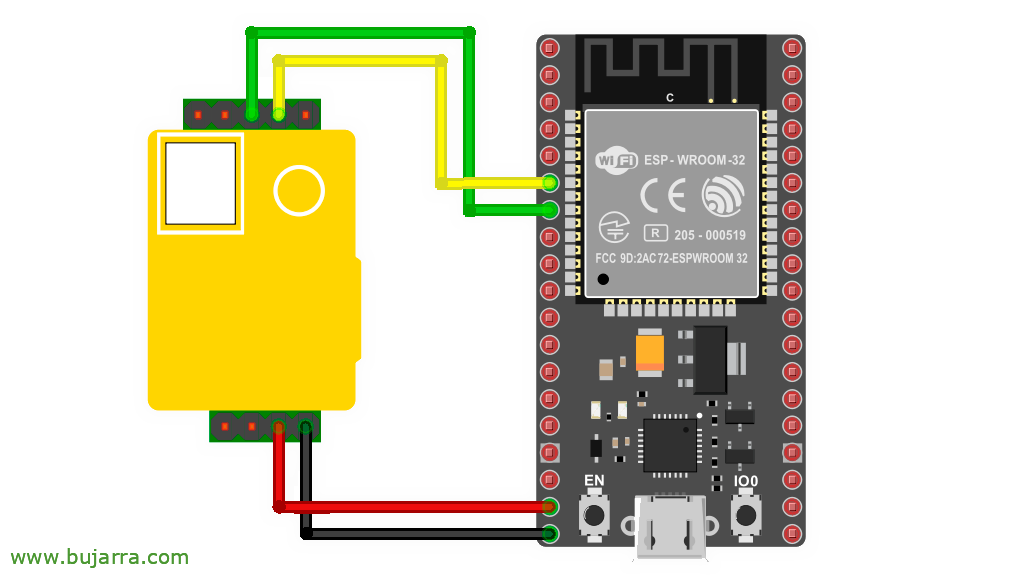
The connection will depend on the plate we use, but in the end it uses a serial connection, so it will be necessary to first feed the sensor with the positive and negative from the board and join as always crossing the RX of the sensor with the TX of the board and also the TX to the RX of the board. Looking at the pinout of the board that you have in Google you will immediately find the GPIO that fulfill this function.

Once we have the connection made, Well, the usual, we will have to go to our ESPHome Builder, create a new device and once created, we can edit the configuration and add a part that we will see below, later we will download the binary with the firmware image, that we will have to put in our ESP. We will upload that firmware to the board from a PC with a USB cable, well with a Wonderful website by ESP, or some tool that you put on your team.
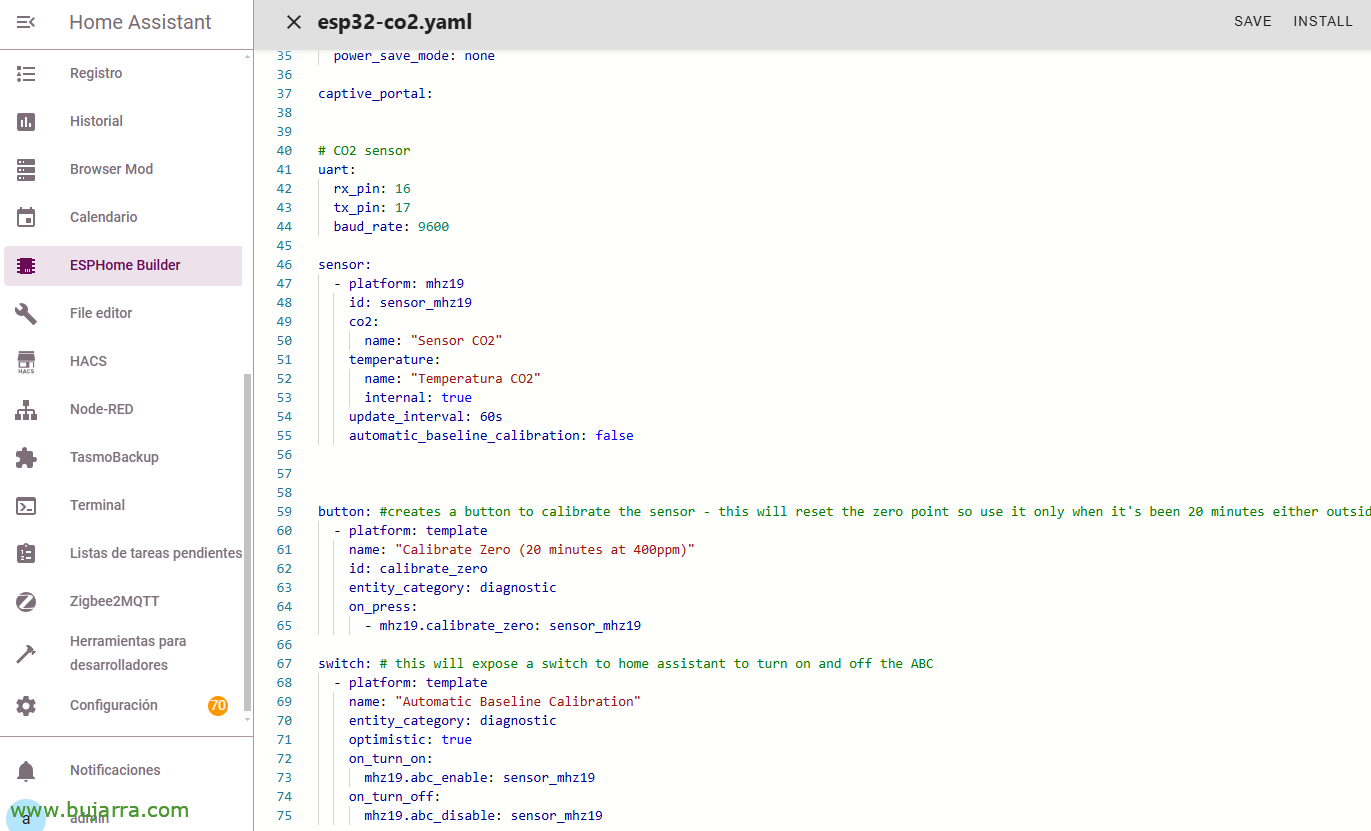
I leave you with the configuration that I added in my case, where the main thing to take into account will be to indicate the numbers of the GPIO that we will use such as TX and RX and they will be connected to the sensor. As well as a button that we can press to calibrate the sensor, o un switch para que tenga un auto calibrado.
# CO2 sensor uart:
  rx_pin: 16
  tx_pin: 17
  baud_rate: 9600

sensor:
  - Platform: mhz19     id: sensor_mhz19     co2:
      Name: "Sensor CO2"
    temperature:
      Name: "Temperatura CO2"
      internal: true     update_interval: 60s     automatic_baseline_calibration: false  button: #creates a button to calibrate the sensor - this will reset the zero point so use it only when it's been 20 minutes either outside or in a room you know the co2 level is at a minimum
  - Platform: Template Name: "Calibrate Zero (20 minutes at 400ppm)"
    Id: calibrate_zero     entity_category: diagnostic     on_press:
      - mhz19.calibrate_zero: sensor_mhz19  switch: # this will expose a switch to home assistant to turn on and off the ABC
  - Platform: Template Name: "Automatic Baseline Calibration"
    entity_category: diagnostic     optimistic: true     on_turn_on:
      mhz19.abc_enable: sensor_mhz19     on_turn_off:
      mhz19.abc_disable: sensor_mhz19
Ante cualquier duda os dejo el enlace de la Official documentation for this MH-Z19.

Now yes, Once we save the configuration we can install the configuration, or by downloading it manually and installing it as mentioned above, or directly if you have it connected to your PC and use a compatible browser, to taste…

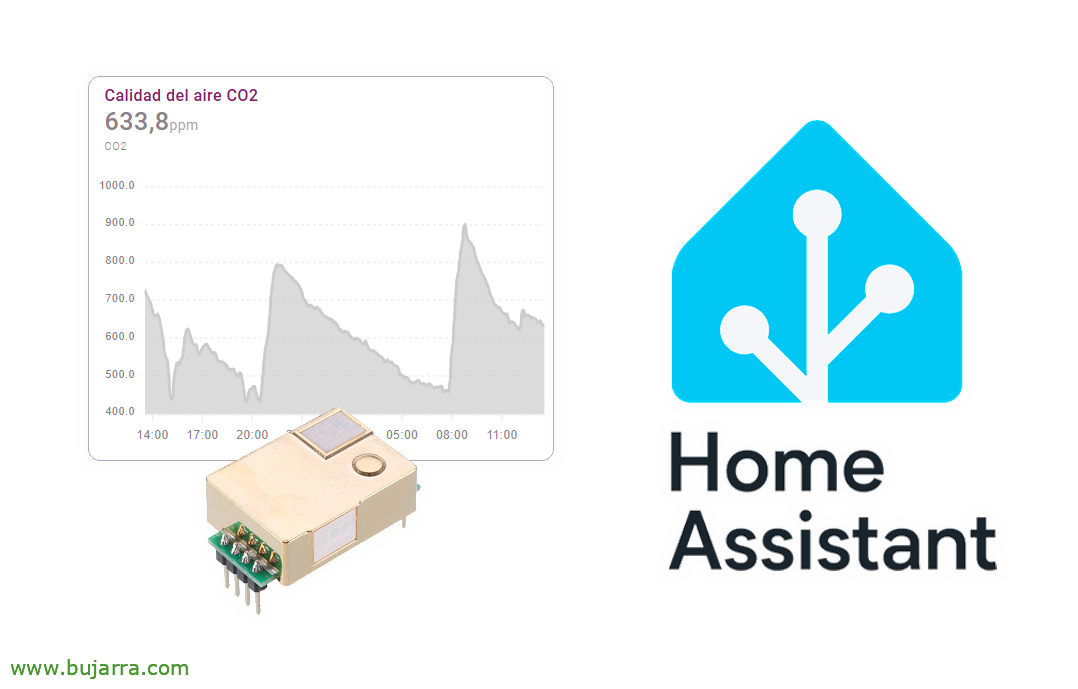
After loading the firmware onto the board, we can already power it with a USB and the party will begin, it will start the ESP with the sensor and Home Assistant will discover it from the Notifications, there it will be nothing more than adopting it and we will be able to access it from the 'Devices and services’ by Home Assistant, in the ESPHome integration, we'll see our ESP device, as we have named him, and if everything has gone well we will see that it already has values, although at first it will be normal to have 5000 ppm since we will have to calibrate it. So when the cabin has been ventilated, free of people for many hours we will be able to calibrate it, as simple as pressing the 'Pulse' button, and after 20 minutes if everything has gone well, will start from 400ppm.

And nothing, Now we can create an interesting graph if we feel like it to visualize this type of information, or as we mentioned at the beginning, an automation that controls the value of this entity that measures CO2 and does something, a notification from the speakers that it needs to be ventilated, or simply with this we will be able to detect the presence of people in this place….
Well, I hope I have been able to contribute something to you, I feel that some posts are like that 'quick', but the details of each step, in this case I see them as unnecessary, because if you have created at least your first device in ESPHome you will be aware of the steps and how easy it is; But I understand that if it's your first time, You can still get lost, and as always I recommend you to calm down and watch a video in yutuf from ESPHome beforehand, And once you're clear about it, Well, you can come back and grab the piece of code you need and chimpum.
What I said, I'm sending you a hug as always, that you continue to behave well, And thank you for making it this far!