Installing and using OpenVAS

Today we will see a great utility that we can use to perform security analysis on our infrastructure, what less than from time to time to know how many vulnerabilities we have to be somewhat safer in the face of a virus attack, Trojan or Ramon ware on duty. In this document we will install OpenVAS 9 on a Debian machine 9 Stretch and we'll look at a basic use to get a report, in a future document we will integrate it with… Nagios!
We start by installing and downloading the prerequisites in addition to the OpenVAS sources 9 and a few extras:
[SourceCode]apt-get install -y build-essential cmake bison flex libpcap-dev pkg-config libglib2.0-dev libgpgme11-dev uuid-dev sqlfairy xmltoman doxygen libssh-dev libksba-dev libldap2-dev libsqlite3-dev libmicrohttpd-dev libxml2-dev libxslt1-dev xsltproc clang rsync rpm nsis alien sqlite3 libhiredis-dev libgcrypt11-dev libgnutls28-dev redis-server texlive-latex-base texlive-latex-recommended linux-headers-$(uname -r) python python-pip mingw-w64 heimdal-multidev libpopt-dev libglib2.0-dev gnutls-bin certbot nmap ufw[/SourceCode]
[SourceCode]
WGET HTTP://wald.intevation.org/frs/download.php/2420/openvas-libraries-9.0.1.tar.gz
WGET HTTP://wald.intevation.org/frs/download.php/2423/openvas-scanner-5.1.1.tar.gz
WGET HTTP://wald.intevation.org/frs/download.php/2448/openvas-manager-7.0.2.tar.gz
WGET HTTP://wald.intevation.org/frs/download.php/2429/greenbone-security-assistant-7.0.2.tar.gz
WGET HTTP://wald.intevation.org/frs/download.php/2397/openvas-cli-1.4.5.tar.gz
WGET HTTP://wald.intevation.org/frs/download.php/2377/openvas-smb-1.0.2.tar.gz
WGET HTTP://wald.intevation.org/frs/download.php/2401/ospd-1.2.0.tar.gz
WGET HTTP://wald.intevation.org/frs/download.php/2405/ospd-debsecan-1.2b1.tar.gz
WGET HTTP://wald.intevation.org/frs/download.php/2218/ospd-nmap-1.0b1.tar.gz
[/SourceCode]
Los descomprimimos con:
[SourceCode]for i in $(ls *.tar.gz); do tar zxf $i; Done[/SourceCode]
Los compilamos y los instalamos:
[SourceCode]cd openvas-libraries-9.0.1
cmake . && Make && make doc && make install
cd .. /openvas-manager-7.0.2
cmake . && Make && make doc && make install
cd .. /openvas-scanner-5.1.1
cmake . && Make && make doc && make install
cd .. /openvas-cli-1.4.5
cmake . && Make && make doc && make install
cd .. /reenbone-security-assistant-7.0.2
cmake . && Make && make doc && make install
cd .. /ospd-1.2.0
python setup.py build && python setup.py install
cd .. /ospd-debsecan-1.2b1
python setup.py build && python setup.py install
cd .. /ospd-nmap-1.0b1
python setup.py build && python setup.py install[/SourceCode]
Editamos ‘/etc/redis/redis.conf’ para integrar Redis con OpenVAS, modificamos el puerto a 0 y descomentamos el fichero para Unix socket & sus permisos, quedando así:
[SourceCode]port 0
unixsocket /tmp/redis.sock
unixsocketperm 700[/SourceCode]
We restart the Redis service to reload the configuration:
[SourceCode]Service Redis-Server Restart[/SourceCode]
We create a symbolic link for OpenVAS to use the Redis socket, we confirm that the previously compiled libraries have been loaded correctly and boot the OpenVAS daemon:
[SourceCode]ln -s /tmp/systemd-private-*-redis-server.service-*/tmp/redis.sock /tmp/redis.sock
ldconfig
Openvassd[/SourceCode]
It's time to update the databases and recreate the cache:
[SourceCode]greenbone-nvt-sync
greenbone-scapdata-sync
greenbone-certdata-sync
Openvasmd –progress –Rebuild[/SourceCode]
We continue to create the self-signed certificate for the use of https:
[SourceCode]openvas-manage-certs -a[/SourceCode]
We start the Scanner followed by the OpenVAS Manager and the Greenbone Security Assistant with:
[SourceCode]Openvassd
Openvasmd
gsad[/SourceCode]
We create an admin user
[SourceCode]Openvasmd –create-user=admin –role=Admin[/SourceCode]
Creamos un fichero que nos permitirá actualizar las bases de datos de forma programada ‘vim/usr/local/sbin/openvas-db-update’ and we add:
[SourceCode]#!/bin/bash
echo "Updating OpenVAS Databases"
greenbone-nvt-sync
greenbone-scapdata-sync
greenbone-certdata-sync[/SourceCode]
Lo hacemos ejecutable con ‘chmod +x /usr/local/sbin/openvas-db-update’, y lo programamos en cron para que se ejecute a diario a las 0h con:
[SourceCode]
crontab -e
0 0 * * * /usr/local/sbin/openvas-db-update[/SourceCode]
Creamos el servicio OpenVAS Manager con ‘vim /etc/systemd/system/openvas-manager.service’
[SourceCode]
[Unit]
Description=Open Vulnerability Assessment System Manager Daemon
Documentation=man:Openvasmd(8) HTTP://www.openvas.org/
Wants=openvas-scanner.service
[Service]
Type=forking
PIDFile=/usr/local/var/run/openvasmd.pid
ExecStart=/usr/local/sbin/openvasmd –database=/usr/local/var/lib/openvas/mgr/tasks.db
ExecReload=/bin/kill -HUP $MAINPID
# Kill the main process with SIGTERM and after TimeoutStopSec (defaults to 1m30) kill remaining processes with SIGKILL
KillMode=mixed
[Install]
WantedBy=multi-user.target[/SourceCode]
We make it executable: chmod +x /etc/systemd/system/openvas-manager.service Creamos el servicio OpenVAS Scanner con: ‘vim /etc/systemd/system/openvas-scanner.service’
[SourceCode]
[Unit]
Description=Open Vulnerability Assessment System Manager Daemon
Documentation=man:Openvasmd(8) HTTP://www.openvas.org/
Wants=openvas-scanner.service
[Service]
Type=forking
PIDFile=/usr/local/var/run/openvasmd.pid
ExecStart=/usr/local/sbin/openvasmd –database=/usr/local/var/lib/openvas/mgr/tasks.db
ExecReload=/bin/kill -HUP $MAINPID
# Kill the main process with SIGTERM and after TimeoutStopSec (defaults to 1m30) kill remaining processes with SIGKILL
KillMode=mixed
[Install]
WantedBy=multi-user.target
[/SourceCode]
We make it executable:
[SourceCode]chmod +x /etc/systemd/system/openvas-scanner.service[/SourceCode]
Creamos el servicio Greenbone Security Assistant con: ‘vim /etc/systemd/system/greenbone-security-assistant.service’
[SourceCode]
[Unit]
Description=Greenbone Security Assistant
Documentation=man:gsad(8) HTTP://www.openvas.org/
Wants=openvas-manager.service
[Service]
Type=simple
PIDFile=/usr/local/var/run/gsad.pid
ExecStart=/usr/local/sbin/gsad –foreground
[Install]
WantedBy=multi-user.target[/SourceCode]
We make it executable:
[SourceCode]chmod +x /etc/systemd/system/greenbone-security-assistant.service[/SourceCode]
GOOD, ahora podemos probar la instalación si es correcta mediante un script que bajamos e ejecutamos:
[SourceCode]cd ~
wget –No-check-certificate https://svn.wald.intevation.org/svn/openvas/trunk/tools/openvas-check-setup
chmod +x openvas-check-setup
./openvas-check-setup –v9[/SourceCode]
If everything has gone well, Now we can set the services to start with the system automatically:
[SourceCode]systemctl enable openvas-manager.service
systemctl enable openvas-scanner.service
systemctl enable greenbone-security-assistant.service[/SourceCode]
We edit /etc/systemd/system/redis.service, we must modify the value 'PrivateTmp=no’ and under 'ReadWriteDirectories=-/var/run/redis’ we add 'ReadWriteDirectories=-/tmp'.
We create this file: 'vim /root/arranca_openvasmd.sh’ and make it executable with the following content:
[SourceCode]#!/bin/bash
/usr/local/sbin/openvasmd -a 127.0.0.1 -p 9391[/SourceCode]
And we finish by putting it in the cron so that when it boots the system runs it, with 'crontab -e', we add:
[SourceCode]@reboot /root/arranca_openvasmd.sh[/SourceCode]

We will finally be able to open a browser against the IP address of the https machine://Open, We will validate ourselves with the user we have created in the previous steps!
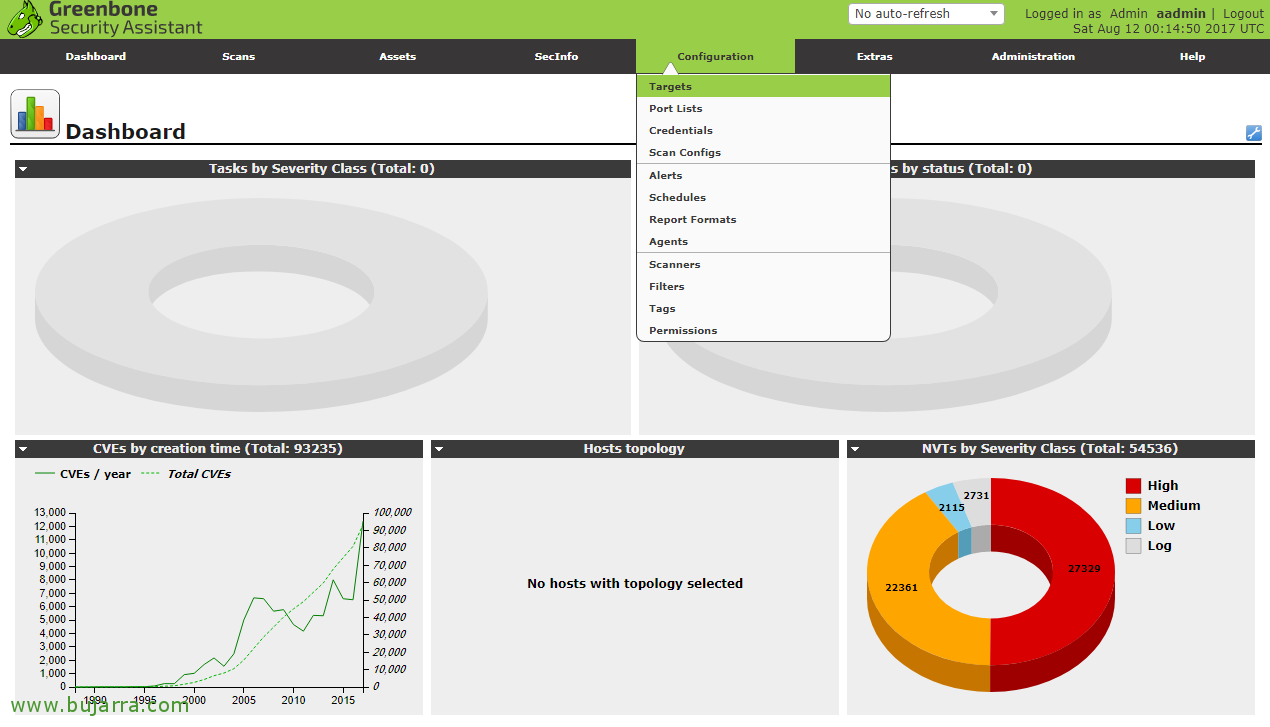
After logging in we will see an empty panel, since we do not yet have analysis tasks, we do see instead the results of the DB with the vulnerabilities we have. The first thing will be to register the machines that we will scan. “Configuration” > “Targets”.
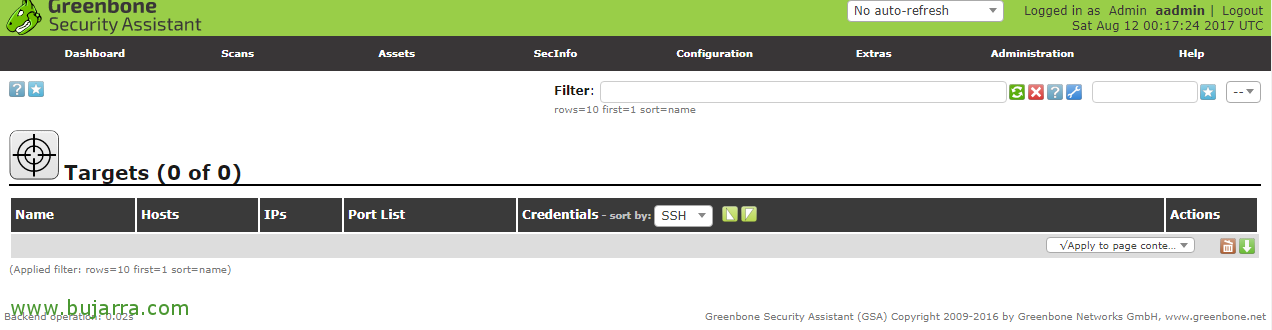
To create a Target, We must click on the icon of the star,
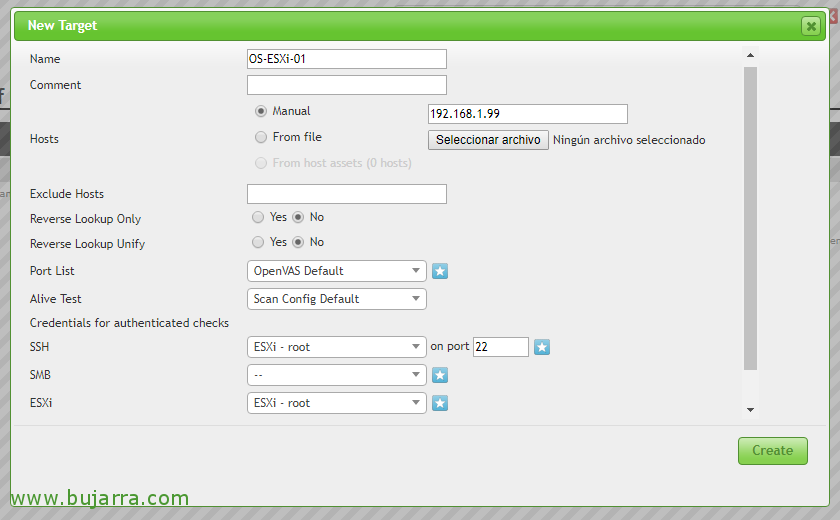
We can add different destinations, well IP ranges, Individual teams, define different port ranges or detection methods, also if we want to carry out the checks with credentials for access by SSH, SMB, ESXi or SNMP. Well, In this case I will analyze only one piece of equipment, is a VMware ESXi host, version 6 Update 3, we indicate the IP address & Click on “Create”,
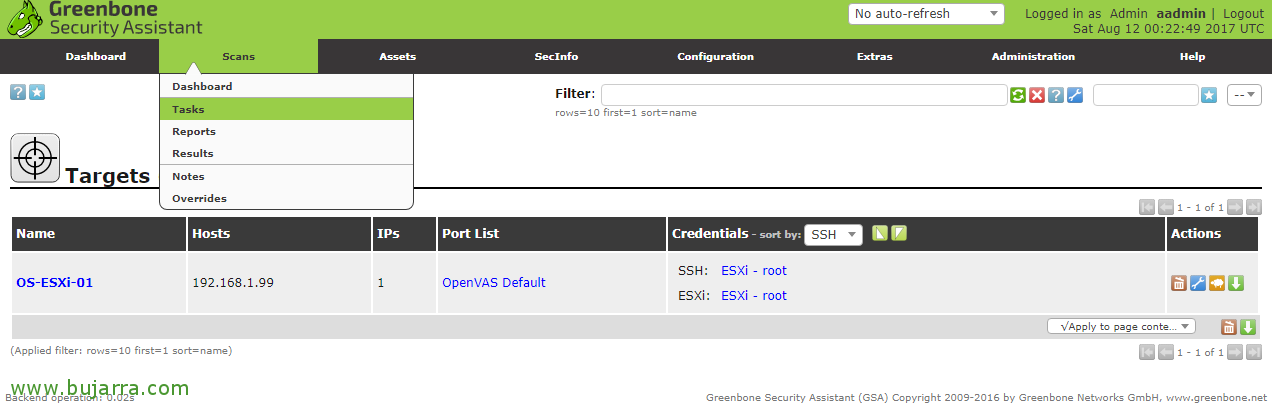
Once the Target has been defined, what we will do is create the Task to execute it, We're going to “Scans” > “Tasks”,
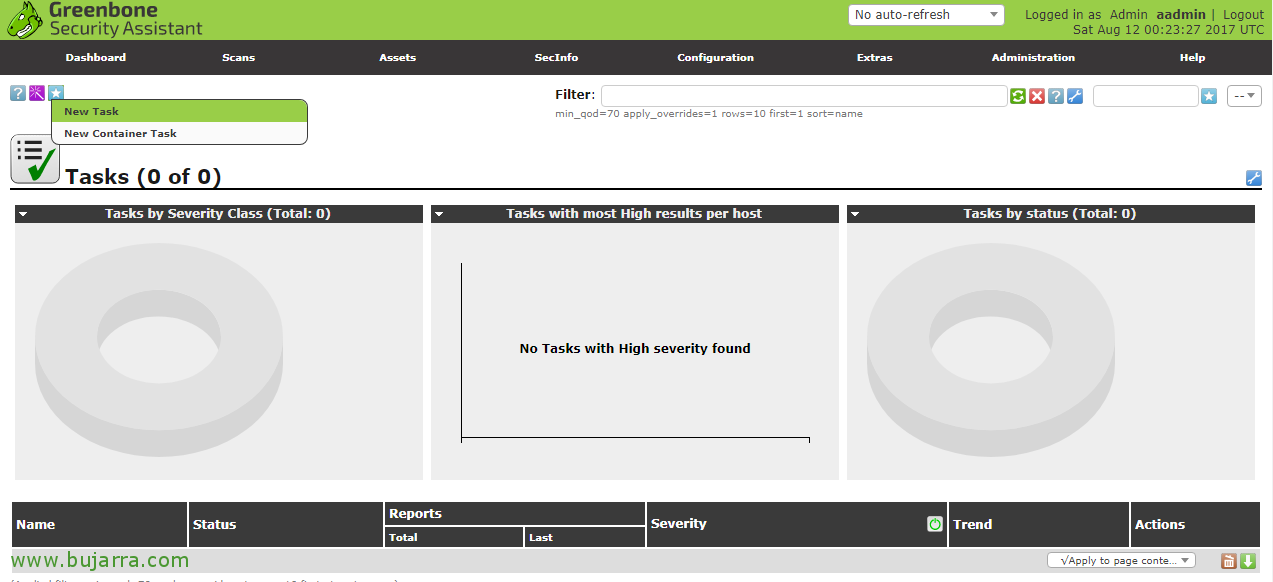
And click again on the star to create a new Task with “New Task”,
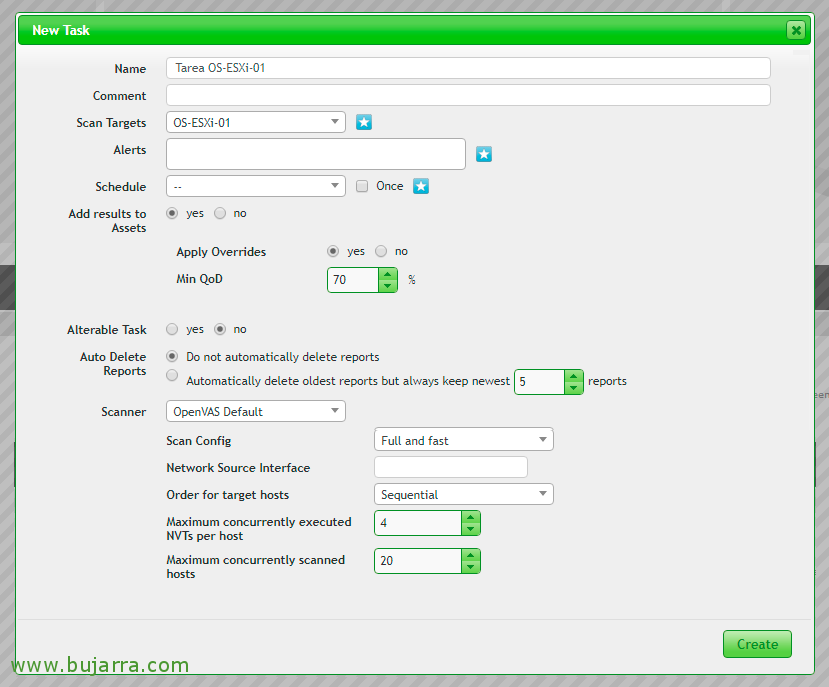
We give the task a name, we add the Target we want to analyze and modify the parameters at will to perform the more or less in-depth tests, etc… “Create” to create the Task.
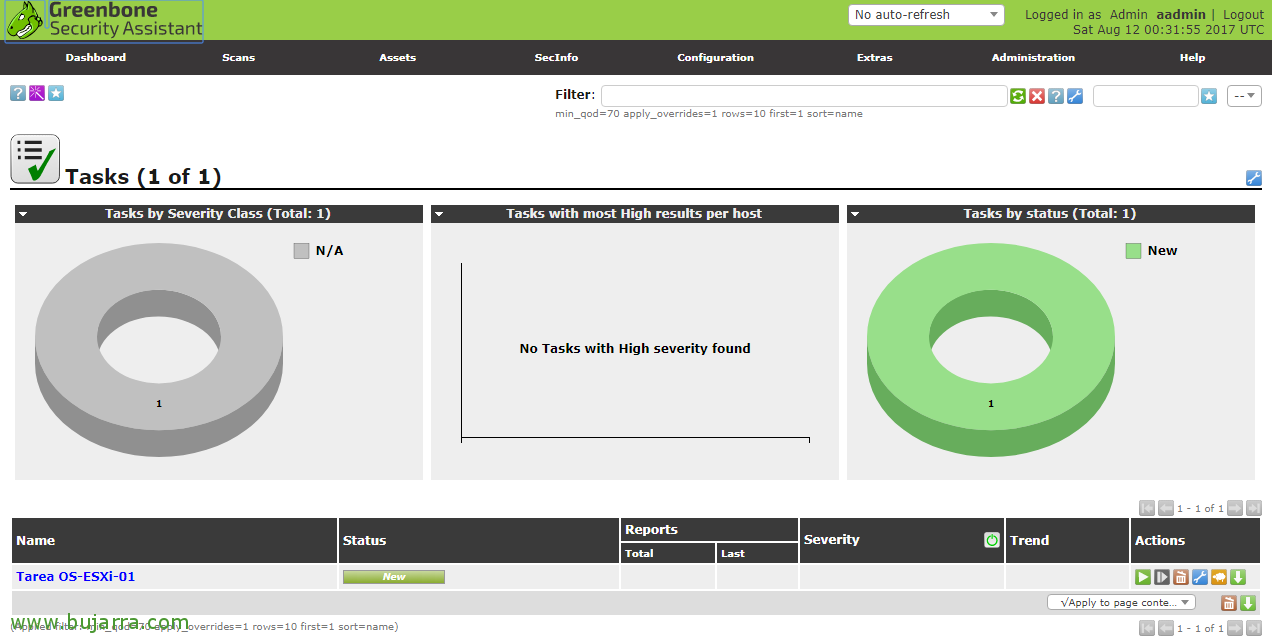
We will see the task created, if we want to run it now we will click on the green Play icon!

… And nothing, We wait while it executes all the tests we have indicated on this machine…
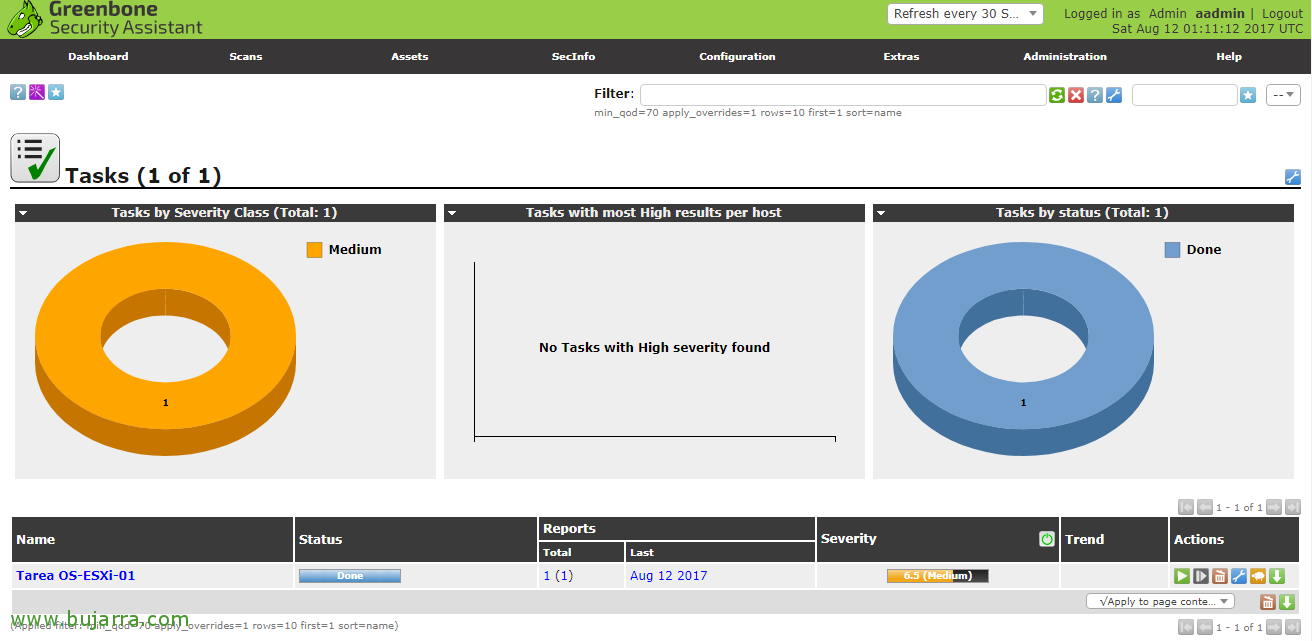
When the analysis task is complete, we can click on the date of the Report to visualize the possible risks that the machine has,
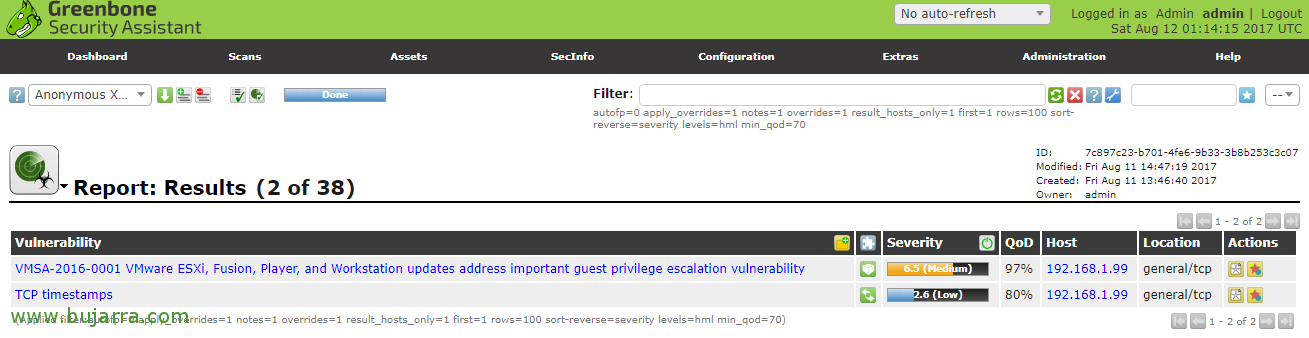
And it will show us the vulnerabilities detected, We will be able to analyze the problem and its possible solution to correct this and avoid compromising the information and service of the machine.
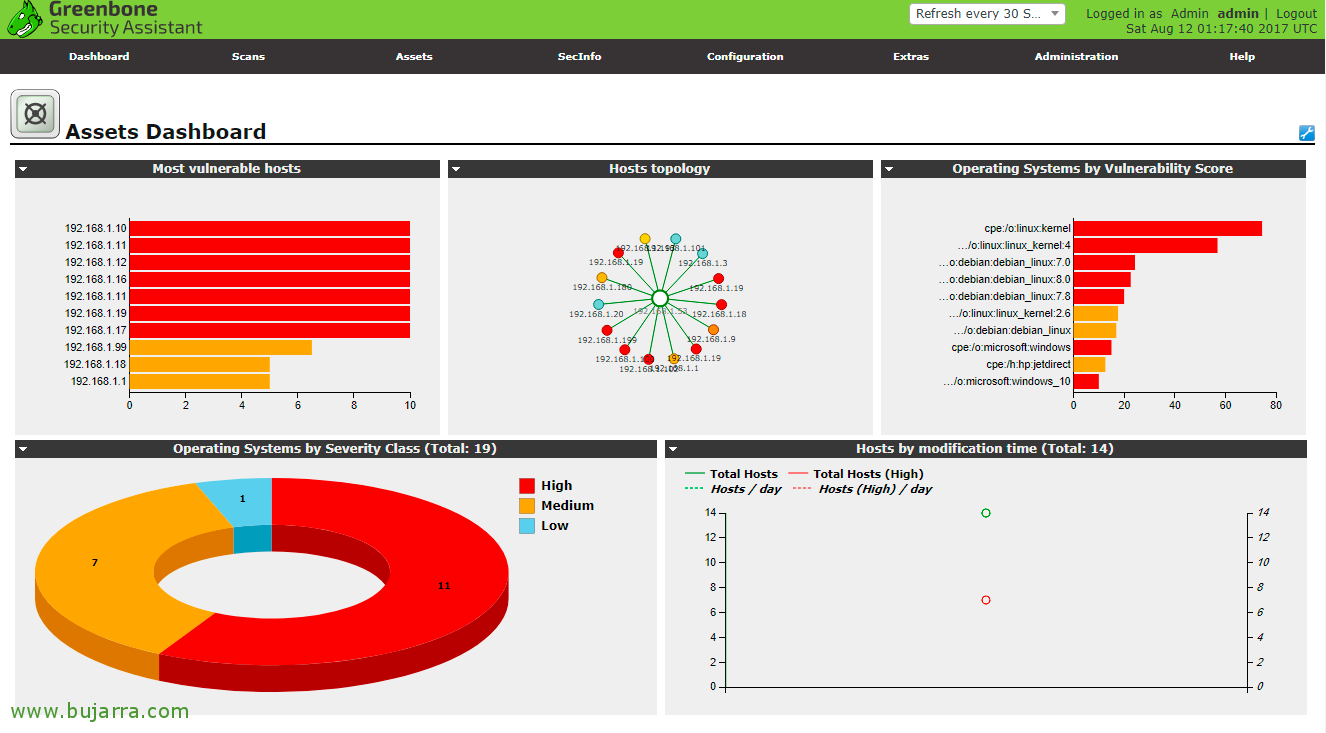
As you can imagine, The tool gives us more possibilities, Browse and try different types of scans. I recommend that you create individual tasks or a generic one with all your teams adding IP ranges, not only to bring out the colors and get our act together with the correction of security flaws, if not because you will need them for a next article to come…