Integrating Sonoff Bridge RF with Hassio – Home Assistant and testing a magnetic door/window sensor
Start the march! The first step in my case (after having Home Assistant installed), will centralize and receive all radio frequency signals with the fabulous Sonoff Bridge RF; and then send the sensor data to the MQTT Broker that we will mount in Home Assistant. That is, the Sonoff Bridge in this case will listen by RF and transmit by Wifi to the Hassio any data that interests us.
Changing the firmware on Sonoff Bridge RF
Before you begin, we need the Sonoff Bridge RF to run with firmware that allows us to tinker, we have several interesting ones such as Tasmota or Espurna (Made by a guru), for now I have the posts made with Tasmota, So I'll keep using that firmware. If you have doubts about how to change the firmware to your Sonoff device you can take a look at In this previous post.
How a more than very quick summary, we connect the USB TTL device to the pins of a Raspberry Pi, or you can also do it from a Windows with GUI, or directly with a USB to Serial converter we connect it by USB to the Pi, Be aware that when connecting to the Sonoff pins we must connect to those next to the long/large LED screen, Staying:
- From USB TTL 3v3 to Sonoff Bridge 3v3.
- USB TTL TXD to Sonoff Bridge RX.
- USB TTL RXD to Sonoff Bridge TX.
- From USB TTL GND to Sonoff Bridge GND.
Before you turn on the Sonoff Bridge, remember to put the PIN of the board in OFF whenever you want to save the firmware in the Sonoff and leave it again in ON for normal operation. And when you turn it on, remember to hold down the little button on the plate for a few 7-8 seconds I seem to remember.
After Download the firmware of Tasmota and the tool esptool.py we can load the firmware through this USB/Serial adapter to the Sonoff with the following command from a Raspberry Pi, Linux…
[SourceCode]esptool.py –port /dev/ttyUSB0 write_flash –flash_size 1MB –flash_mode dout 0x00000 tasmota.bin[/SourceCode]
Then as always, we should connect to the Wifi AP that the Sonoff will mount and connect with the equipment we are, will open the website directly from this Tasmota device, that we must configure to which Wifi network (2.4Ghz) We want you to connect. After that, we will change the IP that it will have obtained by DHCP from our network and assign the Sonoff Bridge RF the IP that interests us:
[SourceCode]HTTP://DIRECCION_IP_ACTUAL/cm?cmnd=IPAddress1 DIRECCION_IP:DESIRED&cmnd=IPAddress2 PUERTA_DE_ENLACE&cmnd=IPAddress3 MASCARA_SUBRED&cmnd=IPAddress4 DIRECCION_IP_DNS[/SourceCode]
Enabling Mosquitto Broker
Let's enable an MQTT broker in the Home Assistant, we will normally use Mosquitto Broker.
To do this,, from Hassio, Let's go to the menu “Hass.io” > “Add-Ons” > and click on “Mosquitto broker”,
Click on “Install”,
And that's it, we already have the MQTT Mosquitto broker installed, we must change the configuration and use an authentication to connect by MQTT, We change the config and enter a username and password, I leave you with an example user that we should change obviously and its password:
[SourceCode]{
"logins": [
{
"username": "mosquitto",
"password": "mosquitto"
}
],
"anonymous": False,
"quiet_logs": True,
"customize": {
"active": False,
"folder": "mosquitto"
},
"certfile": "fullchain.pem",
"keyfile": "privkey.pem"
}[/SourceCode]
We save the setup and start Mosquitto from “Start”, the broker is ready to attend to any request through MQTT, Our lightweight messaging protocol for IoT networks. Based on publish/subscribe communication patterns, which through topics will allow us to receive information from our sensors and process it.
Configuring MQTT in Sonoff Bridge RF
We access the web interface of our Sonoff Bridge RF, that we remember we have Tasmota, let's enable MQTT from the “Configure MQTT”, we will point against the IP address of the MQTT Broker (that is, our Home Assistant), we put the same credentials that we configured when enabling the Add-On and put them in “Save”.
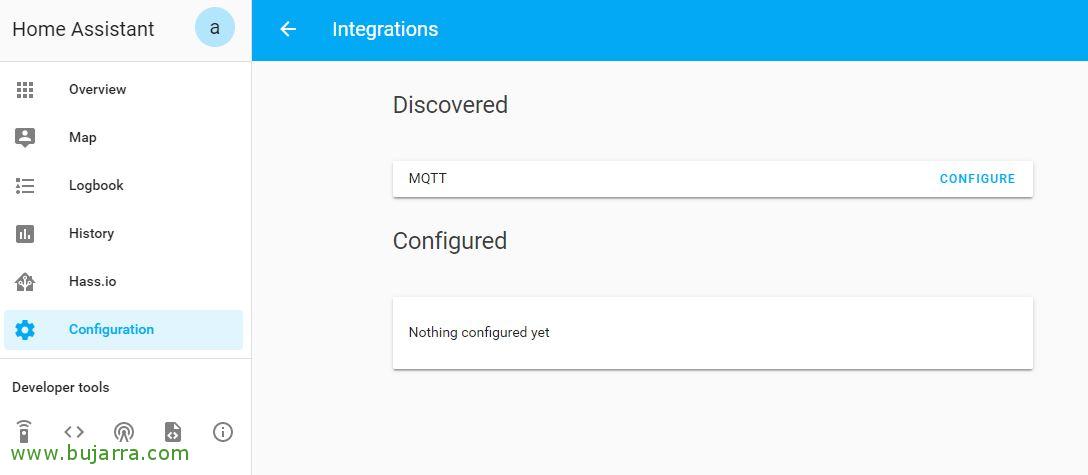
We're going to “Configuration” > “Integrations” > “MQTT” > “Set”,
We allow Home Assistant to connect to the MQTT Broker that we have just defined, We may need this in the future, “Submit”,
“Finish”,
Monitoring RF Sensor Status with Home Assistant,
In this example we will see how one of these magnetic sensors that we can put on doors or windows will detect if a door or window is open. Personally I love the GS-WDS07 Wireless Door Magnetic Strip 433MHz for Security Alarm Home System that we can buy at Banggood for just €3 per device, since these will emit a signal when opening and a different one when closing, with this we will know when it opens and when it closes. And also important is that they already bring the battery with that price! These devices last approximately 2 years without changing the battery (We'll see…). So don't say that we don't have our home/office under control!
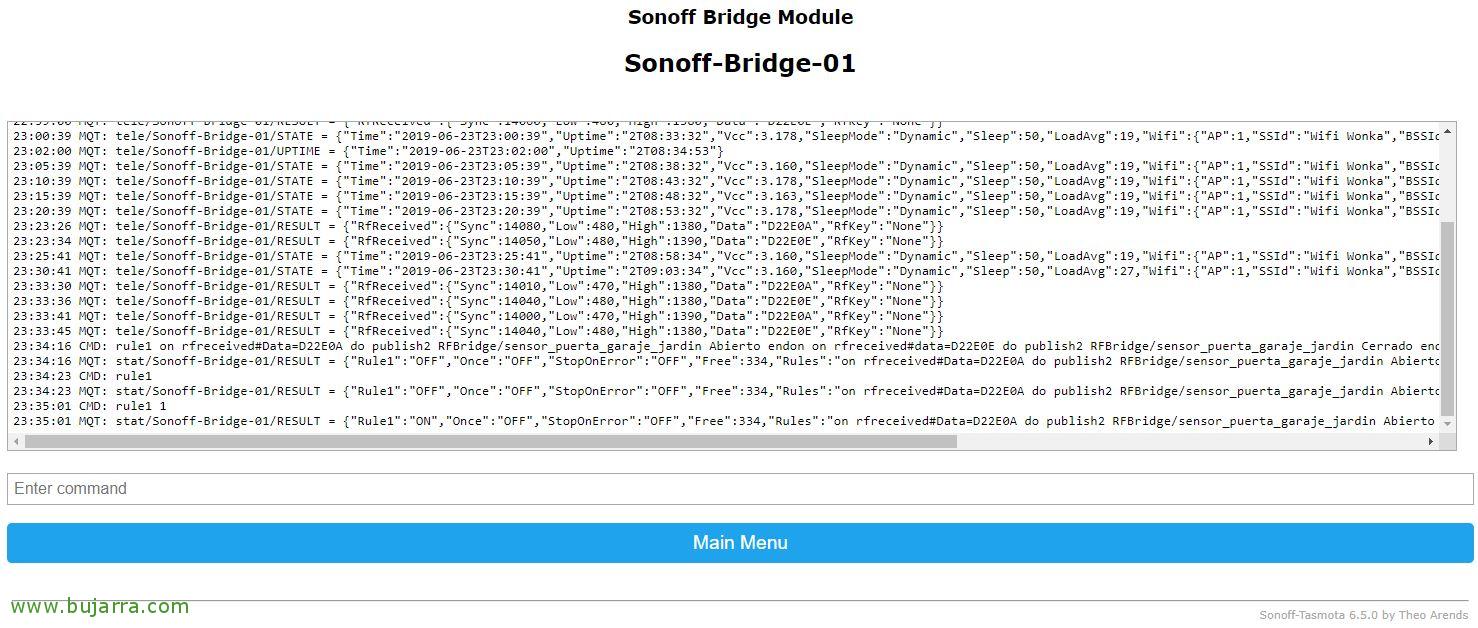
It's time to turn on one of these magnetic sensors, We put the battery well and try to move the other end closer and closer with the magnet. From the web interface of our Sonoff we will be able to see the data sent by our sensor, we will see what we receive in “Date” A code when we separate the magnets (open door), and another code when putting them together (or close the door).
In Tasmota we will use the Rules to publish a topic so that from the Mosquitto in Home Assistant we can interact. Tasmota allows us to create up to a maximum of 5 rules, and each rule can at most contain 511 Characters (although on the screen we would see the 422 First). These rules will be where we look for the data that our devices or modules send by RF and we will indicate the action they perform. In this case, magnetic sensor when separated sends in “Date” The Code “D82D0A” And when we put it back together, send “D82D0E”. These actions would look something like this, where upon receiving a code it publishes a topic and its status:
[SourceCode]on rfreceived#Data=D82D0A do publish2 RFBridge/sensor_puerta_sala_jardin Abierto endon
on rfreceived#data=D82D0E do publish2 RFBridge/sensor_puerta_sala_jardin Cerrado endon[/SourceCode]
We create them from the “Console”, In the first rule, and we will paste in this rule1 all the actions that we need without going over these 511 characters. If we need more for this there are the following rules, You need to properly document the rules you're using. With this example you will communicate to Hassio the status of the Room-Garden Door Sensor device:
[SourceCode]rule1 on rfreceived#Data=D82D0A do publish2 RFBridge/sensor_puerta_sala_jardin Abierto endon on rfreceived#data=D82D0E do publish2 RFBridge/sensor_puerta_sala_jardin Cerrado[/SourceCode]
After you create a rule, We must enable it, we do it with:
[SourceCode]rule1 1[/SourceCode]
Now we will finally go to our machine with Hassio, where we are going to have to define the devices that we have, that is, this Room-Garden Door Sensor (inter alia). We can define these sensors in a file 'binarysensor.yaml’ separately or directly in the Home Assistant configuration file, In my case I will use the general file, We edit '/usr/share/hassio/homeassistant/configuration.yaml', and in the part where the sensors are defined, in #Sensors, we add:
[SourceCode]…
# Sensors
binary_sensor:
– Platform: MQTT
Name: "Puerta Sala-Jardin"
state_topic: "RFBridge/sensor_puerta_sala_jardin"
availability_topic: "tele/Sonoff-Bridge-01/LWT"
Qos: 1
payload_on: "Abierto"
payload_off: "Cerrado"
payload_available: "Online"
payload_not_available: "Offline"
device_class: door
…[/SourceCode]
Sensors of this type are 'binary_sensor', We will use MQTT, we will indicate a name to the device how we want to see it in Hassio, We indicate the topic to subscribe to and we will define the payloads to know if the door is open or closed. We define the type of device so that it puts the correct icon to 'door' among others, If you want to take a look at all the types of sensors you can use, Check out: https://www.home-assistant.io/components/binary_sensor/.
After any configuration change we must restart Hassio, easily from the GUI interface > “Configuration” > “General Settings” > “Server Management” > “Reboot”. It is advisable first of all to click on “Check your settings”, and personally make periodic backups of the configuration files we use.
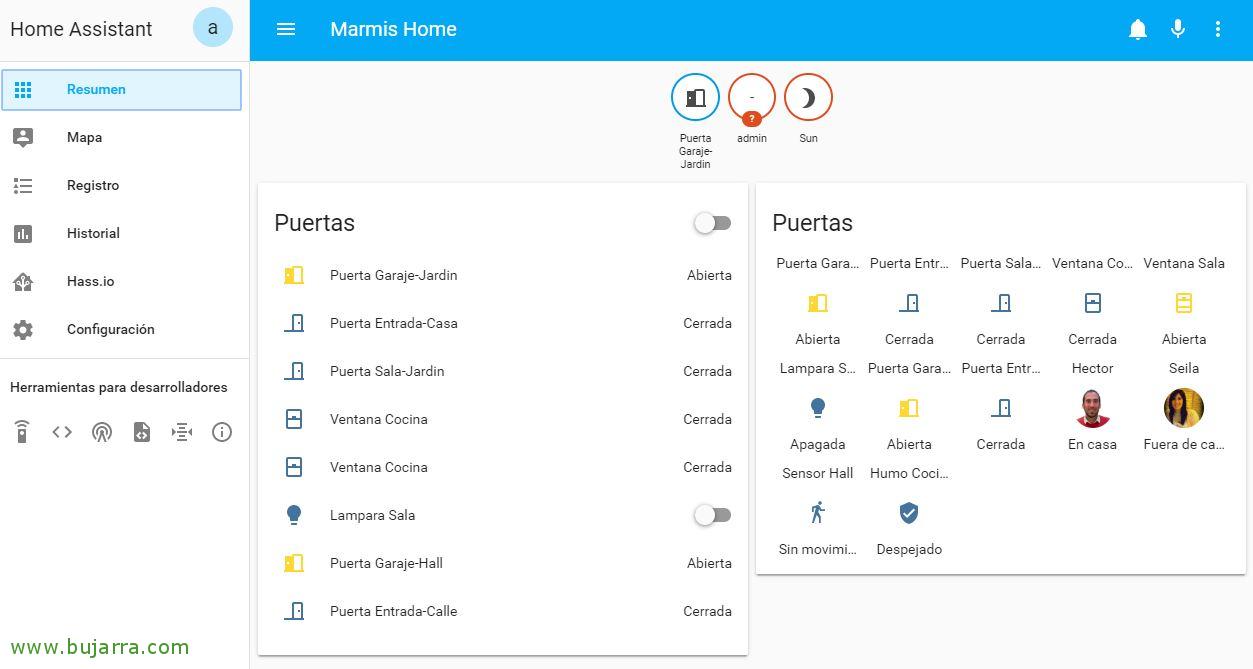
And after a few seconds and start Home Assistant, In the initial view, we can customize the view from “Configure the user view” which we will access with the “…” at the top right 🙂 and there we can add Cards and add the sensors that we have been configuring. We continue another day with more! I hope you find it interesting, We will be adding more ideas in future posts, Automations, etc…


