Putting Tasmota in a SonOff with a Raspberry Pi

Well, after a while tinkering with these wonderful devices, I wanted to share with you some steps that you may need. The SonOffs are small Wifi modules based on ESP8266 with a relay. Ideal for remotely controlling a lamp… or whatever we need to turn off and on remotely. In this post we will see how to flash them and change the firmware and install Tasmota with a Raspberry Pi; sincerely, I found it to be the simplest option of all the ones I tried and it works with all SonOffs.

For all of you who don't know the SonOff, In a nutshell, is a Wifi relay, a switch that will allow us to control the device we connect to it, be lamps, Lights, Garage Doors… everything that does not exceed 10A. My need is to be able to control them from a Rasperry Pi or a computer with linux that I have as a controller for my house, Stop that later, from mobile, From wherever you can turn on/off. If we don't want to use proprietary software that doesn't give us this flexibility, we can flash them and change the firm. We have other ways to flash them, traditional with a USB-TTL device or with Wifi directly connected to a laptop/PC, but from the firmware 1.6 This began to get complicated. Something that has always been great for me is to do it with a Raspberry Pi, Who doesn't have one on hand?
We are going to leave the Raspberry Pi ready to be able to connect with it to the ESP8266 and be able to change the firmware. If we have a newly installed Raspberry Pi we will most likely have to install pip:
[SourceCode]curl https://bootstrap.pypa.io/get-pip.py -or get-pip.py && Sudo Python get-pip.py[/SourceCode]
We install Esptool, a python tool needed to load the ROM into the ESP8266:
[SourceCode]sudo pip install esptool[/SourceCode]
We must stop and disable Getty:
[SourceCode]sudo systemctl stop herself**********@***S0.service
sudo systemctl disable herself**********@***S0.service[/SourceCode]
We removed the command that makes the TTL load, We delete the text “console=serial0,115200′ file “/boot/cmdline.txt”
Last, enable the serial terminal by editing the ”boot/config.txt', we add at the end: “enable_uart=1” and turn off the Raspberry:
[SourceCode]sudo shutdown -h now[/SourceCode]
GOOD, Now it's time for something simple, will be to open the SonOff device carefully (obviously disconnected from the power), and place 4 cables to the Raspberry Pi's GPIOs as follows:

The power cable that goes to the 3.3v of the Raspberry Pi will have to be able to connect and disconnect it comfortably, as it will be necessary when we want to turn the SonOff on or off. Well, we start the Pi again when everything is connected (Except 3.3V).
We download the Tasmota firmware with:
[SourceCode]wget https://github.com/arendst/Sonoff-Tasmota/releases/download/v6.2.1/sonoff.bin[/SourceCode]
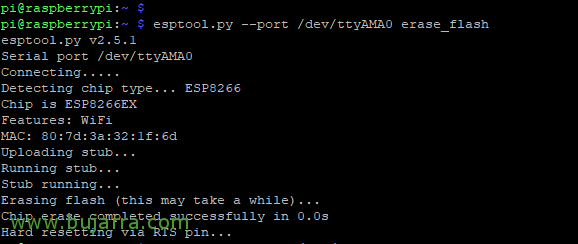
The first thing we will do and without fear, will erase the memory of Sonoff's ESP8266, we will have to hold down the switch button of the SonOff for a few 7 seconds while connecting the 3.3v cable to the Pi. And we will execute:
[SourceCode]If we use a Pi1 or Pi2: esptool.py –port /dev/ttyAMA0 erase_flash
If we use a Pi3: esptool.py –port /dev/ttyS0 erase_flash[/SourceCode]

When the process is finished, We will disconnect the 3.3V cable from the Raspberry, We wait a couple of seconds and go through the process again, connect the 3.3v and press the SonOff switch button for a few years. 7 Seconds. Now we will install the firmware that we have just discarded from Tasmota:
[SourceCode]If we use a Pi1 or Pi2: esptool.py –port /dev/ttyAMA0 write_flash -fm dout 0x0 /home/pi/sonoff.bin
If we use a Pi3: esptool.py –port /dev/ttyS0 write_flash -fm dout 0x0 /home/pi/sonoff.bin[/SourceCode]
Once the new firmware is installed, We disconnect the 3.3V cable and reconnect it, once it has started we will connect to it and configure the Wifi access.
[SourceCode]If we use a Pi1 or Pi2: miniterm.py /dev/ttyAMA0 115200 -and
If we use a Pi3: miniterm.py /dev/ttyS0 115200 -and[/SourceCode]
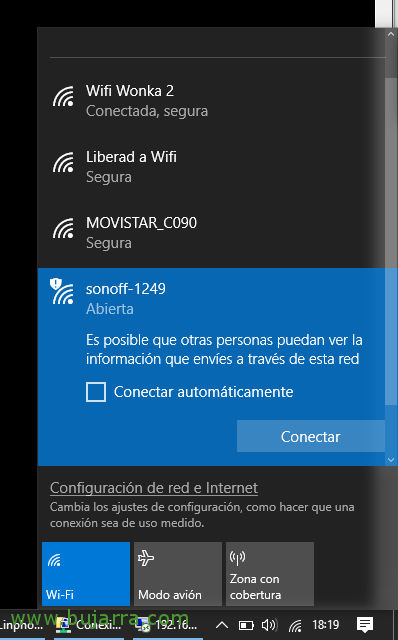
Create an access point, when we connect to their Wi-Fi they will open the browser directly against the IP address of the device.

We can simply configure the network parameters, we indicate the name of our home or office Wi-Fi network and the password. Be careful, it must be 2.4GHz WiFi and not 5GHz which is not supported. We record and that's it! We will be able to restart the SonOff device again and see that it connects perfectly to our Wi-Fi network.
We will be able to open a browser against the IP address that has been taken from the DHCP and we will have Tasmota, we can use it for anything. In other posts we will see other firmwares, but this one serves me perfectly to activate or deactivate the SonOff remotely with Raspberry Pi or any linux.

If we want to set up an IP address in Tasmota, we must do it through the browser, indicating the following URL:
[SourceCode]HTTP://DIRECCION_IP_ACTUAL/cm?cmnd=IPAddress1 DIRECCION_IP:DESIRED&cmnd=IPAddress2 PUERTA_DE_ENLACE&cmnd=IPAddress3 MASCARA_SUBRED&cmnd=IPAddress4 DIRECCION_IP_DNS[/SourceCode]
And for example with this command we would pass the signal to the SonOff so that it turns off the switch (The lamp, TV, Garage gate… whatever we have connected), from a browser:
[SourceCode]HTTP://DIRECCION_IP/cm?cmnd=Power Off[/SourceCode]
And directly if we make a bash script with this line, when executing it we would do the same as in the previous step, How easy with curl:
[SourceCode]Curl HTTP://DIRECCION_IP/cm?cmnd=Power Off[/SourceCode]
If you're curious, Here are all the commands you can use: https://github.com/arendst/Sonoff-Tasmota/wiki/Commands