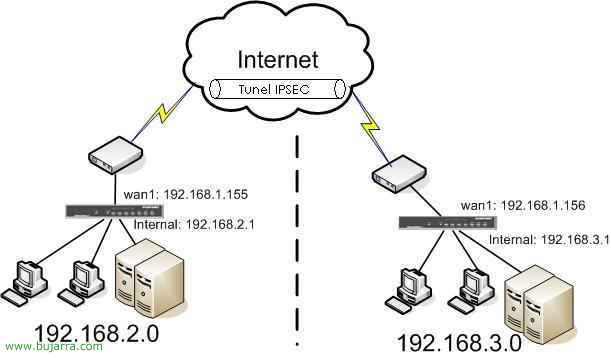
Make a VPN with IPSEC in Fortigate and connect with FortiClient

This procedure explains how to set up a VPN using IPSec to connect to any PC from the internet to your organization's LAN. All traffic would be encrypted using IPSec. To connect to the VPN we will do it through the software “FortiClient”. Two parts are explained:
– Firewall settings – HERE
– Installation, configuring and connecting the VPN client in one place – HERE
VPN Configuration on Fortigate,

Well, First of all,, to configure the firewall that accepts VPN's and configure them securely, we log in to it, go in the menu on the left to “VPN” > “IPSEC” and we have to create the first phase from “Create Phase 1”.

We need to configure all of the following options:
“Name”: We put any one on it, In my example “VPNP1”.
“Remote Gateway”: The type of connection we will have from the start, in my case to connect from any PC with the FortiClient it is “Dialup User”.
“Local interface”: Which interface will the connections go to, Normal WAN1 or WAN2, in my case “WAN1”.
“Mode”: “Main”
“Authentication Method”: The option I have chosen is to put a common password for them to connect via VPN, with “Preshared Key”
“Preshared Key”: I enter the password I am interested in.
“Peer options”: We indicate that you accept all > “Accept any peer ID”.
– Click on the button “Advanced…” to see more connection options.
We have two secure connection options, We choose the safest ones, Now all that remains is for the clients to be compatible, in my case the first one will be “Encryption”: “3DES” and “Authentication”: “SHA1” and if this connection is not possible, the next one will be: “Encryption”: “3DES” and “Authentication”: “MD5”.
“DH Group”: We mark only “5”.
“Keylife”: Default 28800.
“XAuth”: We will enable it but as a server, “Enable as server”.
“Server type”: PAP.
“User Group”: We select the group of users who can connect to this VPN, so all the users that we are interested in connecting should be put in this group (And if it doesn't exist, Well, we create it and put some test users in).
“Nat Transversal”: We enable it “Enable”.
“Keepalive Frequency”: 10 which is the default value.
“Dead Peer Detection”: Also enabled, “Enable”.
Once we have the values like this, we accept, We give “OK”.

GOOD, Now we need to create the other phase, Click on “Create Phase 2”.

We fill in the same information that we have entered for the first phase:
“Name”: The name we want, in my case to be like the previous one, I put it “VPNP2”.
“Phase 1”: I select the one I created before, “VPNP1”.
– Click on “Advanced…”
We put the same encryption as in the first phase.
And we enable PFS “Enable perfect forward secrecy” and that of “Enable replay detection”.
“DH Group” We leave him alone with “5”
In “Keylife” We leave you the time that comes predetermined.
“Autokey Keep Alive” We enable it.
“DHCP-IPsec” also to use a DHCP server on the network.
We give “OK”.

GOOD, now we need to create a rule to allow these VPN connections from the internet to our LAN. To do this,, We're going to “Firewall” > “Policy” > And click on “Create New”.

In “Source” we have to put where we want the VPN encryption to go, that is, destiny (¿?), in my example it would be “internal”.
“Address Name: all”
In “Destination” Where the connection will come from, In my example everything comes through the “wan1”.
“Address Name: all”
We always want it to be operational: “Schedule: Always”.
That all protocols work, to pass all traffic through the VPN, so in “Service” Indicate “ANY”.
And the difference is that in “Action” We have to put “IPSEC” So I created a safe tunnel.
In “VPN Tunnel” We indicate what our first phase is, In my case it was “VPNP1” and we marked the two checks of “Allow inbound” and “Allow outbound” so that there is both incoming and outgoing traffic through the VPN, Bone, that the one who connects can access network resources and can access it.
We give “OK”.

We check that it is in the rules of “internal -> wan1” and in “Action” Puts “ENCRYPT”.

GOOD, now what you have to do is configure the DHCP service (This is optional, if we want someone to connect to us to assign them an IP address or not, otherwise, we can configure it from the VPN client). If we want to configure it, Be, since “System” > “DHCP” > In “wan1” > “Servers” and we give the  .
.

Vale, Let's create a DHCP server for the interface “wan1” but only for VPN connections (IPSEC):
“Name” We give you a name, For example: ServerDHCPvpn
Of course it has to be enabled, so check the “Enable”.
In “Type” We make it “IPSEC”.
In “IP Range” we tell you what the IP range will be assigned to users when they connect. We put the net mask on them “Network Mask” and a gateway (optional), in “Domain” it is simply the domain that is supposed to be on the network.
In “Lease Time” is the time that this IP assignment will last and when it expires if it is not available and another IP request arrives, it will be assigned to this new one.
“DNS Server 1”, are the servers that will resolve your names, We put DNS servers on our LAN.
We give “OK”.

We check that our DHCP server is already there and is enabled. Well all the configuration in the Firewall is already done, Now we have the customer part.
Installation, configuring and connecting the VPN client on a workstation using FortiClient,
This part explains how to install the VPN client called FORTICLIENT and configure it to connect to the VPN. The first thing will be to download it from the website HTTP://www.fortinet.com or HERE.

Vale, First things first, It's an easy installation, an assistant. Click on “Next”,

Yes, We accept the license, We give “Next”,

Eye!! We won't do a full installation, since that will even install an antivirus and if we have two antivirus on the same PC we know what happens, PC crashes. So customized installation, “Custom” and “Next”,

We only select “IPSec VPN” to connect via VPN it would be enough, We give “Next”,

E “Install” to start installing…

…

Vale, a couple of seconds and we already have the VPN client installed, “Finish”,

For the VPN client to work well, We have to restart, is mandatory, so when it can be restarted.

After the PC restarts, we can open the FortiClient now, from it, click on the “Advanced >>>” > “Add…” to create a VPN connection.

We give the connection a name, and we can tell you whether the IP configuration is automatic or manual, if we have already configured a DHCP server in the firewall we can put “Automatic”, otherwise, “Manual” and put a network configuration to work with the interface “internal”. In “Authentication Method” Chose “Preshared Key”, This will be the one we put earlier in the Phase 1 configuration in the firewall. We “Advanced…”

We dial XAuth “eXtended Authentication” and in Remote Network we put you which is the remote network to which you are going to connect (The range). We give “OK”.

With this you are done, Now all that's left is to connect, To do this, click on the “Connect” and wait for it to connect…

It will ask us for a username and password to connect, since we have previously put when configuring phase1 that only the users of the group can connect to this VPN “GrupoVPNssl”, Enter the username and password of a user belonging to that group and click on “OK”, We can tell you to remember the password by checking the “Remember my password”.

We see that in the toolbar the Forticlient VPN network icon is connecting…

And to check that we are connected in the FortiClient it will put the “Status” that is “Up”, and we will be able to work securely through the VPN to the necessary resources.