Installing Centreon on a Raspberry Pi

One of the great possibilities of Centreon, is that we can install it on a Raspberry Pi, we can think of it to install any Centreon role, well if we want it to be our only Central monitoring point, as more commonly to be able to use it in remote delegations or in our clients if we are a provider of such a service.
But first of all, thank kermith72 The great scripts it gives to the community, scripts that in a fully automated way we can install Centreon on a Raspberry Pi, It has in Multi-script GitHub, one of them to install Centreon Poller (What, is the one we will use in this post) and others to install Centreon Central. These scripts are designed if we have a Debian distribution. This man is one of those who deserves a statue in the square of his town!
As we can see, it keeps them quite up-to-date and I'm sure that what we find in its repository is enough for us, But in this post we will rely on it to take a small step further, since for now it has scripts for Debian 8 (Jessie) o Debian 9 (Stretch), but at the time I wrote this post there was no Debian 10 (Buster), and as we know today it is the most recent version, so when downloading an image for our Raspberry Pi we can use the latest version of Raspbian. ¡That's great!
¡Started! The idea is to base ourselves on a script of theirs to which we will make some small modifications so that we can use our Raspbian Buster and install a Centreon satellite or Poller there, which we will then attach to an existing implementation. It is also a good idea and optional to install a VPN client on the Raspberry Pi that connects to the Control Panel, so traffic is safe and direct. Rolls aside, We download the script and make a few small changes:
[SourceCode]wget https://raw.githubusercontent.com/kermith72/auto_install/master/debian9/centreon_poller_1904.sh
sed -i -e 's/stretch/buster/g’ centreon_poller_1904.sh
sed -i -e 's/strech/buster/g’ centreon_poller_1904.sh
sed -i -e 's/Stretch/Buster/g’ centreon_poller_1904.sh
sed -i -e 's/libgcrypt11-dev/libgcrypt20-dev/g’ centreon_poller_1904.sh[/SourceCode]
A good idea is to take advantage of and install the latest versions of Centreon, we can find them at Centreon Sources at: https://download.centreon.com, We modify the script indicating the latest versions, today it would be:
[SourceCode]CLIB_VER="19.04.0"
CONNECTOR_VER="19.04.0"
ENGINE_VER="19.04.1"
PLUGIN_VER="2.2"
PLUGIN_CENTREON_VER="20190704"
BROKER_VER="19.04.0"
CENTREON_VER="19.04.4"[/SourceCode]
And before you begin, we would have to add the public keys of the repository it uses:
[SourceCode]sudo gpg –recv-keys 04EE7237B7D453EC 648ACFD622F3D138 DCC9EFBF77E11517
sudo gpg –export 04EE7237B7D453EC | Sudo apt-key add
sudo gpg –export 648ACFD622F3D138 | Sudo apt-key add
sudo gpg –export DCC9EFBF77E11517 | Sudo apt-key add
Sudo apt-get update[/SourceCode]
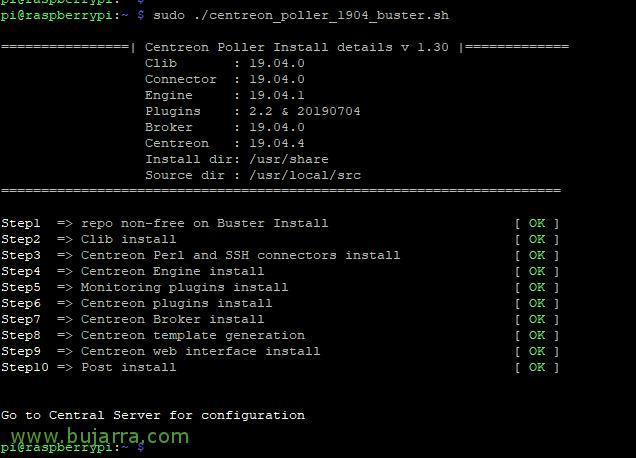
Now, We will be able to proceed with the installation, It's that easy, So it's time to go for a coffee! We will have to do nothing but wait:
[SourceCode]chmod +x centreon_poller_1904.sh
sweat ./centreon_poller_1904.sh[/SourceCode]
Once we have the Poller de Centreon installed, we would only have to integrate this satellite with the Centreon Central server, If you want to know how, Have This post where you have all the steps, from there we can start monitoring with the Raspberry Pi! If you have chosen to mount all the base elements on it, ¡Go ahead! You may need Reviewing the first steps that we could do.