Installing Remotely, Open Source Remote Control

Today we are going to see a fabulous project, called Remotely. A solution to remotely control company or personal equipment, for occasional remote access to support or also unattended equipment. It will also allow if we want the execution of scripts or remote commands.
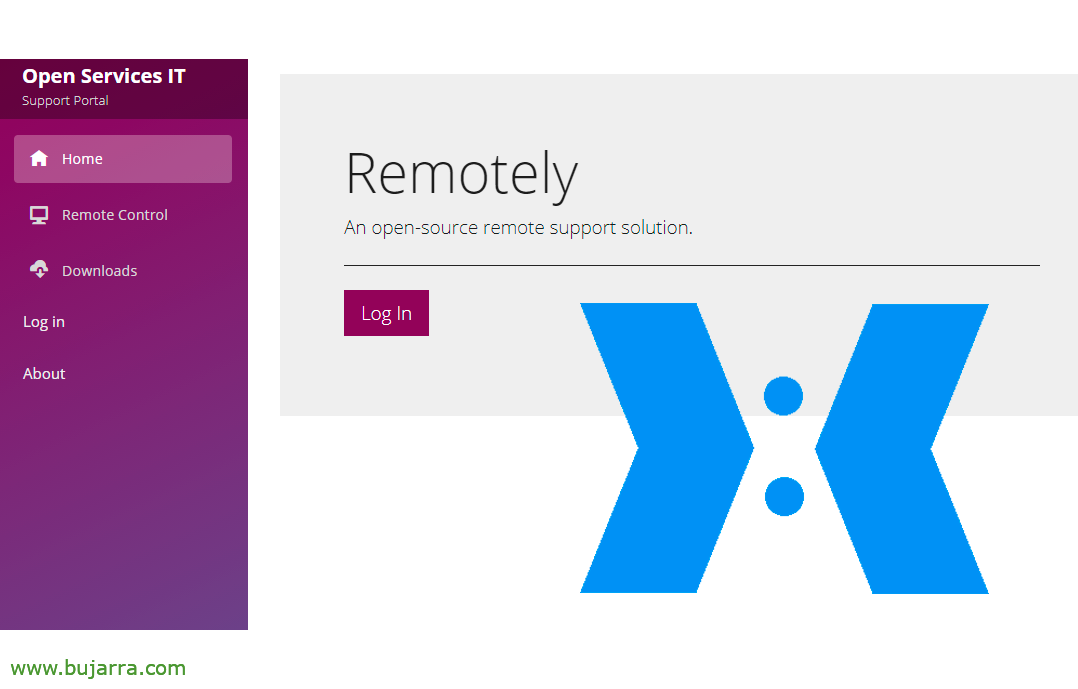
The Remotely project is quite curious, The truth is that it is a complete solution for the day to day when we need to connect to remote computers. What I said, When someone requires support, or when we want to connect to a team and there is no one to assist us. It's secure and quite customizable, we will see that Remotely can be used with its own servers (Public servants) or we can mount it on our own infrastructure. In this post we will look at the two options. As always, I would like to thank and help this type of project that improves the day-to-day life of the IT world, its author is Jared Goodwin, and the site Official Website.
Remotely is pretty straightforward, We will have a web portal, where remote users will be able to log in to download the 'lightweight' software’ Remote connection; or where we as site administrators can enter and remotely control some equipment that we have previously added to our account.
If you want to test its public server, just access here to test: https://app.remotely.one
Another option will be as we said install it under our own server, What is the interesting, But it forks again, looks like a To the point adventure 🙂 game, When installing it locally, we can choose to use precompiled packages, This is the server will be fully functional, But there are things like that the client software cannot be customized, neither with the logos/colors of the company nor with the URL, the user would have to write it by hand. It's a choice. And the other would be much longer but interesting, since we would have to have an account on GitHub, make a fork of the project and some other things, but we would have more customized solution.
So if you think so, let's look at the two options, first with the packages already precompiled and then we can compare and each one keeps what interests them. We start! We need an Ubuntu Server, in my case I used a 21.04, that is up to date, Newly installed, with static IP; we will also think of an FQDN for the website, For example: support.mydomain.eso and we will open in the firewall/router the 443tcp HTTPS and 80tcp HTTP against the machine, the latter for LetsEncript.
Default installation
We start the installation:
wget https://github.com/lucent-sea/Remotely/releases/latest/download/Remotely_Server_Installer chmod +x Remotely_Server_Installer sudo ./Remotely_Server_Installer
Y durante la instalación el asistente nos preguntará si queremos usar paquetes precompilados o no, le indicamos que sí, así como el path para el sitio web y usaremos Nginx como servicio web:
Download pre-built package (yes/no)?
If no, a customized server package will be created through GitHub Actions.
Enter Response: yes  Which directory should the server files be extracted to (e.g. /var/www/remotely/)?
Enter Response: /var/www/remotely What is your server's public URL (e.g. https://app.remotely.one)?
Enter Response: https://soporte.midominio.eso  Which web server will be used?
    [0] - Caddy on Ubuntu
    [1] - Nginx on Ubuntu
    [2] - Caddy on CentOS
    [3] - Nginx on CentOS
    [4] - IIS on Windows Server 2016+
Enter Response: 1
...

Tras unos segundos ya tendremos el sitio montado, we open a browser against our FQDN or Remotely IP. Without logging in, we can simply click on Downloads to download the different software for Windows remote connection, Linux or Mac. So the first time we will create a new user to work as site administrators, Click on “Register”,

We indicate an email and a password & “Register”,
And well, we will have access to more possibilities, give you a walk that is very simple and complete, Throughout this post we will discover the options we have.

For doing the first test and not continuing with this pre-established environment anymore, if in the Downloads area we download the thin client, when you run it you will see that you have to manually type the URL of your site, This is, we will give the remote person an EXE and when opening it they must always write the URL. Disliked. And then the theme of the Logo or the colors, Well, this would be the default.

Once connected against the URL we will have a connection ID,

That we will give it to our agent/technician, from the side menu “Remote Control” you will be able to type it and connect to the customer session.

And not just what we expected from a remote control, but the session can be recorded on video, We can send files, chat, Read privileges… Very stylish!
Customizable installation
Well, Having seen some of its possibilities and its power, we are going to give the customizable installation, This is, that we can not only change Logos, colors, Embedded URL… but also languages or whatever interests us, since we'll have the code for us.
Before anything, We need to have an account at GitHub, So if you don't have it, Register!
Then, if we haven't done it either, we will have to copy the public key of our computer to our Github account, since later we will access a repo of ours. Well, With the following command we create it and see it:
ssh-keygen -t rsa -b 4096 -C "Team Remotely"
cat /root/.ssh/id_rsa.pub ssh-rsa AAAAAAAAAAAAAAAAAAAAAAAAAADDDDDDDDDDDDDDDDdfdsfsdfxxxxxxxxxxxxxdssadlkjasdksaljdalksjdalskdjakdsjaskdljasdhfffffffffffffffffffffffffffffffasddddddddddddddddddddddddddddddddddddddddassxcxxxxxxxxxxxxxxxxxxxxxxxxxxxxxxxxxxxxxxxxxxxxxxxxxxxxxxxxxxxxxxxxxxxxxxxxxxxxxxxxxsssssssssssssssssssssssssssssssssssqqqqqqqqqqqqqqqqqqqqqqqwwwwwwwwwwwwwwwwwwwwweeeeeeeeeeeeeeeeeeeeeeerrrrrrrrrrrrrrrrrrrttttttttttttttttttttyyyyyyyyyyyyyyyyyyyyyuuuuuuuuuuuuuuuuuuuuuiiiiiiiiiiiiiiiiiiiiiiiiiioooooooooooooopppppppppppppppppp== Remotely Device
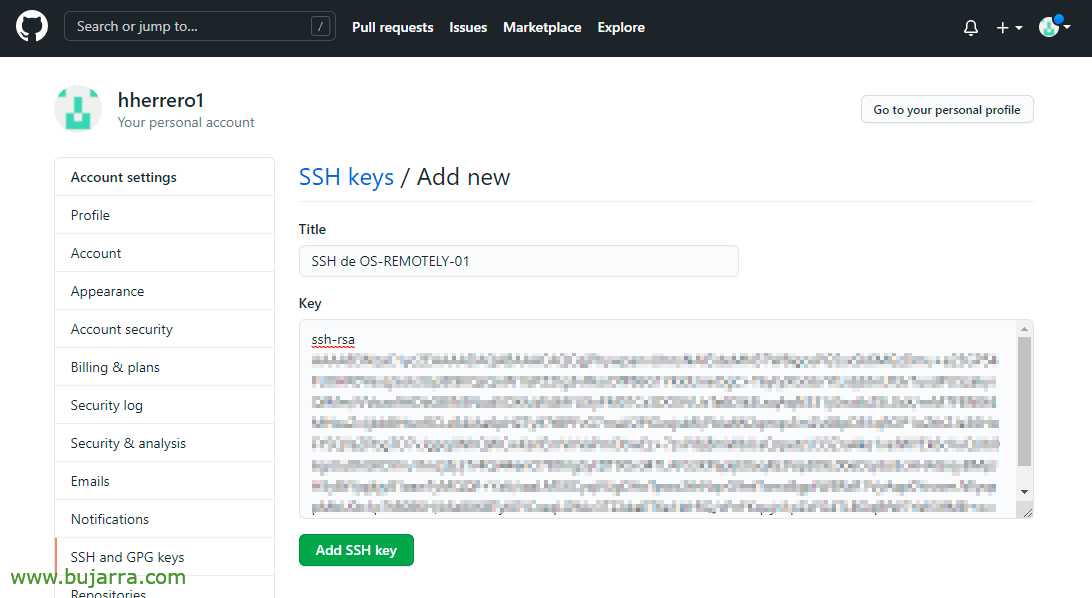
On Github, Let's go to our Settings > SSH and GPG Keys > New SSH Key… We indicate a name and paste it.

We're going to https://github.com/lucent-sea/Remotely and click on “Fork”, We are going to fork the project and we are going to copy exactly a copy of the original in our account.
And then from the shell we can download the project to our machine, It might be a good time if we want to make any modifications to it (language…), and after that we make a pull & A push:
git clone gi*@****ub.com:USUARIO_GITHUB/remotely cd ./remotely git remote add upstream https://github.com/lucent-sea/remotely git pull upstream master git push origin master

We will also need a Personal Access Token, So let's https://github.com/settings/tokens > “Generate new token”

We put a descriptive name for what we will use it for, caducity, We only mark the 'repo' tick’ and below we click on “Generate token”,

And we copy our Token to a safe place, We'll need it.

One last thing, inside our Remotely repo, go to Actions and click on “I understand…”, we will need some workflow actions to work for the Remotely installation.
Now we can really start with the installation, and this time we'll indicate that we don't want to use precompiled packages, yes indeed, in exchange it will ask us for our GitHub username and the Token among others, I leave you the steps for its final installation:
wget https://github.com/lucent-sea/Remotely/releases/latest/download/Remotely_Server_Installer chmod +x Remotely_Server_Installer sudo ./Remotely_Server_Installer
And where we should kindly change our answers, Here's how to proceed with the wizard:
Download pre-built package (yes/no)?
If no, a customized server package will be created through GitHub Actions.
Enter Response: no Which directory should the server files be extracted to (e.g. /var/www/remotely/)?
Enter Response: /var/www/remotely What is your server's public URL (e.g. https://app.remotely.one)?
Enter Response: https://soporte.mysite.eso Which web server will be used?
    [0] - Caddy on Ubuntu
    [1] - Nginx on Ubuntu
    [2] - Caddy on CentOS
    [3] - Nginx on CentOS
    [4] - IIS on Windows Server 2016+
Enter Response: 1

What is your GitHub username?
Enter Response: USUARIO_GITHUB What GitHub Personal Access Token should be used?
Enter Response: ghp_XXXXXXXXXXXXXX_TOKEN_XXXXXXXXXXXXXX Create new build (yes/no)?
If no, the latest existing build artifact on GitHub will be used.
Enter Response: yes Which version would you like to build?
    [0] - Latest official release
    [1] - Preview changes (i.e. Master Branch)
    [2] - Specific release Enter Response: 1
...
By the way, If you get stuck in any step, I leave you this video of its installation tutorial: https://remotely.one/Tutorials
And that's it! We will have the portal up! Remember (Same as before) Create an account with administrative privileges from “Register”. Remember that you can only register for the first time on the site by default, No one else without our consent can do it.
And indicate credentials,
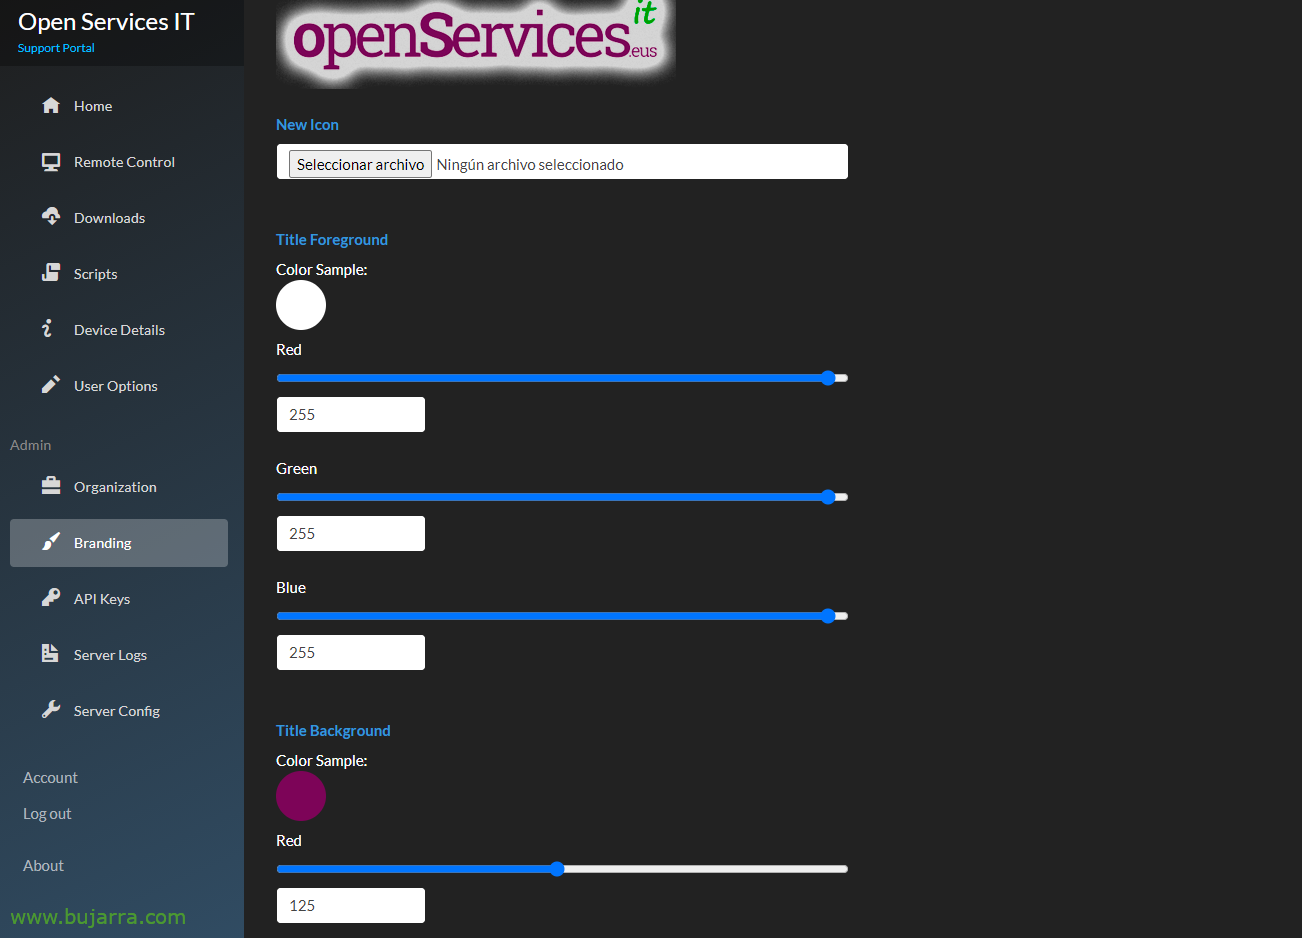
First of all I will go to the subject, We have a section called “Branding” where we can customize the image of the client software, indicating our company logo, a title, colors, Light/Dark Theme…
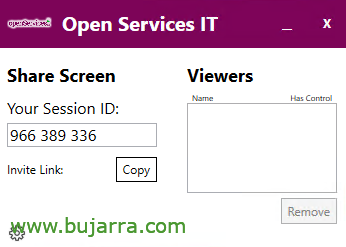
It would look something like this when the customer opens it, precious, and without having to enter any URL. To the agent (Support Technician) We can copy and send you the link or directly dictate the session ID. Since the agent will also be able to enter from the Remotely web portal from “Remote Control”,

When the agent enters the session ID code, The end user will receive a message to accept the remote session.

And what I said, we would have a remote control on a one-off basis with someone who needs it.
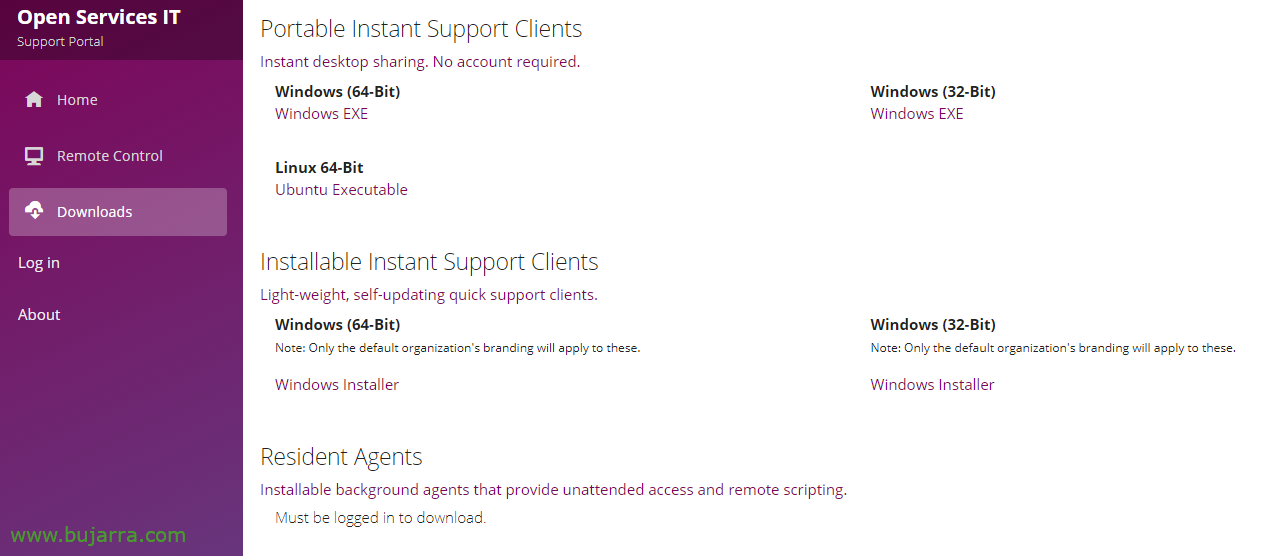
Finally, with the issue, we have two CSS files that will also help us to customize the web front, I'll leave them to you in case you want to make it a little more corporate: /var/www/remotely/wwwroot/css/Themes/yeti.min.css and /var/www/remotely/wwwroot/Remotely_Server.styles.css. Well, and I leave you this example of a screenshot where you can see the downloads that can be made from the client side, the instant Windows laptop will be available for download, Linux or Mac. As well as the installable option, so they don't have to install it, But watch out, This is not the one with the unattended option, which we also have called Resilent Agent, and it is the one we will see below.
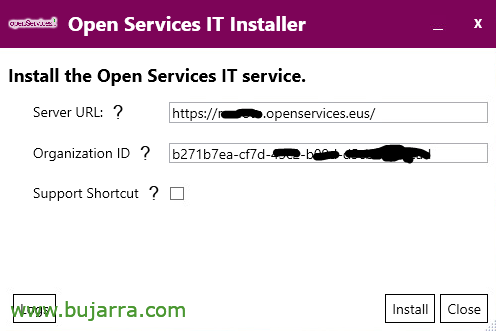
This agent that we can download once we have logged in with our administrative account and we can install it wherever we want, on a remote server to manage later, On a jump team, of a client/company/user that interests us… Click on “Install” There is no need to fill in any data as everything will be embedded.

… wait a few seconds while installing…

“Close”,

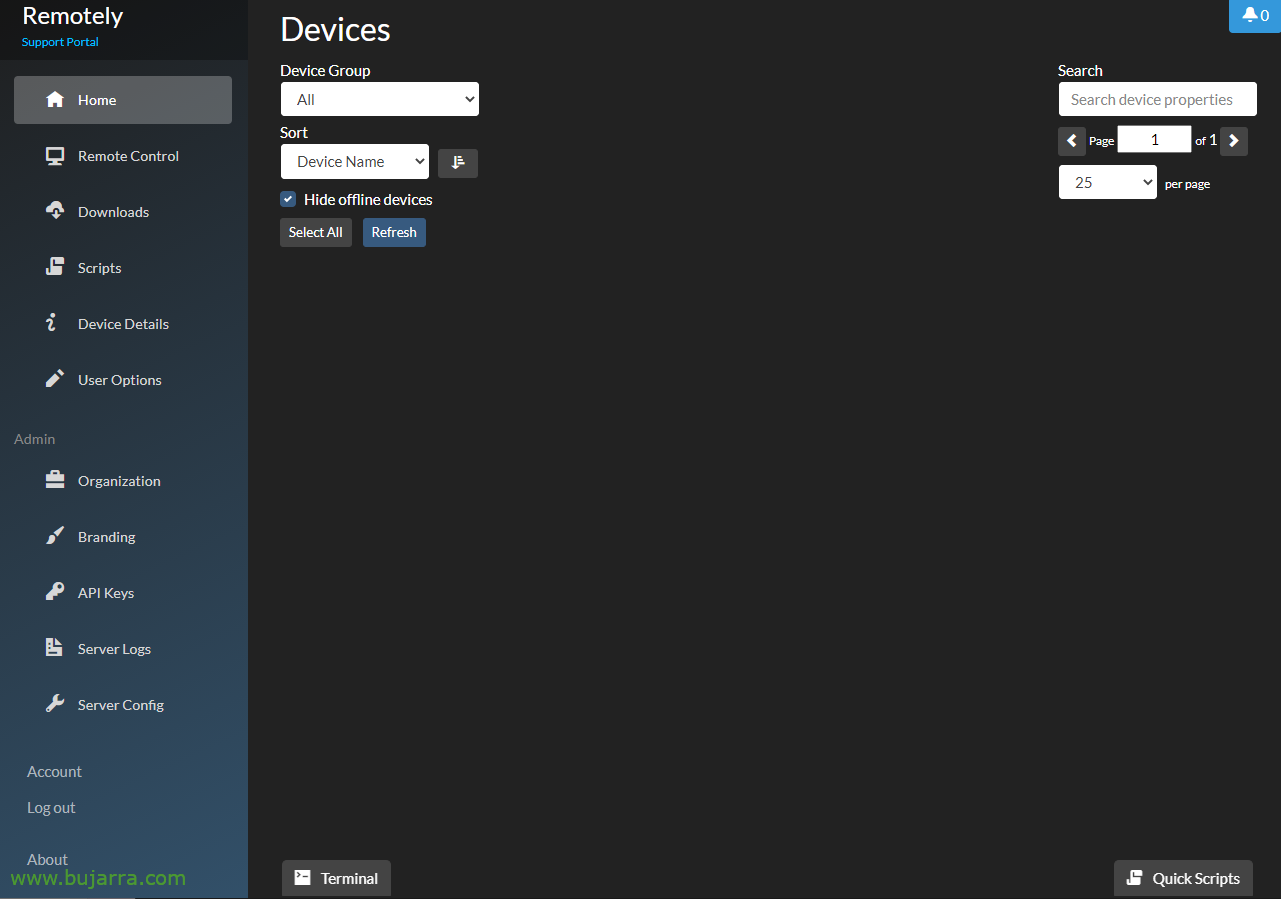
And we will have on the menu “Home” the equipment that we have been adding the unattended connection agent, To connect to any of them you will have to click on it and in the options we will see it.

And the theme of Scripts also exists, the possibility of executing a command on any of these machines, or to schedule it at some time… This personally calls me less, covers less of the need he had.

¡Ah! And wait we are not done yet! Are you concerned about security? Well, nothing, I remind you that you should enable two-factor authentication in your administrative account, so from the side menu “Account” Enable 2FA or Two-factor authentication. An assistant will appear where we will have to scan the typical QR code and add it to our mobile app and copy the security codes in case we lose it.
I hope you found it cool, The truth is that it is amazing, We will have to see how the project grows, But don't tell me that it's not a great solution to make remote connections with clumsy users or with your customers for some support/need they have from you. Total and functional corporate remains, it fulfills what would be asked of it more than enough.
A hug to tod@s, and as always thank you to those who move this type of content on social networks, for the likes, Retweets, Recommendations… Salu2!