Integrating an RF Smoke Detector into Home Assistant

Another possibility that we can give Home Assistant is to install smoke detectors, These are wireless, powered by a small battery and communicate any notification by radio frequency., There are many types and quite cheap, For just €5 you can make sure that nothing burns in your home or office! This is how cheap we protect ourselves, and in the end we will see how to alert with Telegram in case there is smoke.
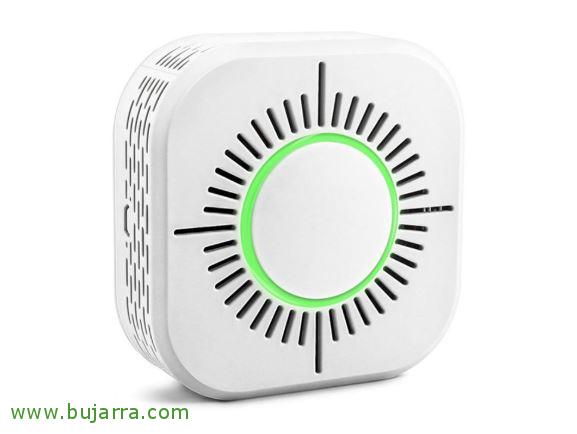
This would be an example of a smoke detector, a ready-made product that simply by feeding it with a battery and detecting smoke, will send an RF signal, and there will be our Sonoff Bridge RF to listen to the radio frequency signal, convert it and send it over Wi-Fi. This final part will be carried out through MQTT where it will be sent to the Broker (the Home Assistant itself or Hassio) and it will depend on our automations because whatever we want, In this particular case, what we were commenting on, to alert us with Telegram messages.
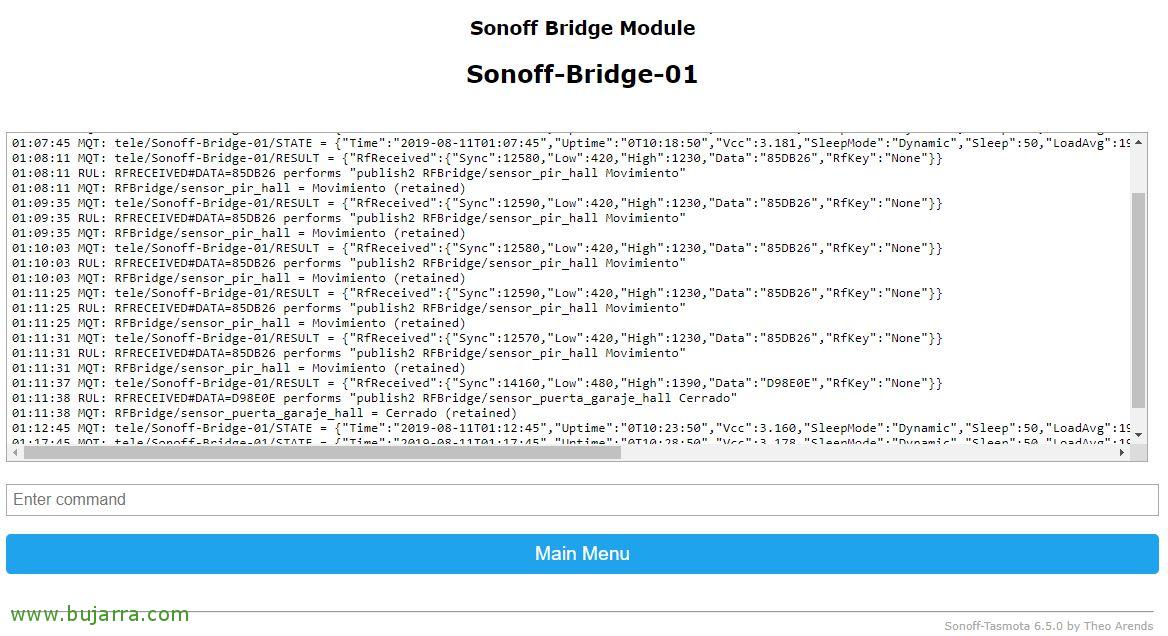
The first thing will be to see the code sent to us by the smoke detector, so we opened the Console of our Sonoff Bridge RF, we make a fire or bring some smoke close to the sensor and if everything goes well, Apart from beeping like a madman, we can see the code it sends. Now as always, we must create a rule in our Sonoff Bridge to publish a topic or issue and have it picked up by the MQTT Broker (our Hassio or Home Assistant). If you need to review, Have This post to see how to mount Tasmota on a Sonoff Bridge or how to use the rules, ¿Ok?. These rules remind you that each device with Tasmota will allow us to create up to 3 rules with 511 characters each, we will be able to nest the rules. And this would be the example we can use, where using the code of each device we will indicate that the sensor detected smoke:
[SourceCode]on rfreceived#data=9D6FB6 do publish2 RFBridge/sensor_humo_cocina Smoke endon[/SourceCode]
We ended up registering this smoke detector, we will do it in the binary sensors section and we will be able to use their specific file or directly in our beloved configuration.yaml that contains the Home Assistant configuration:
[SourceCode]binary_sensor:
– Platform: MQTT
Name: "Humo Cocina"
state_topic: "RFBridge/sensor_humo_cocina"
availability_topic: "tele/Sonoff-Bridge-01/LWT"
Qos: 1
payload_on: "Humo"
payload_off: "Sin humo"
payload_available: "Online"
payload_not_available: "Offline"
device_class: smoke[/SourceCode]
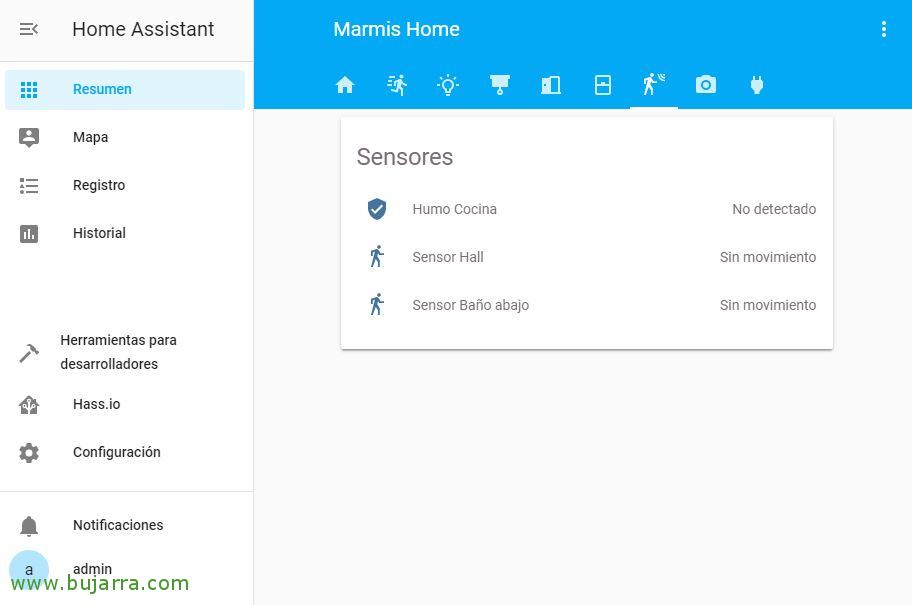
As usual, we restart our Home Assistant and we will be able to verify that the smoke detector already appears correctly.
 |
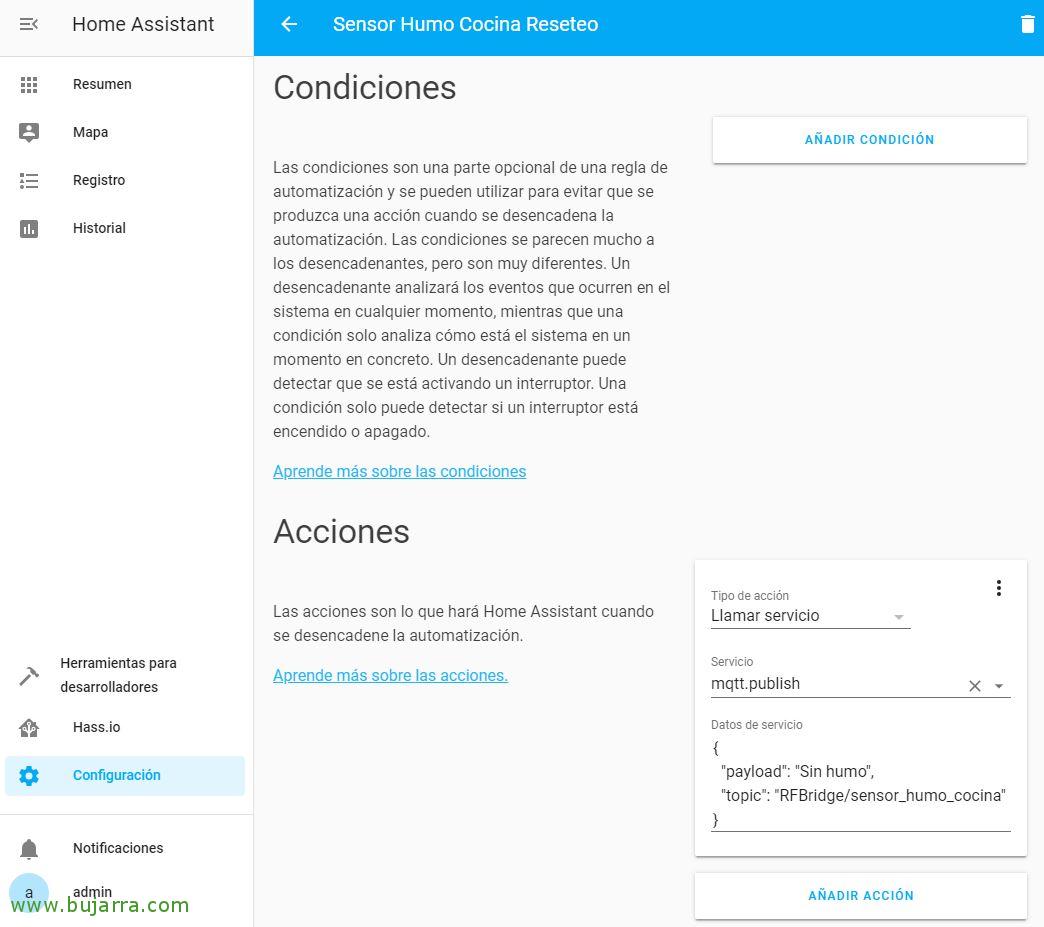 |
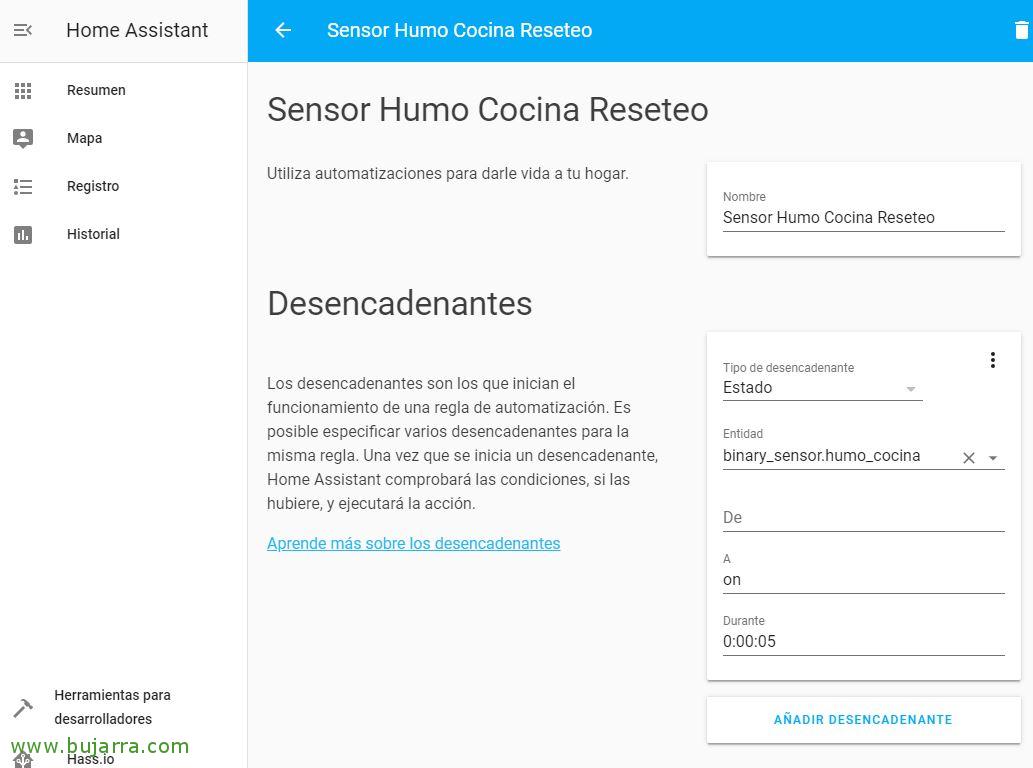
We have to create an Automation so that once the alarm goes off that there is Smoke, Well, past 5 seconds leave the sensor as it was, that is, Smokeless. Otherwise, it would never return to its state and we would always have it activated, It is similar to motion detection sensors, that only send 1 code, When there is movement, smoke… Not when there is no more. In automation, the trigger will be when our sensor is on’ more than 5 Seconds, and thus the action is executed, which will be nothing more than sending him the payload that there is no smoke, In Automations it would look something like this:
[SourceCode]- Id: ‘1564335337169’
alias: Smoke Sensor Kitchen Reset
Trigger:
– entity_id: binary_sensor.smoke_kitchen
for: 0:00:05
Platform: state
To: 'on’
Condition: []
action:
– date:
Payload: Smokeless
topic: RFBridge/sensor_humo_cocina
service: mqtt.publish[/SourceCode]
 |
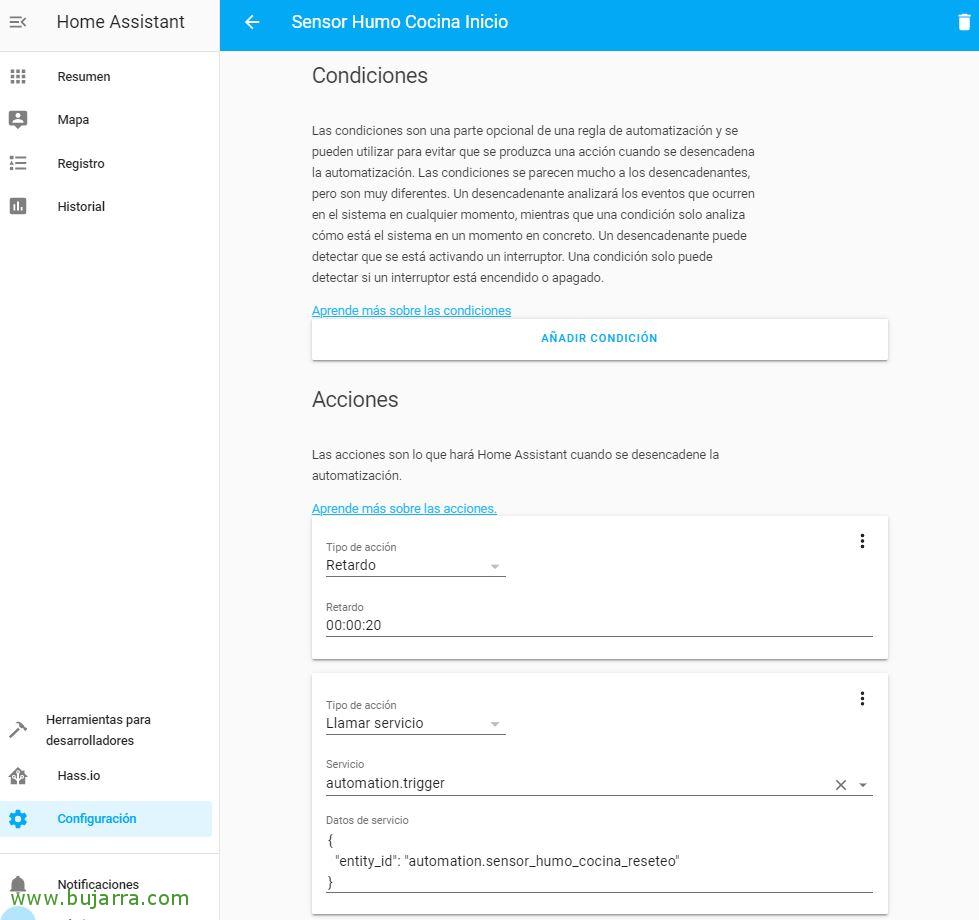 |
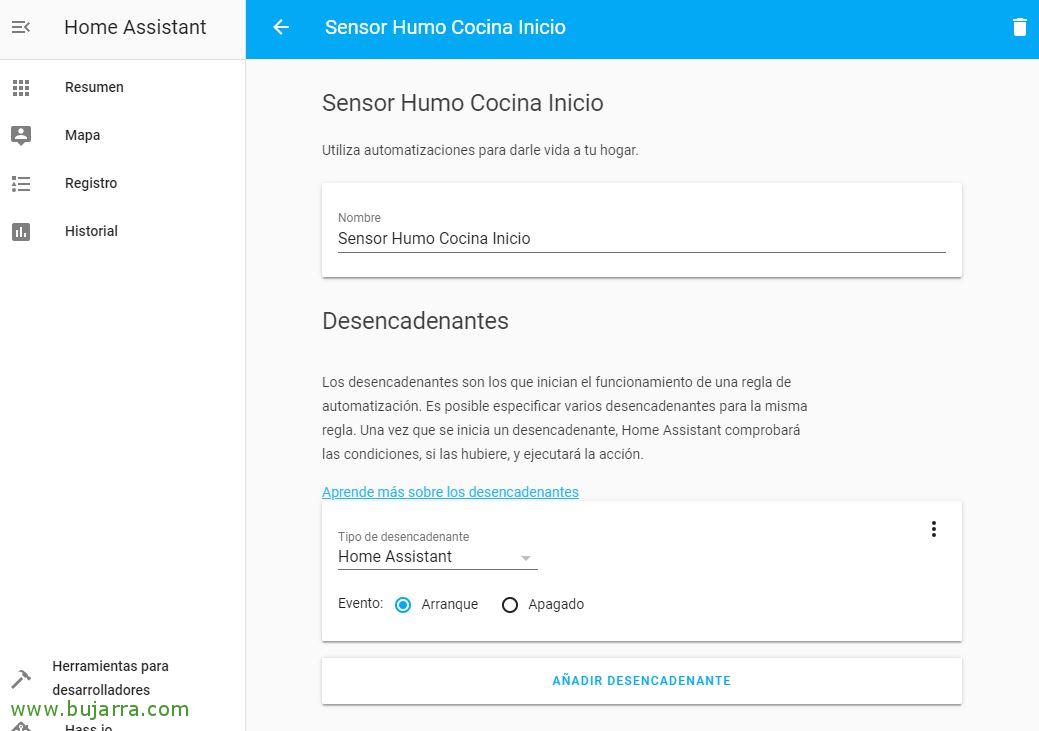
Another automation that we will have to do is, that when I started Home Assistant I reset the sensor, that is, we will correct a small incident, We'll tell you there's no smoke, if not, you will see that every time you restart Hassio the sensor stays activated by default. And I'll leave you if you prefer the code generated by this automation:
[SourceCode]- Id: ‘1564338120195’
alias: Smoke Sensor Kitchen Home
Trigger:
– event: Start
Platform: HomeAssistant
Condition: []
action:
– Delay: 00:00:20
– date:
entity_id: automation.sensor_humo_cocina_reseteo
entity_id: automation.sensor_humo_cocina_reseteo
service: automation.trigger[/SourceCode]
 |
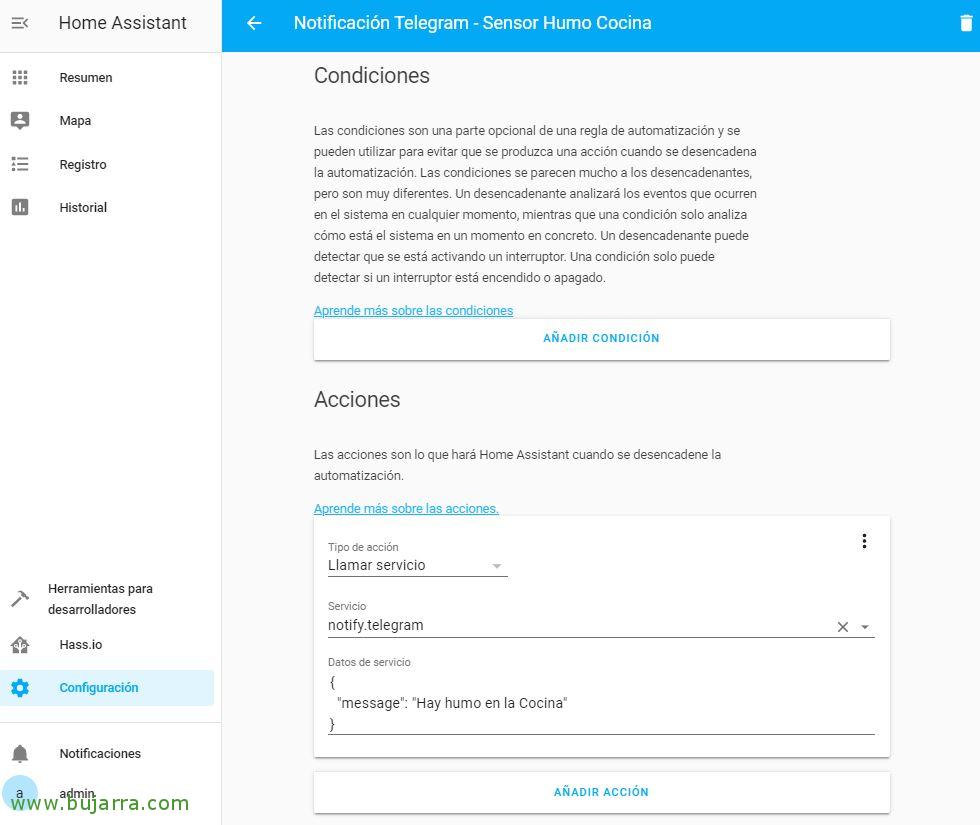 |
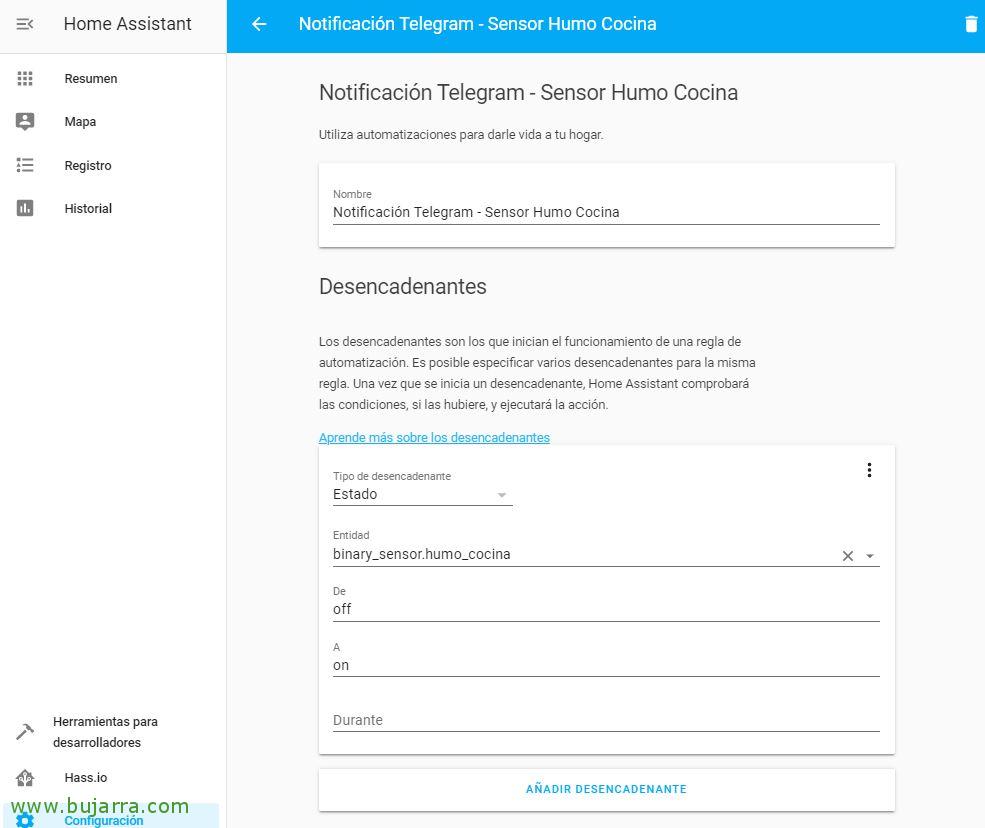
Finally, and what we're going to, The interesting part, sending notifications with Telegram, If you need to remember how to enable these notifications, Remember to take a look to this post. What we see here is through an automation how to get this notification, We will indicate that when the smoke sensor changes from off to on state, send a Telegram notification, As always, I leave you the code generated by the automation in case you prefer:
[SourceCode]- Id: ‘1564335402969’
alias: Telegram Notification – Smoke Sensor Kitchen
Trigger:
– entity_id: binary_sensor.smoke_kitchen
from: 'off’
Platform: state
To: 'on’
Condition: []
action:
– date:
Message: There is smoke in the kitchen
service: notify.telegram
– Id: ‘1564338120195’
alias: Smoke Sensor Kitchen Home
Trigger:
– event: Start
Platform: HomeAssistant
Condition: []
action:
– Delay: 00:00:20
– date:
entity_id: automation.sensor_humo_cocina_reseteo
entity_id: automation.sensor_humo_cocina_reseteo
service: automation.trigger[/SourceCode]
I hope you found it interesting, As we can see, we can secure our home, office or whatever in a cheap way, customized and of course better than any professional solution sold by manufacturers.