Wooden world map + the position of the sun with an ESP32

I think I already warned you that some posts we will see are somewhat different, but I think I consider them at least curious and I want to tell you about my experience and if anyone finds it interesting, You can always apply it in any way. Today… Touches… See how to make a world map with a laser cutter, and put LEDs on the back that we will program from Home Assistant so that only the areas where it is daytime are illuminated…

Well, the sincerely, It doesn't have much mystery, Most of the time will be spent with the laser cutter… The map I used as a model can be found in Download from here. We will have to cut out the map of the world, their countries… the ideal can be in different woods and thicknesses, And if not, We can always burn with different shades, varnishes…

Once we have the wooden world map made, on the back we will glue an LED strip or, In my case and I recommend some garlands WS2812B, which are more flexible than LED strips and so do not even require the use of a soldering iron and in no time you will end up with a hot melt gun.
The point is that we will have to number and point the LEDs, so we can then turn them on individually as we need. We will make as many vertical sections as we need and then we will turn them on as we need.
As always, we will connect a board with an ESP32 to the LED strip, and in it (How could you not), We'll install WLED firmware in a jiffy, once the firmware is installed it will connect to our Wifi network, we will assign a fixed IP address and indicate to WLED the data pin that we are going to use to control the LEDs.
Very briefly, to install WLED on the board with an ESP32, we will connect the microUSB of the board with a USB cable to our computer, with Chrome or Edge we will access https://install.wled.me where the device connected to the computer's serial port will detect, This website will install the firmware on 2 minutes and at the end it will ask us what the SSID of our Wifi network is and the password, so it will join.
I leave you this one somewhat old document where we saw WLED and can help guide you, as well as this Another post by Luis del Valle that the complete process is very well explained.

And to finish, in the configuration.yaml of Home Assistant we will define in the section 'rest_command’ all the sections that interest us, we will indicate the ID of the LED or LEDs that we are interested in associating with the section, as well as in RGB its tonality. I leave you with this example, obviously remember to change and indicate your WLED IP address world map:
...
rest_command:
  mapa_mundi_s01_on:
    URL: HTTP://192.168.1.228/JSON/State Method: POST payload: '{"Sec":{"i":[0,[255,200,0]]}}'     content_type:  'application/json; charset=utf-8'     #verify_ssl: true mapa_mundi_s02_on:
    URL: HTTP://192.168.1.228/JSON/State Method: POST payload: '{"Sec":{"i":[1,2,[255,200,0]]}}'     content_type:  'application/json; charset=utf-8'   mapa_mundi_s03_on:
    URL: HTTP://192.168.1.228/JSON/State Method: POST payload: '{"Sec":{"i":[3,5,[255,200,0]]}}'     content_type:  'application/json; charset=utf-8'   mapa_mundi_s04_on:
    URL: HTTP://192.168.1.228/JSON/State Method: POST payload: '{"Sec":{"i":[6,8,[255,200,0]]}}'     content_type:  'application/json; charset=utf-8'
...
  mapa_mundi_s01_off:
    URL: HTTP://192.168.1.228/JSON/State Method: POST payload: '{"Sec":{"i":[0,[0,0,0]]}}'     content_type:  'application/json; charset=utf-8'     #verify_ssl: true mapa_mundi_s02_off:
    URL: HTTP://192.168.1.228/JSON/State Method: POST payload: '{"Sec":{"i":[1,2,[0,0,0]]}}'     content_type:  'application/json; charset=utf-8'   mapa_mundi_s03_off:
    URL: HTTP://192.168.1.228/JSON/State Method: POST payload: '{"Sec":{"i":[3,5,[0,0,0]]}}'     content_type:  'application/json; charset=utf-8'   mapa_mundi_s04_off:
    URL: HTTP://192.168.1.228/JSON/State Method: POST payload: '{"Sec":{"i":[6,8,[0,0,0]]}}'     content_type:  'application/json; charset=utf-8'
...

And to conclude, in my case I created an automation for each series of LEDs,

Each automation with each LED array will run based on when the sun rose + a fixed time. I'm realizing that I don't think it's the best option, since in summer and winter the behavior would be the same, one day I correct him… I understand that it would be advisable to play with azimuth or elevation (Two attributes of the entity Sol) and divide by the number of sets you have. In my case, I think I have 33 Series, Well, if it's 24 hours a day, they are executed with a space of 43 minutes between them. Each automation turns on one series of LEDs and turns off another, Where it gets dark!

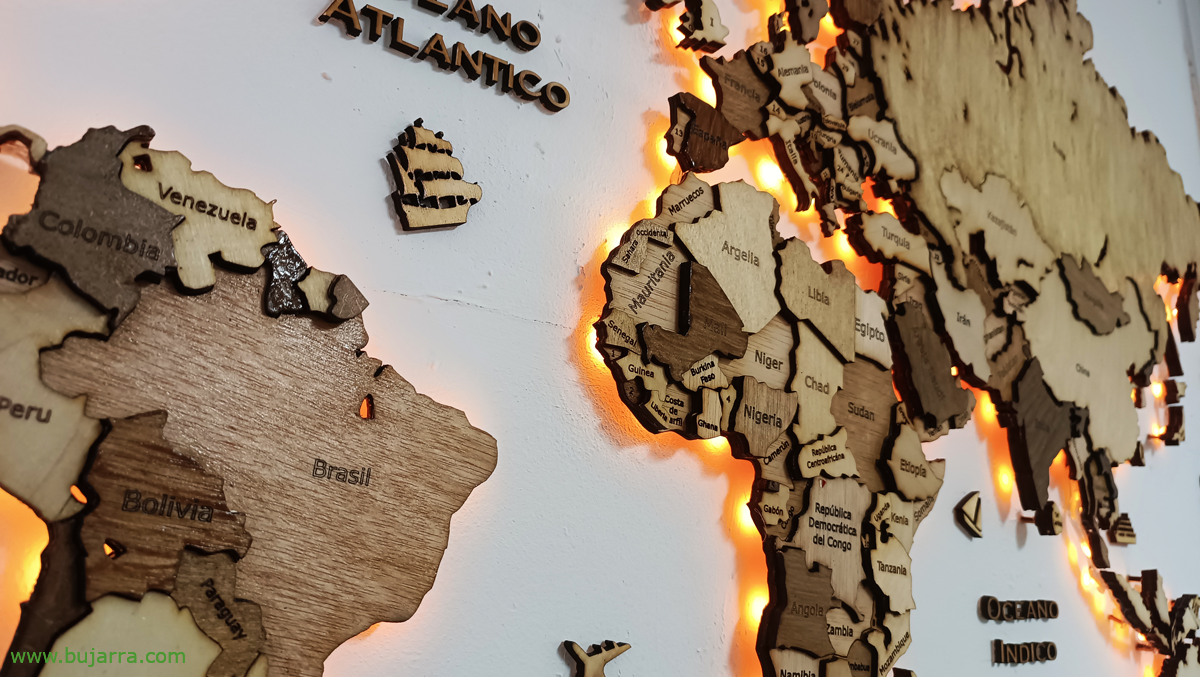
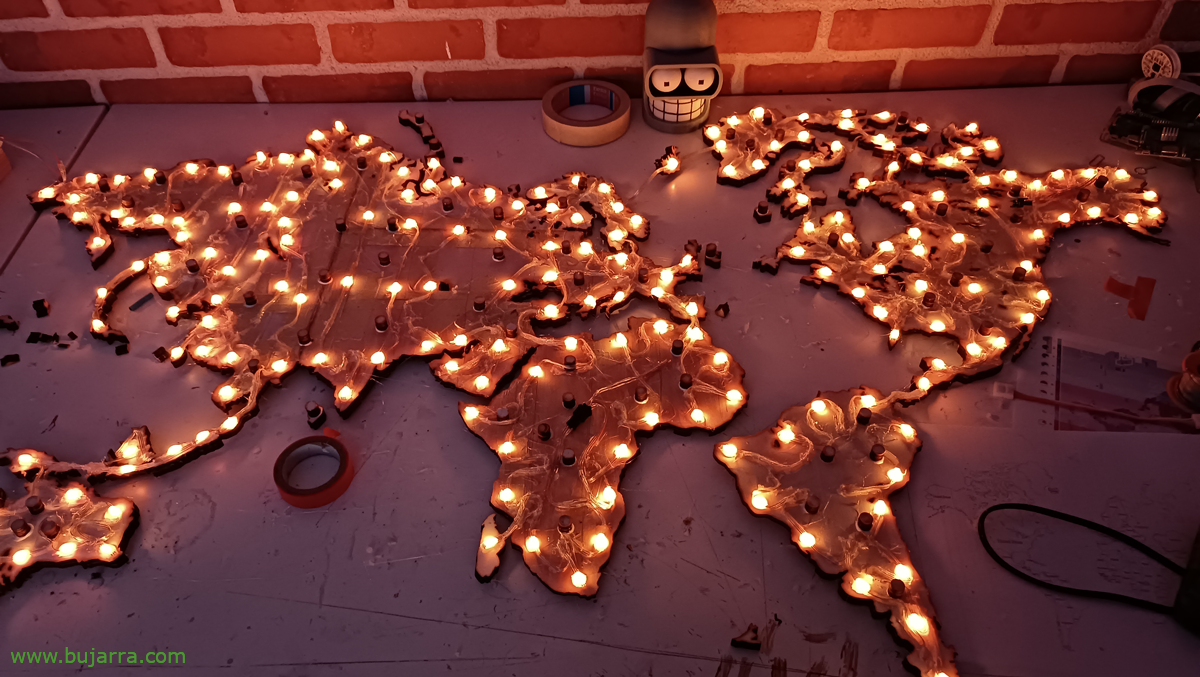
I leave you some screenshots of how it turned out so that you can dare to do something similar!

As some of these geeks I follow on Twitter say… where there are LEDs there is joy! And it's true, They give things another touch…

View of all LEDs on…
And seen with the route I would do during the day.
What I said! I hope you found it interesting! with a laser cutter, a 3D printer and ESP32 or Raspberry Pi inserts, The truth is that you can do very, very curious things, some more complicated than others, or more familiar with the little ones in the house, or for the office, The Logo, With colors…