Adding a timer in Home Assistant

In this post we are going to see something quite useful and common in any home, Using timers to complete an action, such as putting the heating on for the time we choose and when the period ends, Then turn off. As well as the irrigation of the garden or whatever you can think of.
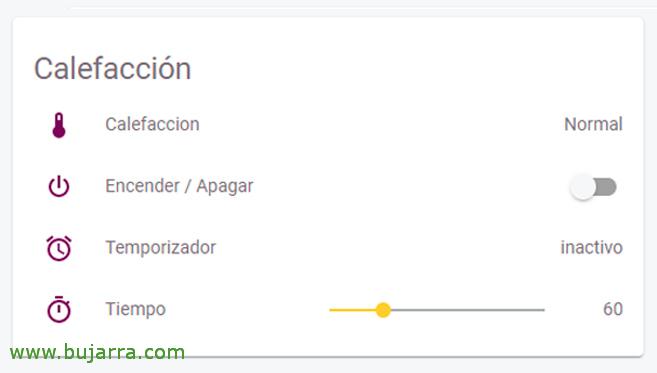
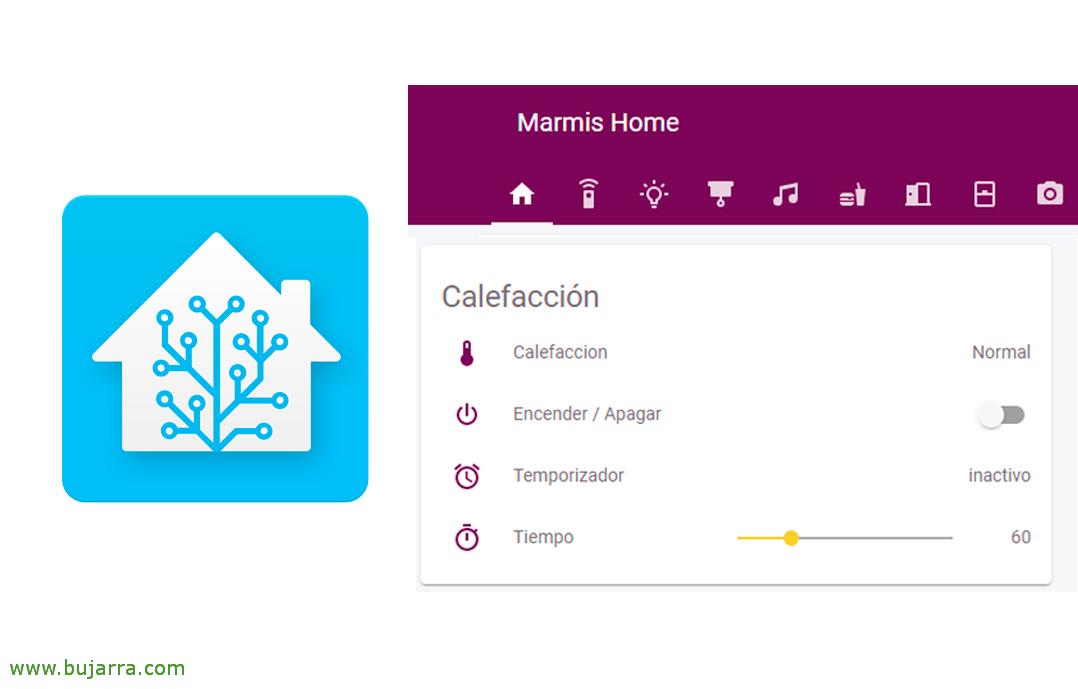
The idea is this, have an interface like the one above within our Home Assistant. Know if something is on or not, as we will do the example of our own thermostat. We can turn it on or off with that button and we will also have to indicate the number of minutes we want this action to last. All fully customizable, Of course.
Well, Well, to begin with, We'll add several configurations in our configuration.yaml configuration file, we will have on the one hand a binary_sensor that will be the entity for Heating and through MQTT we will be able to control and know its 2 States, Either the heating is on or not, So in the section on binary sensors, We discharge him:
binary_sensor:
...
  - Platform: MQTT name: "Heating"
    state_topic: "RFBridge/cale"
    availability_topic: "tele/Sonoff-Bridge-04/LWT"
    Qos: 1
    payload_on: "Cale"
    payload_off: "Without Cale"
    payload_available: "Online"
    payload_not_available: "Offline"
    device_class: heat
...
We will also need a input_boolean to be able to manage it from the GUI and then the automations read its status (On off) And do what you have to do, so in that section, we add it:
input_boolean:
...
  temporizador_cale:
    Name: temporizador_cale initial: Off
More, we need to create a Timer entity, This will be the timer:
Timer:
...
  temporizador_cale:
    Name: temporizador_cale duration: 1800
...
And finally, We'll add a input_number, that is, a numerical value that we can manipulate from the GUI and establish the time we want to turn on the heating (in this example). We will indicate the initial value, in my case 60 (minutes); minimum and maximum values, in my case 0 and 240 (minutes) and finally the jump between number and number, I will use 15 (minutes), we would have something like:
input_number:
...
  temporizador_cale:
    Name: temporizador_cale initial: 60
    min: 0
    Max: 240
    Step: 15
    mode: slider
...
We save the file and as always, restart Home Assistant to reload the newly added settings. The next thing will be to create the automations we need to get this up and running.
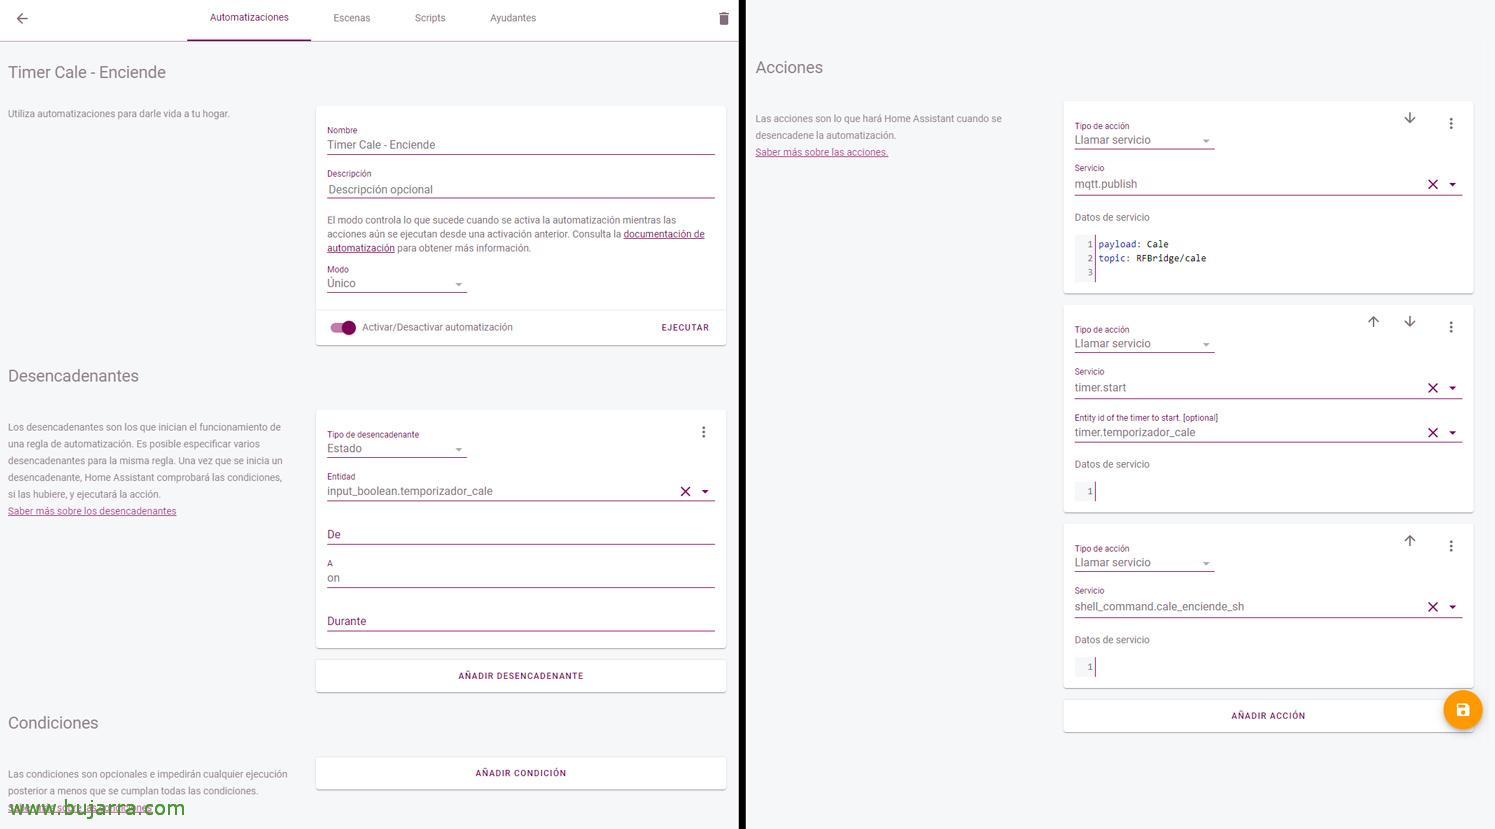
First we will create an automation that turns on the heating when we manually press the boolean, The actions they will do will be to publish by MQTT the new status of that entity that we have created, so we will see that it has been lit, We will also start the timer and execute the action that physically turns on the heating. In my case it's a shell command that opens/closes a relay plugged into a Raspberry Pi next to the boiler. This is what each one has 🙂
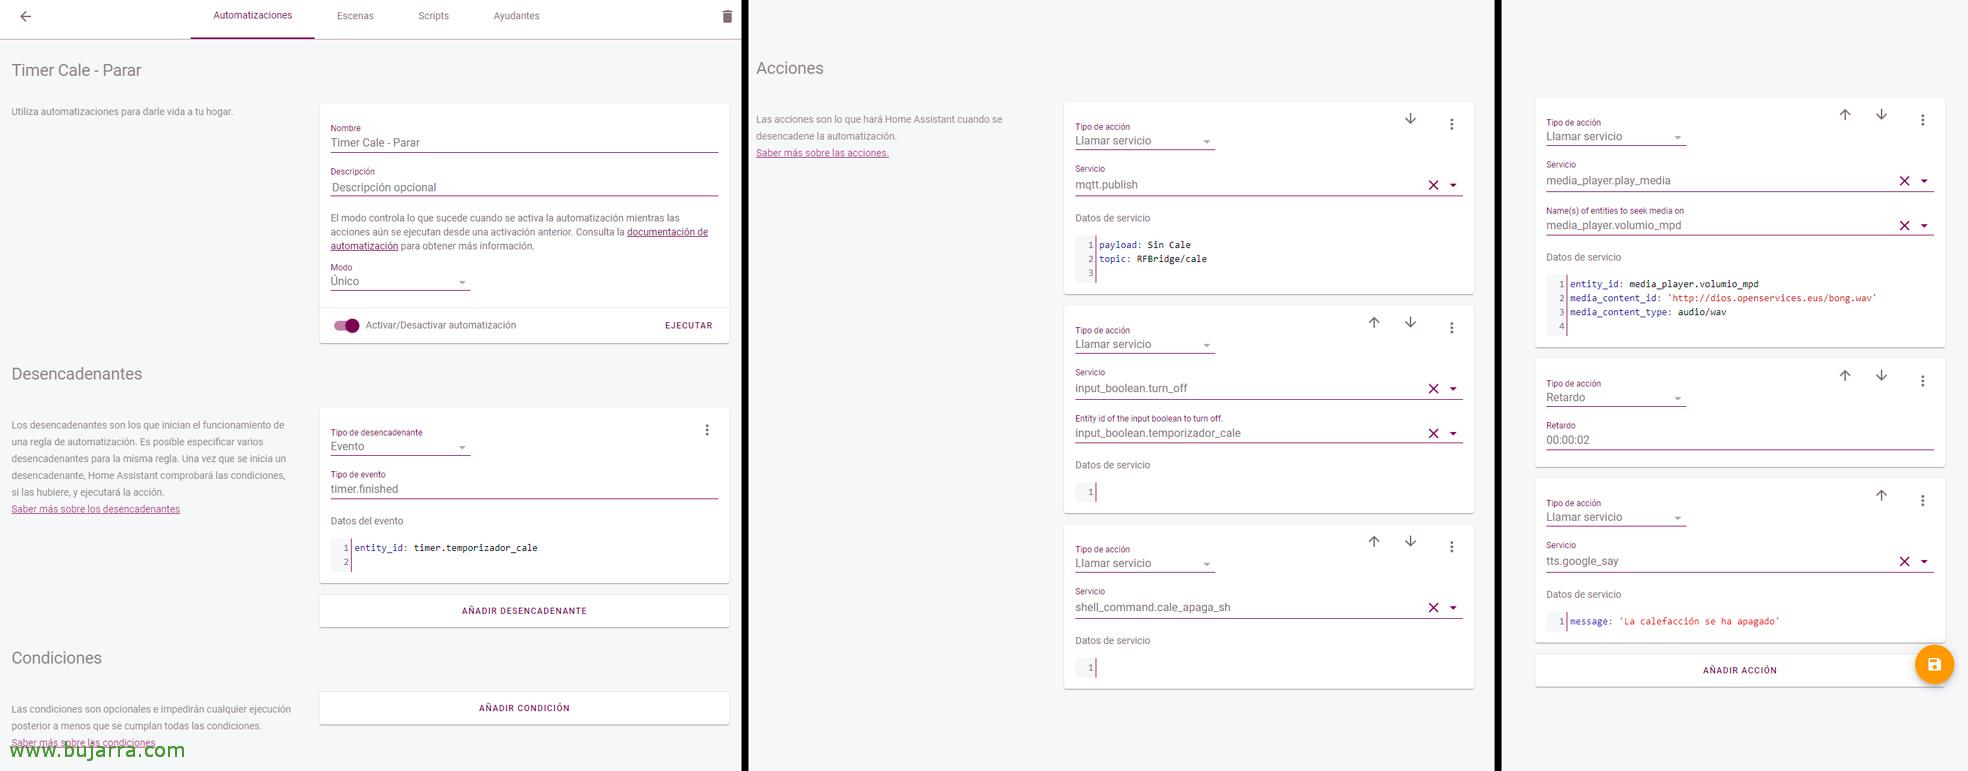
We will create another automation for when the time indicated on the timer is up and we want the heating to turn off. The trigger will be when the timer has ended. Then by MQTT we will send that the cale is no longer on, On another script I will tell the relay to turn off the heating and through the speakers at home it will send a little sound and tell us that the heating has been turned off.
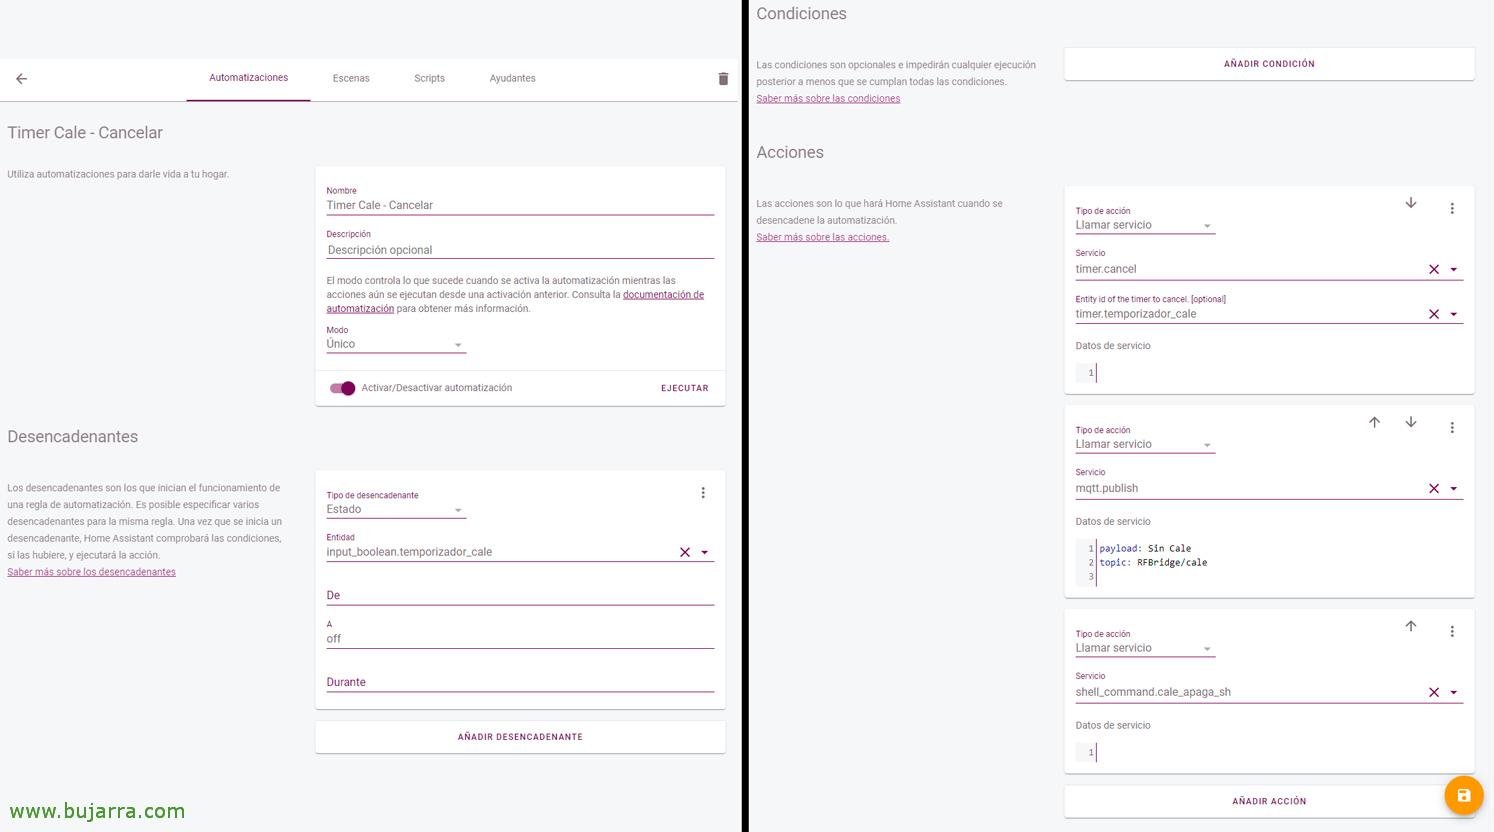
The last automation will be for when we cancel the countdown, This is, if we want to turn off the heating early. Automation will see that Boolean went 'off'; then it will stop the timer countdown, will send topic by MQTT that the heating is off (Updating the Entity Status) and finally, it will run the script that tells the relay to turn off the heating.
Remember to reload automations!

To add it in the Home Assistant Lovelace interface, Well, as always, we add an entity card and add each element that we have defined at the beginning in the configuration file.
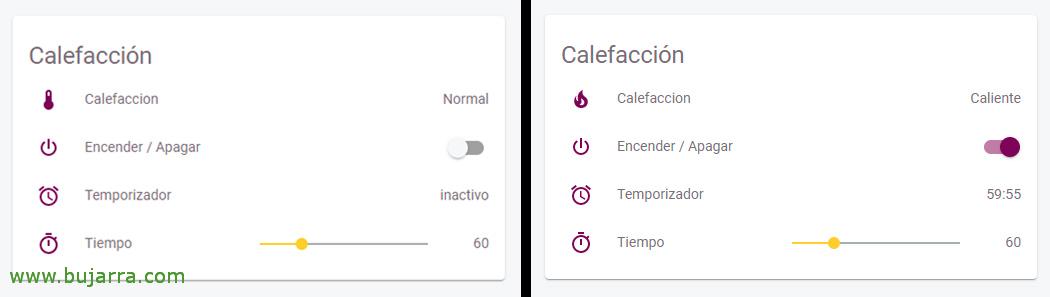
And this is what the Home Assistant interface would look like, left in normal mode, at rest; and on the right once the heating is turned on and apart from its state we will see the timer how it runs down.
I hope you have found it interesting, and thank you for sharing & those likes on social networks!