Winternals Administrator's Pak & ERD Commander & NTFSDOS Pro

Briefly we see how this 'treasure' is installed’ and what is it for?, later we will look at the usefulness ERD COMMANDER 2005 which is the main one and lists all the applications that the 'Pak’ and then in NTFSDOS Pro, Another marvel for tackling systems quickly. First, We will be able to download the package from your Official Website or in another way 😉 and we start installing it:

It's a simple installation, Typical, what is interesting is the package itself, Next,

Yes,
The Path where we will be installed, We give Next

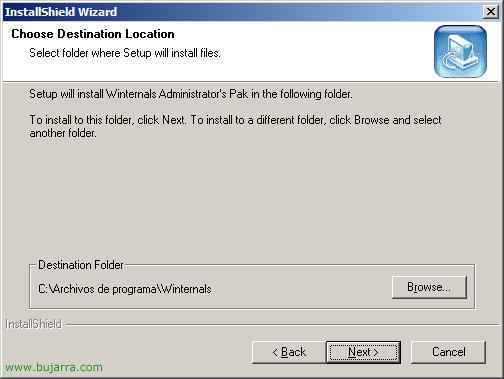
Installation “Typical” and Next

Next

We wait for it to be installed…Zzz….

And at last, End.

Ok, we will see that in the Start menu it has created a folder with all the programs, What does he have, I focus on the ERD COMMANDER 2005, since it has those tools and more, but it is very interesting that you take a look at the others:
– ADExplorer: Search, Modifies, Adds, deletes objects and attributes in Active Directory. HERE An image.
– Crash Analyzer Wizard: Analyzes memory dumps from a PC/Server, when it gives a blue screen or when it restarts without further ado, the mythical DMP files that eat up our HD if we don't delete them. HERE An image.
– Filemon: It is a Spanish comic drawing :DDD. It is a very good utility for MONotorizing FILES/files, processes opened by the system, Very good for browsing. HERE An image.
– FileRestore: Typical tool to search for deleted files from the PC/Server, Recycle Bin… HERE An image.
– Insight for Active Directory: Well, I have no idea exactly, to control the AD a little more. HERE An image.
– Regmon Enterprise Edition: To MONotorize the REGISTRY, what is happening at any given moment. HERE An image.
Here's one of the wonders of the world, with this we will generate a CD-ROM that will be bootable by the BIOS, with this we will be able to enter any PC to which we have physical access, and we restart it and we can set password to the PC administrator, or directly recover data from your hard drives over network, or whatever we need if the PC is damaged and won't boot… It's a diamond!!

Open it from the start menu: “BEGINNING” > “All Programs” > “Winternals Administrator's Pak” > “ERD Commander 2005 Boot CD Wizard” and we give “Following”,

We accept the license… Following

It shows us the current license, if we don't have it, we buy it!!! (or else you can download it ILLEGALLY from HERE) We give “Next”,

Next

We wait while generating the CD image…

Vale, Here we select the last option because we are going to burn a CD, we burn it well and that it serves us for everything, and Next,

Okay, this is the default UDP port that comes with, Explain. If we restart a PC with the ERD COMMANDER CD (with this CD) this port is opened and we can manage it remotely with the “Winternals Admin Pak” from our own PC (Type one “mmc” Windows), We give “Next”

Just like that, Let's not complicate our lives for sure, Following

We put all the utilities on the CD…

Vale, if we are interested in analyzing the DMPs of when a Windows crashes, good for blue screen, good that it restarts without further ado and we want to know why… we downloaded the 'Debuggind Tools’ of HERE, I for my example, passing, So I tell her I won't use them, but if not, You lower them, you install them and leave the PATH that comes up there.

At most this security is good in case you want no one to touch your ERD Commander CD and put a password on it, Not me.

Vale, if we are going to access a PC that has disks other than IDE, Bone, some SCSI, SATA or some hardware RAID, We put here the drivers we have from those disks

And the same for the network card, ERD has a database with multiple network cards, but if the PC we are going to access is not a driver signed by Windows and it is something special, Well, we put it here too, and if we have doubts also that it costs nothing; man, if we are not going to use the PC network, it is not critical either, Next

It generates that directory for us, where EVERYTHING we put in there will be compiled in the CD-ROM ISO, So if we want to put some utility to make the most of the space or that we know we may need, we can put it in by dragging it with the “Explorer”, Next

Ok, tells us where the image of the CD will be generated, will make it to us in the more than international ISO format, Next

We wait for you to compile it…

Ok, And we already have it, now it is simply to burn it to a blank CD and boot the PC that we want to solve or hack, It's all a matter of trying it and enjoying it. If you don't know how to burn this ISO to a CD, read HERE, A brief example:
This ISO has already been burned to a CD, we take a PC and restart it, we put in the BIOS that the main boot is the CD-ROM, we put the CD in and start!!

Hope…

Hope…

Hope…

Vale, For now it is detecting two network cards… Hope…

We start the ERD Commander and OK

Vale, here if it detects us the hard drives would come out up there, For example, my system detects it, says there's a Windows 2003 in C:WINDOWS, We get keyboard languages right (Spanish) and the time, and we hit OK

This would be the desktop, similar to that of a Windows XP, we hit Start and the following comes out:

In “Administrative Tools” we have:
– Autoruns: We see the programs that are booted with the PC/Server, We can remove them so that the device starts well. HERE image.
– Disk Management: It's like the Windows console to watch HDs, Your Status… We can load disks/partitions… HERE image.
– Event Log: It's the Windows Event Viewer, it lets us see the events and why our server does not start or because it stopped… HERE image.
– RegEdit: As the name suggests, is the Windows Registry Editor. HERE image.
– Service and Driver Manager: Console that shows us the drivers, services that the PC has, We can disable them from booting if it's the cause of some error. HERE image.

In “Networking Tools“, we have:
– File Sharing: To activate the SAMBA-type service and access the shared folders of this virtual PC from the network’ and copy the data that interests you, HERE image.
– Map Network Drive: Map a network folder on a PC on your network to a letter on this, typical for copying data from this PC to another. HERE image.
– TCP/IP Configuration: Very important if we want to use the ERD with network access, if there is no DHCP in the network, it will have to be assigned an IP manually. HERE image.

In “System Tools” we have:
– Crash Analyzer: If we have a DMP file (Memory dump) It tells us why our PC doesn't start or because it crashes or because they give screenshots.
– Disk Commander: The typical program that analyzes the disks in search of files that we have deleted and want to recover, Pretty good. HERE image.
– FileRestore: Same as above, but it searches for the files according to search criteria. HERE image.
– Locksmith: THE BEST!!! to change the password/password to any user on the physical PC, administrator or Active Directory if it is a domain controller. HERE image.
– System File Repair: Scans system files for defective ones, If there is something wrong, it solves it. HERE image.
– System Restore: It restores the S.O.. to an earlier date with the famous “System Restore” Windows. HERE image.
And well, has some more utility, as an MSDOS console (HERE) or the Mozilla Firefox browser, An explorer, the Notepad… and everything we want to put on the CD in a previous step of compiling the CD.
This one is similar to the previous one, but simply lighter, instead of burning it to a CD-ROM, He saves it for us on a floppy disk (Floppy) and with that wonderful floppy disk we can boot any PC and access NTFS partitions (Windows NT/2000/XP/2003), good for recovering data, good to hack some system and delete the SAM file from C:WINDOWSsystem32config and thus remove the password from the local administrator or any local user, or for whatever we want.

We started it from: “BEGINNING” > “All Programs” > “Winternals Administrator's Pak” > “NTFSDOS Professional Boot Disk Wizard” and we give “Next”

It takes away the license we have…. and Next

Next

We leave that one that is correct, and Next

We indicate the path of the system directory of our PC, normally “C:Windows” and Next

We indicate A: to generate the boot disks with the NTFSDOS Pro and Next,

Next to start copying…

And after a few minutes it will generate some bootable floppy disks.

With one of the floppy disks, we will boot the PC/server that we want to access the NTFS partitions, and run by MSDOS commands, and with “ntfspro.exe” we will load the NTFS partitions to letters and we will be able to access any hard drive NO use of passwords. And using our heads we can hack or recover data, as seen 🙂