Setting up a Fortigate SSL VPN

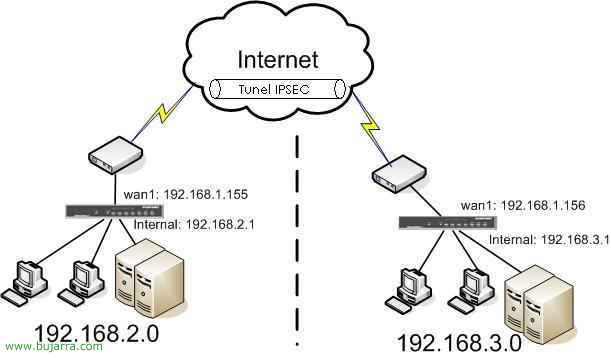
This procedure explains how to set up a VPN using SSL to connect to any PC from the internet to your organization's LAN. All traffic would be encrypted using SSL. And you only need to have a compatible browser, without installing software. Two parts are explained:
– Firewall settings – HERE
– VPN client connection at one station – HERE
VPN Configuration on Fortigate,
Very simple configurations have to be made on the FW to allow this type of connection, first, We will create a user and a group; so that authentication is then done with them. Then we will configure on the FW that it can be connected using SSL.

We get to FW, we are going to create the user and then connect by VPN. In “User” > “Local” > Click on “Create New”.

In “User Name” we put the login for the user and in “Password” The password, We give “OK”.
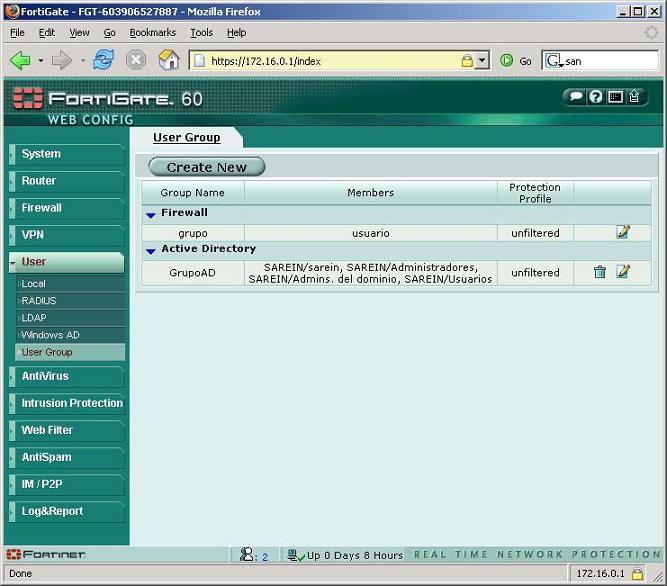
Now we will create the group, since Fortigate does not handle users. We're going to “User” > “User Group” and click on “Create New”.

In “Name” We indicate the name of the group, For example: GrupoVPNssl and in “Type” we indicate that it is of the type “SSL VPN”. In “Avaliable Users” Select the user on the left that we are interested in putting in the group and move it to the right by clicking on  . We have to allow them to connect to the VPN, To do this, select the “Enable SSL-VPN Tunnel Service”. And if we want we can rerestrict it if it has an antivirus installed, or a firewall. Or if we are interested in putting it in an IP range for when the DHCP server is going to assign it an IP. So that you don't have problems with the cache, We would mark to clear the cache, “Enable Cache Clean”.

Vale, we see that in “SSL VPN” Our group is coming out. Now let's set up the VPN itself.

To set up the VPN we're going to “VPN” > “SSL”. We have to enable it “Enable SSL-VPN”, The default port is the 10443; This will be the port that clients have to connect to in order to connect, to the public IP of WAN1 (or whatever it is). In “Tunnel IP Range” we indicate what will be the IP range that will be assigned to everyone who connects to the VPN (so a DHCP server is no longer necessary), we set up a LAN range. In “Server Certificate” we selected the one from Fortigate, That one and no other. For more security, We will indicate that 128bit security is required from the customer by dialing “Require key kength > 128bit(High)”. The “Idle Timeout” It's fine as it is with that time. In “DNS Server #1” we tell which server will be the one that resolves the DNS names of the LAN, we indicate the IP of the DNS server of the LAN. We give “Apply”.

Now we need to create a policy to allow these connections, since “Firewall” > “Policy” > and create a new one in “Create New”.

Vale, In the rule is, we configure the origin that will be “Source” the “wan1” And it's all going to my LAN that's the leg of “internal”. In “Service” Put “ANY” so that the VPN doesn't close any ports between which they connect. In “Action” it must be indicated that it is “SSL-VPN”, in “Available Groups” We indicate the group we created before and mark it as “Allowed” with . We give “OK” To create the rule.

We check that our rule is from WAN1 to INTERNAL and in Action it says “SSL-VPN”. Well, everything on the firewall side is already configured, now only the client side remains.
This part of the document explains how any user should connect with just a browser to the corporate network via SSL VPN.

First of all, from the client PC, open a browser and connect to the public IP address of the firewall using the SSL protocol (HTTPS) and to the port 10443, In my example: https://XXX.XXX.XXX.XXX:10443. A notification will indicate that we must accept the certificate and we need to continue, in Internet Explorer 7 Click on “Continue to this website”, if it's another browser, it's simply a matter of clicking “OK” to accept it or “Yes”.

Vale, now it will ask for a username and password, estos serán los que hemos creado antes, al principio de este documento. Son usuarios del firewall, pertenecientes al grupo que hemos creado antes llamado “GrupoVPNssl”, un miembro de ese grupo era “usuariovpnssl”, metemos su contraseña y pulsamos sobre Login. (Si no se quieren usar usuarios del FW y sí del Directorio Activo, se puede usar la herramienta FSAE como se explica HERE).

Abajo en Tools, podemos conectarnos únicamente a servicios especificados, si lo que queremos es que no se conecten completamente a la LAN de nuestra red, si no sólo vía web (Connect to Web Server) o simplemente Pings, o Telnes, o VNC o una conexión de escritorio remoto mediante “Rdp to Host”. Pero en este documento se explica cómo hacer una conexión VPN en sí, así que pincharemos en el link de “Activate SSL-VPN Tunnel Mode”.

It will ask us to install an ActiveX control, So we installed it from the top bar, Click on “Install ActiveX Control…”

“Install”,

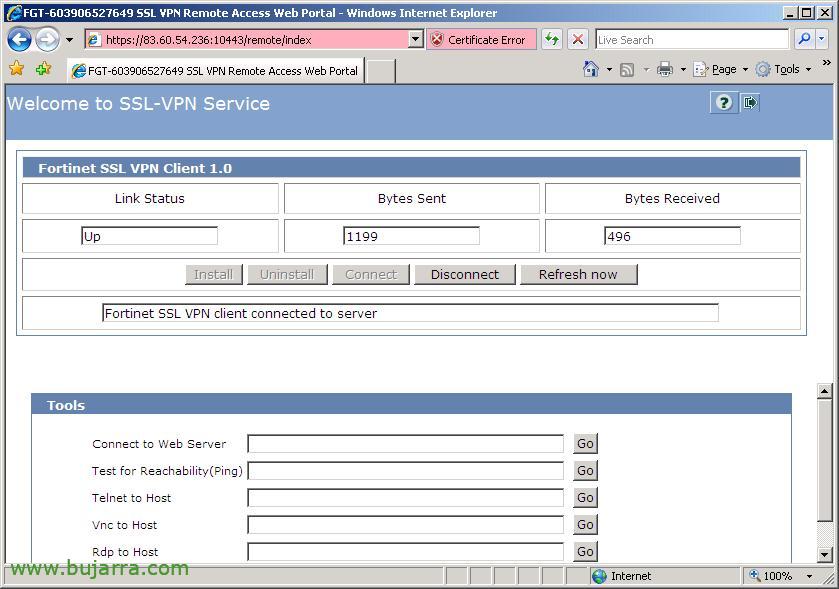
Vale, Now from this screen we will see how our connection is from “Link Status”, Now it's offline (Down), To connect we must click on “Connect”.
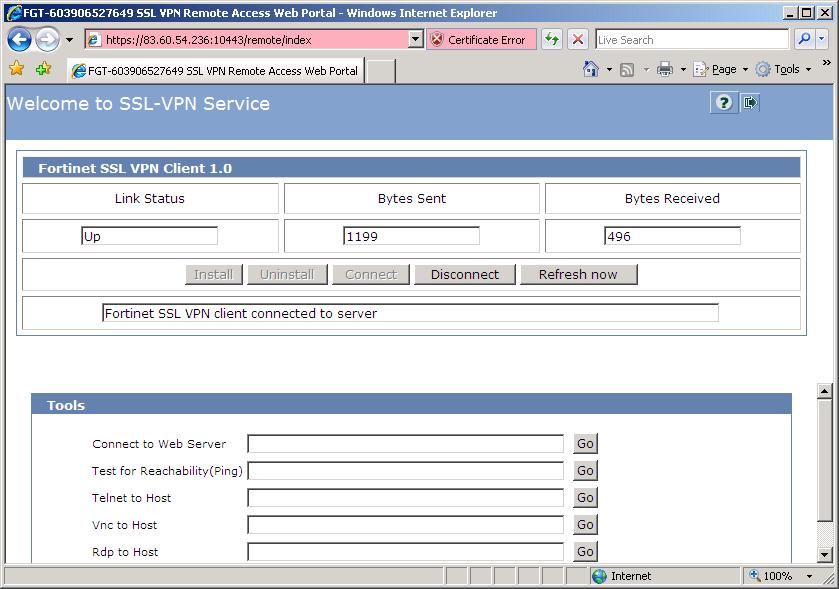
GOOD, it already says that the VPN connection is up “Link Status” (Up) and indicates the Bytes sent and received, We will be able to work normally, We can minimize this website and work against the corporate network securely using the resources we need, we will have an IP of the company's LAN and we will be able to access the services we need. If we want to disconnect it would be as easy as pressing “Disconnect”.