Controlling the blinds with Shelly 2.5 and Home Assistant

In this post we are going to see how to control the blinds of our home or office, we start with traditional PVC blinds (in my case) to which we want to put a motor to automate something else and make a Smart Home. It will be super simple, We'll do it all with a Shelly 2.5 to control the upload or download wirelessly, and all integrated with Home Assistant!
 |
 |
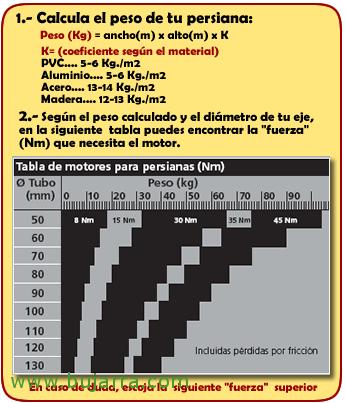 |
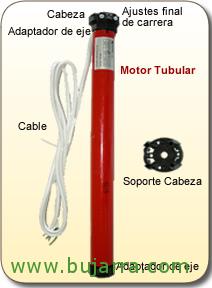
What I said, If we want to put a small tubular motor on our blinds we will do it in a jiffy, We will need a motor that has so much force to raise our blinds and all this will depend on the material we have, are made of wood, PVC, aluminium… therefore, When buying the engine, make sure that it can lift this weight, I leave you with a conversion table that may be able to guide you (If you still have doubts in This piece website You have a calculator). And it will also be essential to know the diameter of the shaft of our shutter, which is normally 40mm or 60mm. Searching on the Internet I found this website that is dedicated to the sale of motors for blinds, that for a little more than 30 We have a Shutter Motor wiring in our house. And it is clear that this is just as true for blinds, blinds or awnings!

We will also need to acquire a Shelly 2.5, which is a double Wifi relay based on the ESP8266, therefore, we can change the firmware if we are interested and put Tasmota or Espurna among others, But wow, honestly you won't need to flash it, since the latest firmwares that Shelly brings are already compatible with MQTT and we can manage them remotely with our Mosquitto Broker that we have installed in Home Assistant or Hassio. It's really easy, ¡You'll see!
The first thing will be the connection with the feed of a socket that we take out of a register box and leave it as beautiful as possible. Do we need a wall push button? It doesn't have to, but if we want we can have a switch to raise or lower the blind connected to the Shelly 2.5. Otherwise in the image you can see it clearly, after feeding the Shelly 2.5 and the tubular motor we will connect the two steering cables to the Shelly, We won't worry now which way it's going, whether each one goes up or down, We can change that later with code 🙂
Shelly Settings 2.5
 |
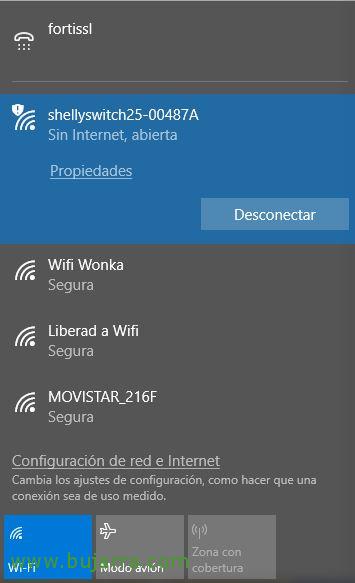 |
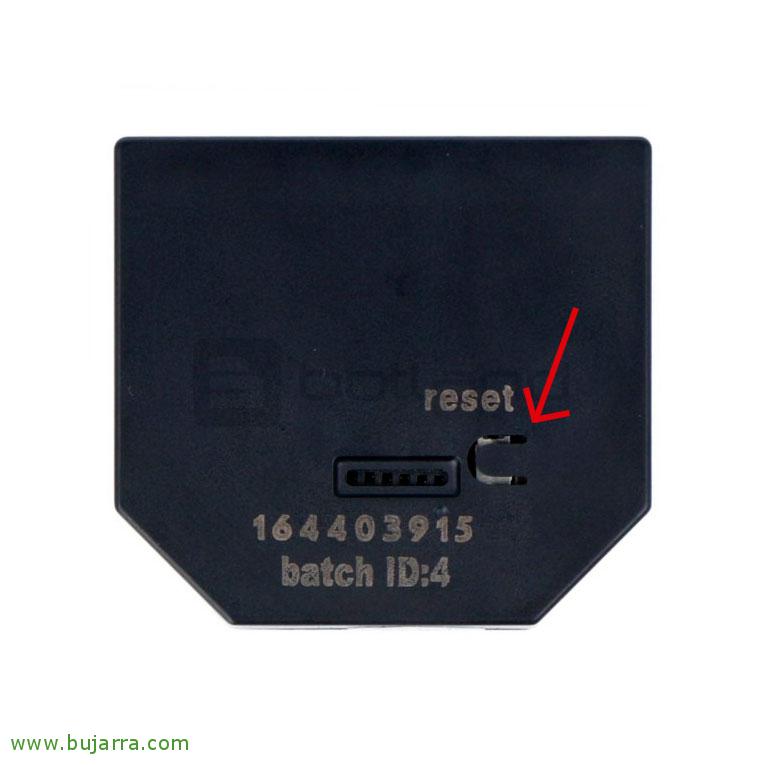
What I said, It's sucked, The complicated part is the physical part, Why what is the configuration… See… first, when you feed the Shelly 2.5, When it reaches the power you can restart it whenever you want with the tip of a pen, etc… You'll see that after 8-9 seconds will change the flicker, it will be time to look for a Wifi network with our laptop or mobile phone. We'll see that it creates an AP with the name of our Shelly, we connect to it, No password.
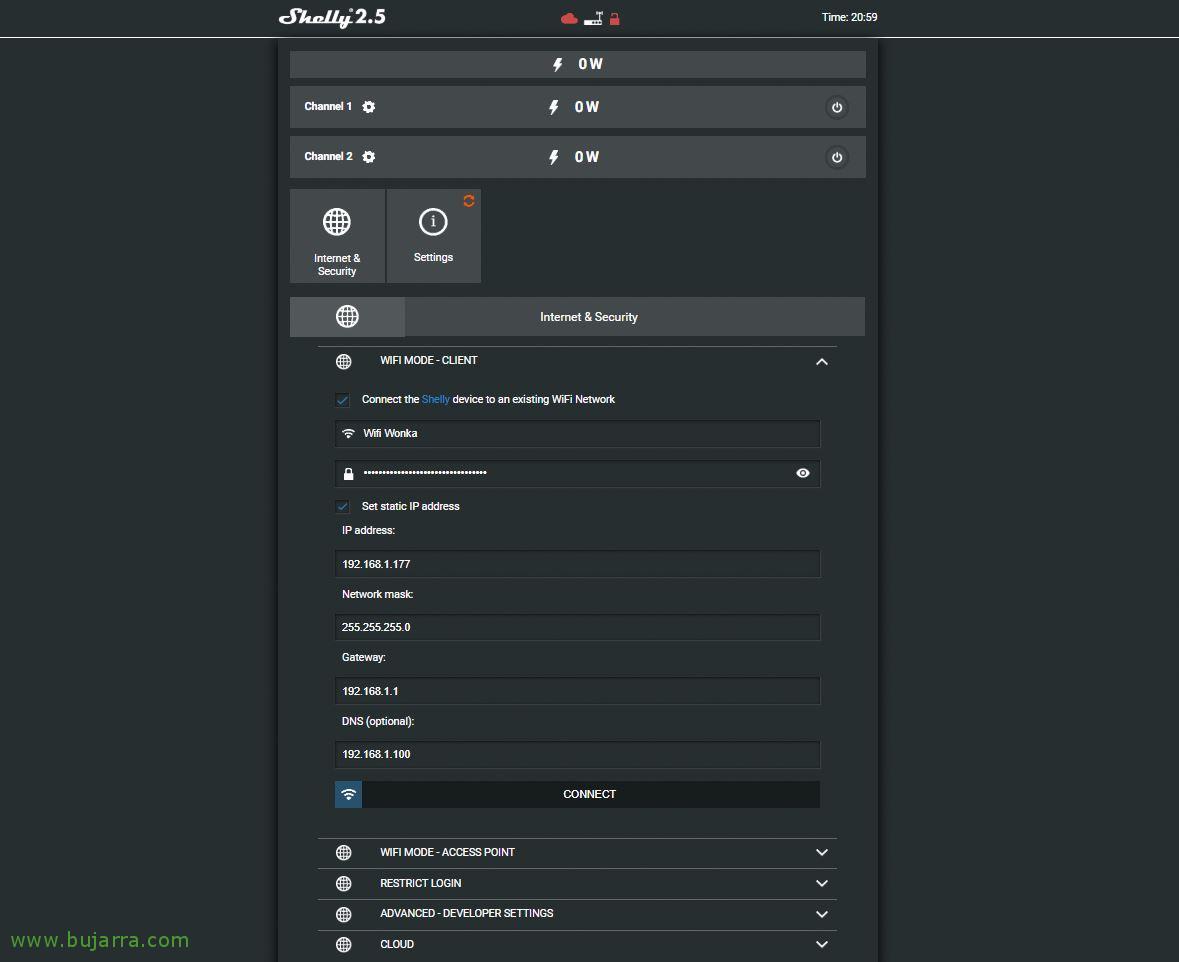
We open a browser and go to the Shelly IP which will normally be http://192.168.33.1 and without credentials, We're already in our Shelly! Let's set up four little things, The first, tell the Shelly to connect to the Wifi network that we have in 2.4GHz, for this, We're going to “Internet & Security” > “WIFI MODE – CLIENT” > we indicate the name of the Wi-Fi network and its password, as well as if we want to assign a static IP address to this Shelly 2.5. Click on “CONNECT”.
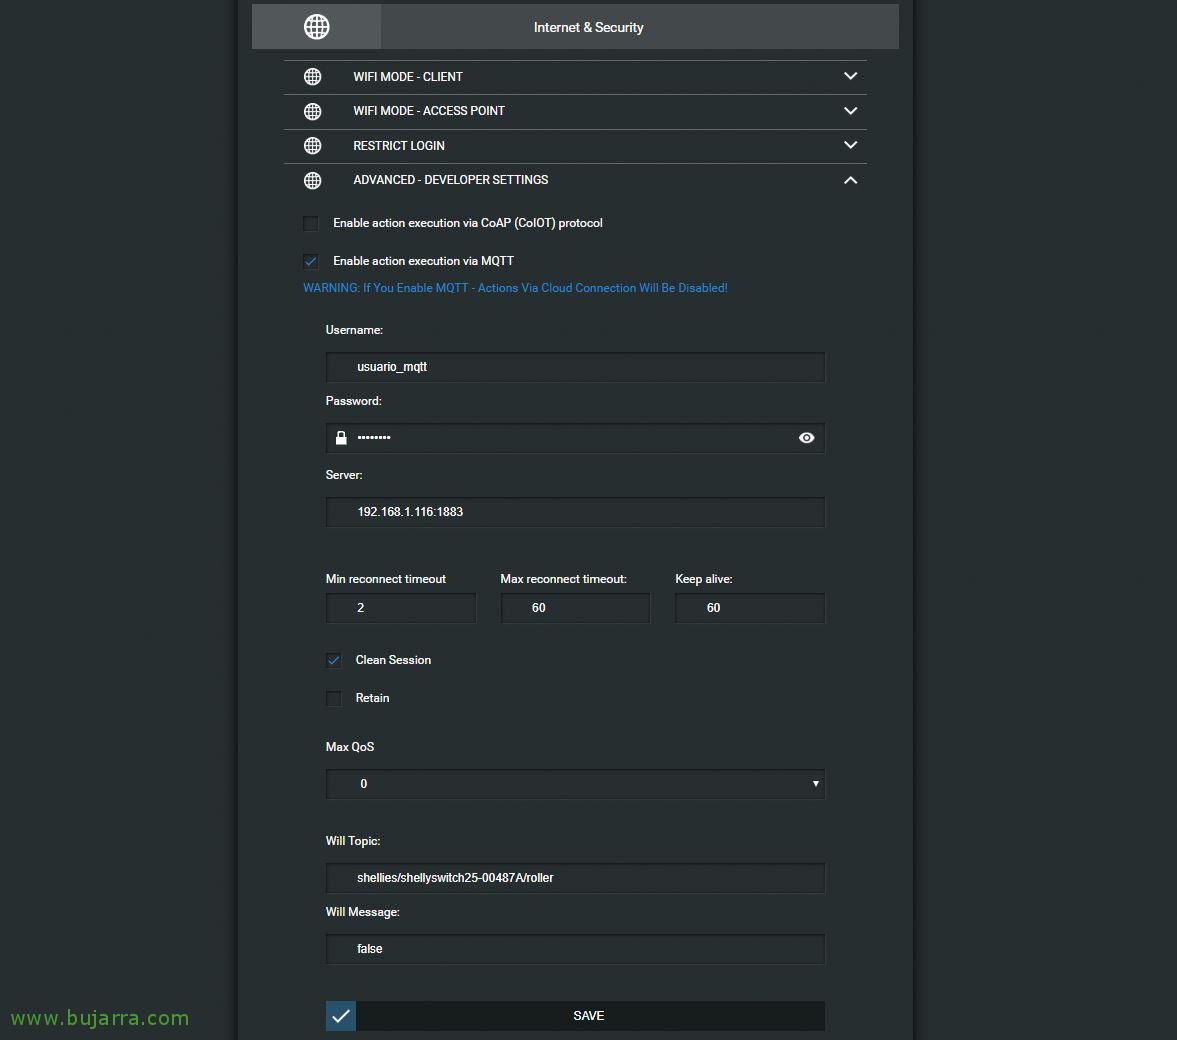
Our Shelly will already be connected to our Wifi, we access the IP address that you have taken on our Wi-Fi network again with a browser and continue, in “Internet & Security” > “ADVANCED – DEVELOPER SETTINGS” We will be able to mark “Enable action execution via MQTT” to be able to connect to our MQTT Broker, that as we saw in a previous post it is difficult for us 2 leave it enabled in the Hassio or Home Assistant itself. We will indicate the Broker's IP address and MQTT username and password, just as we look at the topic and copy 😉 it We click on “SAVE”.
By the way, if you don't see this option in your Shelly 2.5, Update firmware, You can do it in this same web console in a moment.
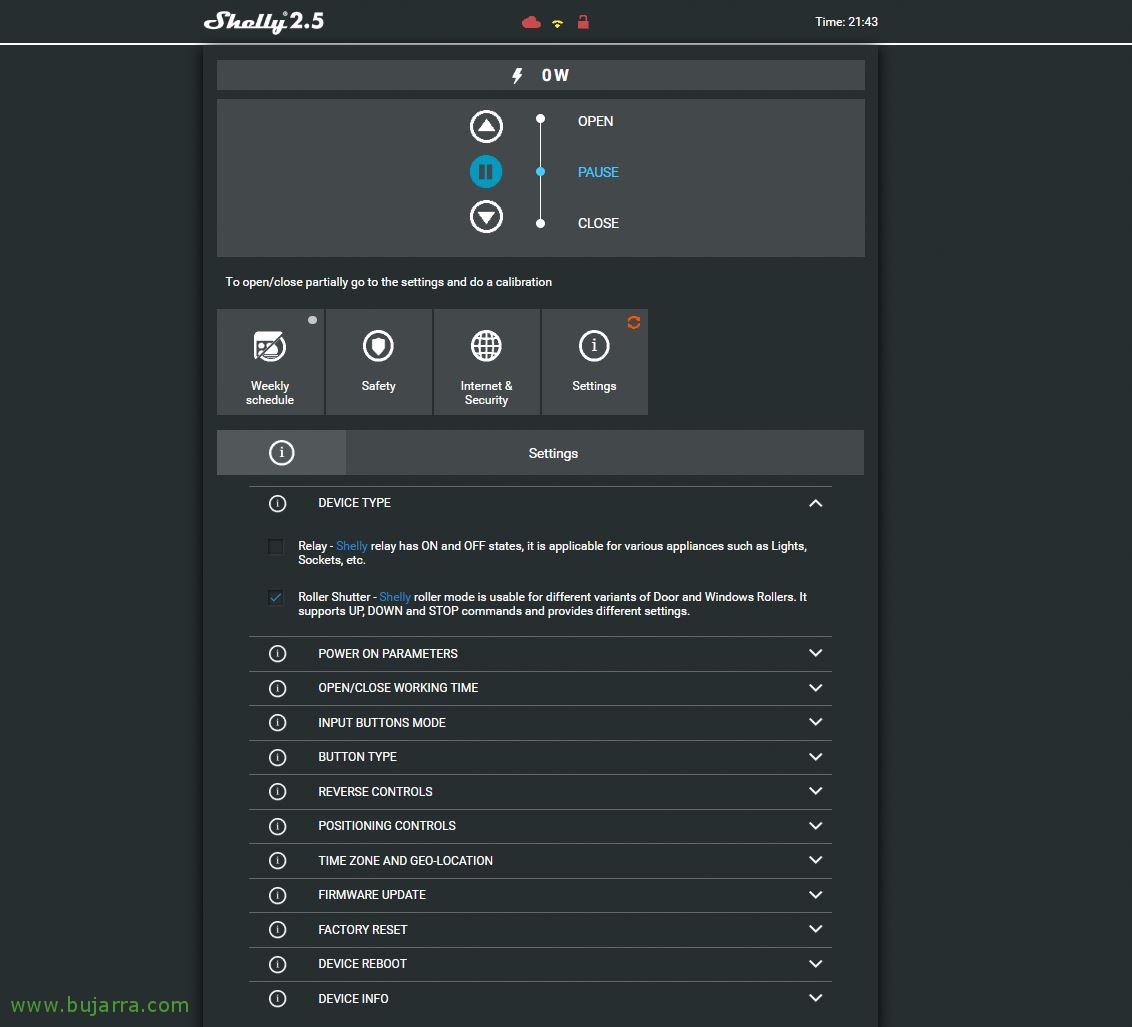
By the way, in “Settings” > “DEVICE TYPE” We can tell you not to behave like a double relay but like a blind, We will check the option of “Roller Shutter”.
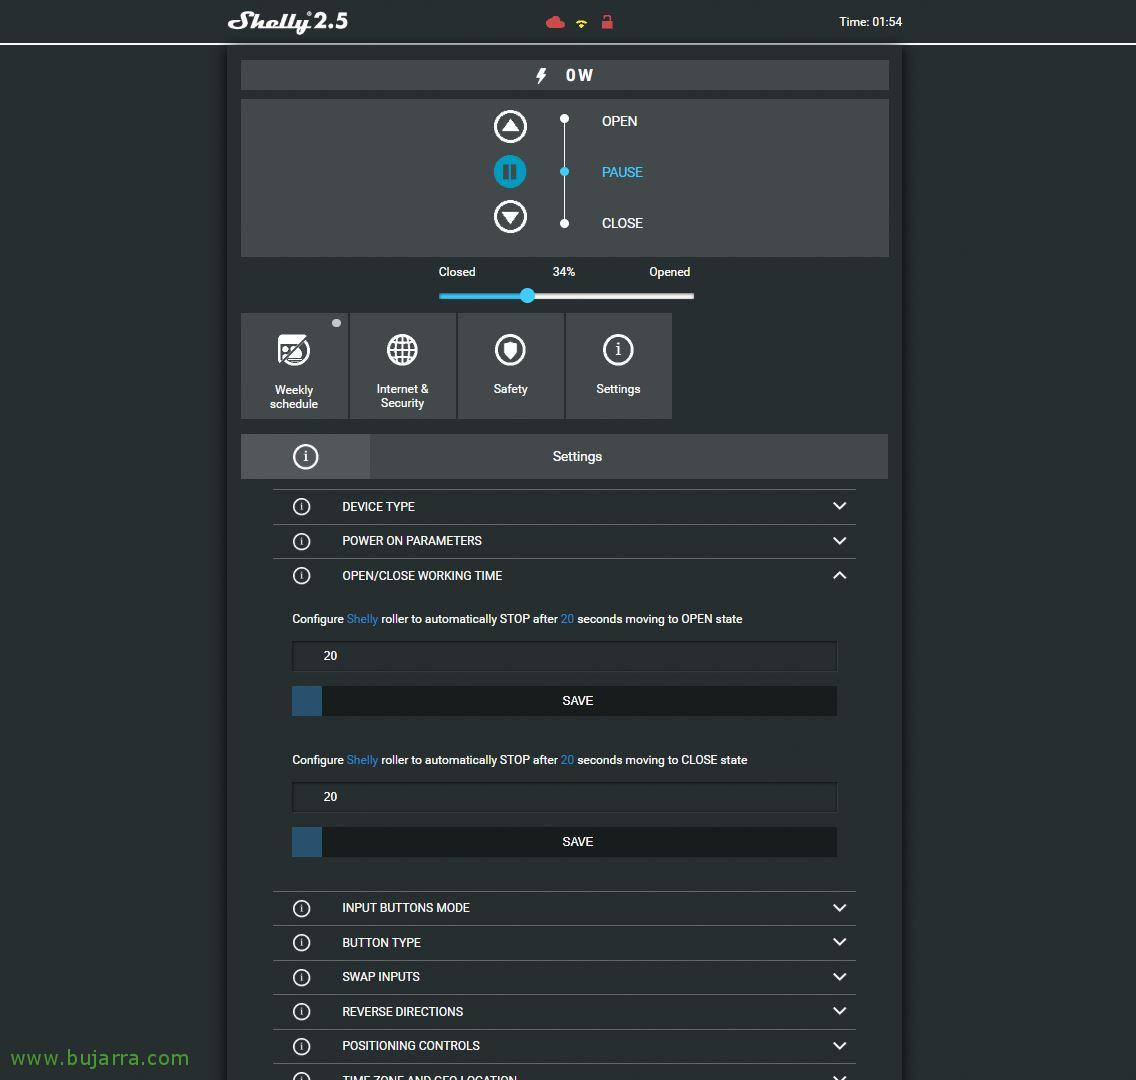
At this moment that we already have the Shelly 2.5 set up it would be time to make sure and let the installation of the physical part done. You will see that it is not very complicated to disassemble a blind and you have thousands of videos on Youtube, With the blind fully lowered you can open the box to disassemble the shaft, Fit the tubular motor following the manufacturer's instructions and place it back in the shutter box. Then remember to calibrate the full rise and fall of the motor using the small accessory that comes with the engine, It really doesn't cost anything. When you have it all set up, you'll need to tell Shelly how long it takes to fully raise or lower the shutter, to stop the engines after that time at the latest, It is advisable to leave it for a couple more seconds. All this in “Settings” > “OPEN/CLOSE WORKING TIME”.
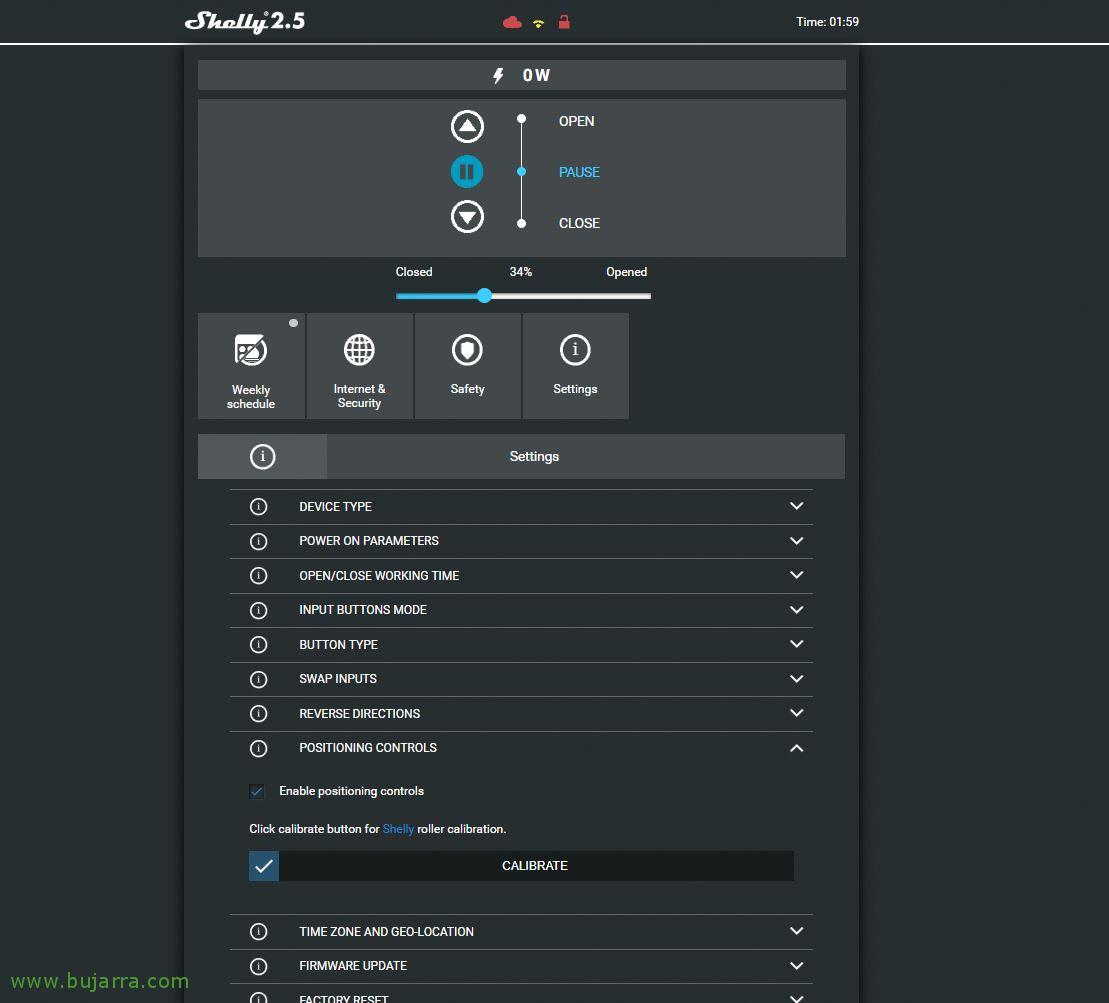
And finally we'll be able to tell Shelly to use position controls, so we can open the shutter at the percentage % that interests us, for this, in “Settings” > “POSITIONING CONTROLS” We will mark “Enable positioning controls” and click on “CALIBRATE”, The blind will be raised and lowered a couple of times to know what a 0% and a 100%, so we can then take advantage of this in Home Assistant.
Home Assistant Settings
To register this Shelly 2.5 in our Home Assistant and be recognized as a blind or a store, It will be as simple as adding the following code to our file “configuration.yaml” by Hassio.
[SourceCode]cover:
 - Platform: MQTT name: &Quot;Kitchen Blind&Quot;
 state_topic: &Quot;shellies/shellyswitch25-000091/roller/0&Quot;
 command_topic: &Quot;shellies/shellyswitch25-000091/roller/0/command&Quot;
 position_topic: &Quot;shellies/shellyswitch25-000091/roller/0/pos&Quot;
 set_position_topic: &Quot;shellies/shellyswitch25-000091/roller/0/command/pos&Quot;
 #availability_topic: &Quot;shellies/shellyswitch25-000091/online&Quot;
 payload_available: &Quot;True&Quot;
 payload_not_available: &Quot;False&Quot;
 Qos: 1
 retain: False payload_open: &Quot;open&Quot;
 payload_close: &Quot;close&Quot;
 payload_stop: &Quot;stop&Quot;
 position_open: 100
 position_closed: 0
 optimistic: False[/SourceCode]
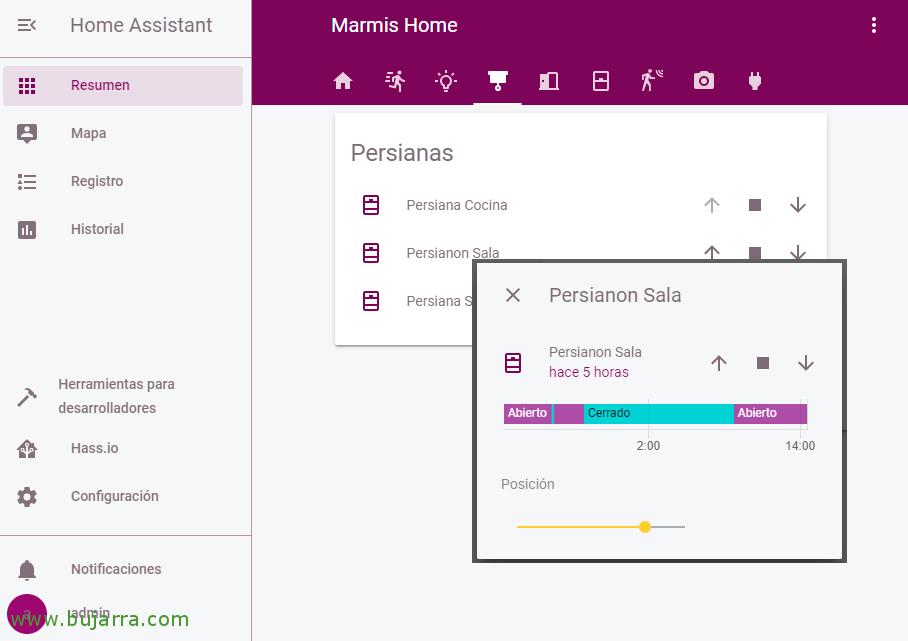
As usual, save the configuration file and restart Home Assistant. After that, We will be able to add the new device to our view and control it, We can raise and lower the blinds easily with the arrows or after clicking on the indicated blind, establishing the % desired. And of course, we can create Automations to perform automatic actions, as if it were daytime for the blinds to be raised, With heat, let them get off, etc…