Installation, Setting up and using Virtuozzo

What is Virtuozzo? How does Virtuozzo work??
Virtuozzo creates isolated virtual environments (virtual enviroments or VEs or virtual private servers, or VPSs) on a single physical server. This allows hardware sharing, Systems Administration Effort, and sometimes software licenses between different workloads.
The EV acts in most cases as if it were an individual server, since it has its own hardware and is an operating system with total independence from the rest, It's another machine for other functions, it simply serves to virtualize our environments. It can host tens to hundreds of EVs on a single server due to the way it works and perform system-level virtualization.
Virtuozzo virtualizes at the OS level. (operating system), rather than the hardware level like other virtual machine products (VM) frequently. While attempting VMs virtualize "a complete hardware system,"VEs represent a "lighter" abstraction, Virtualizing instead of another "an operating system case". All VEs run on top of a single operating system core. The VE mechanism multiplexes this kernel of an OS to look like multiple OS cases (and server), especially from the perspective of current uses, of users, and network services.
Because you virtualize less, EVs impose lower overhead than VMs. Consequently, more EVs can be supported on a given server. From the authors demands "occasional thousands of EVs per server" in test situations to determine the upper limits of the technology. Virtuozzo Supports Servers with Up to 64 x86 CPU and 64 GB of the RAMP, but 1-4 CPU systems are more common far in practice.
Virtuozzo Installation – HERE
Setting up and using Virtuozo – HERE
GOOD, We have several possibilities, install it under Linux or under Windows, I will opt for an installation on an OS. Windows 2003, We can download a trial version from their official website: www.parallels.com.

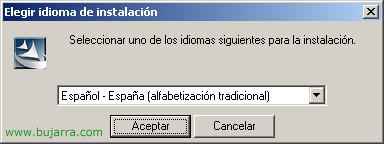
GOOD, Let's start the installation, simple, we select our language and “Accept”,

Installation Begins Wizard Type, “Following” to start it,

We accept the license “I agree to the terms of the license agreement” & “Following”,

We indicate the name and organization for the product, “Following”,

GOOD, We have to indicate three locations for the folders, The first “Install Virtuozzo for Windows 4.0” is where binaries will be installed, That path can be without problems. After “Virtuozzo Data Folder” is where you will store EVs, So we need to have enough space available for it. And “Virtuozzo Backup Folder” is where we will save the backups we make of the virtual machines. “Following”,

GOOD, If we press “Install” Installation will begin,

… We wait while you install…

All the requirements or components that are necessary to have will be installed automatically…

… Starting Services…

GOOD, We have two options: “Windows Services Minimum Play (Optimized for the best EV density)” and “Standard Windows Services Game Used by Windows 2003 (Optimized for the best application compatibility)”. What it simply means is that if we select the first option, the EVs that we believe will put them with the minimum necessary Windows services. “Following”,

We indicate the license to install the product and “Following”,

We check the installation overview, and we see that in itself, has installed some templates that we may need or use, as well as S.O templates. How to apply. “End”,
Setting up and using Virtuozzo,
GOOD, Once installed, We will always use the Admin console to be able to configure options, create EVs, Distribute apps…

Open the console “Virtuozzo Management Console 4.0”,

This is the presentation of the console, from here we will see what version of Virtuozzo we have, how much memory we have free/occupied, We can use the file manager to copy/move data, or directly connect to the monitor and see the status of everything, Check logs, manage your app or EV templates, back up EVs, schedule tasks to be performed, or directly manage the virtual machines.

Well, The interesting thing is to create the virtual machines or virtual environments, to be able to virtualize our systems. Well, First of all,, We're going to “Virtuozzo Virtual Enviroments” and right-click select “Create Virtual Environment”.
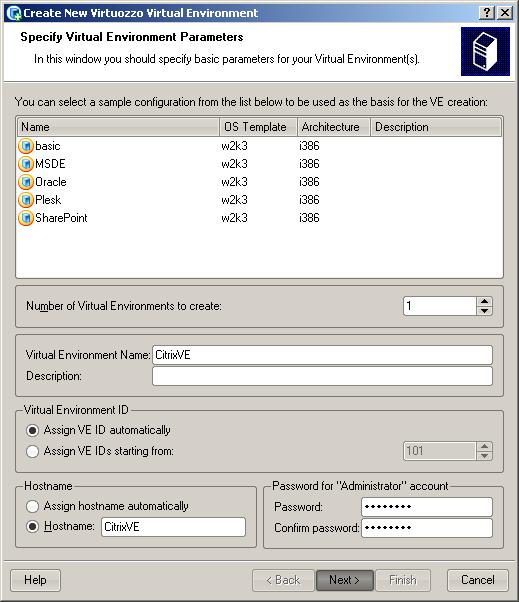
It shows us the templates that we can use to install them, They are simple applications, in my case I will create an EV to use with Citrix, So I don't mark any template, we give the VE a name in “Virtual Environment Name”, We can assign the machine ID automatically, already assign the computer name to the host in “Hostname”, as well as assigning a password to the Administrator user. “Next”,

Here we can configure the network adapters that we want it to have, As many as we want, as well as set up an IP address, plus your configurations, like DNS, Gateway… “Next”,

We need to select the template for installing an operating system on it, when installing Virtuozzo on a Windows 2003, it will already create the templates with this OS by default., with or without the R2. We select one and “Next”,

Here it tells us which application we want to install from a template, for now since we do not have any generated we cannot install it, later in the document it will be shown how to do it, “Next”,

From here we can configure the parameters for the CPU, Memory, Disk space… We select what interests us most. “Next”,

It is the path where we will store the EV, We can change the location, “Next”,

If we add a domain, the EV will automatically adapt its settings to work directly against it, We can add one if we are interested, “Next”,

From here, we can enable or disable these services on the EV machine so that we can manage it offline, We enable it if we are interested, “Next”


We must indicate the Terminal Server mode that the EV will use, if it will be a Terminal Server we will logically check the second option, otherwise, The first, as it is required to manage the virtual machines with “Remote Desktop for Administration”, “Next”,

We will mark “Boot VE” if we want the virtual machine to boot with the physical server (“Start Virtual Environment on Hardware Node boot”). If we are interested in differentiating EVs by their ID, We must mark “VE ID” or “Display VE ID on desktop”. We also score “Network browsing” (“Enable network browsing” if we want to enable network scanning on the host in the VE to be able to access its resources from the network. And finally we have “QoS packet scheduler” to enable QoS on the EV. “Next”,

We review all configurations, and if we agree, click on “Finish”, I will take advantage and save this equipment as a template to be able to use it in the future on other servers of the same characteristics, to expand my Citrix farm… since “Save As VE Sample…”

We indicate a name and click on “Save”,

GOOD, Now we click on “Finish”,

GOOD, The EV has already created us, Click on “OK”.

There we have it, your ID, Your name, your IP, Your Status, If everything is correct, your OS, Its architecture…

Now it would be working at the EV level, for this already, we would go in to administer it, with right click we could connect to it > “Connect with…” > “Remote Desktop”.

… We wait while you connect…

And so we have a direct connection against the EV with an RDP connection, we can configure and install whatever we want on our EV.

And here we see all the possibilities we have on an EV. We can stop the machine, Restart, move it to another place, clone it to get another one just like it, Configure it for a cluster, back it up, Install an app using a template…

In addition, if we place ourselves on “Backup” We will be able to restore a previous state of the machine to a previous point from a backup we have.

Since “Templates” > “Add/Update Virtuozzo Templates” As I said, We can install any application we have in a template or directly update the version of the application.

And about its properties, we see quite basic information from “General”, From the other tabs we can configure the network parameters and their adapters, Terminal Services mode…

In “Backups” We have a history of all backups of our virtual environments,

Since “Scheduled Tasks” > “Schedule New Task” > “Back Up Virtual Environments…” We will be able to configure new backup tasks, but programming its frequency, so that you can make copies for us in a fully automated way.

Since “VE Samples” > “Create New Virtual Environment Sample…” we can create an EV for a laboratory environment, to customize a machine.

In the part of “Monitor” We have the physical state of our server, we will be able to observe the burden it suffers, at the CPU level, RAM, Paging Files, Network adapter, even see the logs of what happens in our environment.

As well as in “Logs”, we will see everything that is happening in the machines,

If we are interested in adding an existing physical server to an EV, to remove physical servers and virtualize all of them, we could do it from “Virtuozzo Virtual Environments” > “Tasks” > “Migrate Physical Server to VE…”

Another way to access that we have is through the console “Virtuozzo Control Center Launcher”, which is a lighter console than the previous one to monitor the state of the community,

We indicate the name of the server we are interested in, your credentials and click on “Connect”,

We accept certificate, “Yes”,

And this would be an example of the console.

In addition, We can connect to the console via the web with any browser, if we open the address of the Virtuozzo server by connecting to port 4643tcp (default), We authenticate and log in, We would arrive at the same console shown in the image above.

Another task that we can perform is to install the administration console on a remote machine, If we go up to: “C:Program FilesSWsoftVirtuozzoVZMC Distributive” there we will have the executable to install wherever we want.

For example, if we install it on our customer machine, Then we run the console and enter the server plus the login credentials, We will have absolute control.

Well, Let's make an example of how an application can be installed in an EV from a template, We have several options, or we download the template from the internet application, or we generate a, For now I will download an application and then we will do all the wizard to generate a new one. To import an app template into the console, We're going to “Templates” > “Upload and Install New Virtuozzo Templates…”

Click on “Add…” to add it…

We look for the file with the extension .efd or .zip and add it.

In my case we see that it is an Acrobat Reader 7.0.7, Something old, But to prove it… “Next”,

It asks us which server we will host the template on, we mark ourselves and “Next”,

We check that everything is correct… “Finish”,

And now all that's left is to wait while the template is uploaded to our host server…

“OK”,

There we would have it ready to be installed in the EV that interests us.

We're going to install an application template on a server, Click on the template of the application in question and “Install into Virtual Environments…”

Select the servers we want to have this application installed and “Next”,

Mark “Force template instalation” to force the installation and not give us problems, “Next”,
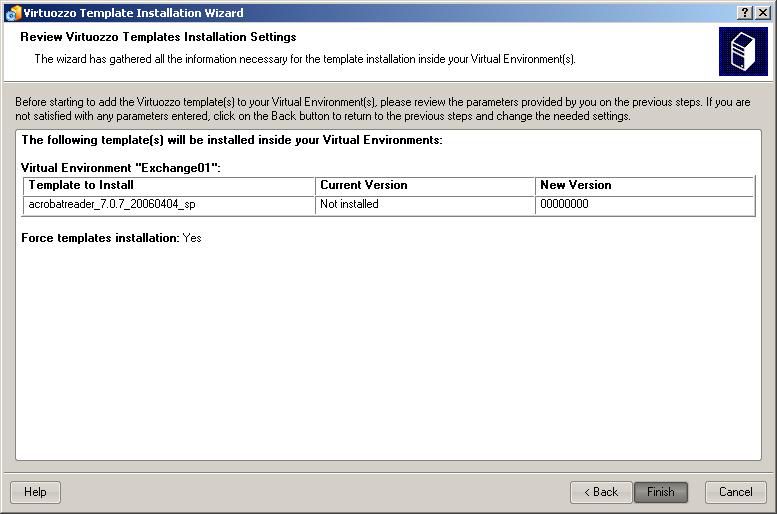
We check that everything is correct… “Finish” to install that application on that server.

We wait while it is installed…

“OK”, perfect,

Now all that remains is to connect to the server and check that it is perfectly. Ideally, this is so that all servers have the same applications installed with the same versions and in the same way, To have everything the same.

If we are interested in creating our own application templates for later distribution, We have to execute the “Virtuozzo Template Creation Assistant”.

Select the option we are interested in, What is the first, Create a template about installing an app, Mark “Create a template on the basis of an installed application” & “Following”,

What this will do is create a temporary EV where we will install the application, then the template is generated and the EV will be deleted. We assign you an ID, a disk space, an IP address and an OS template. what we will use for this. “Following”,

Select the directory where we want to save the template and the name we are going to assign to it, “Following”,

We wait while the temporary EV creates us…

GOOD, eye! Now what we have to do is click on “Following” and an RDP connection will be opened against the server, we need to minimize this Terminal connection and go back to this wizard,

…

GOOD, As I said, minimize this RDP screen from above…

Now what we have to do is prepare everything in the virtual machine to install the application, so in my case how am I going to create a Winzip template, I'll go to the internet and download the executable to the desktop, Then we come back here and click on “Following”,

GOOD, now we return to the EV and proceed to install the application, when we finish installing it, We come back here, to the assistant.

GOOD, We install the application in question…

And when we have the application installed, We go back to the assistant and continue it, “Following”,

… we hope that you will generate the template and eliminate the temporary EV…

We can modify any option if we are interested, Edit the 'virtual' record’ since “Edit registry” or 'the file tree'’ since “Edit files” and click on “Following”,

We fill in the fields that interest us such as the name of the application, The version… “Following”,

Select which executable you have to run to uninstall the application if you ever want to remove this template from any EV.
In summary, this document shows another environment for virtualizing environments, How we'll build hosts, Your Virtual Machines, How we'll create application templates and then distribute them on our servers…
www.bujarra.com – Héctor Herrero – Nh*****@*****ra.com – v 1.0