Installing and Using VMware Workstation

It is the virtual machine that I prefer, mainly because it is the first one I got to know, but it does not have the advantage that Microsoft’s has (Virtual Server) which can be installed on a server dedicated to it and PCs can connect to it to load operating systems on remote virtual machines, consuming resources (RAM and processor) on the server and not on the PC where it is running. Of course, the disadvantage is that when we are out of the office we would not be able to connect… or if we need a virtual machine for ourselves it is more uncomfortable to do it on a remote server and it is better locally… they are two identical tools but used differently.
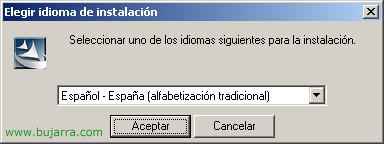
Empezemos a instalar,

Primero se comienza la instalación, típica de asistentes… al final de todo nos creará un servicio y dos adaptadores virtuales de red para conectarnos a las máquinas por LAN si hiciera falta para algo. We give “Next” or “Following”,

We accept the license (y lo leemos 😉

El path donde se instalara por defecto los binarios, es correcto, si más adelante queremos instalar una máquina virtual podemos instalarla en otro disco del PC.

Vale, los iconitos que nos pondrá,

“Install” to start installing… tardará bastante (some 5 minutes),

Hope…

Finalizamos la instalación con “Finish” y reiniciamos el PC donde lo hemos instalado, otherwise, no funcionará.

Vale, una vez reiniciado el PC, ejecutamos el icono del VMWare…

Lo primero es crear una máquina virtual que queramos usar, imagine, ahora todo esto lo he instalado en mi PC corriendo Windows XP, but I need to run some tests on a PC that runs another operating system or the same XP, but I don't want to ruin the one I use daily, For example, I want to install Linux to learn how to use it and I don't want to mess things up by formatting disks or anything, the simplest way would be this, creating a virtual PC without ruining or touching anything, As I said:
“File” > “New” > “Virtual Machine…”

A virtual machine creation wizard pops up, “Following”,

We select custom “Custom” and Next,

New, we select the version “New – Workstation 5”,

And since my example is about creating a little Linux, well I select “Linux” and below the distribution that resembles it the most, “Following”,

I give my Linux distribution a name, “Fedora Core 4” and a place on my PC with enough space to create an image file to store all the data (capacity for an operating system), “Following”,

The RAM that I want to assign to it, the more physical RAM our PC has, the better to be able to do several things at the same time, if not, it's a bit tight, I give my virtual machine 220MB of my physical RAM, “Following”,

The first option is to make it seem like that PC is on the same LAN as me, it is usually the most interesting,

Default…

We create a new album (virtual), it will be a file and on our virtual PC we will be able to format or fiddle with partitions, and our real PC will not be affected at all, since everything is done on the virtual disk which is a simple file.

Exactly…

We indicate the Gb that we want our virtual disk to have, eye! If we fall short, then it cannot be expanded! It's better to put too much on it, this will not use our real physical disk immediately, only what is being used…

The name of the file we want to set and “End”,

As we can see, the PC is created but it is stopped, to start the PC, we click PLAY and it will start!

Once started, we see it as if it were another PC, but in a little window as if it were any program on our Windows, we can enter the BIOS to modify what we want with F2, para salir de la pantalla virtual pulsamos CTR + ALT.

Metemos nuestro CD del sistema operativo que queramos instalar y ale! adelante! como si fuese un PC de verdad, yo he metido el mio de Linux, de Fedora Core 4 y me pondré a instalarlo ahora.