
Installing Elasticsearch

Today we start with the first of all, a document where we will see the steps necessary to fully deploy Elasticsearch, which will be our data warehouse to store the logs or metrics of the equipment, and then attack with Kibana or Grafana to visualize it!
It's free, is Open Source and Java-based. It is responsible for storing the data we send it and performing searches (very fast) of the information we have stored. As we can understand, is the heart of the Elastic Stack!

Elasticsearch is one of the most widely used tools lately in all types of architectures, and especially on the DevOps side, It is used for the purpose of searching large amounts of data, how is BigData 😛 It is a search server based on Lucene, provides a full-text search engine, distributed and multitenant using a RESTful web interface and JSON documents.
Regarding the requirements, It will be a machine that will depend on each scenario as is obvious, think that it will require a lot of disk to store everything we send it, you will need a very minimum 1-2vCPU with 4Gb of RAM, it is advisable to put 4vCPUs and 8GB of RAM, But you'll see; just like the album, that 40Gb we can easily fill them.
Install Elasticsearch,
We start! we base the installation on a machine with Ubuntu 18.10 that we have updated and configured with a static IP address. The installation process is pretty quick. We start by first installing the OpenJDK requirements:
[SourceCode]apt-get install openjdk-8-jre-headless java -version[/SourceCode]
And download the latest Elasticsearch package that we want to install, In the case of this post we use a 6.4.2, We proceed to install it:
[SourceCode]wget https://artifacts.elastic.co/downloads/elasticsearch/elasticsearch-6.6.1.deb dpkg -i elasticsearch-6.6.1.deb[/SourceCode]
We edit the main Elasticsearch configuration file '/etc/elasticsearch/elasticsearch.yml’ and we edited at least the following posts, that will define the cluster name, the name of this node and its IP address with which it will provide service.
[SourceCode]cluster.name: Nombre_Cluster node.name: Nombre_Servidor network.host: Dirección_IP_servidor[/SourceCode]
We will need to modify the system variable 'vm.max_map_count’ to give you more virtual memory:
[SourceCode]sysctl -w vm.max_map_count=262144[/SourceCode]
We launch the Elasticsearch service and configure it to start correctly:
[SourceCode]Service ElasticSearch Start SystemCTL Enable ElasticSearch[/SourceCode]
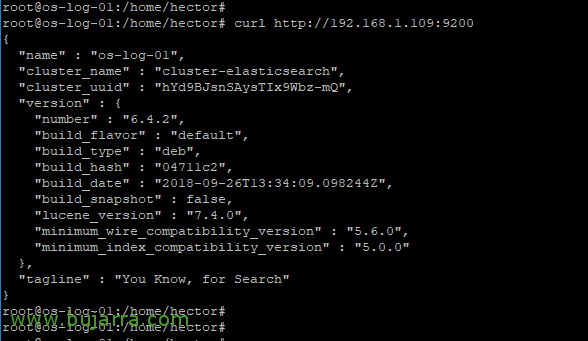
If everything has gone well, We will be able to test it and check if the service is running:
[SourceCode]Curl HTTP://Dirección_IP:9200[/SourceCode]