Installing Kibana

We continue with a last post about the core installation of our real-time monitoring system, today we will see how to install Kibana. By definition we could summarize this tool as a data visualizer, that through different panels or Dashboards we can try to see and understand what we have stored.

Kibana are the eyes of the Elastic stack, we will be able to visually explore and analyze in real time the data stored in Elasticsearch. In a couple of minutes you will be able to create dashboards in a fairly intuitive way that will show metrics, Logs Processed, Database queries… we will be able to complete our installation with Widgets. But as I have mentioned before, I will use Grafana to visualize the data, We will see the two options and let each one keep what they like the most.
Install Kibana,
GOOD, if we are going to install Kibana on the same machine where we have Logstash we will already have the public key to be able to proceed with the installation of Kibana, otherwise, we add it, We add the repository, We update and install:
[SourceCode]wget -qO – https://artifacts.elastic.co/GPG-KEY-elasticsearch | Sudo apt-key add –
echo "deb https://artifacts.elastic.com/packages/6.x/apt stable main" | tee -a /etc/apt/sources.list.d/elastic-6.x.list
apt-get update
apt-get install kibana[/SourceCode]
That is why, We basically configure in the configuration file '/etc/kibana/kibana.yml’ at least with which IP address the service will listen, we give this server a name and add the IP address for Elasticsearch queries:
[SourceCode]server.hosts: "Direccion_IP"
server.name: "Nombre_Equipo"
elasticsearch.url: "http://Direccion_IP_Elasticsearch:9200"[/SourceCode]
We enable the service to start automatically with the computer and start it:
[SourceCode]systemctl enable kibana
Service Kibana Start[/SourceCode]

We tried opening browser against Kibana's address, will be http://Direccion_IP_Kibana:5601
We're going to “Management” and create an Index Pattern, We indicate as index pattern 'logstash-*’ that must have data since when we installed Logstash we did a small test. Click on “Next step”,
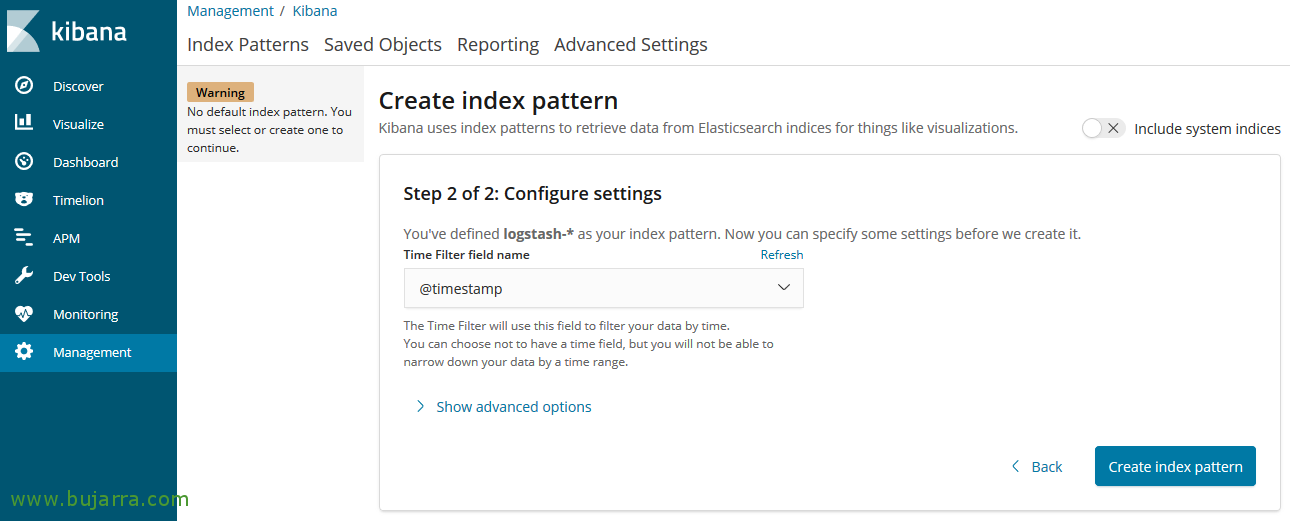
We indicate as a time field '@timestamp', Click on “Create index pattern”,

We will be able to verify that the creation has been successful.
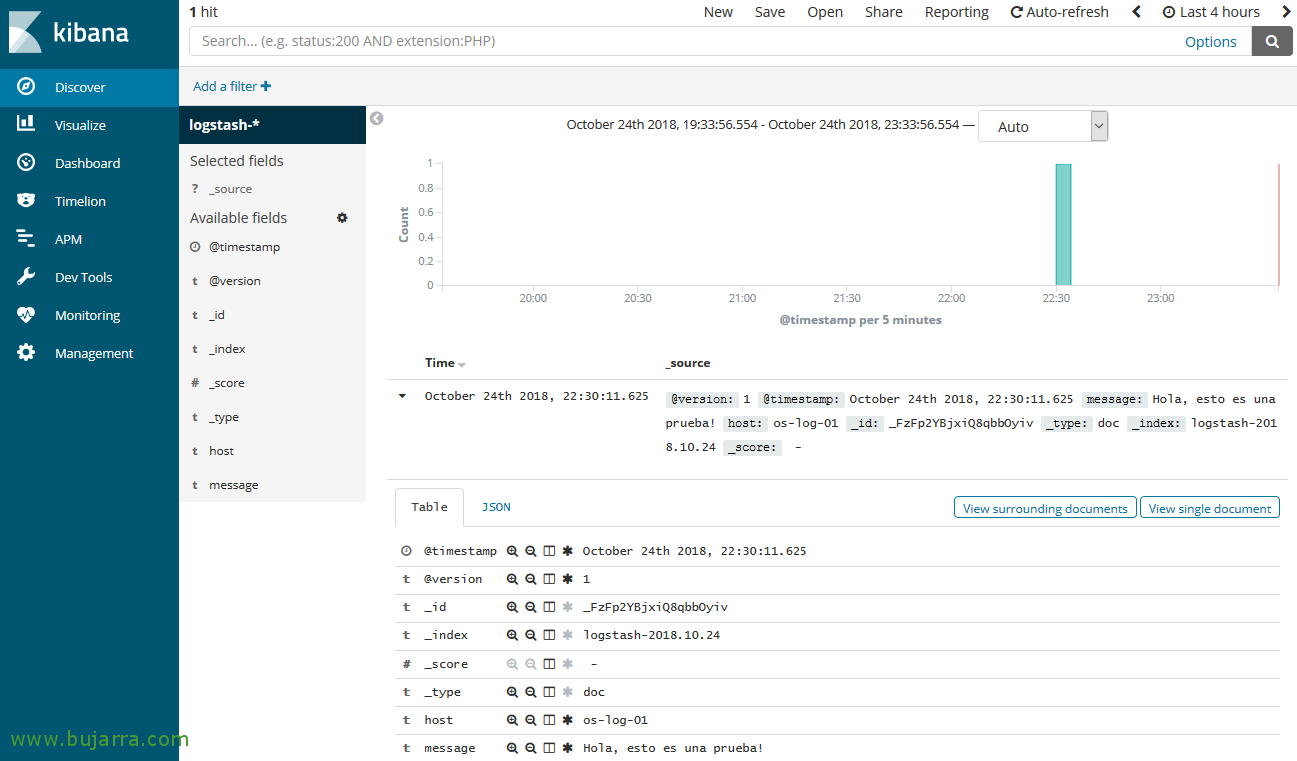
We're going to “Discover”, We change the time range and put the last ones for example 4 hours, If everything goes well, We should see our event created as a test, As I said, remember that when we installed Logstash we did a test.
Donate! We leave it here, We already have Kibana running!