Installing Moodle

Very good, I had to publish something about Moodle for years, So today we bring you a first post where we will see the installation part. Consequently, We will have our own learning platform, Usually aimed at training centres (colleges, universities, Academies…), Full-fledged e-learning!
Well, today I think there are few left who don't know what Moodle is, but to give it a very good look. Moodle comes to provide a solution to any education center that wants to interact with its students/teachers, a central place where we will have courses, Different types of content, Grade Management, Reports… Everything is customizable, so it is sure to suit our needs when working with training environments, ah and, Of course! It's open source!
This guide is based on an Ubuntu 21.04 Newly installed, Updated and with fixed IP addressing, we will also need to think of an FQDN for the site (Pej: formacion.openservices.eus), I leave you the Site Link with official documentation.
We need to install Apache, MySQL and PHP:
Sudo apt install apache2 mysql-client mysql-server php libapache2-mod-php -y
After installing MySQL it is always good to secure the site, Giving a password to the root user, Remove remote access…
I sweat mysql_secure_installation
First of all, we put some requirements that we are going to need:
Sudo apt install git graphviz aspell ghostscript clamav php7.4-pspell php7.4-curl php7.4-gd php7.4-intl php7.4-mysql php7.4-xml php7.4-xmlrpc php7.4-ldap php7.4-zip php7.4-soap php7.4-mbstring -y
And we restarted Apache:
Sudo Service Apache2 Restart
Now it's time to download Moodle and select the version to install, which today is as follows:
cd /opt sudo git clone git://git.moodle.org/moodle.git cd moodle sudo git branch -a sudo git branch --track MOODLE_39_STABLE origin/MOODLE_39_STABLE sudo git checkout MOODLE_39_STABLE
We copy and correct permissions in Moodle directories:
sudo cp -R /opt/moodle /var/www/html/ sudo mkdir /var/moodledata sudo chown -R www-data /var/moodledata sudo chmod -R 777 /var/moodledata sudo chmod -R 0755 /var/www/html/moodle
It's time to log in to MySQL 'sudo mysql -u root -p’ and create the database for Moodle and a user with permissions (we can set the DB name we want, username or password):
CREATE DATABASE moodle DEFAULT CHARACTER SET utf8mb4 COLLATE utf8mb4_unicode_ci;
create user 'USUARIO_MOODLE'@'localhost' IDENTIFIED BY 'XXXXXXXX';
GRANT SELECT,INSERT,UPDATE,DELETE,CREATE,CREATE TEMPORARY TABLES,DROP,INDEX,ALTER ON moodle.* TO 'USUARIO_MOODLE'@'localhost';
Quit;
Before installing and configuring Moodle via the web, We will give dangerous permits (temporarily, then we'll remove them):
sudo chmod -R 777 /var/www/html/moodle
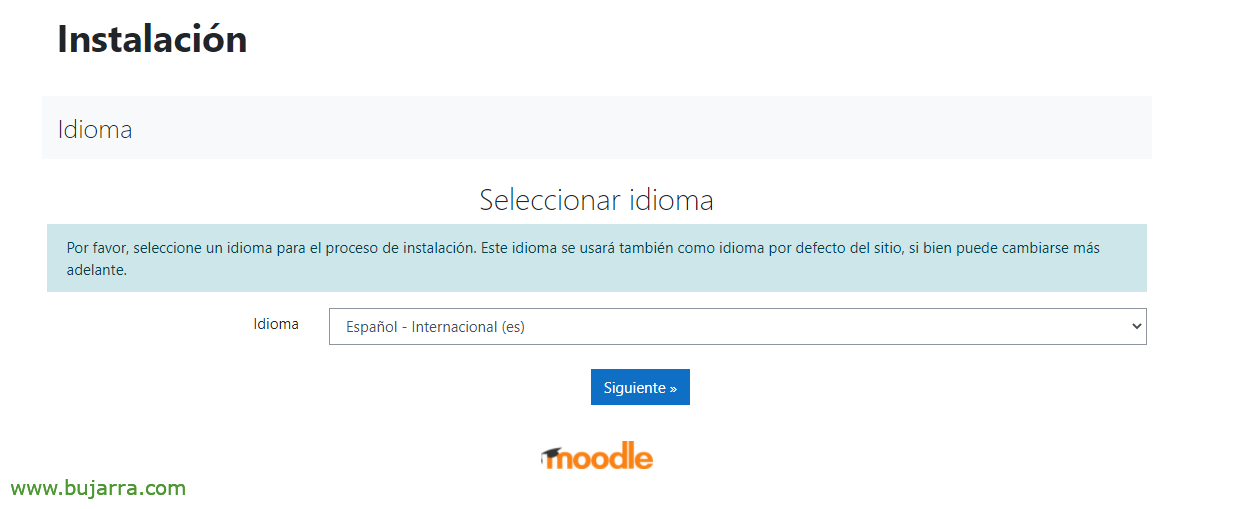
And we will be able to access http://DIRECCION_IP_MOODLE/moodle to finish the Moodle installation wizard, We select our language & “Following”,

We indicate as a data directory: /var/moodledata & “Following”,

We select 'Enhanced MySQL's database (native/mysqli)’ & “Following”,

We indicate the database server, the name we give to the DB, the user we have generated with permissions in the database and its password, as well as 'mdl_’ as a table prefix. “Following”,

We read and accept the terms and conditions, “Continue”,

Finally, it will check us if we meet all the requirements, everything will be in order and we will be able to click on “Continue”,

Now will be the moment where the entire structure is generated… Hope… and below we will click on “Continue”

It's time to create the user with administrative privileges on the Moodle Site, We will provide you with the password, a name, a surname and an email address & “Update personal information”,
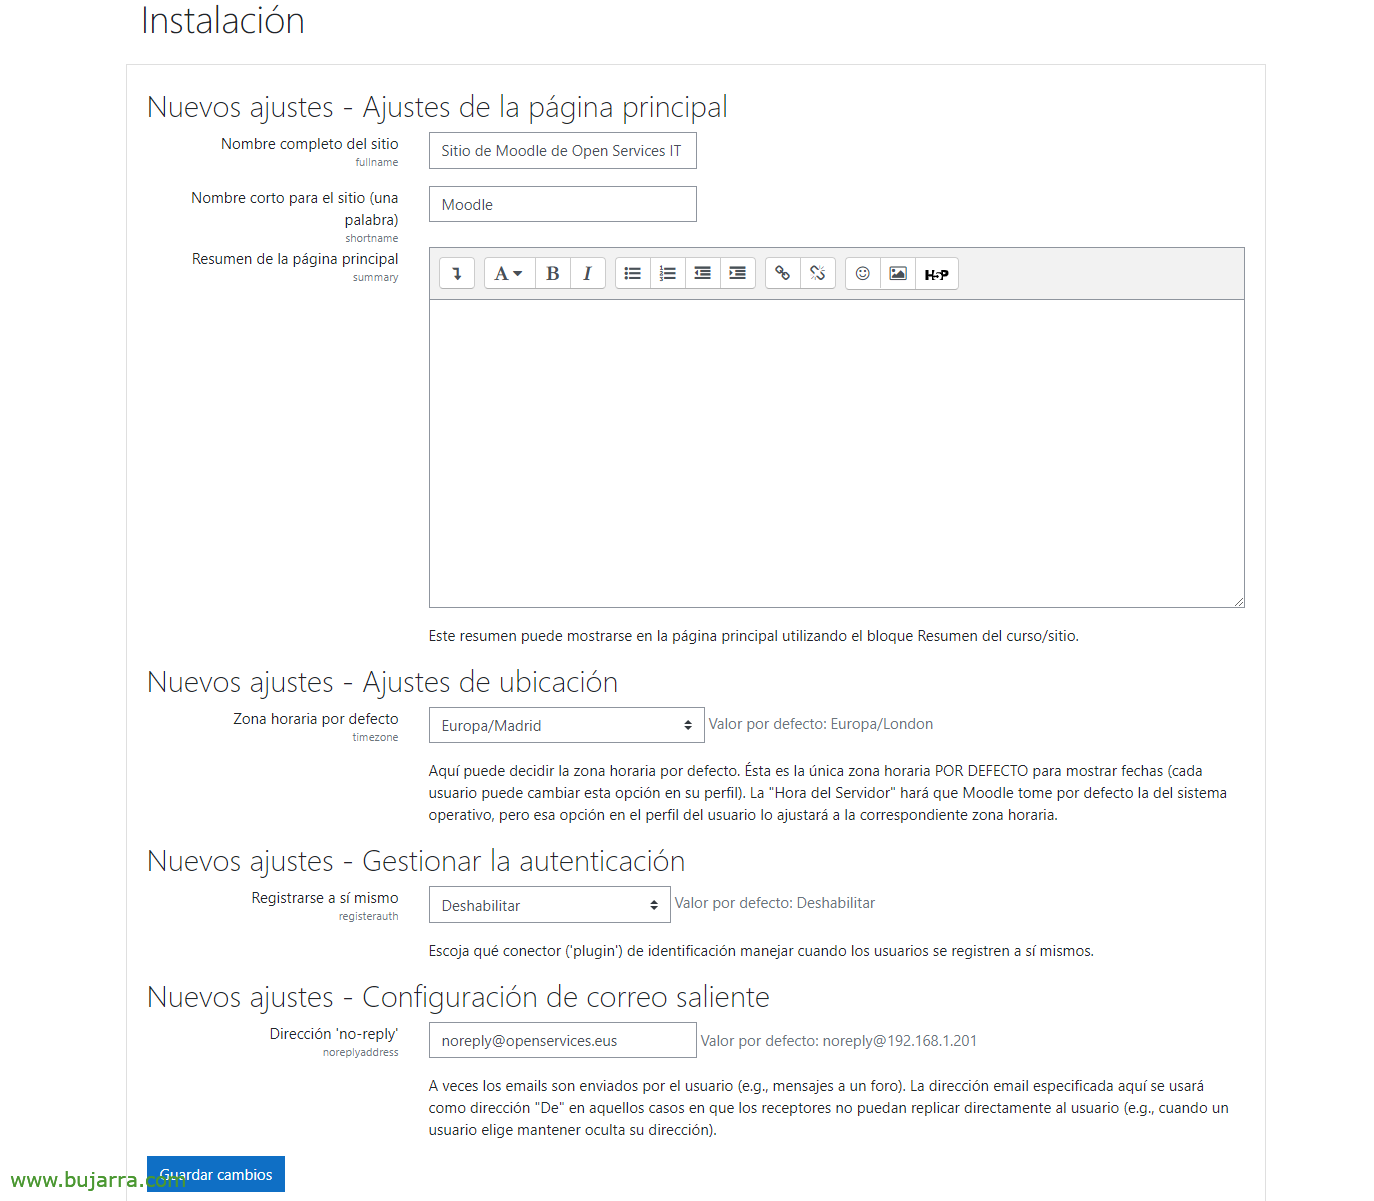
To conclude, It will ask us to give the site a name, it will be the public name by which we will all know him, So let's be original! Remember to check the time zone.
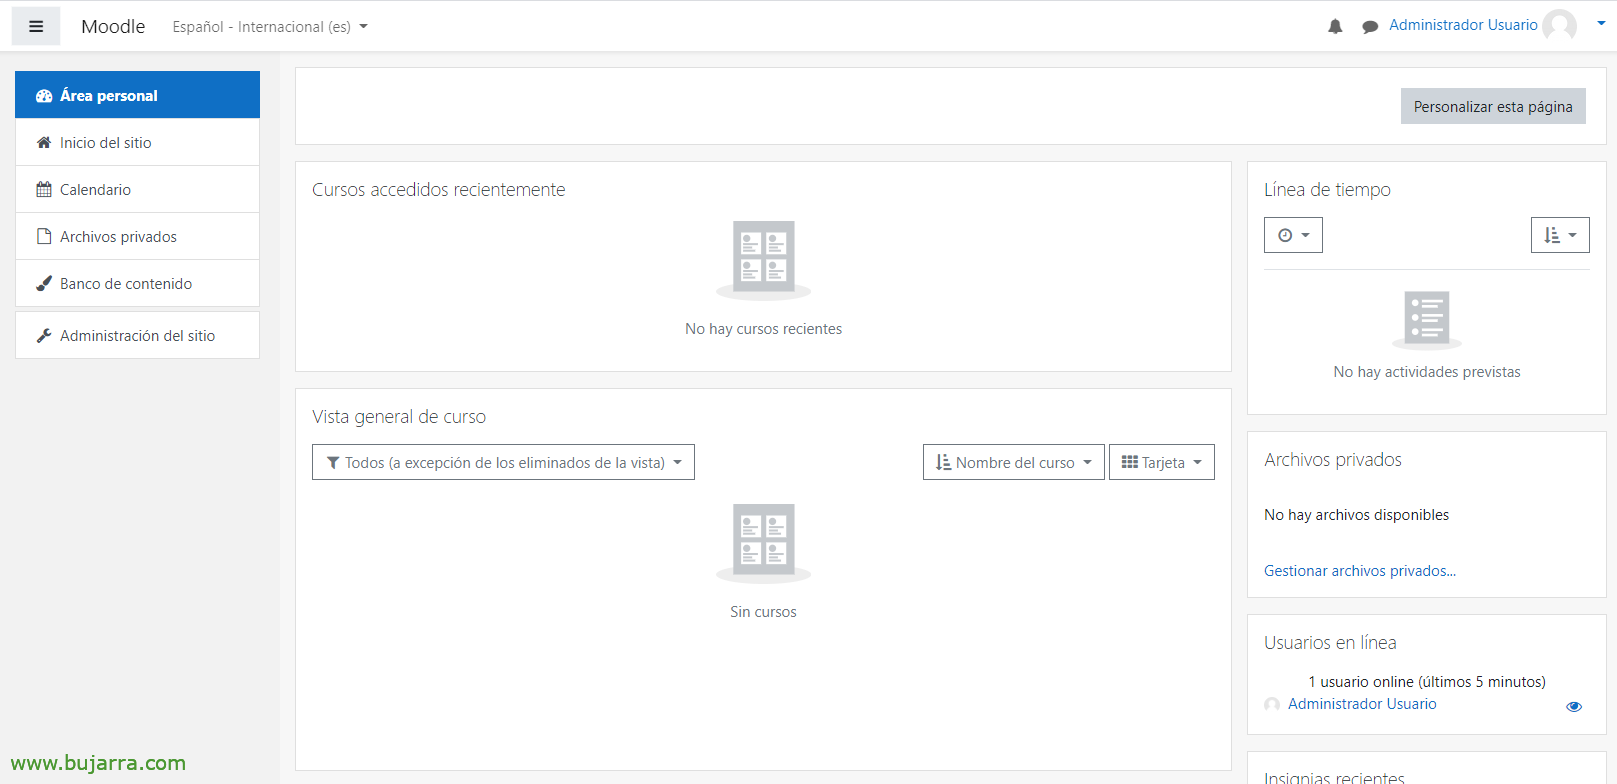
And that's it! we'll have our Moodle Site created, it will be totally empty and in the mood for affection.
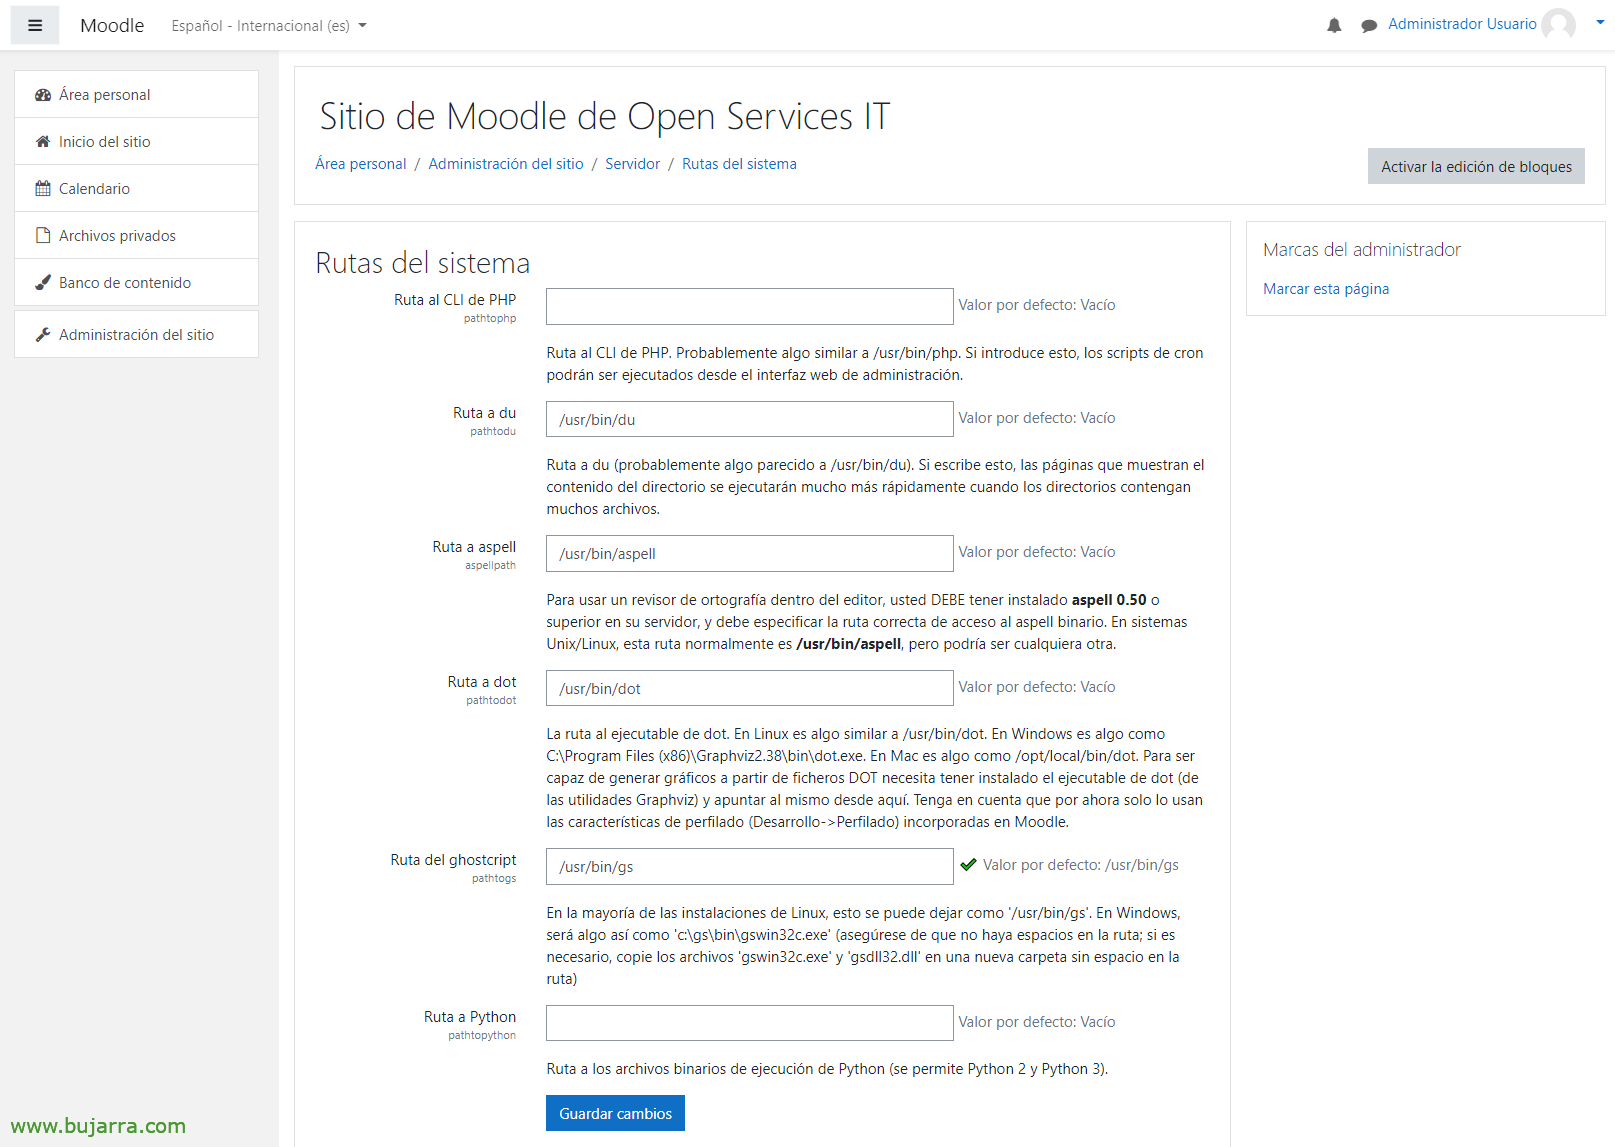
Before you finish, We will go to “Site Administration” > “Server” > “System Routes” and we indicate:
- Route to du: /USR/BIN/DU
- Route to aspell: /usr/bin/aspell
- Route to dot: /usr/bin/dot
And click on “Save changes”.
¡Ah! ¡Important! Remember to correct permissions to the Moodle website:
sudo chmod -R 0755 /var/www/html/moodle
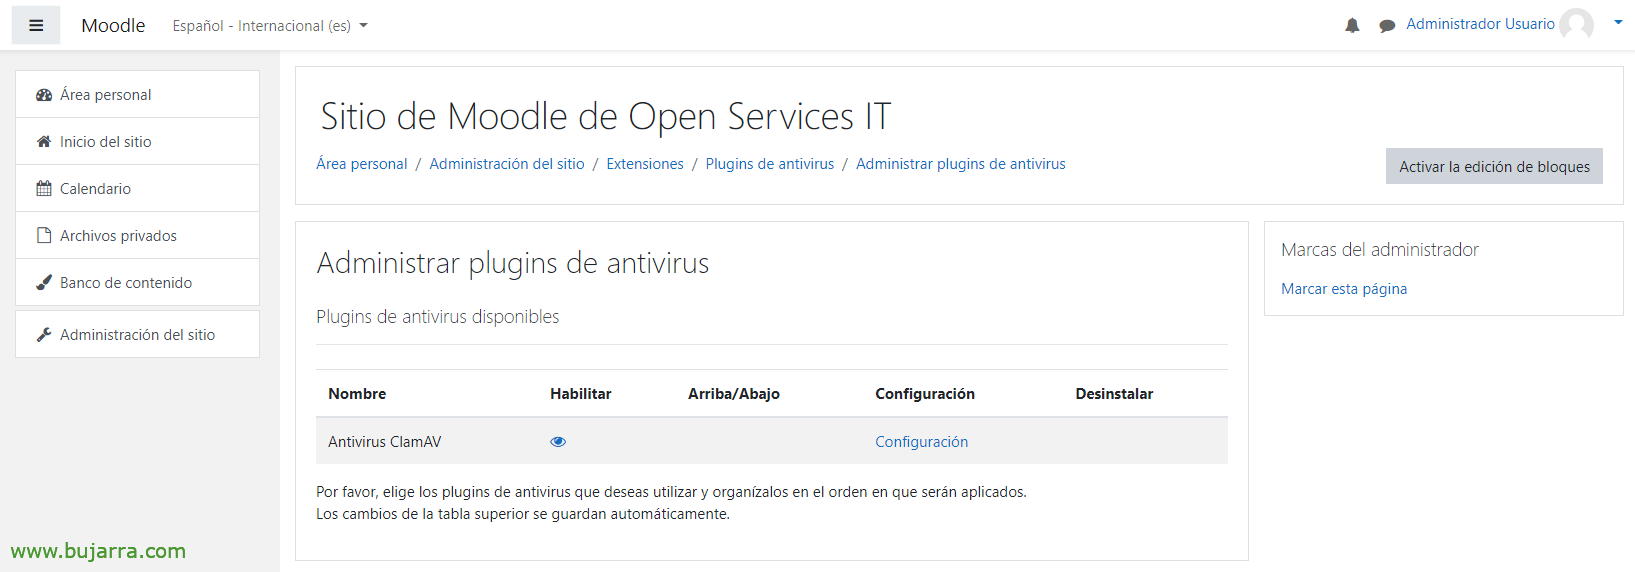
As we initially installed ClamAV to protect ourselves from viruses or malware, we have to set it up in Moodle, first we enable it by clicking the ClamAV Antivirus in the eye. Then click on “Configuration”,

We end up correcting:
- Command Lina: /usr/bin/clamscan
- Unix domain socket: /var/run/clamav/clamd.ctl
And nothing, we already have Moodle fully installed, Now the fat part is left, what is feeding it, We will now be able to create courses, Students, teachers, change the theme to something more corporate, Add any type of content, Ratings, Calendars, Competences, Logos… Well and also remember to enable SSL on the website, to encrypt and secure communications.