Monitoring a QNAP NAS
In this post, we'll look at how to monitor a QNAP NAS or SAN that we have in our organization, we will do it only through SNMP and we will see everything we can get! Thanks to Centreon it will be quick and easy to have everything under control, from hard drives to any chassis sensor or RAID status! Nothing, We get a couple of necessary scripts first and that's it! Then sew and sing!
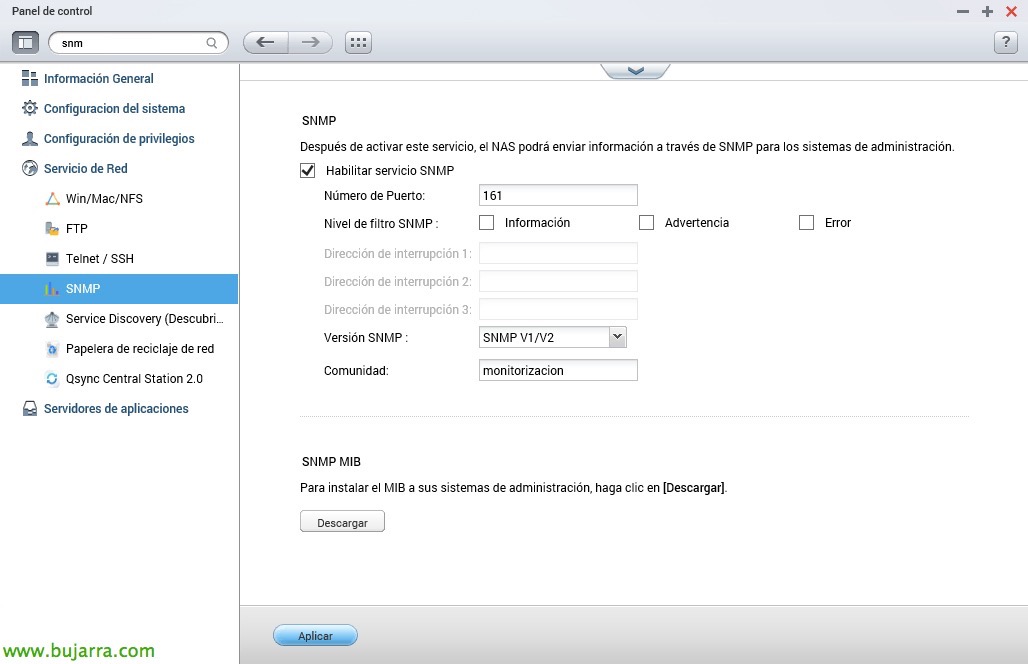
Before anything, we must enable the SNMP service on our QNAP if we have not already done so, we will do it from the “Panel de Control” > “Network Service” > “SNMP”, after enabling it, We will establish the SNMP Community and apply the changes.
CPU and Memory Usage
With the 'check_qnap_cpumem.sh script’ we can easily obtain results of CPU usage and memory used in QNAP. We download this file from Nagios Exchange and we put it in '/usr/lib/nagios/plugins/'. We'll make it executable with 'chmod +x’ and we can try to run it with the following format:
[SourceCode]./check_qnap_cpumem.sh -H DIRECCION_IP_QNAP -v VERSION_SNMP -C COMUNIDAD_SNMP -w %_AVISO_WARNING -c %_AVISO_CRITICAL[/SourceCode]
Temperature monitoring
To measure the temperature of QNAP, we will do it with 'check_qnap_temp.sh', we download it from Nagios Exchange and we also make it executable and leave it in the plugins' path.
[SourceCode]./check_qnap_temp.sh -H DIRECCION_IP_QNAP -v VERSION_SNMP -C COMUNIDAD_SNMP -w TEMPERATURA_WARNING_EN_CELSIUS -c TEMPERATURA_CRITICAL_EN_CELSIUS[/SourceCode]
More QNAP…
The rest of the elements, such as disk usage, The status of the hard disks or volumes can be obtained with the 'check_qnap script’ that we will also come down from Nagios Exchange, saving it in the plugins' path and making it executable.
If we run the command followed by the appropriate parameter (that we will obtain with –help) we will be able to monitor what interests us. We may need to edit the 'check_qnap script’ at will to monitor more discs… But, well, running in this format we would get results from shell:
[SourceCode]./check_qnap DIRECCION_IP_QNAP COMUNIDAD_SNMP WARNING CRITICAL OPTION[/SourceCode]
Well, after optional shell testing, We will proceed to create the 3 Commands, one for each script we will use, and being 3 different things to get different things that we will monitor… As we will always do from “Configuration” > “Commands” > “Add” and indicate the names of the commands with the original names of these scripts, so we will relate them better when we need them when creating the Services.
Example of a command line for 'check_qnap_cpumem.sh':
[SourceCode]/usr/lib/nagios/plugins/check_qnap_cpumem.sh -H $HOSTADDRESS$ -v $_HOSTSNMPVERSION$ -C $_HOSTSNMPCOMMUNITY$ -w $ARG 1$ -c $ARG 2$[/SourceCode]
Example of a command line for 'check_qnap_temp.sh':
[SourceCode]/usr/lib/nagios/plugins/check_qnap_temp.sh -H $HOSTADDRESS$ -v $_HOSTSNMPVERSION$ -C $_HOSTSNMPCOMMUNITY$ -w $ARG 1$ -c $ARG 2$[/SourceCode]
Example of a command line for 'check_qnap':
[SourceCode]/usr/lib/nagios/plugins/check_qnap $HOSTADDRESS$ $_HOSTSNMPCOMMUNITY$ $ARG 1$ $ARG 2$ $ARG 3$[/SourceCode]
Where the first argument will be the parameters that we will pass from the Service to monitor the volume, disk…
And nothing, Once the Commands have been defined as a basis to start working, we can already create the Services that will monitor each item,since “Configuration” > “Services” > “Add” We will create them by associating them with the QNAP Host. Be careful, if you have not created this host it is time to do it, you register it from “Configuration” > “Hosts” > “Add” and you give it a name, An alias, your IP address and assign it the generic-host template at least. After that, what has been said, we will create as many Services as we need, in this screenshot we check the Free Memory and after selecting the Command we will fill in the arguments that interest us!
After recording the configuration and restarting the engine, since “Monitoring” > “Status Details” we will be able to see all the Services that we have been adding, we will force a check or wait for Centreon to execute them and verify their correct monitoring. With this kind of thing, It's true that every day we live more peacefully? We can now assure that we have our small QNAP storage array under control!


