
Setting up a VPN or Virtual Private Network on Windows using PPTP protocol

With this, What we will achieve is, from a physically separate location to our company's LAN, house… connecting to it and seeing all the devices on the network. It is a free connection that we will use once we are connected to the Internet. These ports need to be open and mapped to the routing server (VPN), Port 47 GRE (failing that, TCP) and the 1723 TCP.

The first thing we will do is enter the Administrative Tools and once there, enter the Routing and Remote Access console. On the server, we will right-click to enable and configure the service.

An assistant will appear, and we will click Next.

We select the option for manual configuration and continue.

We only select the VPN Server option.

We confirm and continue

Nos indicará que va a iniciar el servicio y le damos a Sí.
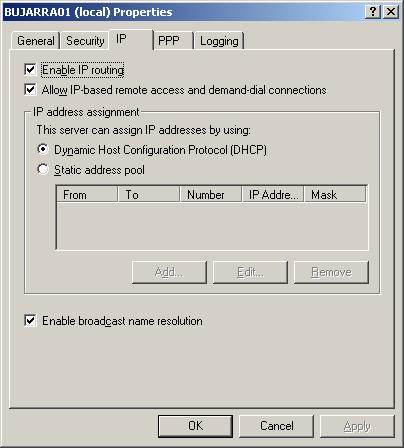
Una vez iniciado el servicio debemos entrar en las propiedades del servidor VPN y asignar un intervalo de direcciones IP para los clientes que se nos vayan a conectar. Si en la red tenemos un servidor DHCP este le asignará una direccion IP, en su defecto debemos indicar un rango válido.

Ahora debemos ir a las Herramientas Administrativas y a la consola de Usuarios y equipos del DA. Allí, debemos seleccionar que usuarios queremos que tengan permisos para conectarse por VPN, para ello en las propiedades del usuario, en la pestaña de Marcado o Dial-In, tenemos que decirle que le de permisos al usuario.

The VPN server should now be configured correctly; now we need to create the client connection for the stations we want to connect to.. For this, we need to create a new network connection and this wizard will appear..

We select the option to connect to a network at my workplace..

Virtual private network connection..

We give the connection a name.

This screen indicates that if there is any other connection that needs to be marked before making the VPN client connection, it should be marked..
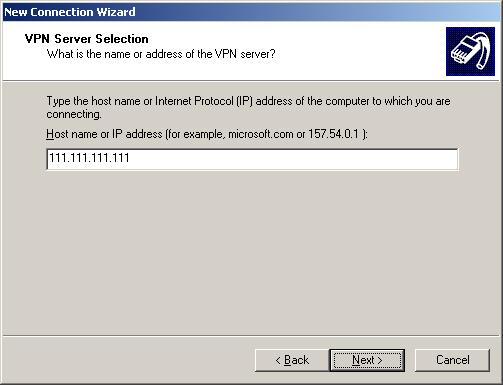
This field is for entering the name or IP address of the server we want to connect to..

And this one is 'optional'., It simply indicates whether this connection will be used by any other user on the local machine..

Finalized
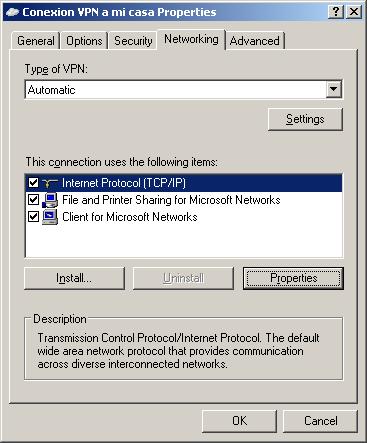
In the properties of the connection that we have just created we have to go to the Network tab and enter the properties of the TCP/IP protocol.

Click on 'Advanced…’

We will remove the check so that we do not go out to the internet through this connection. And we tried to connect!!!


