ownCloud – Setting up our corporate Dropbox

One of the best solutions to set up our own Dropbox in our organization is ownCloud, we have clients for Windows, Linux, Mac, iPad, iPhone, Android and web client! With this, users will be able to have a repository of files that they can share with people outside the organization in a secure and controlled way, in addition to being able to synchronize calendar, Contacts, Have photo viewer-type applications, online music playback and hundreds of applications that we can add to it (Mail Viewers…)
En este documento veremos la instalación de ownCloud en un Ubuntu Server 12.10 x64, posteriormente integraremos ownCloud con nuestro Directorio Activo para que puedan validarse los usuarios de una forma centralizada, además de ver alguna opción de configuración, Quotas, formas de compartir…
Tenemos aquí el manual de administrador completo: HTTP://doc.owncloud.org/server/4.5/admin_manual/
Installation: HTTP://doc.owncloud.org/server/4.5/admin_manual/installation.html

Aún que haya otra forma de instalarlo más automático, que sería agregandonos el repositorio de owncloud en nuestro sources.list, en este caso hice una instalación manual, que viene siendo lo mismo, primero tenemos que tener el S.O. actualizado y luego instalar las dependencias de ownCloud:
sudo apt-get update
sudo apt-get upgrade
sudo apt-get install apache2 php5 php5-gd php-xml-parser php5-intl php5-mysql smbclient curl libcurl3 php5-curl php5-sqlite php5-ldap
Posteriormente nos bajamos ownCloud, lo descomprimirmos y lo movemos a /var/www, así como establecemos los permisos correspondientes:
WGET HTTP://mirrors.owncloud.org/releases/owncloud-4.5.7.tar.bz2
tar -xvf owncloud-4.5.7.tar.bz2
sudo mv owncloud /var/www/
sudo chown -R www-data:www-data /var/www/owncloud
Más info de cómo hacerlo algo más automatizado con otras distribuciones de Linux: http://software.opensuse.org/download.html?project=isv:ownCloud:community&package=owncloud

Editamos en ‘/etc/apache2/sites-available’ y habilitaremos en el directorio ‘/var/www/’ el ‘AllowOverride’ a ‘All’ y reiniciamos apache.
vim /etc/apache2/sites-enabled/000-default.
AllowOverride a All
sudo service apache2 restart

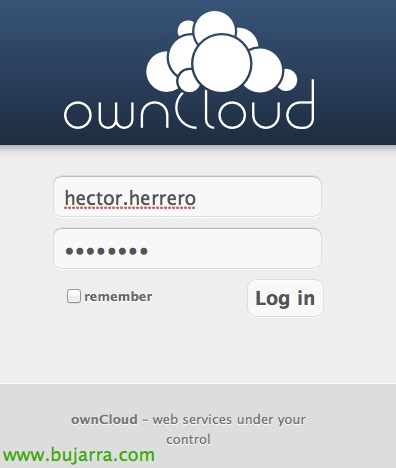
Nothing, and we will be able to access ownCloud without problems to configure it, We open a browser to http://IP/owncloud to create the administrator account we want, with the password we are interested in, And we can specify at this moment where we will have the storage data, Before this point we may have connected a larger capacity disk to the machine to separate the OS. From the data, As soon as we have it mounted, we will indicate the path here. In addition to what type of DB we will use, In this case an SQLite, If we want a MySQL, we must have it installed beforehand. And we click on “Complete the installation”,

And we will log in as administrator, This is the initial view.

The first thing will be to configure if we are interested in the authentication method, en nuestro caso habilitaremos desde la ‘tuerca’ de Settings, en ‘Aplicaciones’ > ‘LDAP user and group backend’ and click on “Activate”,
Esta parte de aplicaciones es una de las más interesantes de ownCloud, ya que podremos integrar distintas opciones en el portal web, para que puedan tener acceso a su correo (con webmail tipo RoundCube), cliente de VNC para accesos remotos… y una infinidad de ellos que podremos encontrar en: http://apps.owncloud.com

GOOD, ahora en “Administration” we will be able to configure the authentication part with LDAP, we will take into account in 'LDAP Basic':
– 'Server': IP or name of the domain controller.
– 'Base DN': user location base.
– 'User DN': User with privileges to query or modify if necessary in our AD.
– 'Password': Your password.
– 'User login filter': sAMAccountName=%uid
– 'List of user filters': objectClass=person
– 'Group filter': objectClass=group
“Save”,

And in the advanced parameters:
– 'Port': If it is not the default LDAP port we will change it.
– 'User base tree': Container at the OU level of the users.
– 'Group base tree': Container at the Group level of the users.
– Marcamos el check ‘Servidor de LDAP sensible a mayúsculas/minúsculas (Windows)’
– ‘Campo de nombre de usuario a mostrar’: sAMAccountName.
– ‘Campo de nombre de grupo a mostrar’: sAMAccountName.
“Save”,

Y si vamos a “Users” para confirmar que los tenemos ahí todos, podremos asignarles a distintos grupos, o establecerles cuotas mismamente.

Probamos a entrar con un usuario del Directorio Activo,

Al entrar como usuario y llendo a ‘Personal’ podremos acceder a la información general, donde veremos links de descarga para los clientes, el uso que tenemos en la cuenta, veremos las rutas URL para los accesos a nuestro contenido vía WebDAV, Stocking, o acceso al calendario para sincronizaciones… en el caso de ver URLs locales como es mi caso y sin https, It would basically be Apache configuration, adding a certificate and enabling SSL.

And nothing, This would be the generic view of the 'Files' folder, where we can upload them manually, We will be able to sync them thanks to the multi-OS or mobile client applications. We will be able to rename the files, share them with internal ownCloud users or external users via email, les proporcionaríamos un link público cifrado y opcionalmente protegido con una contraseña. Elegiríamos los permisos que queremos que tengan sobre dicho(s) fichero(s) y si queremos una caducidad para que no se nos olvide quitar accesos! Podremos también descargarlos directamente o ver un historial de versiones del contenido para una vuelta atrás si fuese necesario.

En el caso de la ‘Música’ podremos reproducir online el contenido de audio que hayamos subido desde el navegador directamente, al igual que los videos (si es que hemos habilitado la app de videos!).

En el caso del ‘Calendario’ sería lo mismo, podremos crear citas, import, export, o sincronizar con las URLs que obtendremos desde sus ajustes.

And nothing, unicamente nos quedaría descargar los clientes para los S.O. that we need.
– Link de descarga para clientes en desktops: http://owncloud.org/sync-clients/
– Link de descarga para clientes en dispositivos móviles: https://owncloud.com/overview/mobileapps

Y la configuración como vemos no tiene nada, será meter la URL (pública o privada) y la cuenta del usuario. En ese momento el usuario podrá comenzar a trabajar con ownCloud y subir la información que necesite!