Remarkable 2: Hacks & Own server

In this document (for educational purposes), we will be able to see how the system that the Remarkable brings can be changed a little 2 to unleash all its functionalities, as well as how to set up our own cloud server to synchronize, Screen sharing, documents…
 |
 |
As I think many of you have heard of the Remarkable device 2 It's amazing for those of us who like to take notes manually. A touch device, Electron Ink, that allows you to have different notebooks to organize yourself as you want, Different Tips, Thicknesses… very very complete. Very papery to the touch, You can underline, move, copy… The truth is that the hardware is amazing, and the 'problem’ let's say the software has it, which depends on what functionalities you are interested in as it requires an annual subscription, and if the price were affordable, Well, good… The possibility of screen sharing, Send a document by email, convert what has been written to OCR…
To avoid all this, we can change the system on the one hand and enable the functions that come unlocked, and on the other hand we set up our own Remarkable server to perform the storage and synchronization functions of our notebooks, notes, books… in addition to being able to send docs or share the screen, inter alia.
Updating the Remarkable Software 2,
 |
 |
We started first by updating the firmware of the Remarkable 2 to the maximum version that we find that has the 'hacked' version. I leave you with a note of the steps I followed when I acquired it 1-2 years. On this website you will find the instructions of DDVK (Dobrin von Känel) for the hacks and In this other one for the update process.
In a VM with linux we download the ddvk repo that allows us to update the Remarkable 2:
cd /tmp/ git clone https://github.com/ddvk/remarkable-update.git
From here we will download the latest version for our Remarkable 2 and save it in the 'updates' folder’ that the previous step will have created. We are now starting the service offered by the update:
cd remarkable-update python3 serve.py

2.12.2.573
Using hostname, to override use: ./serve.py hostname Device should use:  HTTP://OS-XXX-01.openservices.local:8000/
Available updates: {'reMarkable2': ('2.12.2.573', '2.12.2.573_reMarkable2-XnE1EL7ojK-.signed')}
Starting fake updater: 8000
In my case the Remarkable 2 I brought the version 2.10.4.5 and we're going to upload it to the 2.12.2.573. Now let's go to the Remarkable 2, we log in to it by SSH with root and our password (which we will find in Settings > Help > Copyright and Licenses, under GPLv3 Compliance). We edit the update configuration file with vim or nano with the URL that gave us the previous step, We record and go out:
vim /usr/share/remarkable/update.conf SERVER=http://OS-XXX-01.openservices.local:8000
:wq
From the Remarkable shell 2 We can force you to upgrade, We lift the service, We check for updates and see the update process:
systemctl start update-engine update_engine_client -check_for_update journalctl -u update-engine -f
After that, We reboot and ready to apply the hack!
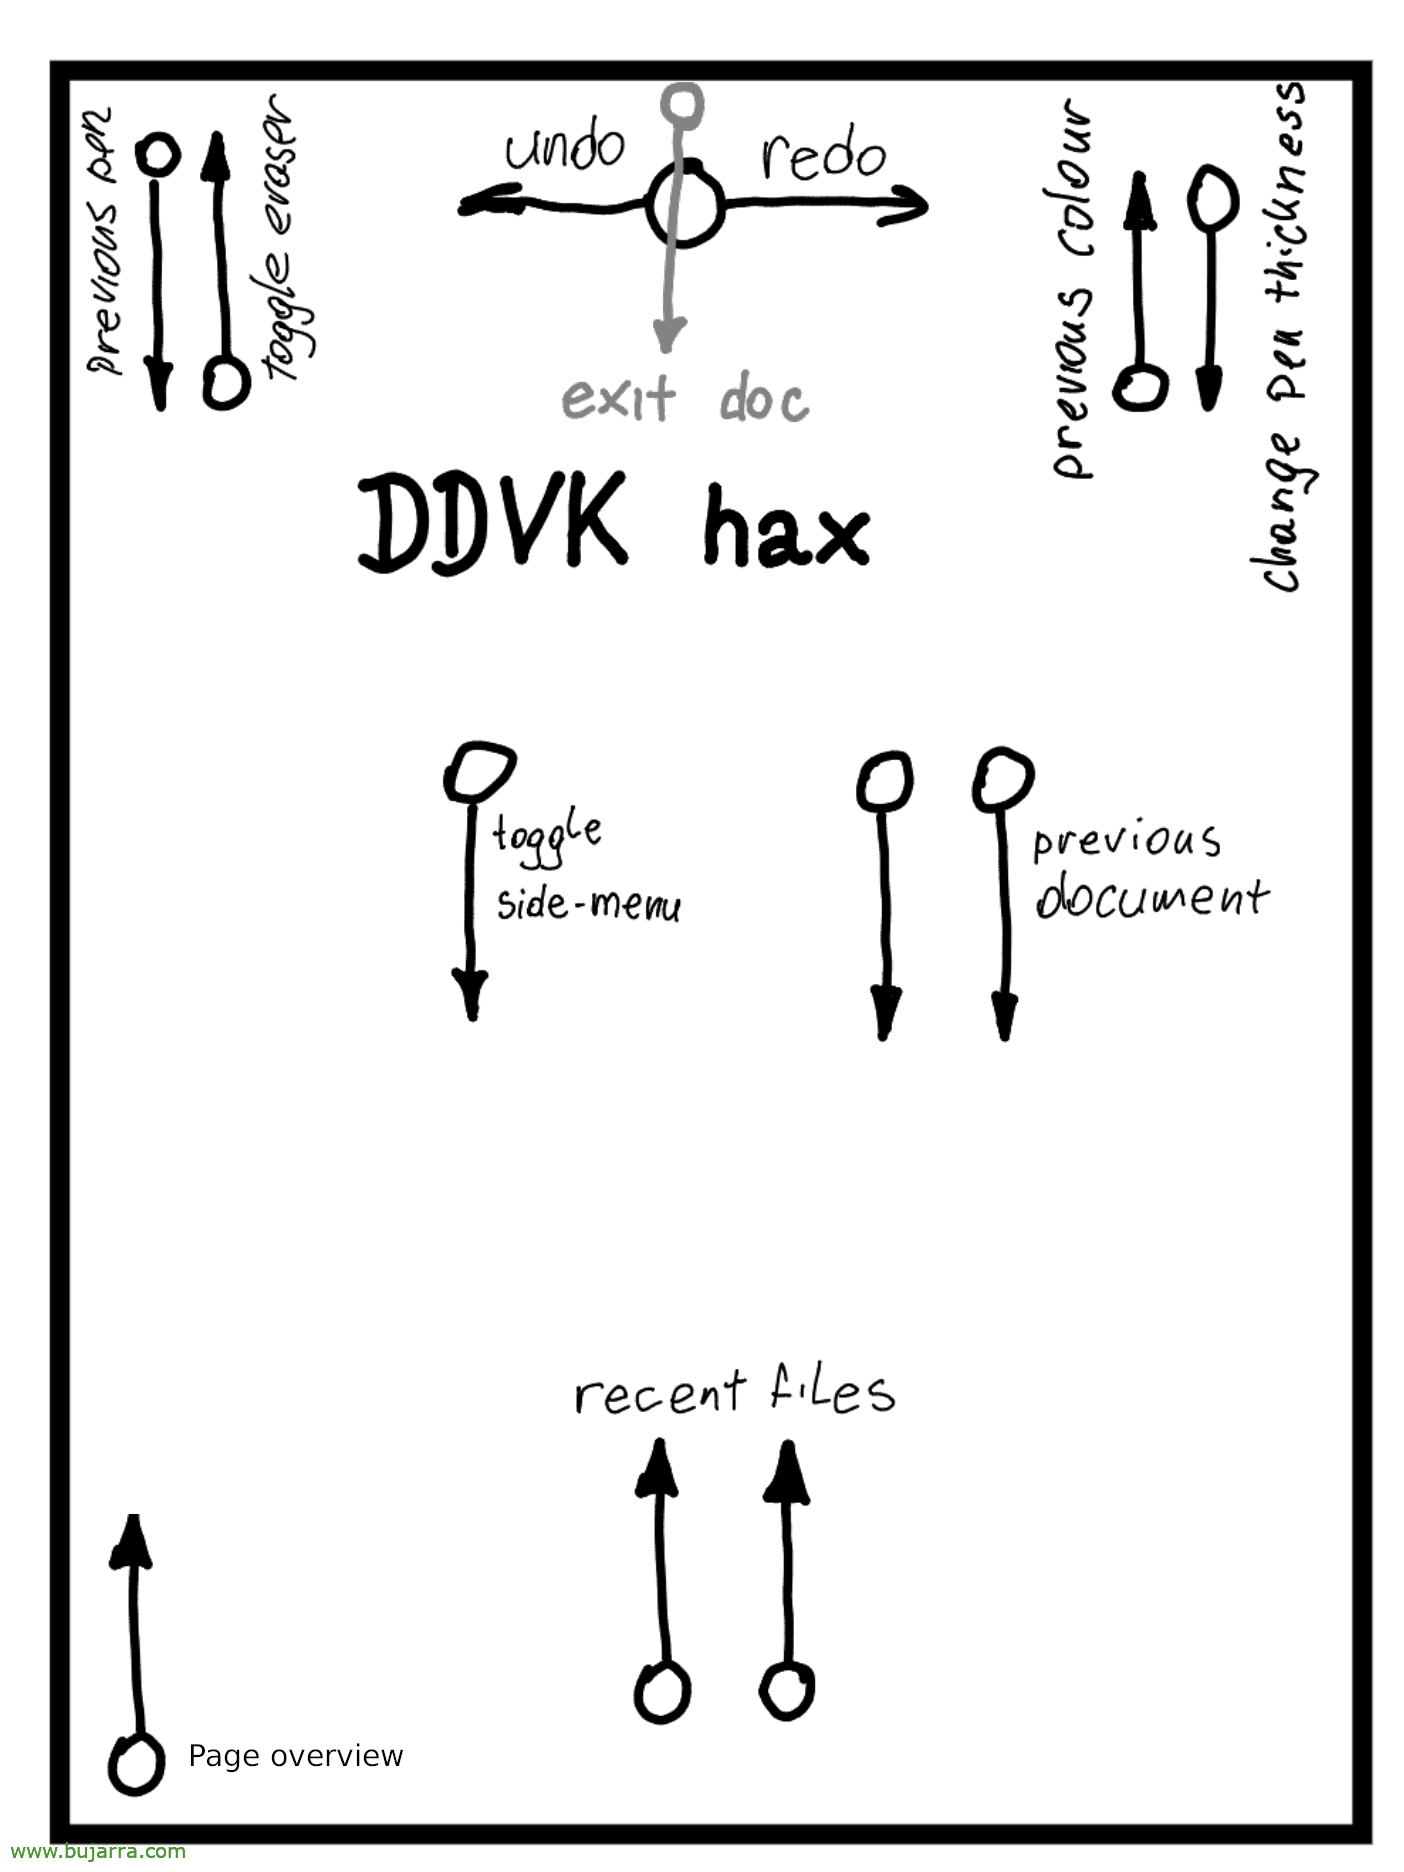
Switching from software to hacking software,
GOOD, now that we've updated the Remarkable 2 to a hack-compatible version, Well, we can start applying it. Fearless, since when we finish we will be able to choose whether we will apply the changes or not, after tinkering with the device a bit.
We log in again at the Remarkable 2 with SSH as root and the password that we will have already written down in a safe place. And we execute:
sh -c "$(wget https://raw.githubusercontent.com/ddvk/remarkable-hacks/master/patch.sh -O-)"
Y empezará:
Connecting to raw.githubusercontent.com (185.199.111.133:443)
wget: note: TLS certificate validation not implemented writing to stdout
-                    100% |***********************************************************************************************************************************************************************************************************| 10013  0:00:00 ETA written to stdout Disk space seems to be enough.
rM2 Version 2.12.2.573 - patch_31.2.01 Connecting to github.com (140.82.121.4:443)
wget: note: TLS certificate validation not implemented Connecting to raw.githubusercontent.com (185.199.109.133:443)
saving to '/home/rmhacks/patch_31.2.01' patch_31.2.01        100% |***********************************************************************************************************************************************************************************************************| 88907  0:00:00 ETA '/home/rmhacks/patch_31.2.01' saved Connecting to github.com (140.82.121.4:443)
wget: note: TLS certificate validation not implemented Connecting to raw.githubusercontent.com (185.199.110.133:443)
saving to '/home/rmhacks/patch.sh' patch.sh             100% |***********************************************************************************************************************************************************************************************************| 10013  0:00:00 ETA '/home/rmhacks/patch.sh' saved Failed to stop rm2fb.service: Unit rm2fb.service not loaded.
killall: remarkable-shutdown: no process killed killall: xochitl: no process killed Cleaning up...

**********************************************
Trying to start the patched version...
You can play around, press CTRL-C when done!
**********************************************

Registering exit handlers Reading waveforms from /usr/share/remarkable/320_R400_AF8F11_ED103TC2C5_VB3300-KCD_TC.wbf Running INIT (111 phases)
15:02:22.065 qt.qpa.input             evdevtouch: Using device discovery
15:02:22.072 qt.qpa.input             evdevtouch: Adding device at /dev/input/event2
15:02:22.072 qt.qpa.input             evdevtouch: Using device /dev/input/event2
15:02:22.073 qt.qpa.input             evdevtouch: /dev/input/event2: Protocol type B  (multi), filtered=no
15:02:22.073 qt.qpa.input             evdevtouch: /dev/input/event2: min X: 0 max X: 1403
15:02:22.074 qt.qpa.input             evdevtouch: /dev/input/event2: min Y: 0 max Y: 1871
15:02:22.074 qt.qpa.input             evdevtouch: /dev/input/event2: min pressure: 0 max pressure: 0
15:02:22.074 qt.qpa.input             evdevtouch: /dev/input/event2: device name: pt_mt
15:02:27.521 qt.qpa.input             evdevtouch: Updating QInputDeviceManager device count: 1 touch devices, 0 pending handler(s)
^CShutting down...
Cleaning up...
If everything worked, do you want to make it permanent [N/y]? N Use the /home/rmhacks/xochitl.patched binary if you change your mind / provide it if it segfaulted.
Starting the original...
Esto arranca la Remarkable 2 con el hack, podremos parar el proceso con CTR+C cuando queramos y nos preguntará si queremos guardarlo en memoria N/y.
If N reboots with the previous firmware.
Setting up our own cloud server,
GOOD, we can mount on an MV or a Raspberry Pi, or in a NAs… our own Remarkable server 2, for what we have said before, Store and synchronize documents, the possibility of sending them by email, Screen sharing, etc…
We will do this with another of the ddvk utilities, with RMFAKECLOUD, a Docker container that in a jiffy we will have running.
Before you begin, We have to create an account at: https://developer.myscript.com and after activating the account, We'll create an app in HTTPS://developer.myscript.com/dashboard >Cloud recognition > Manage > Create application (or go to https://cloud.myscript.com/#/user/applicationList). In my case I call it 'App for rmfakecloud'. We open it and > Generate application Key', and we must write down the 'Application Key’ (Format xxxxxxxx-xxxx-xxxx-xxxx-xxxxxxxxxxxx) and the HMAC Key: (Same format).
On a machine where we have Docker we create the directory for the data and lift the rmfakecloud container, having to modify some data as you can see:
Sudo mkdir /mnt/data-rmfakecloud sudo Docker Run -p 3000:3000 -v /mnt/data-rmfakecloud:/data -e JWT_SECRET_KEY='XXXXXXXX' \
-e RMAPI_HWR_APPLICATIONKEY='xxxxxxxx-xxxx-xxxx-xxxx-xxxxxxxxxxxxx' \
-e RMAPI_HWR_HMAC='xxxxxxxx-xxxx-xxxx-xxxx-' \
-e RM_SMTP_SERVER='mail.midominio.eso:465' \
-e RM_SMTP_USERNAME='us*****@*******io.eso' \
-e RM_SMTP_PASSWORD='contraseña' \
-e RM_SMTP_FROM='us*****@*******io.eso' \
-and RM_SMTP_INSECURE_TLS \
-and RM_SMTP_STARTTLS \
DDVK/RMFAKECLOUD
We lift the container and tell it to always start:
Sudo Docker Start RMFAKECLOUD sudo Docker Update --Restart Unless-Stopped RMFAKECLOUD

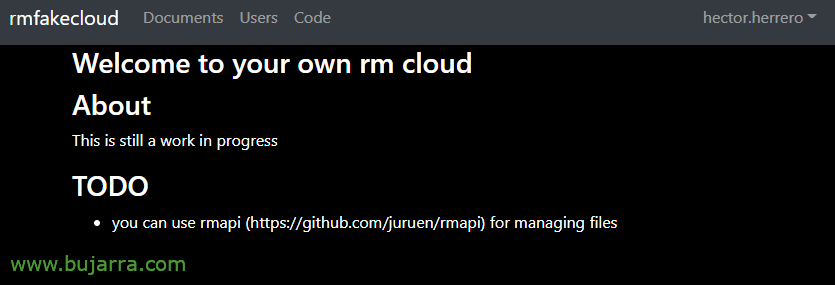
We open a website against the URL of the container in http format://FQDN_DOCKER:3000 y el primer usuario con el que entremos, se creará.
Nos vamos a la Remarkable 2 y desde la shell, desde un Putty logueados como root ejecutamos:
sh -c "$(wget https://raw.githubusercontent.com/ddvk/rmfakecloud/master/scripts/device/automagic.sh -O-)"
Y saldrá algo como esto:
root@reMarkable:~# sh -c "$(wget https://raw.githubusercontent.com/ddvk/rmfakecloud/master/scripts/device/automagic.sh -O-)"
Connecting to raw.githubusercontent.com (185.199.109.133:443)
wget: note: TLS certificate validation not implemented writing to stdout
-                    100% |***********************************************************************************************************************************************************************************************************|   275  0:00:00 ETA written to stdout Getting the installer...
Connecting to github.com (140.82.121.3:443)
wget: note: TLS certificate validation not implemented Connecting to objects.githubusercontent.com (185.199.108.133:443)
saving to 'installer.sh' installer.sh         100% |***********************************************************************************************************************************************************************************************************| 2000k  0:00:00 ETA 'installer.sh' saved Running the installer...
Extracting embedded binary...
Failed to stop proxy.service: Unit proxy.service not loaded.
~/rmfakecloud ~ Generating CA key and crt...
Generating RSA private key, 2048 bit long modulus (2 primes)
.....................................+++++
...................................................+++++
e is 65537 (0x010001)
Generating private key...
Generating RSA private key, 2048 bit long modulus (2 primes)
.....+++++
................................+++++
e is 65537 (0x010001)
Generating pub key...
writing RSA key Generating csr and crt...
Signature ok subject=C = AA, ST = QQ, L = JJ, O = the culture, CN = *.appspot.com Getting CA Private Key Generation complete!
Clearing symlinks in /etc/ssl/certs...
Done.
Updating certificates in /etc/ssl/certs...
rehash: warning: skipping ca-certificates.crt,it does not contain exactly one certificate or CRL
1 added, 0 removed; Done.
Running hooks in /etc/ca-certificates/update.d...
Done.
Enter your own cloud url [HTTP(s)://somehost:port] >
It is asking us to enter the URL with our own server that we have just set up in the following format. : HTTP://FQDN_DOCKER:3000 and hit Enter, note that here we can use a public FQDN if we want connect to the Remarkable 2 can be accessed from the Internet. After the Enter, will follow…
Setting cloud sync to: HTTP://FQDN_DOCKER:3000
Created symlink /etc/systemd/system/multi-user.target.wants/proxy.service → /etc/systemd/system/proxy.service.
Patching /etc/hosts Stoping xochitl..
Fixing sync status...
Starting xochitl...
~
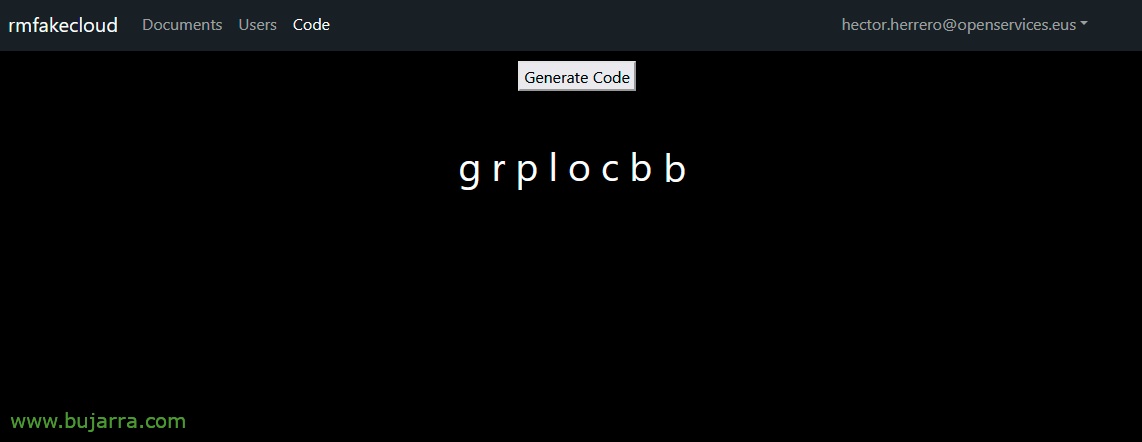
In the Remarkable 2 let's go to Settings > General > Account > Connect to reMarkable cloud > Connect > and it will ask us for a code of these OTs that we will get in http://FQDN_DOCKER:3000/generatecode
We'll introduce it and that's it! Our account will be activated and with the 'Connect' type Subscription Plan! Now the only thing to remember is not to update the Remarkable by itself 2, look for it in the Settings.
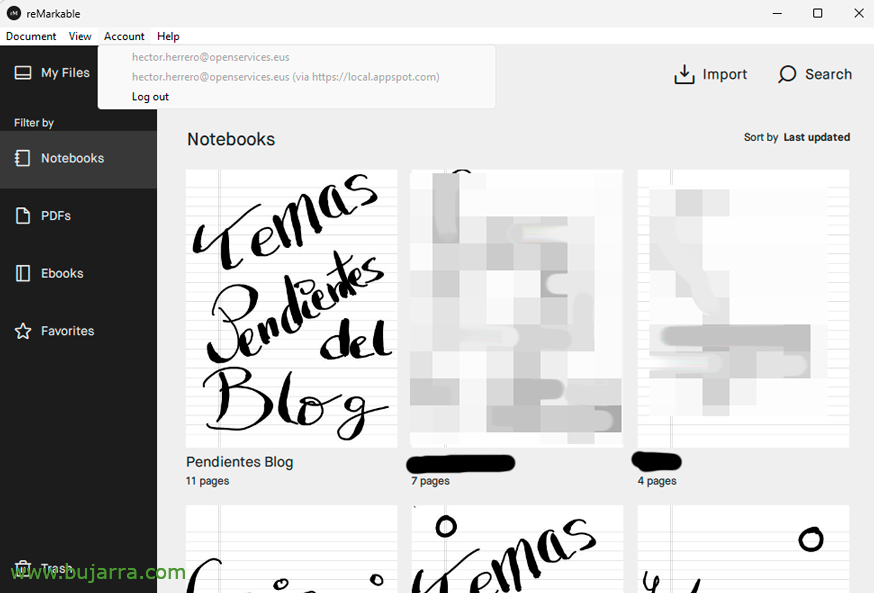
In case you don't know it, there is also a Remarkable app for the PC, for our desk, to view the documents, Access screen sharing… for this we must take into account that the FQDN 'local.appspot.com’ will need to respond against our rmfakecloud container or a reverse proxy that we mount on Nginx.
I hope you found it interesting, The idea of this document is to see the possibilities of these hacks, and much less encourage piracy or those nasty things. As usual, I wish you a great deal, May you be happy and eat partridges!

Come the last… You can buy a cheap pencil on Amazon like this one from STAEDTLER, And it looks very geeky… There are those with borragomas on the back to erase directly…
Now yes, A hug!