Raspberry Pi – Spanish Speech Recognition

Well, Well, After a long summer of enjoyment and leisure we are back to the fray!!! In this document we will see how to make a Raspberry Pi listen to us, waiting for us to talk to him and execute the commands we instruct. It's really simple to do, I've been testing more complex alternatives for some time both to install and configure, And this one for me is the best. What you are going to see in this document you will be able to implement in less than 30 minutes! And tell him… “Antonia, put me Telecinco”!

We'll be based on a Raspberry Pi 2 or 3 with Jessie installed and updated, we will install Apache on this Raspberry and we will put a website that will allow the browser to visit it, plug in your microphone and talk to him. The website will process what it hears by executing any command that we previously configure. We can connect to this website from a PC/Laptop/mobile/tablet and with Chrome, it will ask us for access to the microphone and will be listening to us at all times. Ideally, you should do everything on the same Raspberry Pi, Let me explain, connect it to a microphone and make it autologify when rebooting and run the Chromium against itself. So the Pi will be serving a website that will listen when you connect to it and with its own browser and microphone it will act as a 'client’ and 'server'.
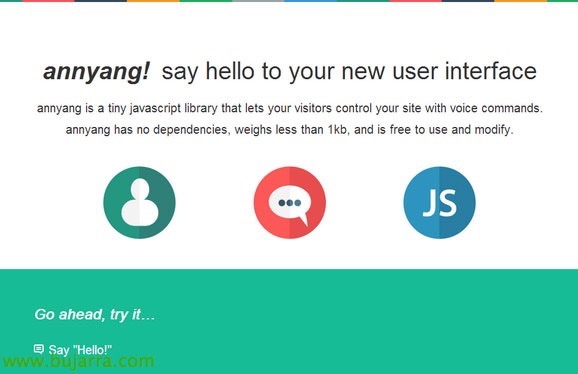
GOOD, all this is possible thanks to a Javascript library that the website will have (HTML) called Annyang, adding the ability to use voice recognition for users who connect. It will forward what it hears to a small php website that will execute the commands. In my case after pronouncing his name (Antonia), it will take the following words and look for any commands to execute. I also have it on that if I call him something else (Manolo), will look for me in WolframAlpha the answer to the question I ask 🙂 him but I have not put that in this document so as not to mislead; Let's go, the normal use with Antonia is for me to turn on/regulate/off the light in the room, Raise/lower blinds, change the TV channel to the one I tell you ;), Turn on the heating, The alarm, tell me temperatures, Weather forecasts…

And also, This can be done with any language! in this document we will try to recognize Spanish or Castilian, It's free, The script takes up 1kb… what else! By the way, For those who ask, I'm using a nice microphone (In my humble opinion), omnidirectional, that hears perfectly from anywhere (I have a 30m2 room and it's hidden) it's a CAD Audio U9 Condenser Microphone, Omni. But come on, with any microphone it works, either USB or webcam. I'm telling you, You can put it on Pi itself, or use it from other computers in the house.
Installing Apache,
The first thing will be to install apache with php and its requirements:
[sourcecode language=”Plain”]sudo apt-get install apache2 php5 libapache2-mod-php5[/SourceCode]
We'll change the user that will run apache2 (I do it so that I can hear the audio of my commands, For not including the Apache user in the audio group):
[sourcecode language=”Plain”]sudo vim /etc/apache2/envvars[/SourceCode]
And we modify:
[sourcecode language=”Plain”]export APACHE_RUN_USER=pi
export APACHE_RUN_GROUP=pi[/SourceCode]
GOOD, so that the web isn't constantly asking for access to the microphone, if we make the site secure (HTTPS) and we install a self-signed certificate, The browser will trust the site and will no longer ask for access to the micro more than the first time. So I put here the necessary steps to secure the website, We will create a directory to store the certificates there, We will create the certificate and private key, We enable the modules in Apache, we create a link to the Apache configuration and will edit it to indicate the correct paths of the certificates:
[sourcecode language=”Plain”]sudo mkdir /etc/apache2/ssl
SUDO OpenSSL REQ -x509 -nodes -days 1095 -Newkey RSA:2048 -out /etc/apache2/ssl/server.crt -keyout /etc/apache2/ssl/server.key
sudo a2enmod ssl
sudo ln -s /etc/apache2/sites-available/default-ssl.conf /etc/apache2/sites-enabled/000-default-ssl.conf
sudo vim /etc/apache2/sites-enabled/000-default-ssl.conf[/SourceCode]
And we modify:
[sourcecode language=”Plain”]SSLCertificateFile /etc/apache2/ssl/server.crt
SSLCertificateKeyFile /etc/apache2/ssl/server.key[/SourceCode]
At last, we restart Apache and that's it!
[sourcecode language=”Plain”]sudo /etc/init.d/apache2 restart[/SourceCode]
Required files,
Here are the only two files you need, we will leave them in /var/www/html/:
index.html
[sourcecode language=”Plain”]<HTML>
<HTML>
<Head>
<meta charset="utf-8">
<script src="//cdnjs.cloudflare.com/ajax/libs/annyang/2.4.0/annyang.min.js"></script>
</Head>
<Bodysuit>
<script>
function openPage(voice){
window.open('hector.php?voice='+voice);}
if (Annyang) {
annyang.setLanguage('en-US');
var commands = {
'Antonia *voice’ : openPage,
'Manolo *voice’ : openPage
};
annyang.addCommands(commands);
annyang.start();
}
</script>
</Bodysuit>
</HTML>
[/SourceCode]
This file is the initial website, the one that loads the Javascript and allows recording from the audio of a browser. We can change the source language there and put any other, as well as the(s) word(s) that it has to listen and then launch a function that opens the website hector.php with the words spoken as arguments in the URL. Ex., Say: 'Antonia, Put the one. And I would open 'https://X.X.X.X/hector.php?voice=put on the 1’ in a tab and then closes.
hector.php
[sourcecode language=”Plain”]<HTML>
<Bodysuit>
<?php
$value = $_REQUEST['Voice'];
if($value=='turn off the music’ || $value=='turn off the music’ || $value=='for music')
{
Exec(‘/home/pi/textoAvoz.sh "Si mi amo"’);
Exec('/home/pi/musica_apaga.sh');
}
if($value=='Voter uploads’ || $value=='Upload the store')
{
Exec(‘/home/pi/textoAvoz.sh "Si mi amo"’);
Exec('/home/pi/estoresubeon.sh');
}
if($value=='put the sixth’ || $value=='font la sexta’ || $value=='by the sixth')
{
Exec(‘/home/pi/textoAvoz.sh "Si mi amo"’);
Exec('/home/pi/la6_enciende.sh');
}
echo "<script>window.close();</script>";
?>
</Bodysuit>
</HTML>[/SourceCode]
I give you just a small example of the file to give some idea, As you can see it is very simple, it is only to capture the audios that listen to us and execute a script. In my case he doesn't always hear the right words, so with that little dictionary of possible errors he understands the possible failures. So 'put’ Sometimes 'font' understands me, 'by'… 🙂 If we ever say a command and you don't understand us, with viewing browser history and seeing 'what’ has understood us and add it to the possibilities. With that, you already hear perfect!
Install Chromium
GOOD, This is optional. If we want Raspberry itself to have the microphone, we will follow these steps as well, since we'll install Chrome and make it open automatically when you log in 'pi’ boot to connect against the web server.
These steps are for installing Chromium on a Raspberry Pi 3:
[sourcecode language=”Plain”]
wget https://launchpad.net/~canonical-chromium-builds/+archive/ubuntu/stage/+build/7916060/+files/chromium-browser_45.0.2454.85-0ubuntu0.15.04.1.1181_armhf.deb
wget https://launchpad.net/~canonical-chromium-builds/+archive/ubuntu/stage/+build/7916060/+files/chromium-codecs-ffmpeg-extra_45.0.2454.85-0ubuntu0.15.04.1.1181_armhf.deb
sudo dpkg -i chromium-codecs-ffmpeg-extra_45.0.2454.85-0ubuntu0.15.04.1.1181_armhf.deb chromium-browser_45.0.2454.85-0ubuntu0.15.04.1.1181_armhf.deb[/SourceCode]
Now we'll make it so that when you autolog the session 'pi’ in the X, open Chromium against the web service:
[sourcecode language=”Plain”]vim ~/.config/lxsession/LXDE-pi/autostart[/SourceCode]
And we add at the end:
[sourcecode language=”Plain”]@chromium-browser https://127.0.0.1[/SourceCode]
Testing,

Once we open the browser against the IP address of the Raspberry Pi, it will ask us for access to the microphone, having connected with HTTPS:// it will only ask us this time and it will save it in the preferences. By default, if everything has gone well, it will open us against 'index.html'.

The way I've done it (Not the best, but fast and functional) is that after listening to us, the browser will open the URL in a tab with the words that it has understood by attacking hector.php passing them as a variable. Then the tab will close!
Well, Well, that's it, thank Miguel Ignacio Guerra from the blog Cucopc Some little help that has given me. Thank you all and I hope you enjoy it, combining this type of documents with others that you will see in the section Raspberry Pi, We can make a fully intuitive and powerful smart home.