

Citrix NetScaler Gateway with OTP (One Time Password)

Well, I've wanted to leave you this post for a long time, where we are going to see how to enable one of the great new features of Citrix NetScaler 12, which is the possibility of using OTP authentications (One Time Password) or one-time password natively and without having to rely on third-party manufacturers!

From NetScaler 12.0 FR1 and if we have the version Enterprise or Platinum, We will have fully integrated the possibility of enabling and configuring the Require of a Two-factor OTP authentication. We will be able to make users with your mobile device and through the Google Authenticator app they have to provide a random OTP key in addition to their password to enter our corporate portal, and thus we will ensure that whoever we want enters our company and no user has been stolen Your password.
In this document we will see all the necessary steps, We will also create a vServer so that users first Register Your Device (will use this Portal every time they want to register a new device). We'll also look at the settings needed to enable in our Gateway such OTP authentication.
We will take into account that currently Citrix Receiver does not support it, but it will be for exclusive use (For now) with web browser, so the user will have to download the Google Authenticator (For example) and register so that you can then access your application or desktop portal on a regular basis, validating with your usual password and the Random code generated that you get from the app.
Important, Before you begin, Make sure you have the time service NTP configured. It assumes that you already have a properly configured NetScaler Gateway that validates against your domain using an LDAP server and policy, We will use this for users to access the portal ‘manageotp‘ and manage their device.
LDAP authentication

Since “Security” > “AAA – Application Traffic” > “Polices” > “Authentication” > “Advanced Policies” > “Actions” > “LDAP” > “Add…”, we create a new LDAP Server. In my case I will call him “192.168.1.250_LDAP_OTP_sin_auth”, we fill in the IP and port data as usual, We uncheck “Authentication”, in “Administrator Bind DN” we must include an account that has privileges to modify the OTP attribute in the accounts of our Active Directory. Add, (from the right) The Field “OTP Secret” we will establish what will be the attribute that will be used in the user accounts to store the OTP secret (we can use for example userParameters or the one we like the most). Click on “Create” to create it.

GOOD, we create another LDAP Server, In this case I will call him “192.168.1.250_LDAP_OTP_valida_sin”, It will be the same as the previous one but with a change in the search filter, We add in Search Filter The value userParameters>=#@ and click on Create.
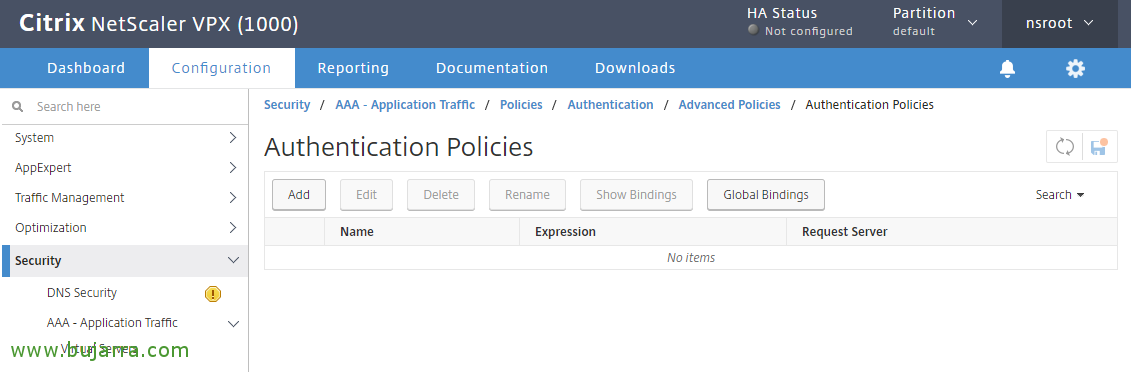
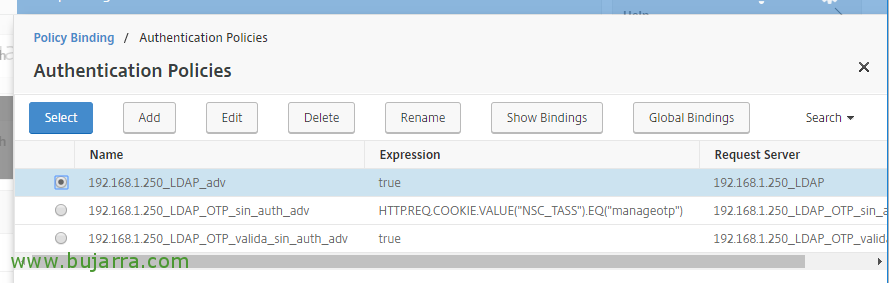
We're going to “Security” > “AAA – Application Traffic” > “Policies” > “Authentication” > “Advanced Policies” > “Policy” and click on “Add” for Create authentication policies.

We indicate a name, in my case “192.168.1.250_LDAP_adv”, in Action Type Indicate “LDAP”, we select in Action our regular LDAP Server, the one we already had initially in our environment. In Expression Indicate True & click on Create!
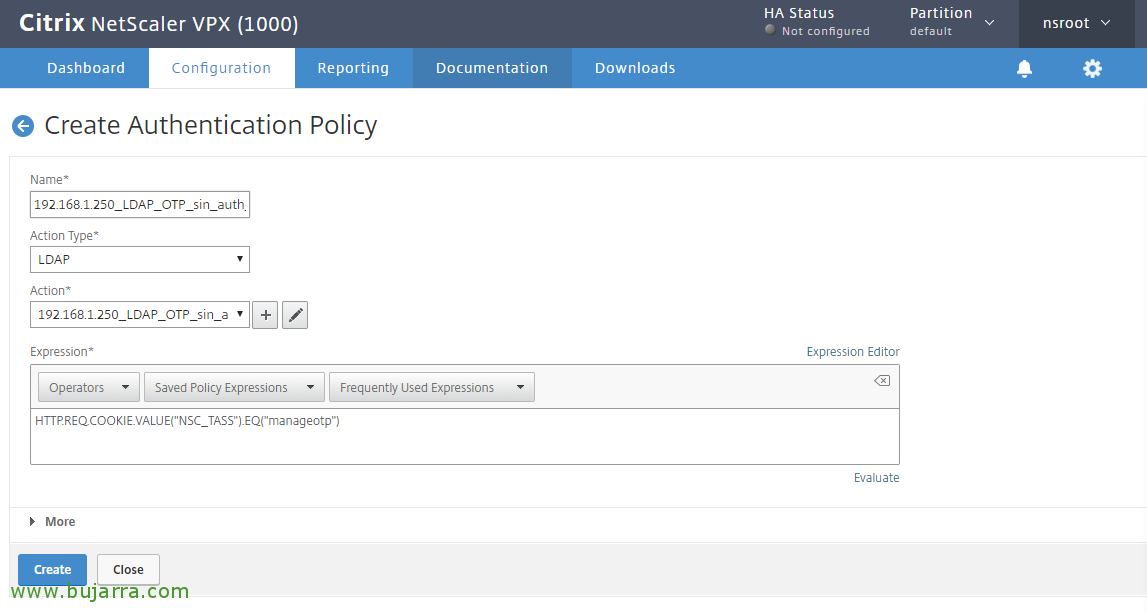
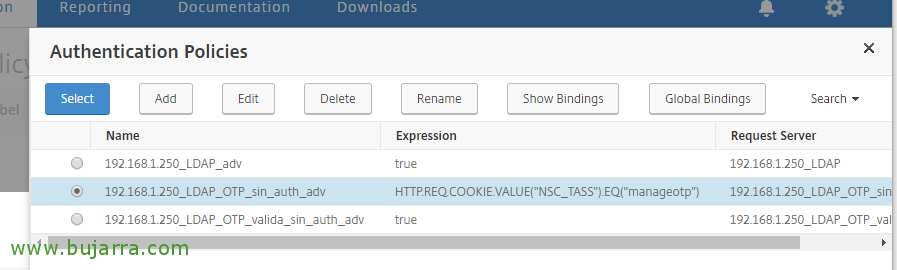
We create another new policy, this will be used for OTP management, I call her “192.168.1.250_LDAP_OTP_sin_auth_adv”, in Action Type Select “LDAP”, in Action we associate it with the LDAP server that does not have an auth and also does not have the configured filter, which is the first one we have created, In my case it's “192.168.1.250_LDAP_OTP_sin_auth”. And in Expression Indicate: HTTP. REQ. COOKIE. VALUE("NSC_TASS").EQ("manageotp") and click on Create.

And We create a last new policy, will be used for verification, I call her “192.168.1.250_LDAP_OTP_valida_sin_auth_adv”, in Action Type Select “LDAP”, in Action we will associate the LDAP server that does not have authentication enabled, that does have OTP secret and search filter configured, in this case it was “192.168.1.250_LDAP_OTP_valida_sin”. In Expression Indicate True and click on Create.
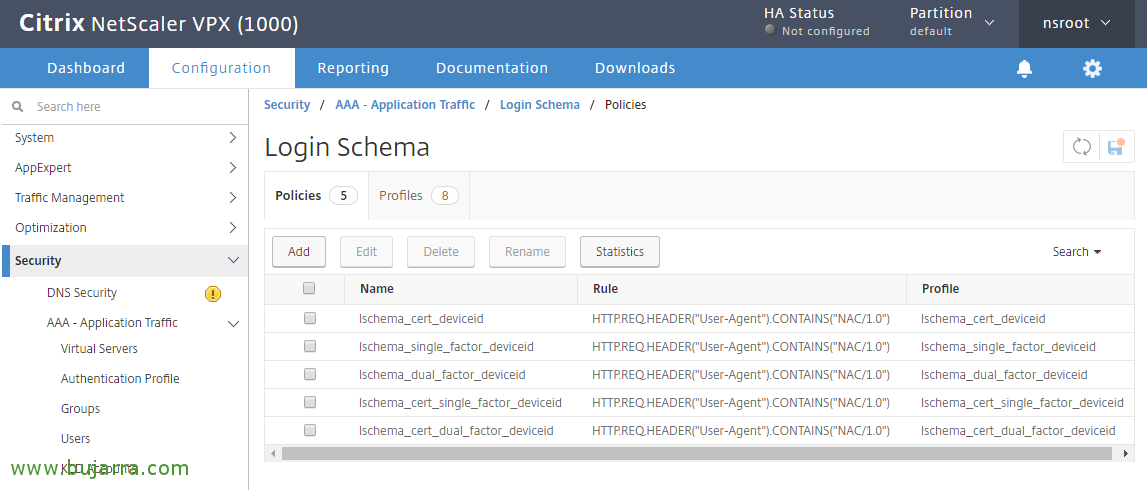
Login Schema,

We're going to “Security” > “AAA – Application Traffic” > “Login Schema” > “Profiles” > “Add”,

We will create here the Simple Factor Login Scheme for ManageOTP, We give you a name for example “Single_Manage_OTP_Login_Schema” and in Authentication Schema We press the pencil to edit,

We filter and search for the file SingleAuthManageOTP.xml, and click on “Select” to select this scheme, We click on “Create”.

Click on Create,
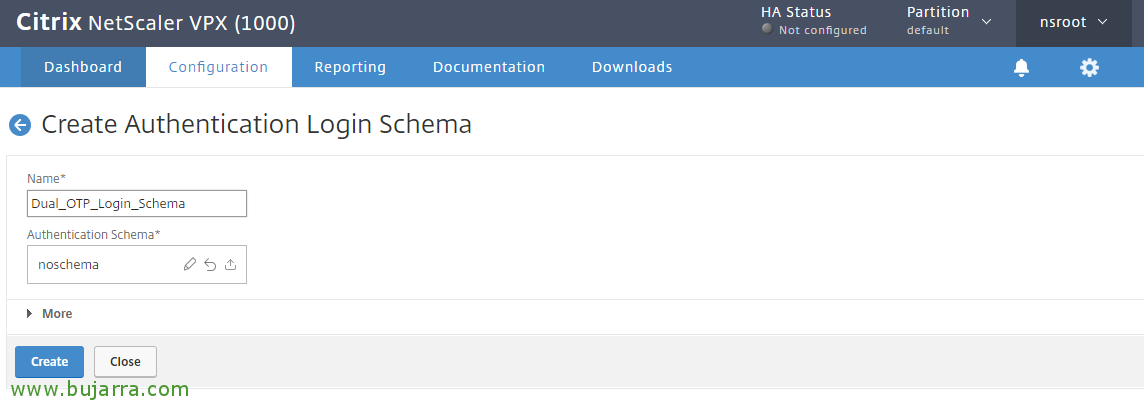
We create another login schema profile, this time for two-factor authentication, We call it whatever we see fit, In this case “Single_Manage_OTP_Login_Schema” and in Authentication Schema Re-editing,

And we proceed in the same way, We filter this time and search DualAuth.xml, Click on “Select” and in “Create”,
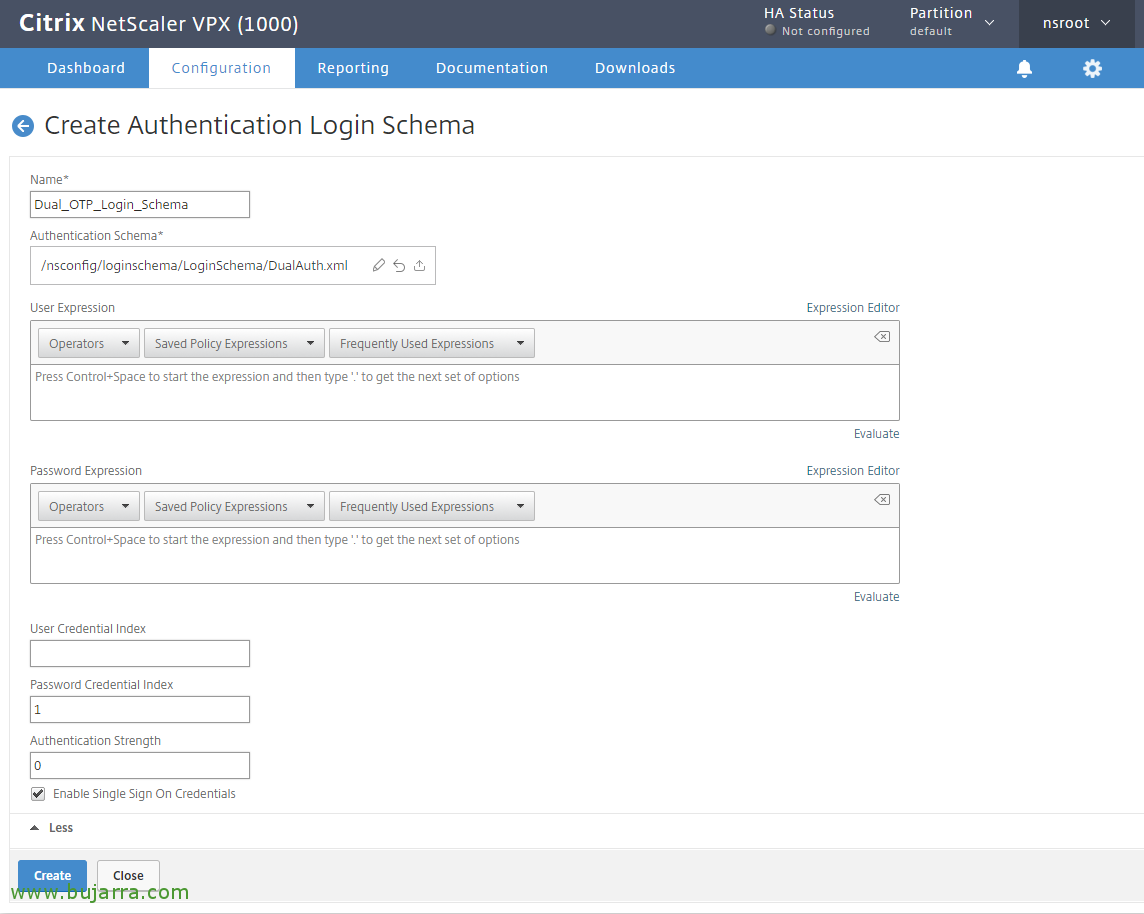
Click on More… We add in Password Credential Index one 1 to indicate the field that stores the user's password, Click on “Enable Single Sign On Credentials” and in “Create”,
GOOD, now in the tab “Policies” Let's create your policies, Click on “Add“,
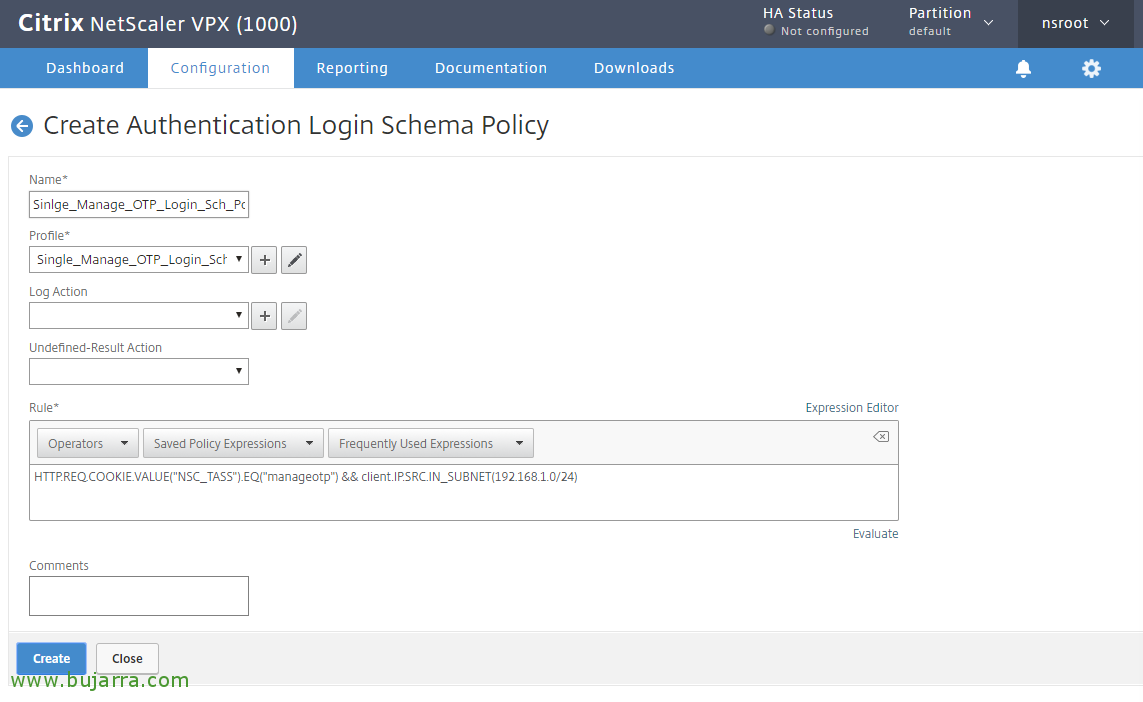
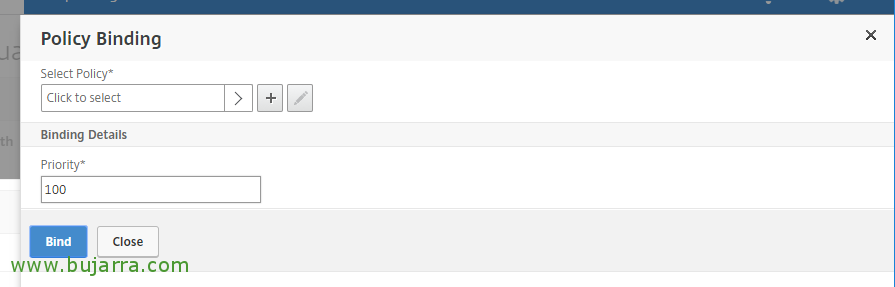
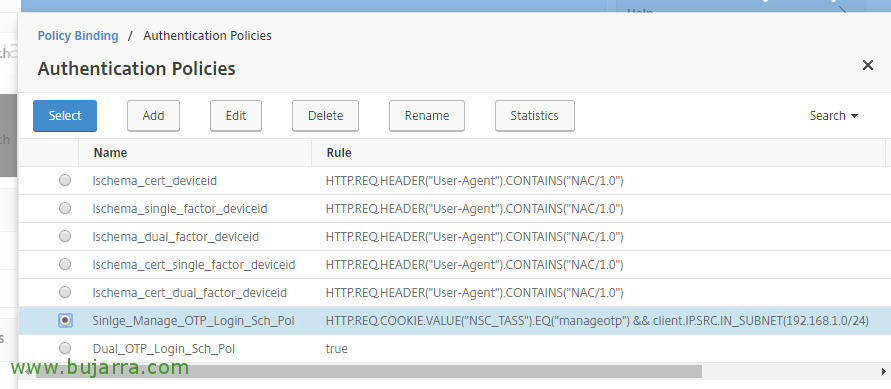
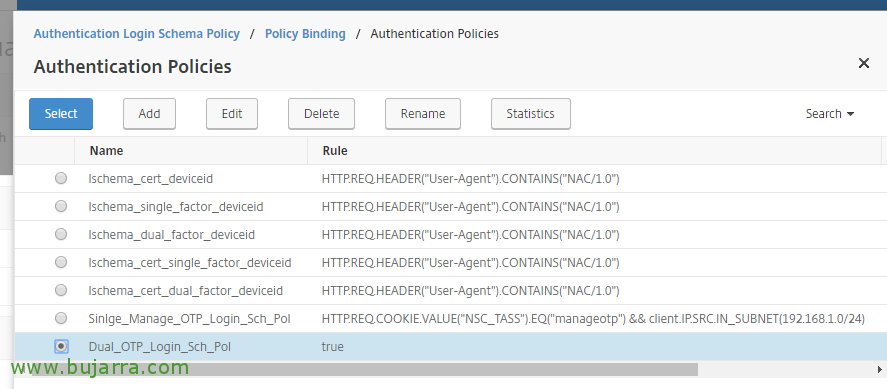
We give a name to politics (Pej:”Single_Manage_OTP_Login_Sch_Pol”) that will be associated with the profile we have created with the Simple Factor Login Scheme, What was it “Single_Manage_OTP_Login_Schema” and create a rule so that it only shows this portal if the user accessed /manageotp. And if we want to, we can also add the local IP range of our network so that they can only be registered from within our network (for the same security reasons), We add the rule:
http.req.cookie.value(“NSC_TASS”).Eq(“manageotp”) && client. IP. SRC. IN_SUBNET(192.168.1.0/24)
Click on “Create”,
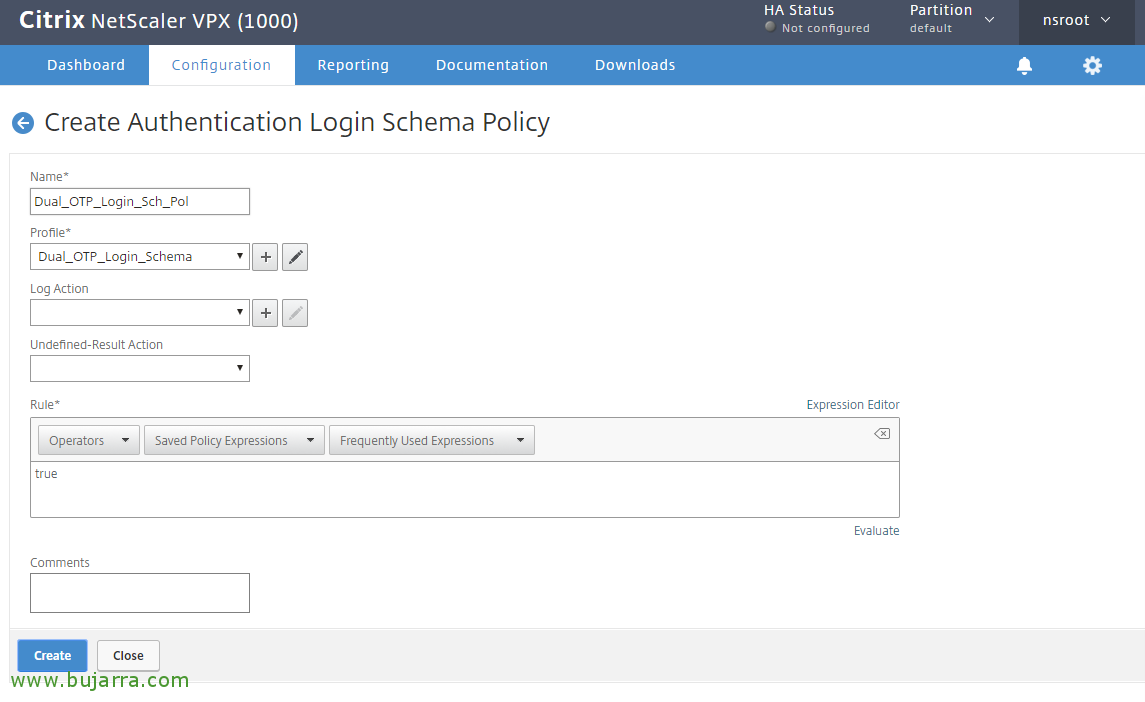
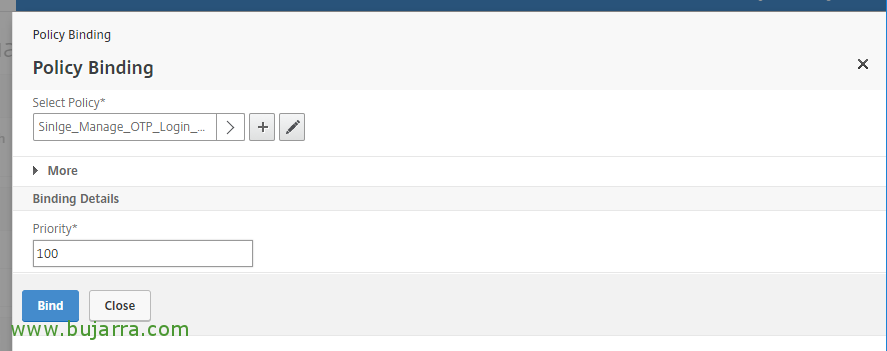
We create another policy, this time for the two-factor authentication profile, We give it a name, For example “Dual_OTP_Login_Sch_Pol” and select our previously created profile, in this example it is “Dual_OTP_Login_Schema”. In Rule Indicate True and click Create!
Authentication Policy Labels,

We follow, Now let's go to “Security” > “AAA – Application Traffic” > “Policies” > “Authentication” > “Advanced Policies” > “Policy Labels” > Add”
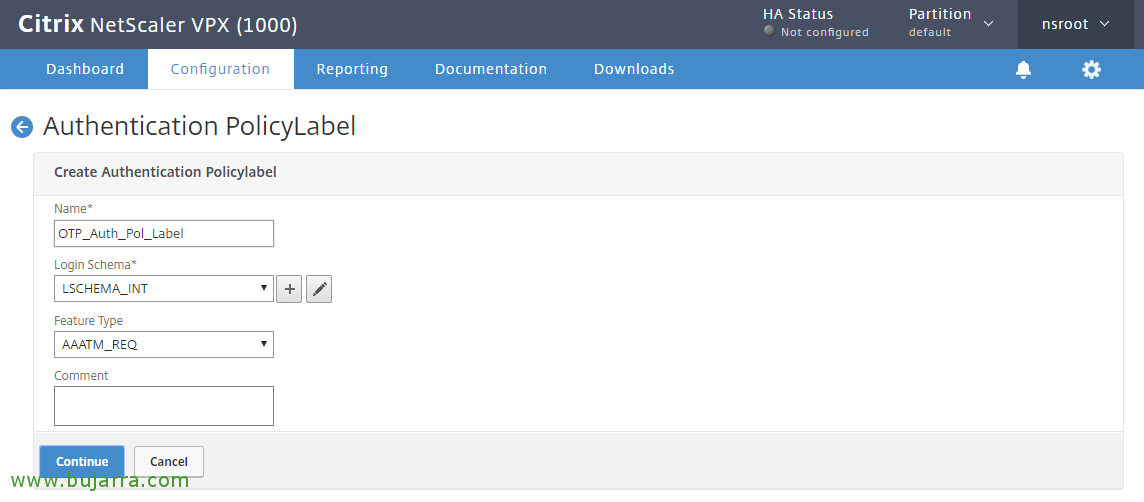
To be used for OTP management and verification, We give you a name “OTP_Auth_Pol_Label” and we associate him in Login Schema The LSCHEMA_INT, click on Continue,

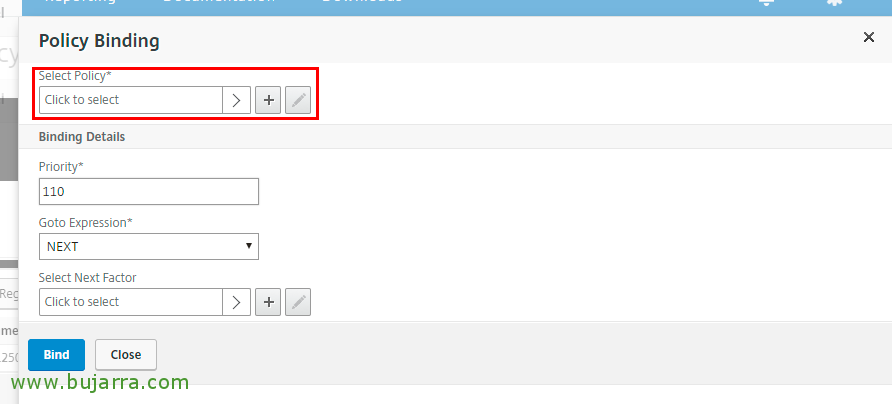
Click on Policy Binding,
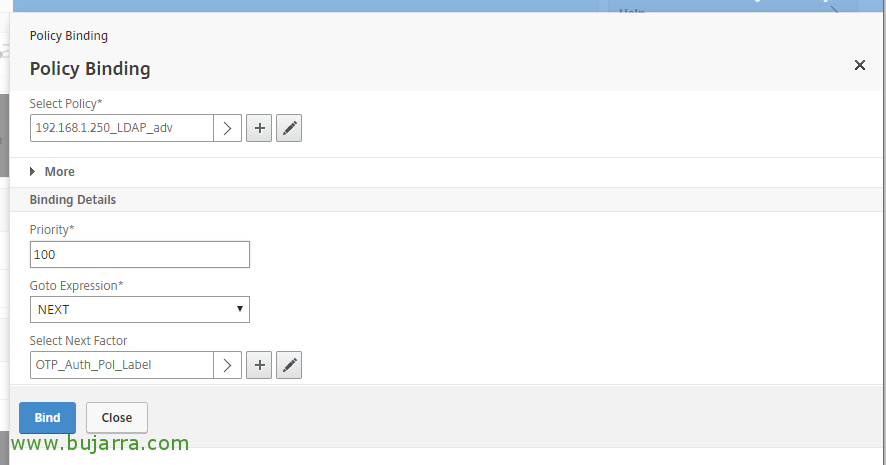
And We select the policy that I didn't have the auth enabled and only had the OTP secret in my case it was “192.168.1.250_LDAP_OTP_sin_auth_adv” and we give “Select”,

Click on “BIND”,

Click on “Add Binding” for Add another policy,
Click on Select Policy,

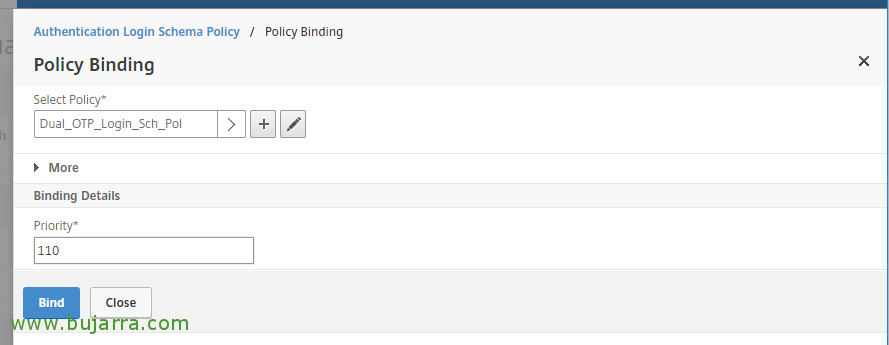
And we selected the policy that checks the OTP in my case was “192.168.1.250_LDAP_OTP_valida_sin_auth_adv”, We give “Select”,
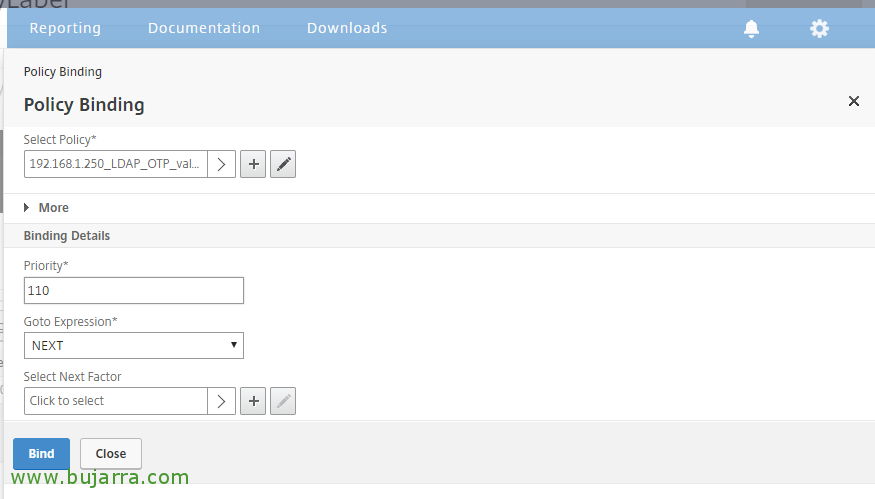
And we give you Less priority than to the policy of mageotp, and we give “BIND”,

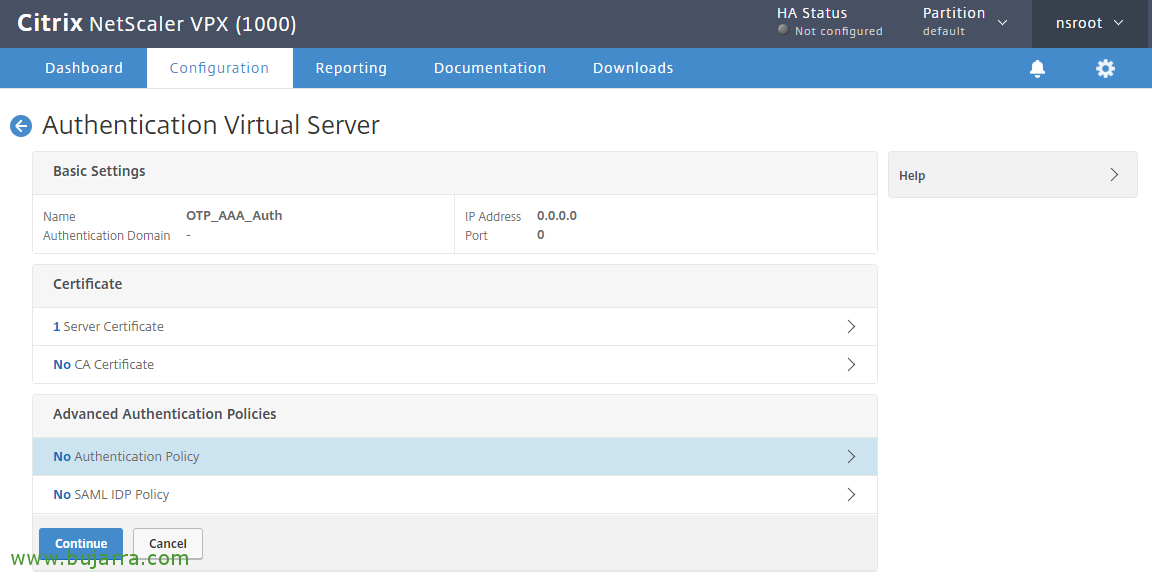
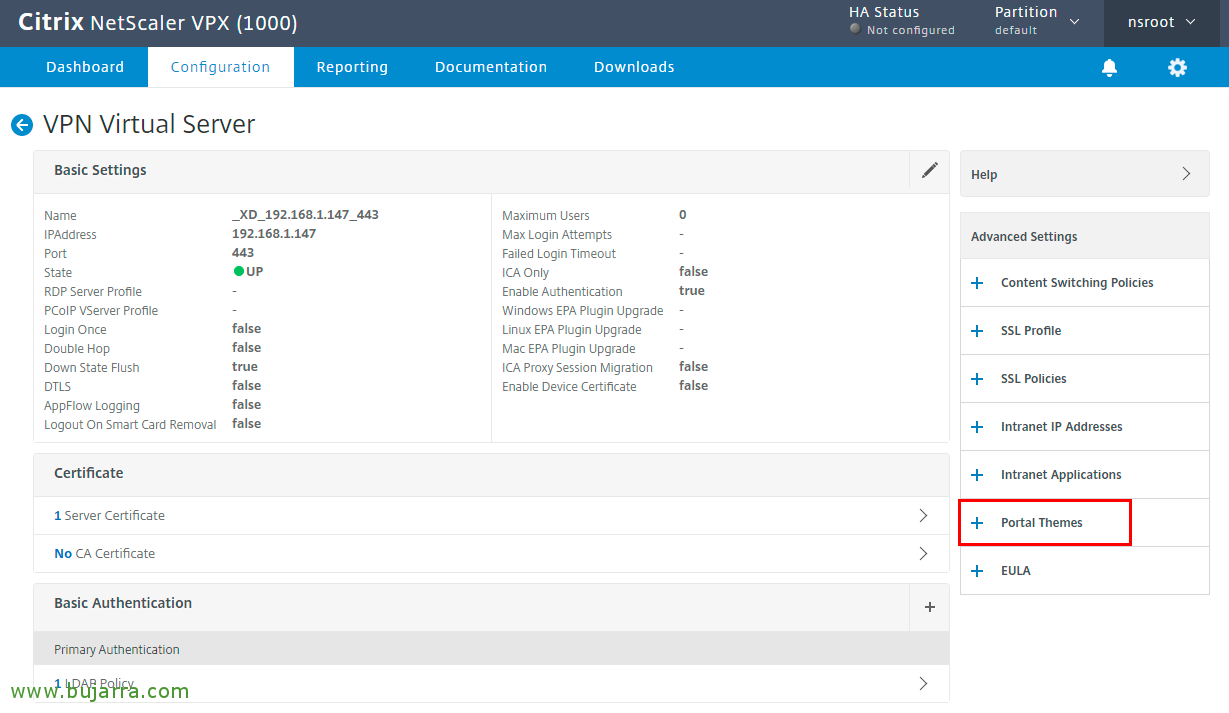
We're going to “Security” > “AAA – Application Traffic”, We enable it > “Virtual Servers” > “Add”,
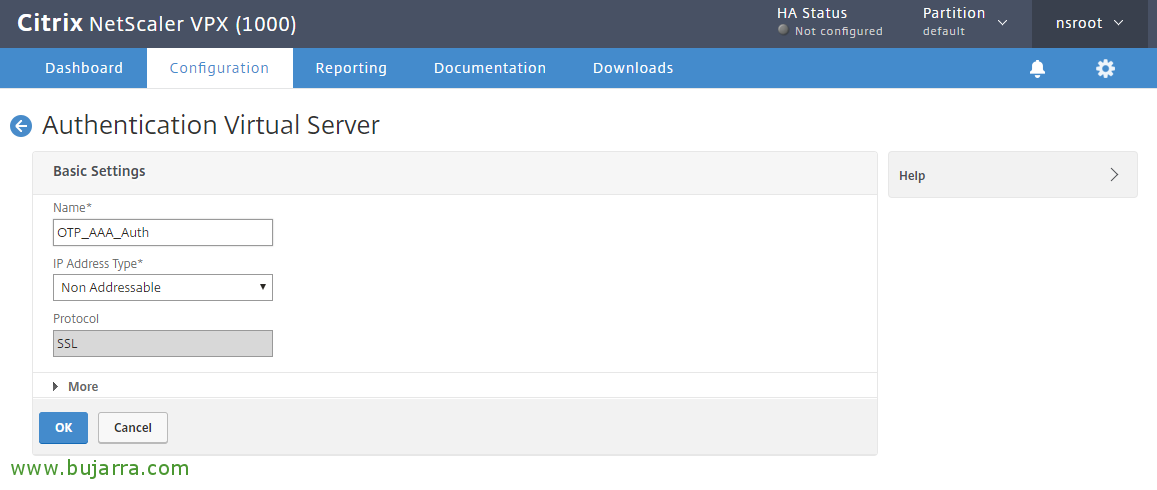
We create an authentication server for OTP, It doesn't need to be addressed, We indicate a name in this case “OTP_AAA_Auth”, in IP Address Type Indicate “Non Addressable” and click on “OK”.

Click on “No Server Certificate”,
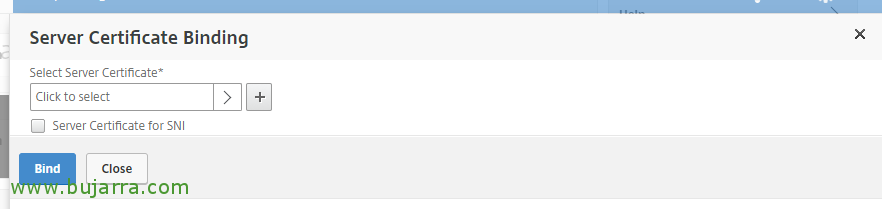
Click on “Select Server Certificate”,

And we choose the certificate that we have already installed and valid, in my case a Wildcard, “Select”,

“BIND”,

“Continue”,
Click where it indicates “No Authentication Policy“,

Click on “Select Policy”,
And we select our usual LDAP authentication policy, the one with authentication enabled,

Click on “Select Next Factor”,

And we select the Policy Label that we have created for OTP.
Click on “BIND”,

Click on “Continue”,

We click on the Menu on the right in “Login Schemas” and we add one from “No Login Schema”,
Click on “Select Policy”,
And we select our login policy “Single_Manage_OTP_Login_Sch_Pol” single factor, “Select”,
“BIND”

Now, Click on “Login Schema” and “Add Binding”,

Click on “Select Policy”,
And we select the two-factor one which in this example is “Dual_OTP_Login_Sch_Pol”, & “Select”,
“BIND”,

In the right menu we look for and add a Theme for the portal since “Portal Themes”, Select RfWebUI.
Click on “OK”.
Traffic Policies,
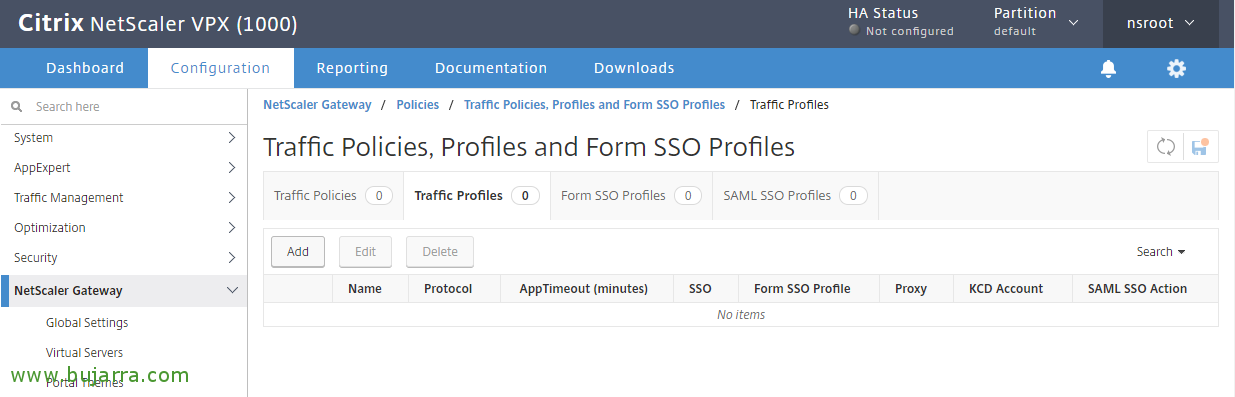
We're going to “NetScaler Gateway” > “Policies” > “Traffic” > “Traffic Profiles” > “Add”,
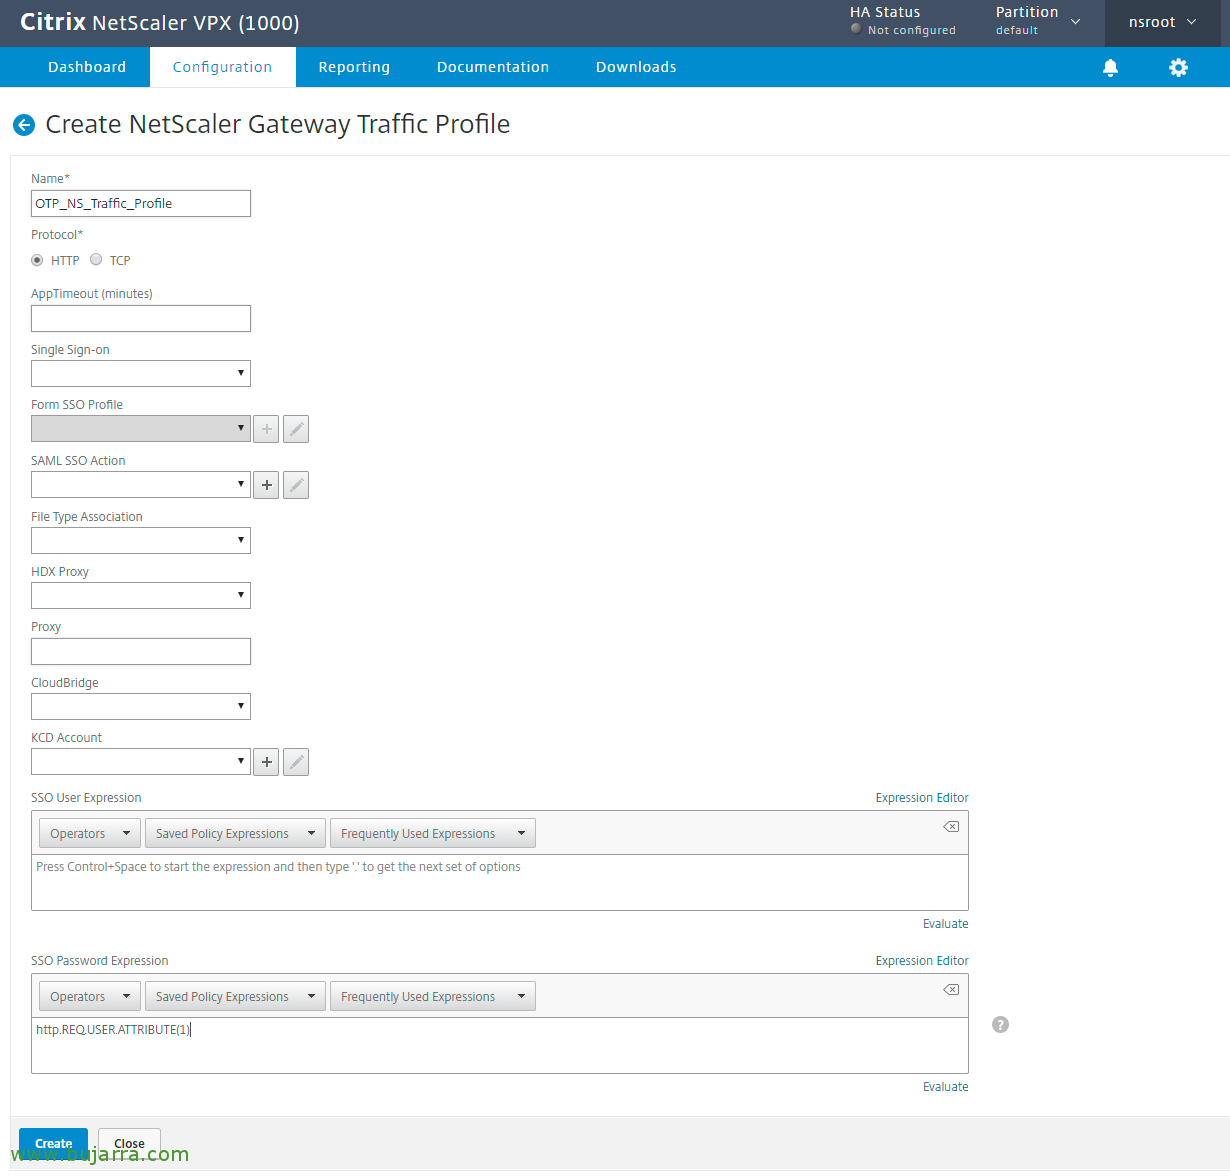
We create a traffic profile for OTP, We give it a name, in my case “OTP_NS_Traffic_Profile”, in SSO Password Expression Indicate HTTP. REQ. USER. ATTRIBUTE(1) and click on “Create”.
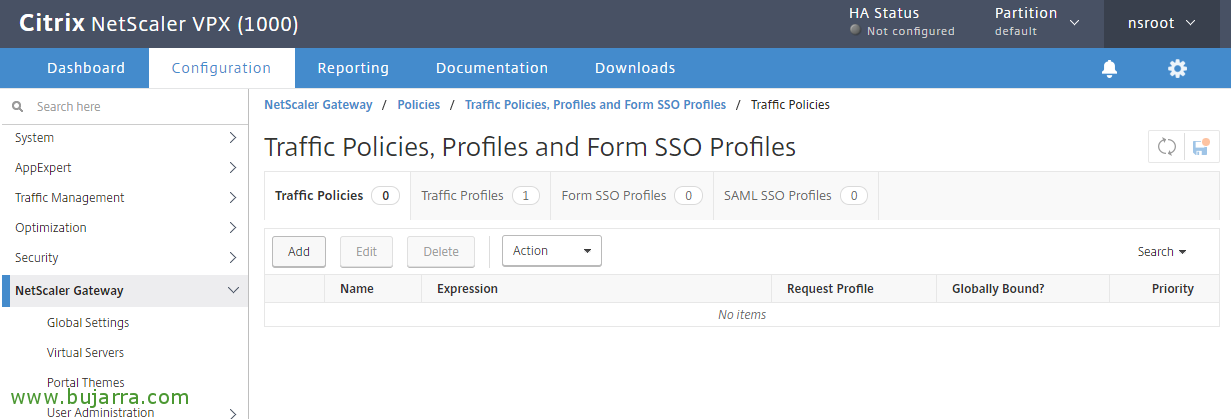
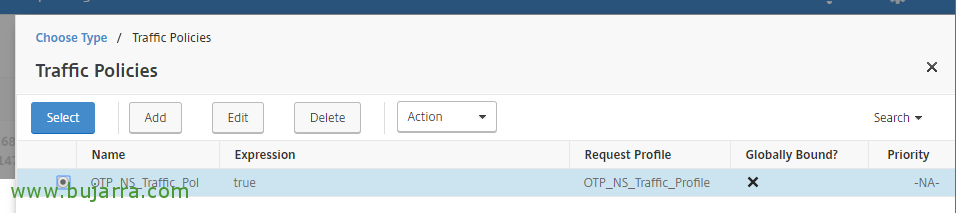
We create a policy from “Traffic Policies” > “Add”,
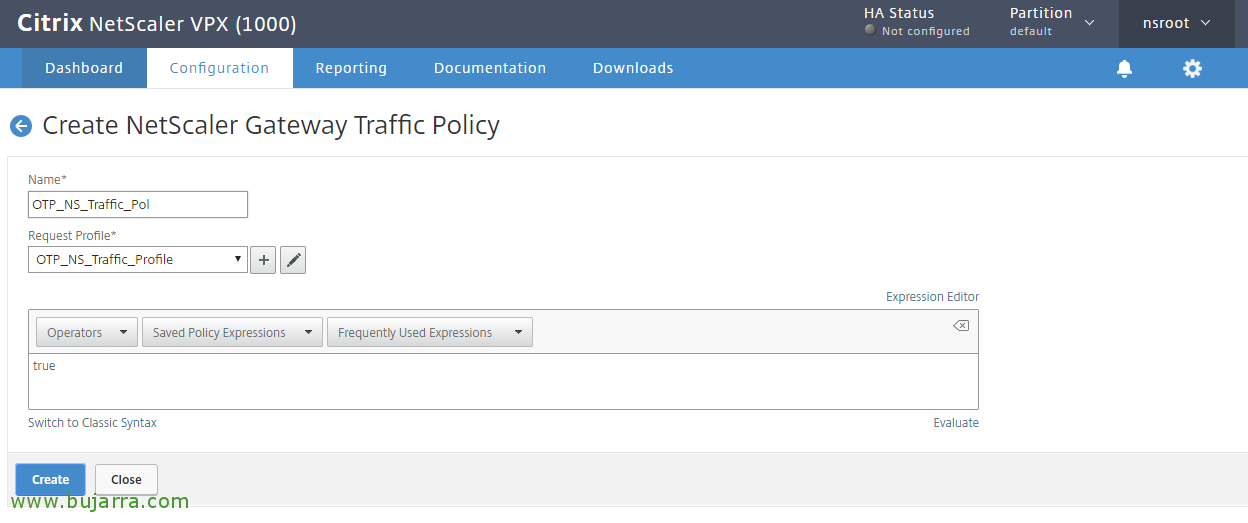
We give you a name “OTP_NS_Traffic_Pol”, Select the profile we have just created”OTP_NS_Traffic_Profile”, Click on “Switch to Default Syntax”, we leave as an expression True and click on “Create”,
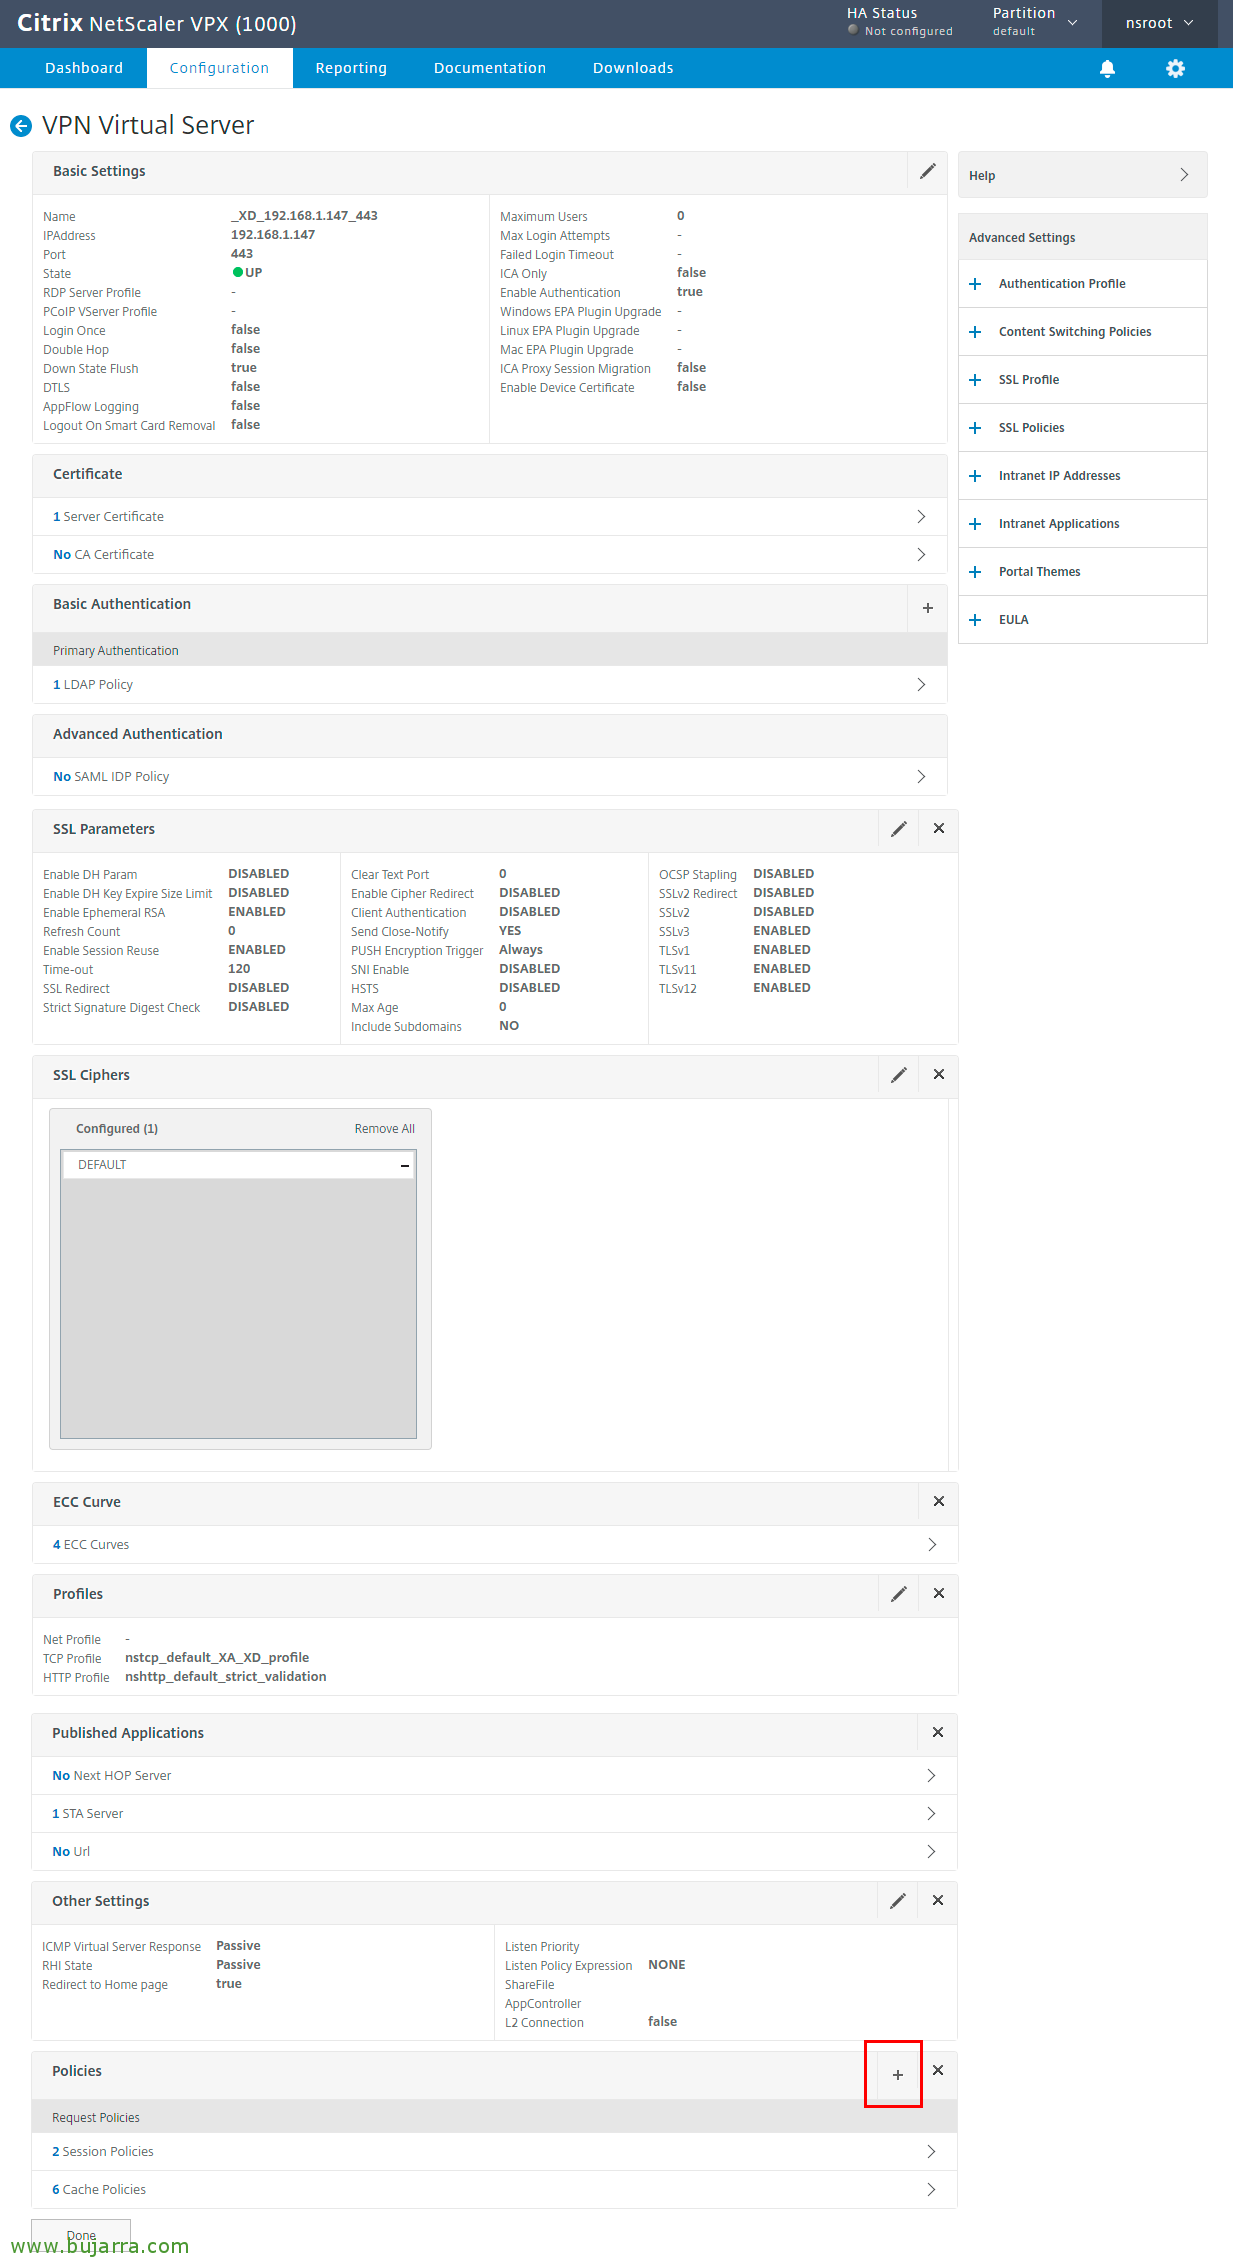
We're going to edit our NetScaler Gateway virtual server, We're going to “NetScaler Gateway” > “Virtual Servers” > We select ours > “Edit”. And we add policies!
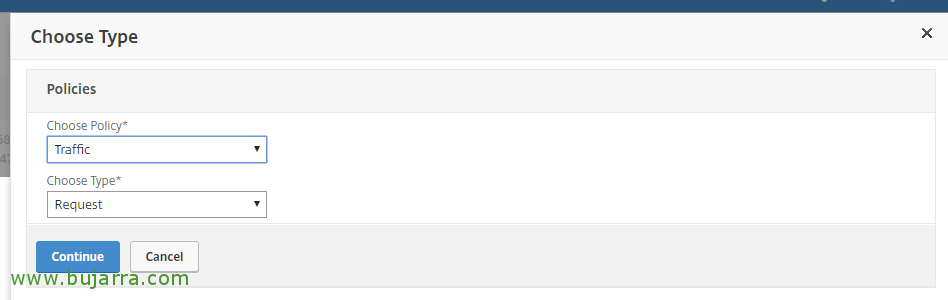
In “Choose Policy” we choose from type Traffic, “Continue”,
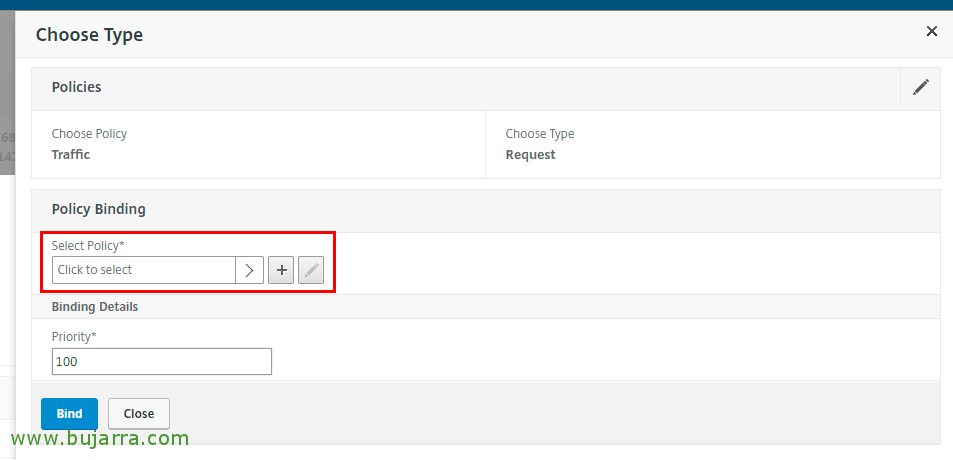
Click on “Select Policy”,
We select the newly created traffic policy, What was it “OTP_NS_Traffic_Pol” & “Select”,
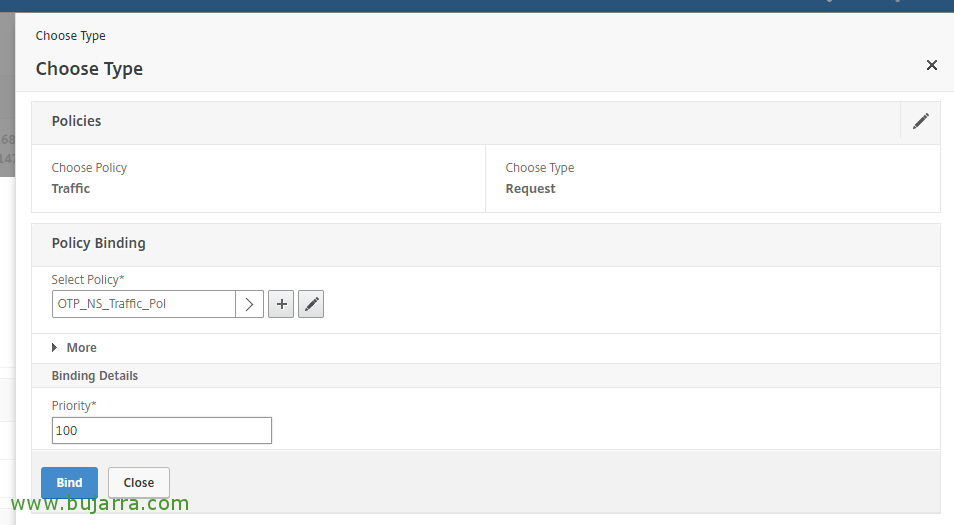
“BIND”,

In the menu on the right we add the “Authentication Profile”,
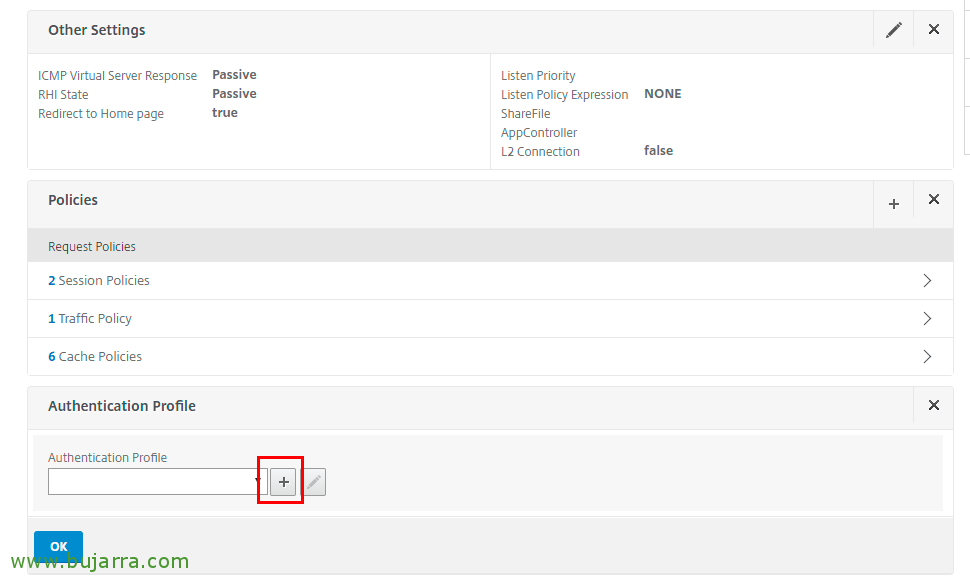
Click on the more than “Authentication Profile”,

We create a profile that we link to the authentication server we have created, we give it a name and click on “Authentication Virtual Server”,
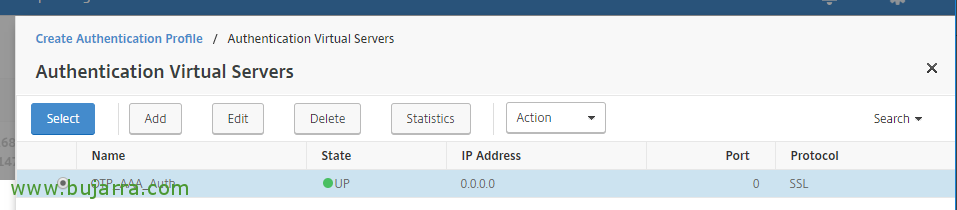
We select the server, What was it “OTP_AAA_Auth” & “Select”,

Click on “Create”,
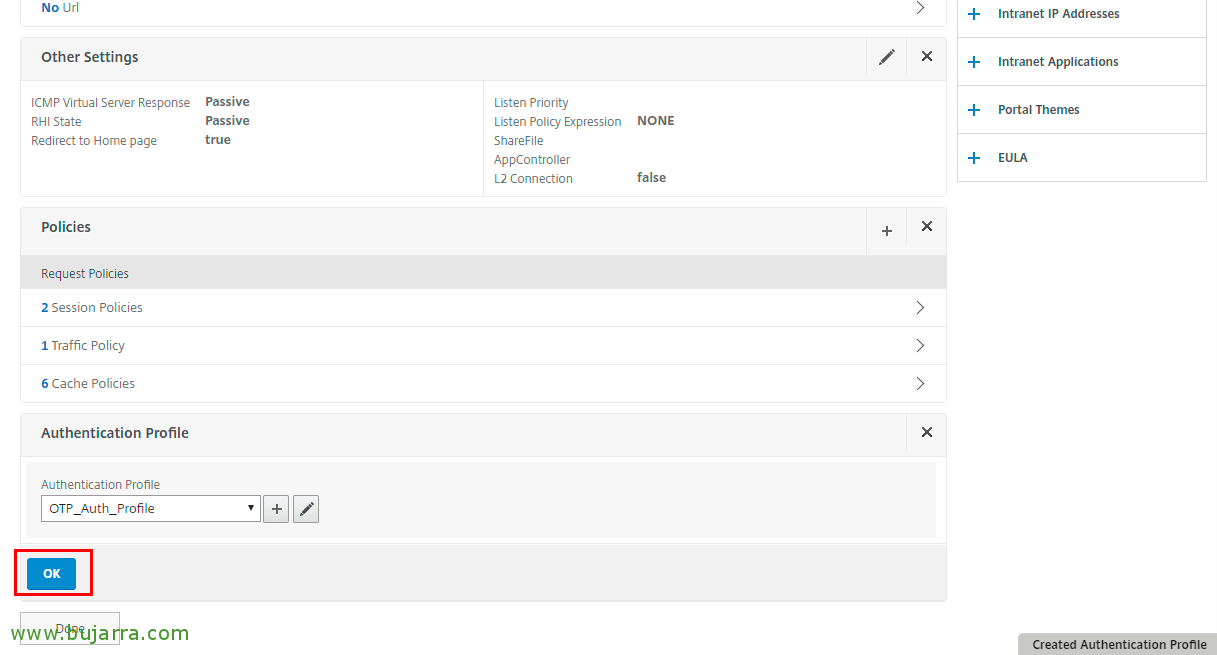
Click on “OK”,
We also add the portal theme to the virtual server from “Portal Themes” on the right,
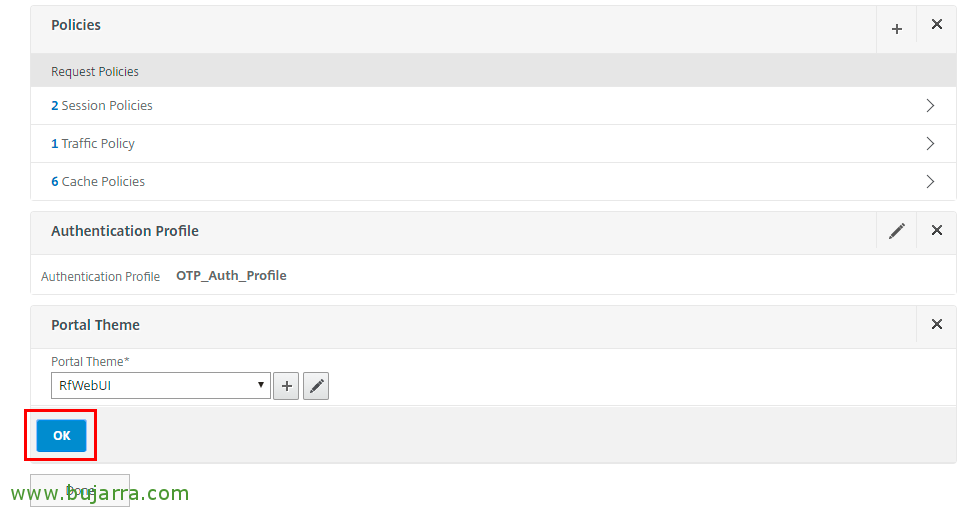
We select the portal RfWebUI,
“OK” and save the settings, Even if you don't believe it… That's it!!!! Almost nothing…
OTP Management Portal,

As a user, first, We should access our corporate portal to register our mobile device, but adding /manageotp to the end of the URL, For example: https://citrix.openservices.eus/manageotp, the user will need to be validated with their AD credentials.
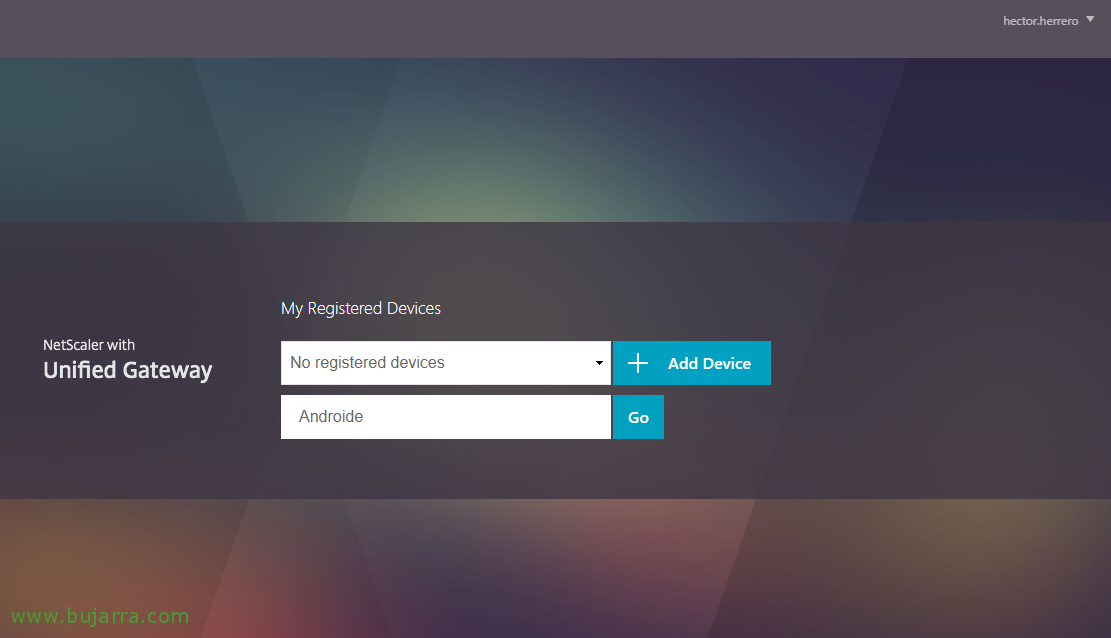
And from here you can add a new device to use as a token, I would give it a name and “Add Device”,
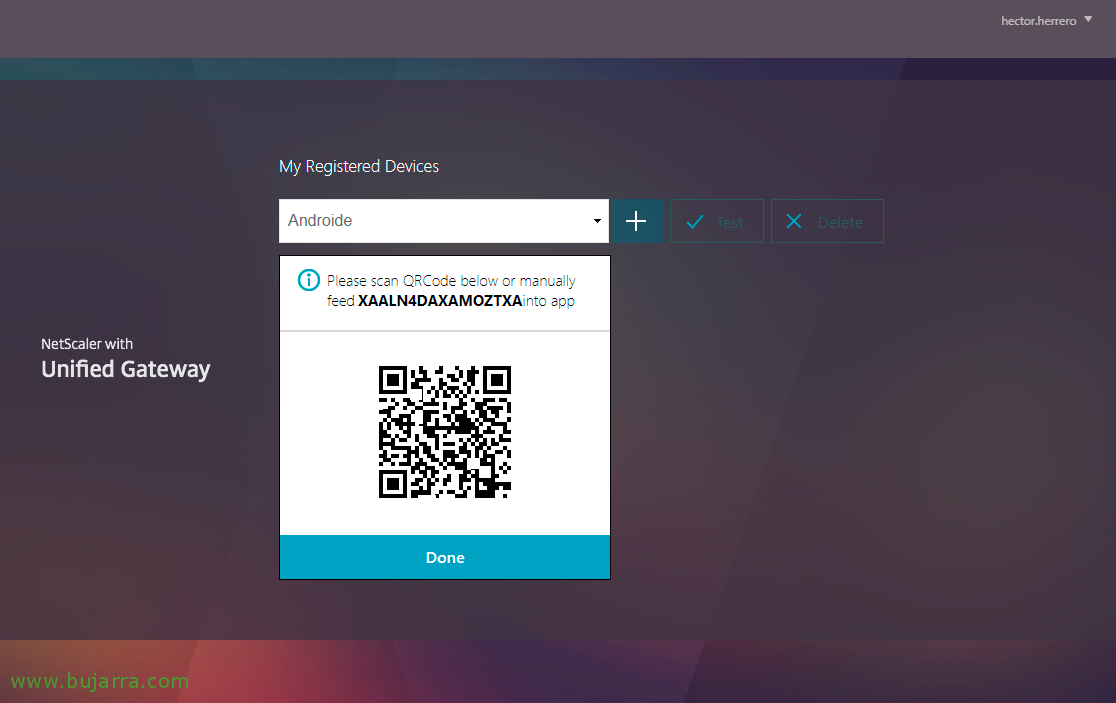
You will get a QR code that you should scan to link with your Google Authenticator app that is available both on Android for generic devices and on iOS for iPhone or iPad.
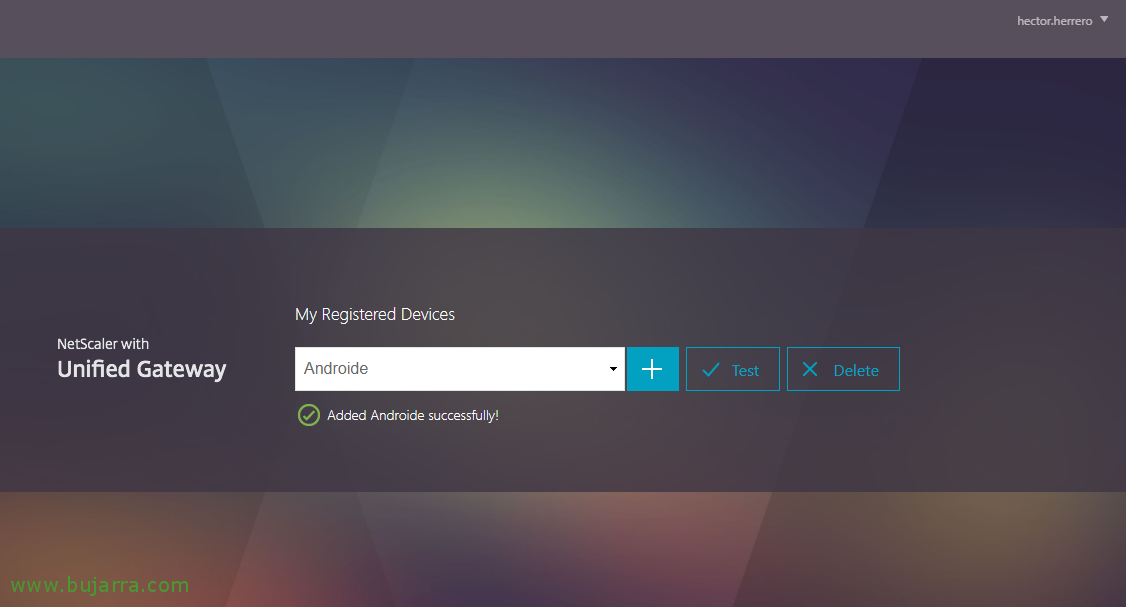
And it will tell us that it was successfully registered!

Now the user will be able to enter their usual corporate portal and continue working normally, when you access as we see, you will have to enter your credentials as usual and then the OTP or one-time password that you will get from the mobile.
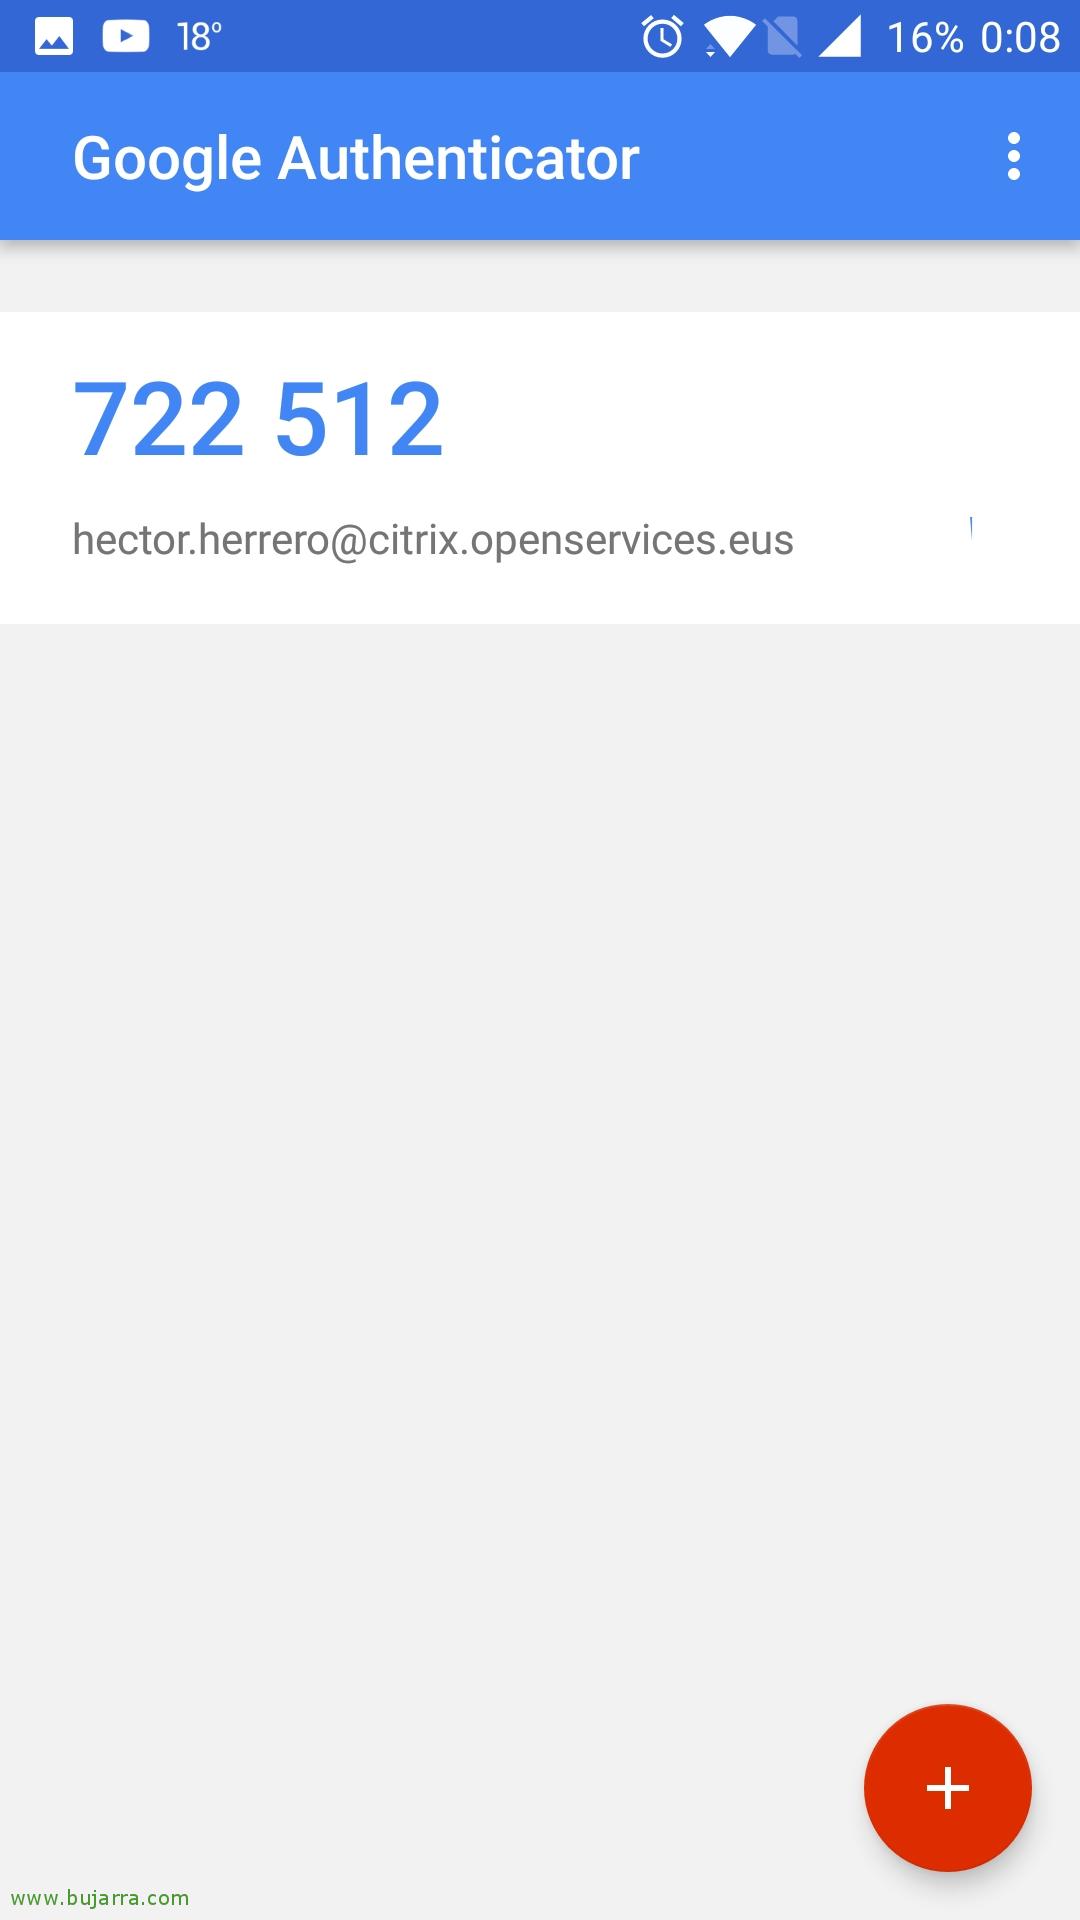
And that's it! This would be a screenshot of what the user would see, that would be the code that is randomly generated for you and you must enter when you need to. Something long to set up but with great results in terms of obtaining much more security in our environment. They will never again be able to steal our users' credentials!


