
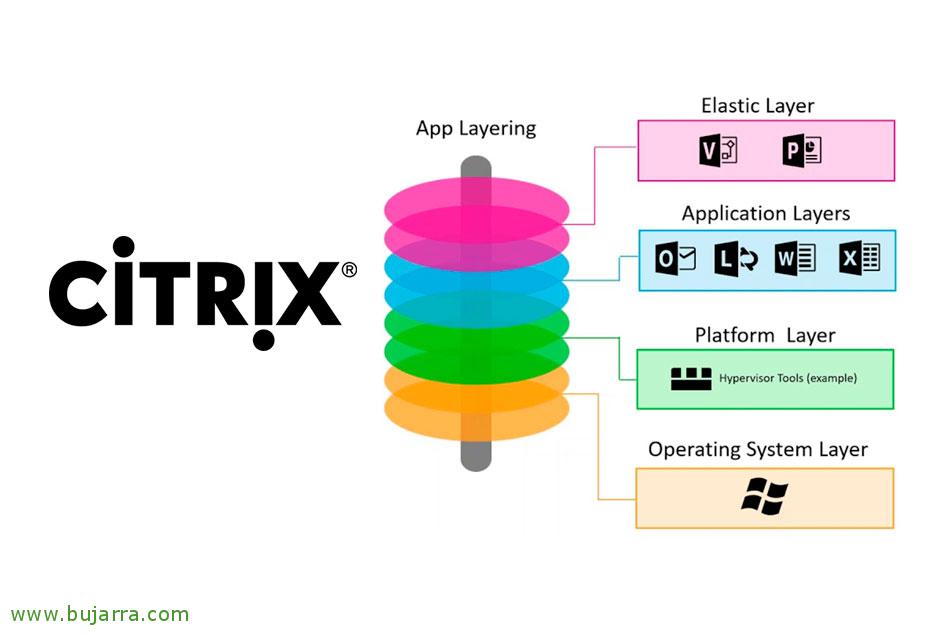
Managing OS Layers, platform, apps and user with Citrix App Layering

Citrix App Layering is a new solution from Citrix for designing our OS layers., Software or User Data. In January 2017 Citrix acquired Unidesk, in order to have a tool that allows us to reduce the number of images to be kept, both in desktop pool environments and RDHS servers. We will arrange the OS in separate layers, the tools and drivers that are needed, as well as isolating each app in different layers; which we can then associate and deliver as we see fit, either per user or per VDA machine. We will be able to have a single layer of our corporate Windows, that when we need to update we will do it only once, and we will display it to the rest of the images.
Last, And strange as it may seem, Yes, App Layering is available for all editions of Citrix Virtual Apps and Desktops, although Premium will have the possibility to add multiple connections to different hypervisors/cloud, they will be able to combine both MCS and PVS and also use third-party brokering, such as VMware Horizon View.
I leave you the order that we will follow in this document:
- Deploying the Citrix Enterprise Layer Manager appliance
- Citrix App Layering Basic Configuration
- Installing the Citrix App Layering Agent
- Creating an OS Layer
- Creating a Platform Layer
- Creating an Application Layer
- Creating Images
- Associating Layers to Users
- Creating a new version of an application layer
Deploying the Citrix Enterprise Layer Manager appliance

First of all, will be to download the appliance offered by Citrix from its official website: https://www.citrix.com/downloads/citrix-app-layering/
The appliance is available for Citrix Hypervisor (or XenServer), Microsoft Hyper-V, Microsoft Azure, Nutanix AHV or VMware vSphere.
In this case we will use vSphere, we import the downloaded OVA template into vCenter as usual.

We confirm that we are importing Citrix Enterprise Layer Manager (ELM), We currently have the 19.11 and indicates that with thin disk it will weigh approximately 9.7GB of disk and in thick format 330GB.
So in the following steps we will indicate on which host or cluster we will deploy the appliance and the format of the disk,
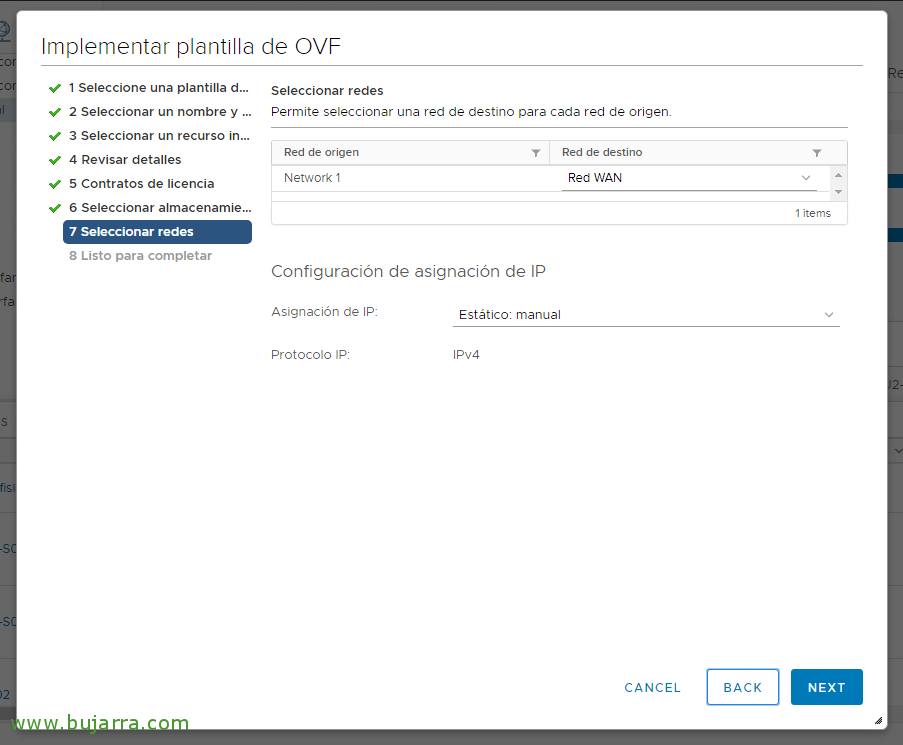
We will select the network interface of this appliance, which virtual network we will connect it to and whether we want static or dynamic IP addressing, although we can change this later.

We confirm that everything is correct in the summary of the OVF template import, and click on "Finish" to start unfolding it.

After a few minutes, At the end, We will verify that the appliance will turn on automatically.
Citrix App Layering Basic Configuration

To begin the base configuration, We'll start with the network. We will open the VM console once it is booted.
By default, we will be able to log in with the administrator user with Unidesk1 password
We will get a menu where we can, inter alia, Configure the network (by pressing 'C'), the time zone (by pressing 'T') or NTP time servers (by pressing 'N').

Once the appliance has an IP address, we will open the browser and access its URL.
We will need Microsoft Silverlight installed.
And we log in with the default credentials, Same as before, administrator with Unidesk1 password
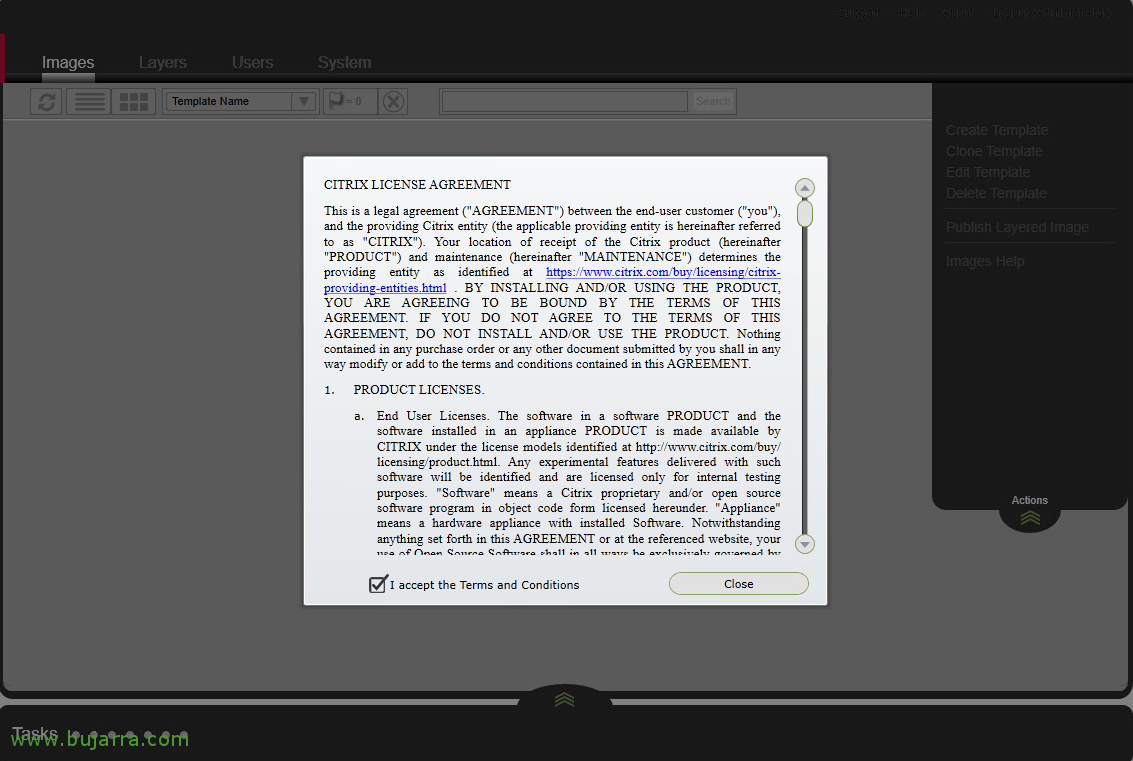
The first time we enter, We will need to accept the licensing agreement. "I accept the Terms and Conditions"
"Done",
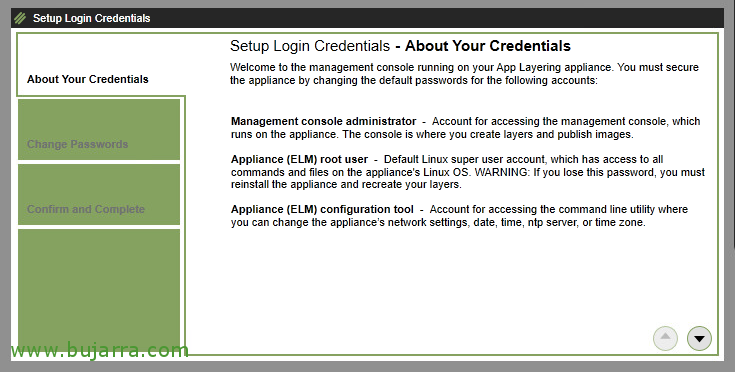
Then we'll get an assistant that will force us to change the passwords of the users we'll use to manage the appliance.
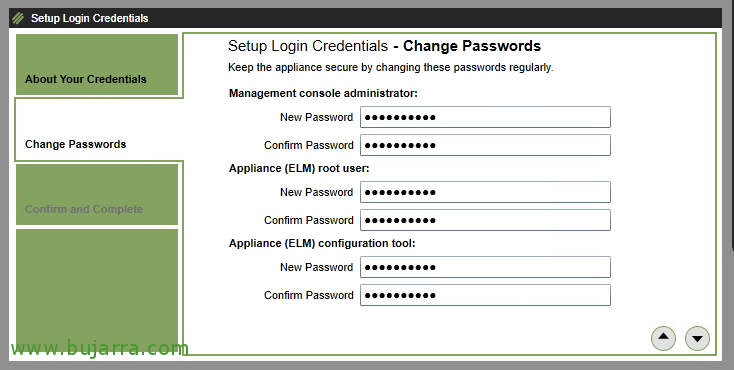
We will have to change the password for the 'administrator' of the ELM administration console, the password for the root user of the appliance system and the password for the configuration tool.
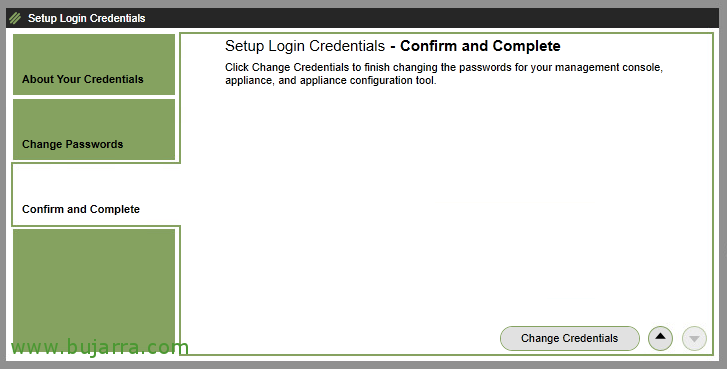
Click on "Change Credentials" to apply the changes.
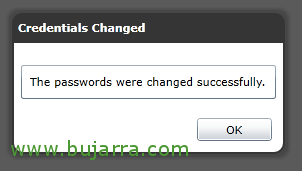
"OK", It seems that everything was correct.

He welcomes us with an assistant where he tells us the steps we must follow, where we'll first set up App Layering, then we must create the layers that interest us to finish delivering them to users or machines.
"Close",

If we go to "System" > "Settings and Configuration", We will have several things that we can change, It would be interesting to install the certificate that we are interested in presenting, instead of the default self-created.
Click on "Edit" in the "Network File Shares" section.

Here we will need to add an address of an SMB shared folder in UNC format. We indicate the user with access privileges. And click on "Test SMB File Share" & "Save". This user will have privileges of at least being able to modify and ideally this is the user of the App Layering service.
This resource must also be accessed by the 'Authenticated Users' group as a reading.

The next thing will be to add our connection to the manager of our virtual layer, in this case we use VMware, add a connection to our vCenter server. From "System" > "Connection" > "Add Connection Config".
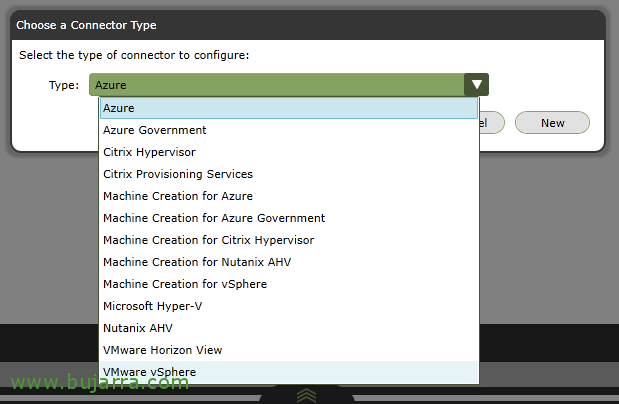
As we can see, We can add a multitude of environments, in this particular case we will connect against "VMware vSphere",
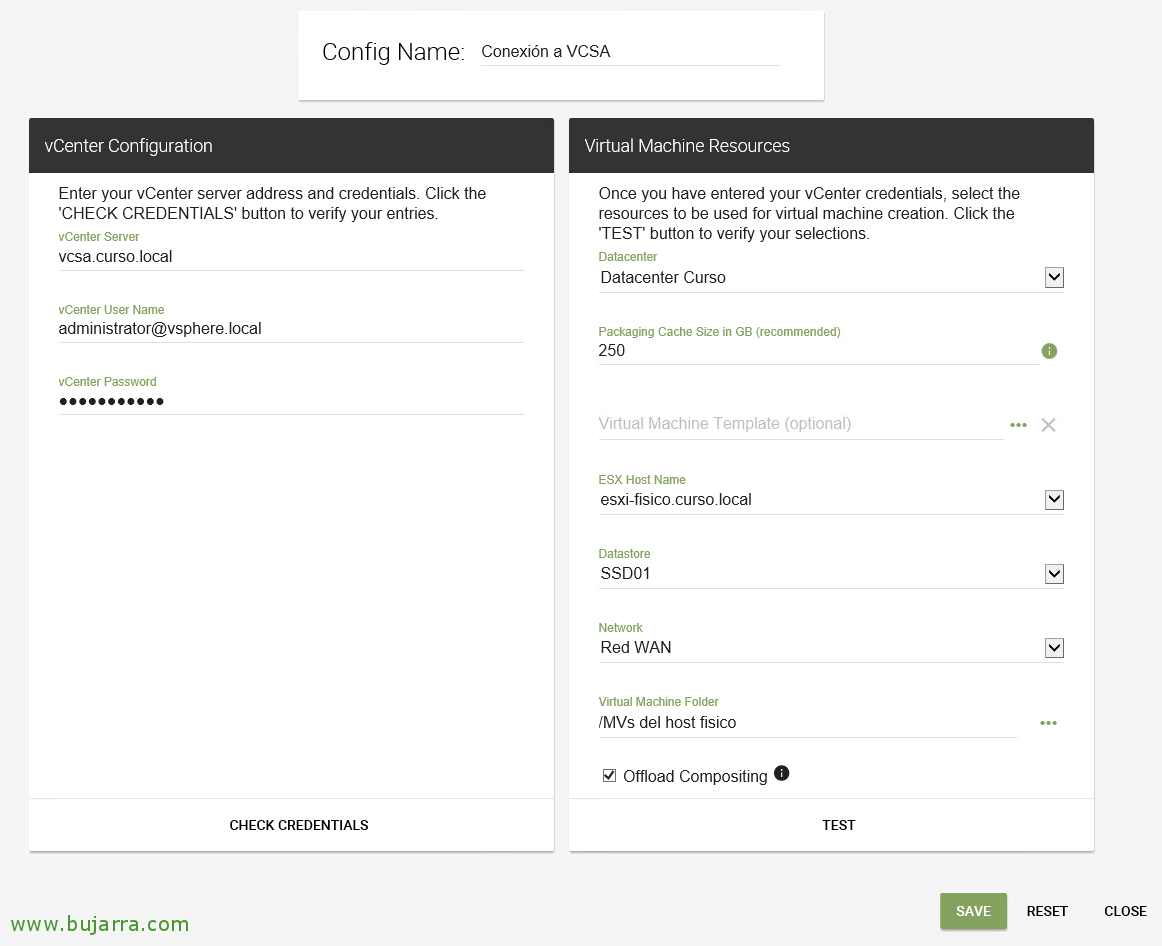
We give the connection a name and configure the access data, as a user with administrative privileges on the virtual platform. We verify with "Check credentials".
We select the Datacenter, The maximum size of the cache disk, We select the host, the datastore and the network where the machines we generate for App Layering will be created.
And we check "Offload Compositing".
As usual, we validate with "Test" and save the changes with "Save".
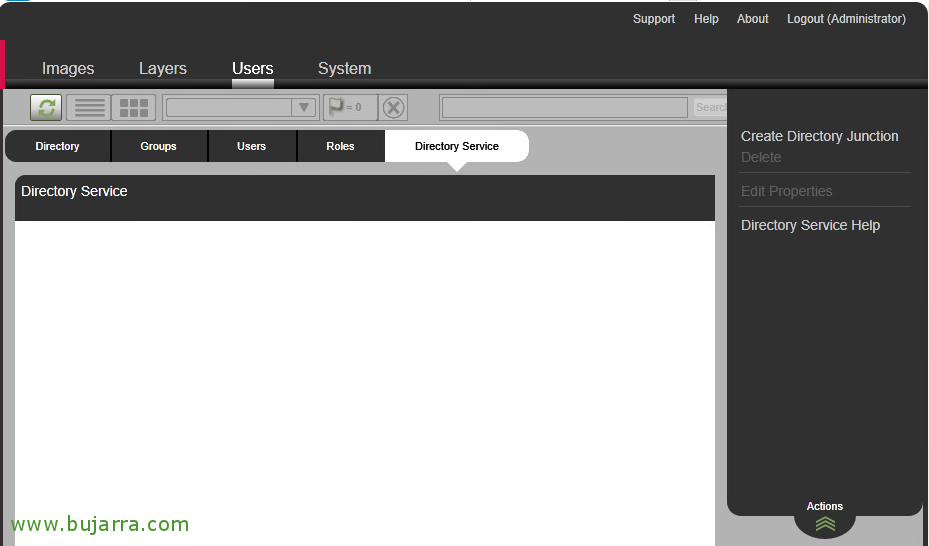
We will need to join ELM to our Active Directory if we want to assign layers to users or for a delegated administration using domain users.
From "Users" > "Directory Service" > "Create Directory Junction".
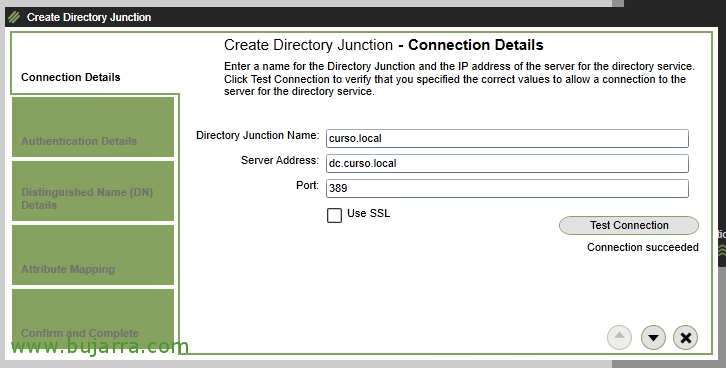
We give a name to the connection with our AD, we indicate a domain controller and specify whether we will use LDAP using 389tcp or LDAPS using 636tcp. "Test Connection",

Following the wizard, we will need to specify an account that has read privileges in our Directory service. We will specify the correct DN path of the account or directly in us*****@*****io.eso
"Test Authentication",
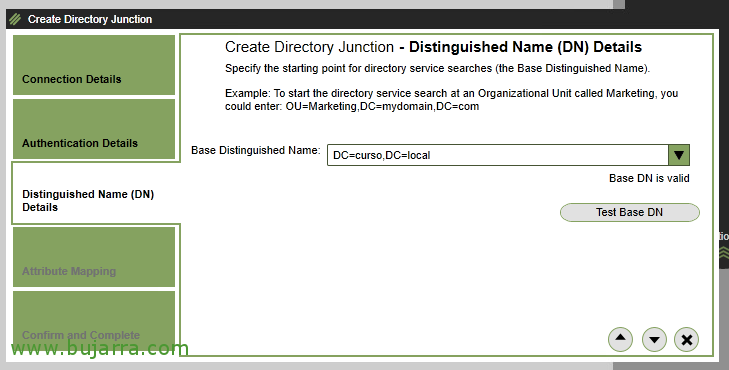
We indicate the DN Base, that is, what will be the path that contains the users/groups that we are interested in, being able to specify a specific OU or the entire tree.
"Test Base DN",
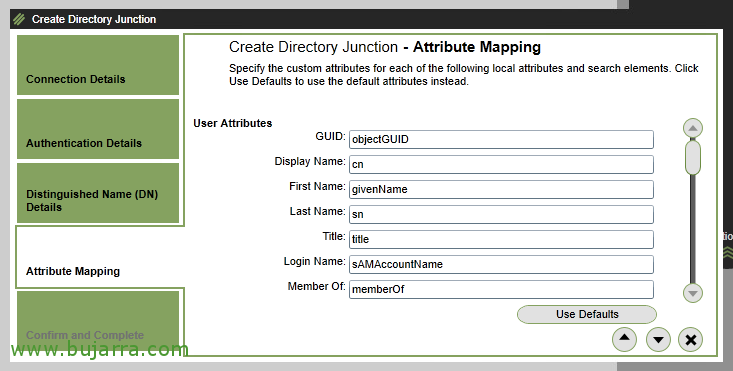
No need to modify any attribute mapping of AD objects. We continue with the assistant,
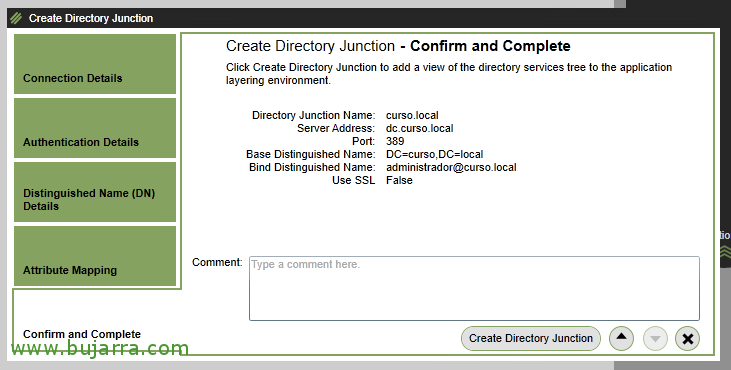
We confirm that everything is correct, click on "Create Directory Junction".
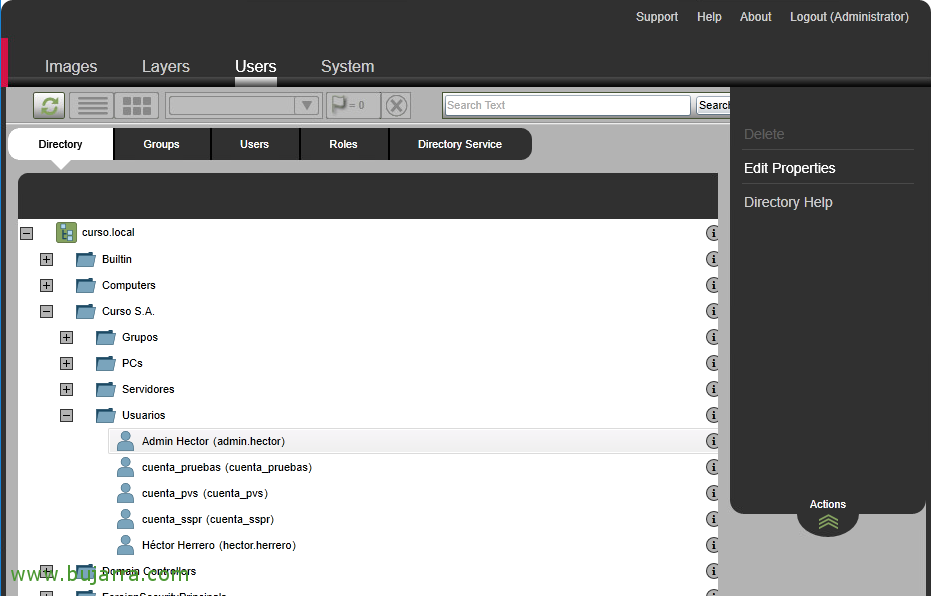
We can finally delegate permissions to Active Directory users, for this, We will assign administrator privileges to an account that we want to use. From "Users" > "Directory", select the user or group and click on "Edit Properties".

We can assign the Administrator role, or granularly give you access to what you need, BE App Layer Management, of the user, Manage image templates, of SO, platform and, additionally, to be able to publish them.
Installing the Citrix App Layering Agent
The App Layering Agent must be installed on servers that need to communicate with ELM, usually if we have Citrix Provisioning, we must install it on one of the PVS servers.
"Next" to begin installation.

We accept the terms of conditions, "I accept the terms in the license agreement"
"Next",

We indicate the port of communication with the Agent, Default 8016TCP, "Next",
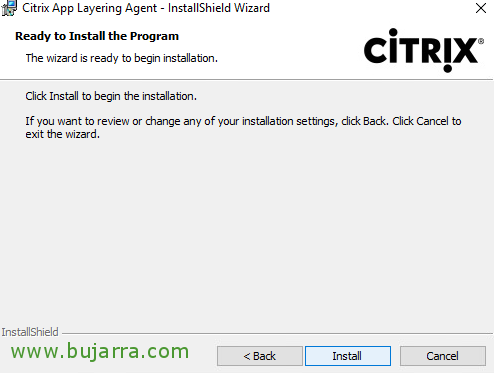
Click on "Install" to install the Agent,
… we waited a few seconds...
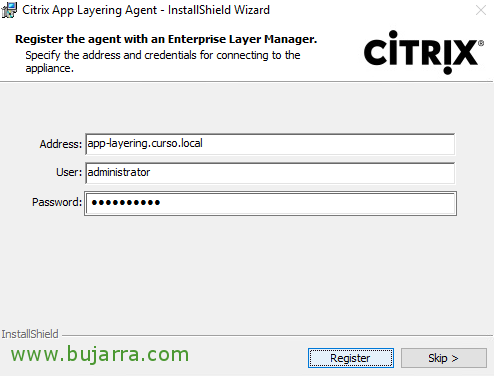
We must register against ELM, we indicate your FQDN or IP address and a privileged user.
"Register",
"Finish",
At last, if this were a PVS server, we should add the connector from the ELM console.
Creating an OS layer
The OS layer is the lowest priority layer, the rest of the layers that interest us will be attached to it. We must choose a supported Server OS (2008 R2 to 2019) or a Desktop OS (7 a 10). In the VM that will be the future OS layer, we will install the OS as clean as possible, we will update the OS and clean up storms and so on. We will take care of this layer of SO, since it will be the one used by all our users.
We will have to take into account numerous conditions in this MV, must use VMXNET3, BIOS (no UEFI), You must not have any additional software installed, VMware Tools only, not even be joined to Active Directory. And in the network settings, IP address must be in DHCP mode. If this machine will be RDSH we will take the opportunity to leave it enabled.
We'll also remove all Apps from the Microsoft Store (if we use OS Desktop, through the utility RemoveStoreApp.cmd), disable Windows Defender and Windows Firewall, as well as IPv6 if we will use PVS. And at the end it will be advisable to run Citrix Optimizer.
Subsequently, in the Platform layer we will install the software we need such as the VDA, o PVS Target Device, NVIDIA drivers, Citrix Workspace or join to domain.
Installing Citrix App Layering Image Preparation Utility
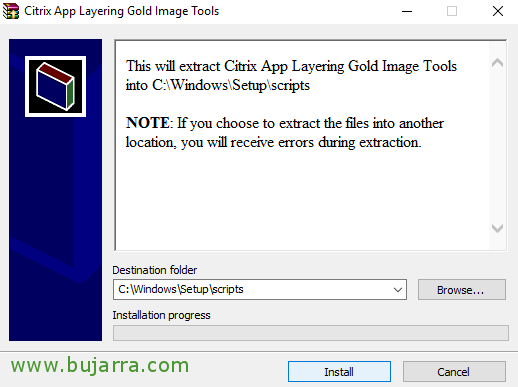
After having the OS ready and free of reboots, we'll extract Citrix App Layering Gold Image Tools in C:\WindowsSetupscripts
"Install",
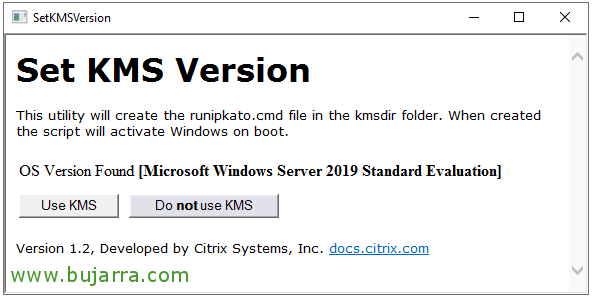
We will click "Use KMS" if we have a KMS server for Windows activations, or failing that "Do not use KMS".

In the folder that has extracted Citrix App Layering Gold Image Tools all the scripts and tools, we will have to install Citrix App Layering Image Preparation Utility, To do this, we will execute "setup_x64".
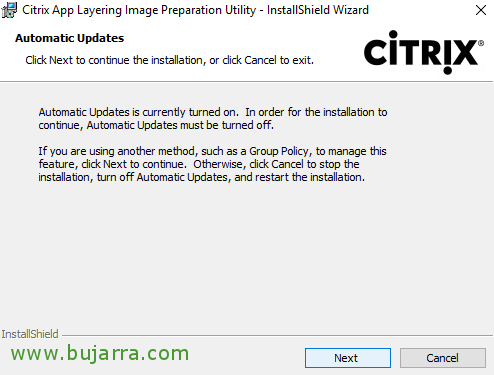
By the way, Windows updates should also be disabled on this machine, either by GPO or local configuration.
It will be when we say when the VM will be updated; For example, In the future, when we introduce new versions of this OS layer to our users.
"Next",
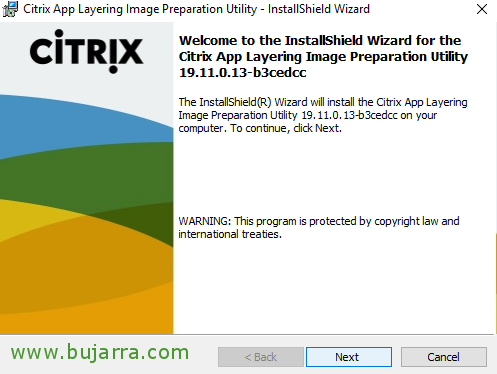
"Next" to begin the installation of Citrix App Layering Image Preparation Utility.
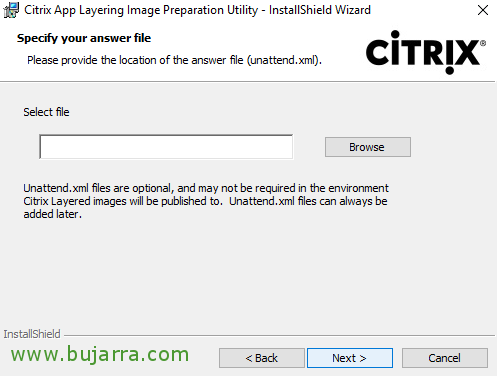
No need to work with Windows unattended response files, so we can skip this step and continue,
"Next",
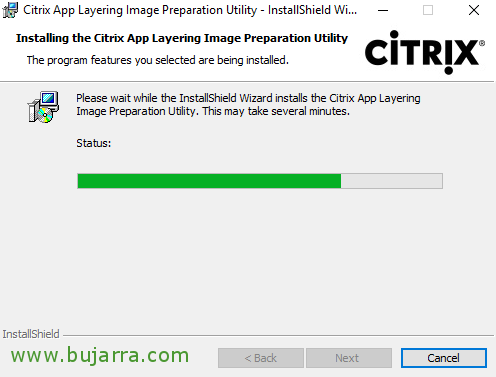
… we wait a few seconds while it installs...
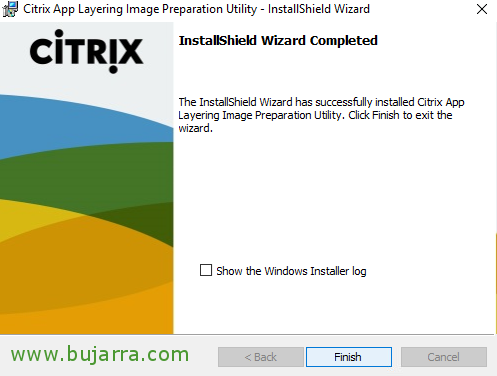
Perfect, Completed installation, click on "Finish".
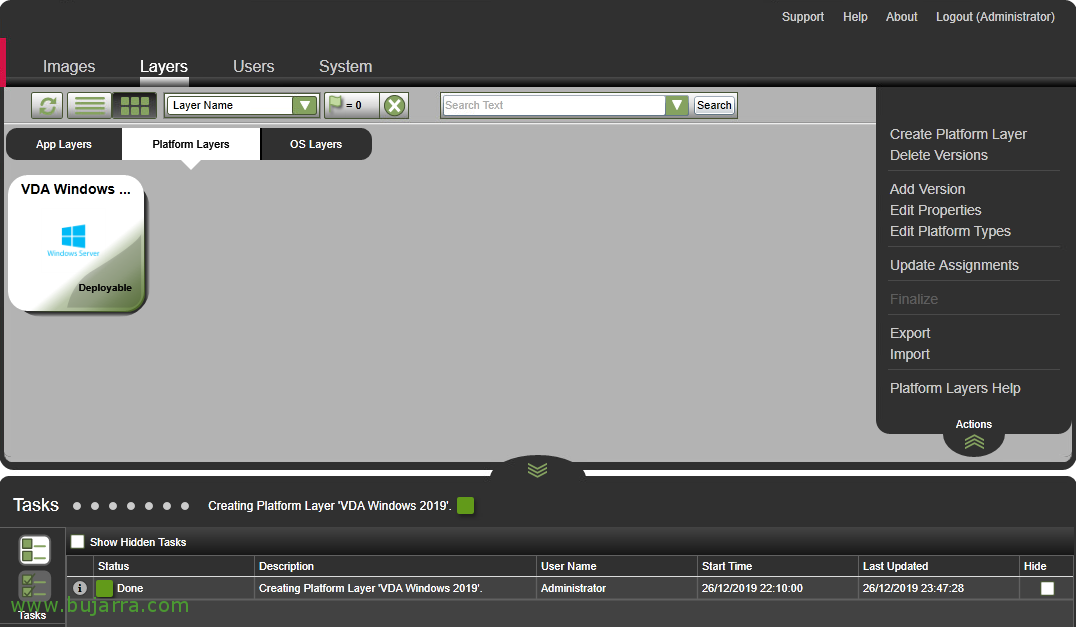
Creating the OS Layer

To create OS layers, from the ELM administration console we will go to "Layers" > "OS Layers" > "Create OS Layer".
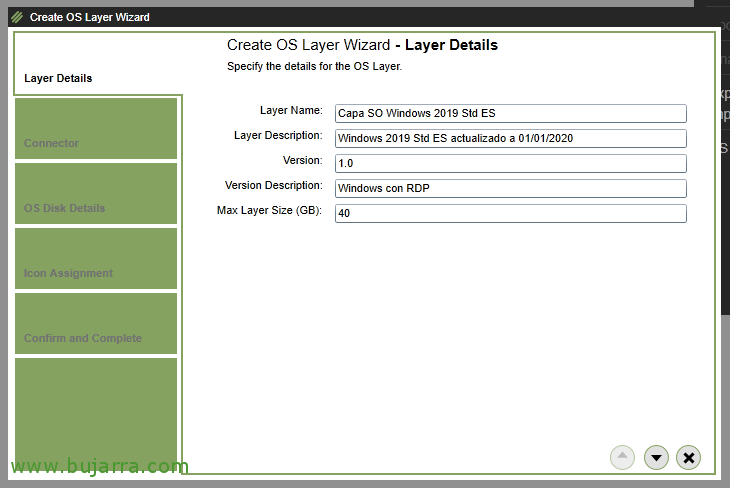
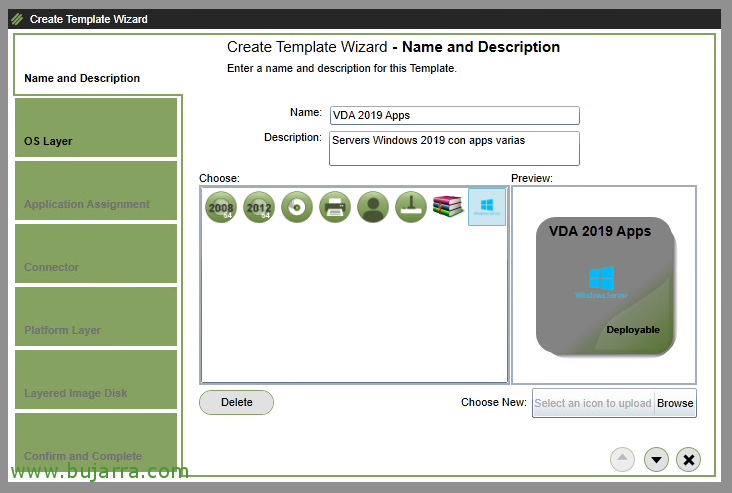
We must give the OS layer a name, plus a description and start a versioning, 1.0 For example. In this case we will create a layer for Windows 2019 Standard EN, and with 40GB of maximum layer size it will be enough.
We continue with the assistant,
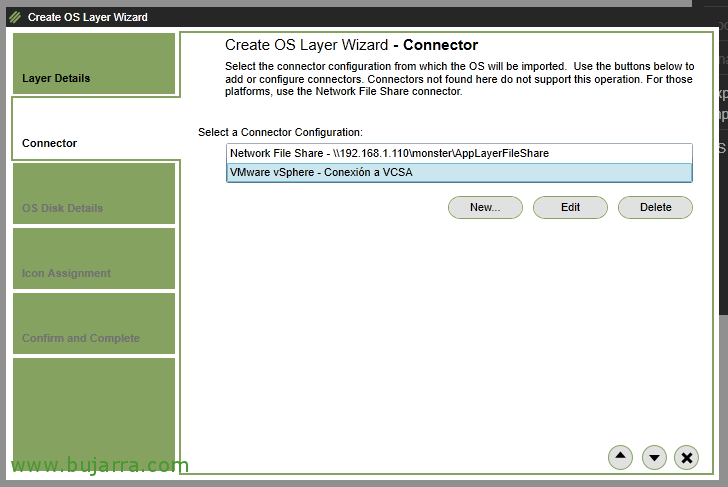
Connect to our vCenter Server to be able to import the OS of the VM that we select below,
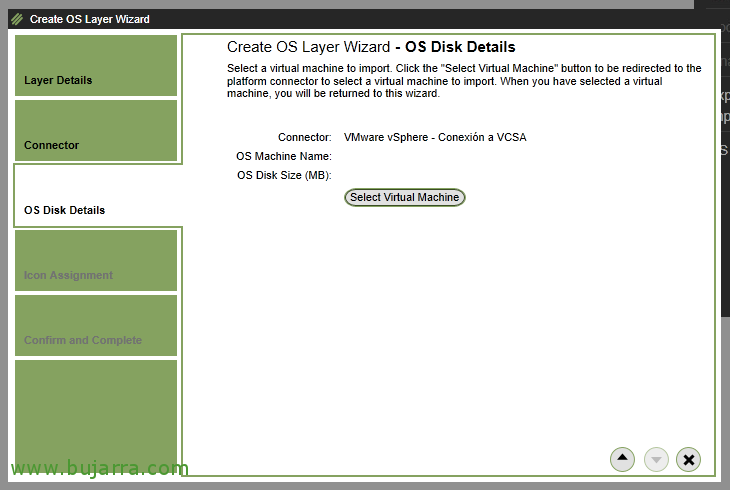
Click on "Select Virtual Machine" to choose the disk of the VM that we are going to import.
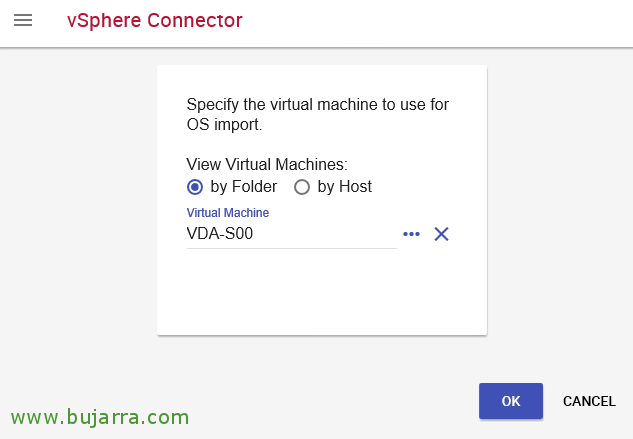
Through the vSphere Connector we will travel until we select the VM from which we want to import its Operating System, in my case it's an MV called VDA-S00. "OK",

We will check that we have the machine correctly added, as well as we will see the size of your hard drive.
We continue with the assistant,
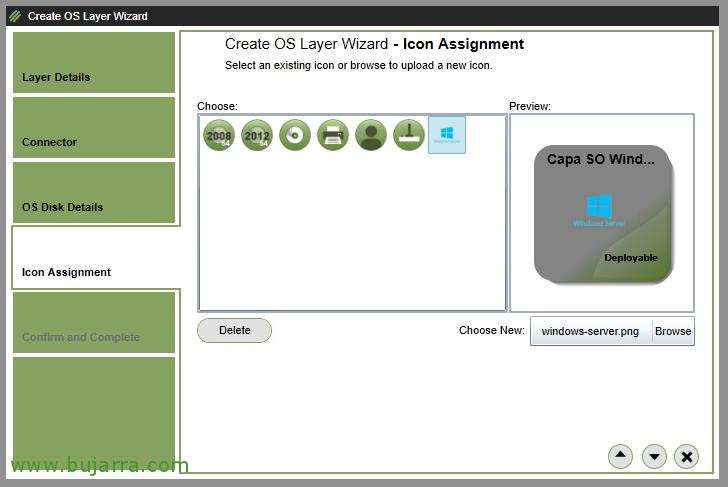
We can select an icon to this OS layer, it will be interesting to associate the icon of the OS it has to better associate it.
We continue with the assistant,

Check in the summary view that everything is correct and click on "Create Layer" to create the OS layer.

Start creating the OS layer, in the bottom view of Tasks we will be able to see the progress, We waited a long time... wait while copying the virtual disk to the repository.
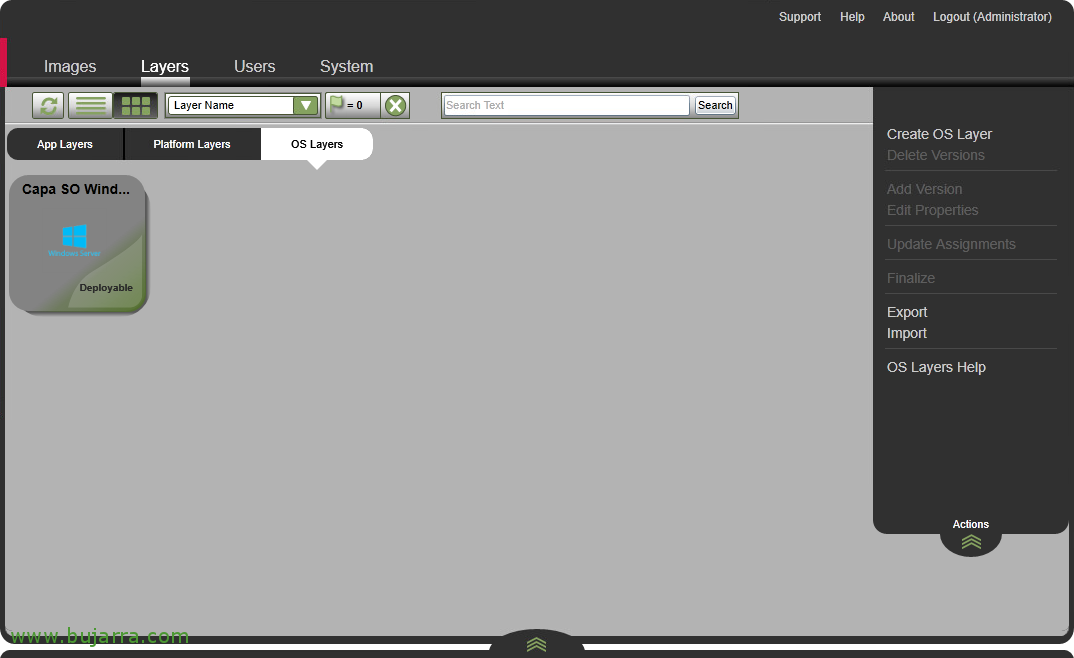
And we wait for it to finish correctly, we will know as it will change its status to "Deployable".
Creating a Platform Layer

Once we have the OS layer ready, we will now be able to create the platform layers we need with the base of the OS created previously.
A very typical machine will be to be able to use that OS as a connection destination for our users, so let's prepare our VDAs with Windows 2019.
Platform layer has the highest priority, This means that it will be applied at the end and you will be able to overwrite other layers.
From "Layers" > "Platform Layers" > "Create Platform Layer".
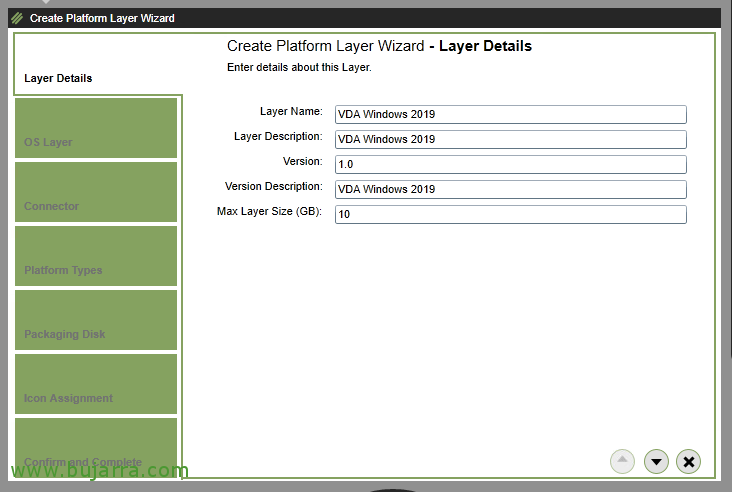
We give the layer a name, A description, a version and the maximum size we will give to the disk where we will make the changes.
Basically, we will join the VM to the domain and install the Citrix agent or VDA. We continue with the assistant,
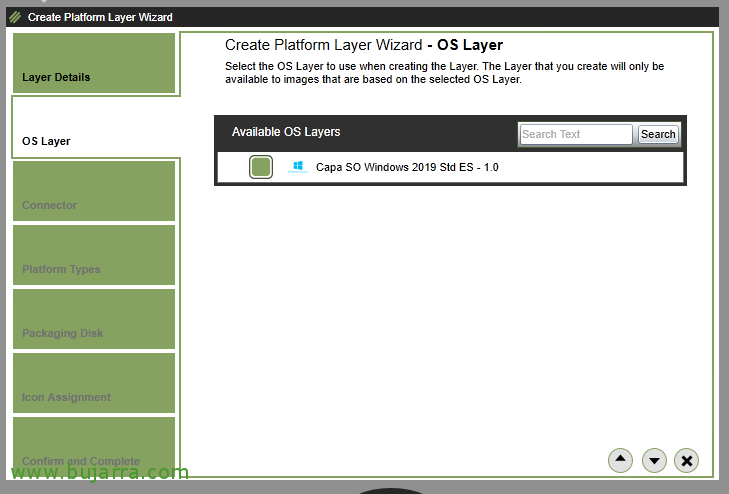
We have to select the OS layer that we are interested in, in this example we have already created the Windows OS layer 2019 Standard, being the version 1.0 What's available.
Continue,
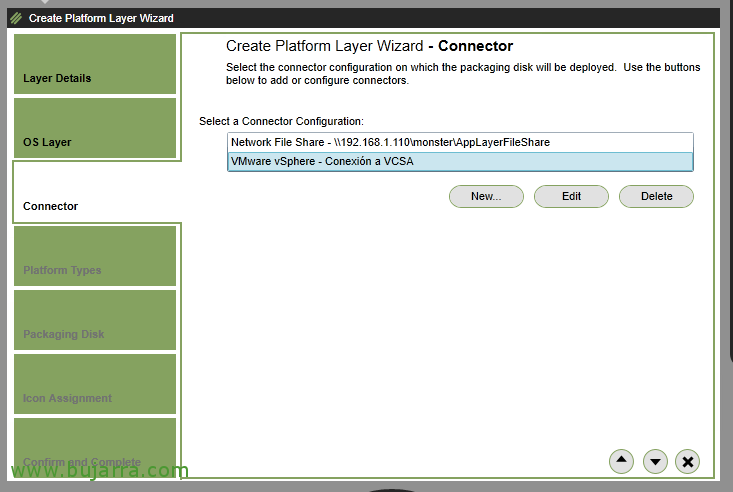
Select the connector where we will deploy the disk and the machine to prepare the layer, we will use the VMware vSphere connector by connecting to our vCenter Server,
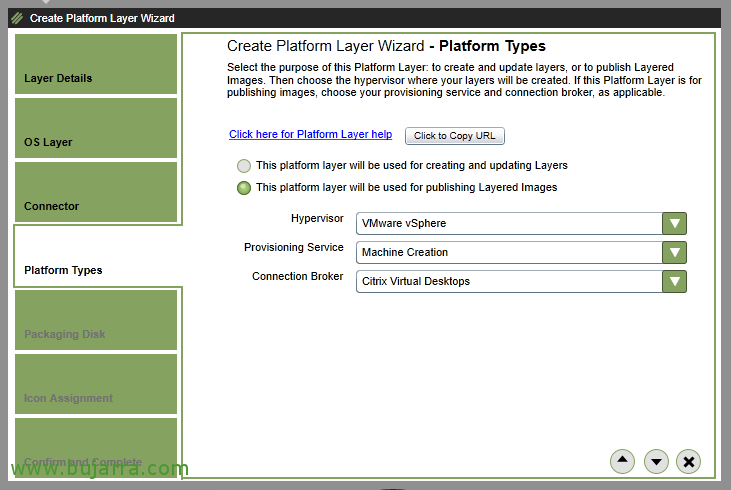
We'll use it to publish other layers, so we checked "This platform layer will be used for publishing Layered Images".
In addition to indicating the Hypervisor we are using, and technology (Yes, MCS, PVS or View Composer), as well as the brokering service that we are going to use (if Citrix Virtual Apps, Citrix Virtual Desktops, Azure, Microsoft RDS, u Horizon View.
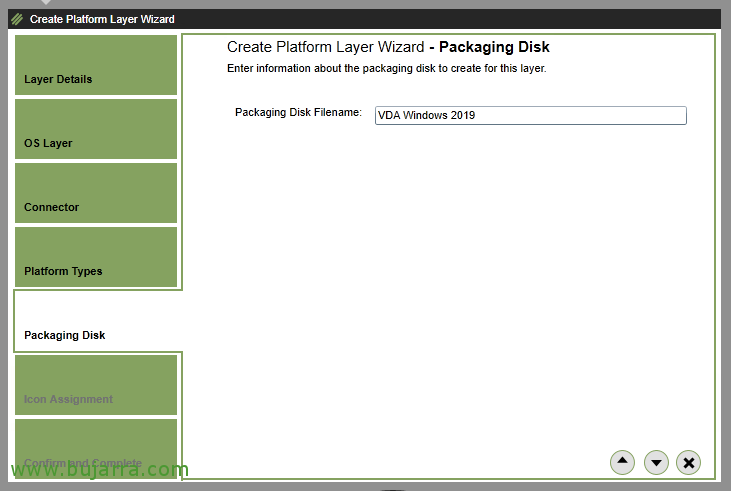
We give the vDisk a name.

And optionally we can also associate an icon with this platform layer.
Continue,
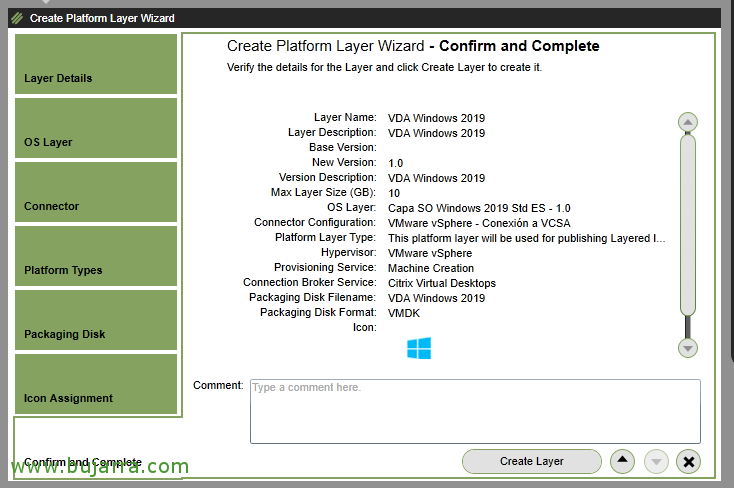
We check the attendee summary, if everything is correct we finish the creation of this layer from "Create Layer".
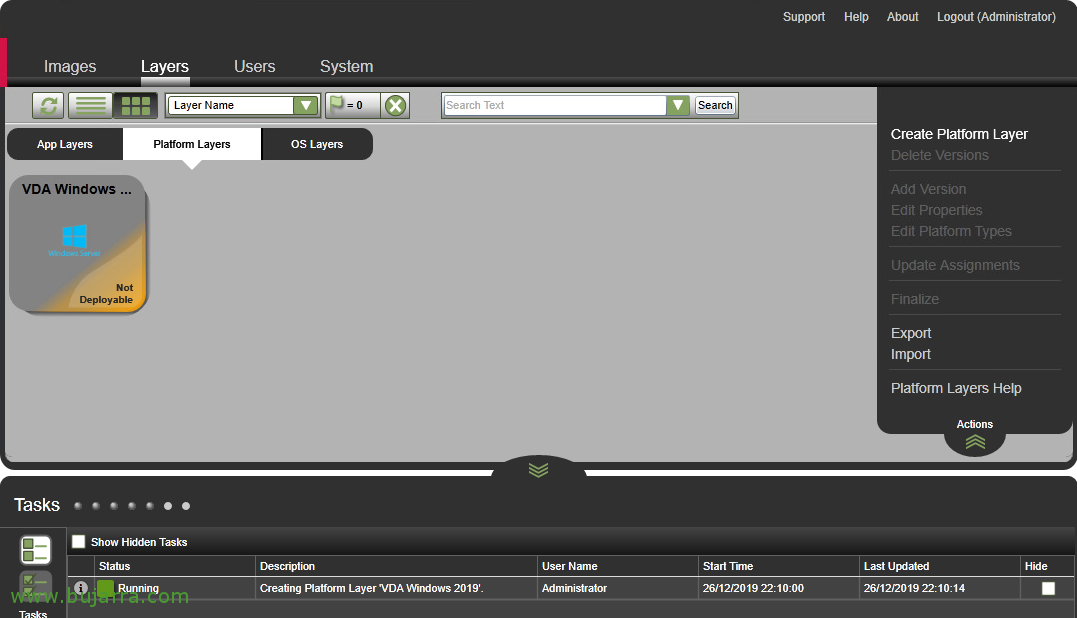
We'll check in Tasks that the task is running., until he gives us a warning and tells us that the machine is ready and waiting for us to make the changes we need.

What I said, Once you alert us, it will have created a VM for us in our vSphere environment in edit mode. We open the VM console, we can change the name to the VM and finally join it to the domain, as well as restart it if necessary without any problem.

It will also be time to install Citrix Virtual Desktop Agent or VDA, if we require Citrix Workspace then also, or Citrix optimization packs. As well as the Citrix PVS Target Device software, we will use PVS to provision the machines. If we use Write Cache disk in PVS, It will also be the time to present the album and not forget to delete it at the end.
We'll run Citrix Optimizer again to apply Citrix optimizations, since the OS ones are already optimized in the OS layer.
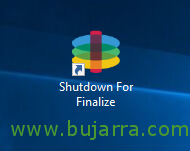
Once we have the machine correctly installed and configured, click on "Shutdown For Finalize", an icon that we will have on the Desktop.
And we'll see how the task is automatically finished and the layer is ready to deploy.
Creating an Application Layer
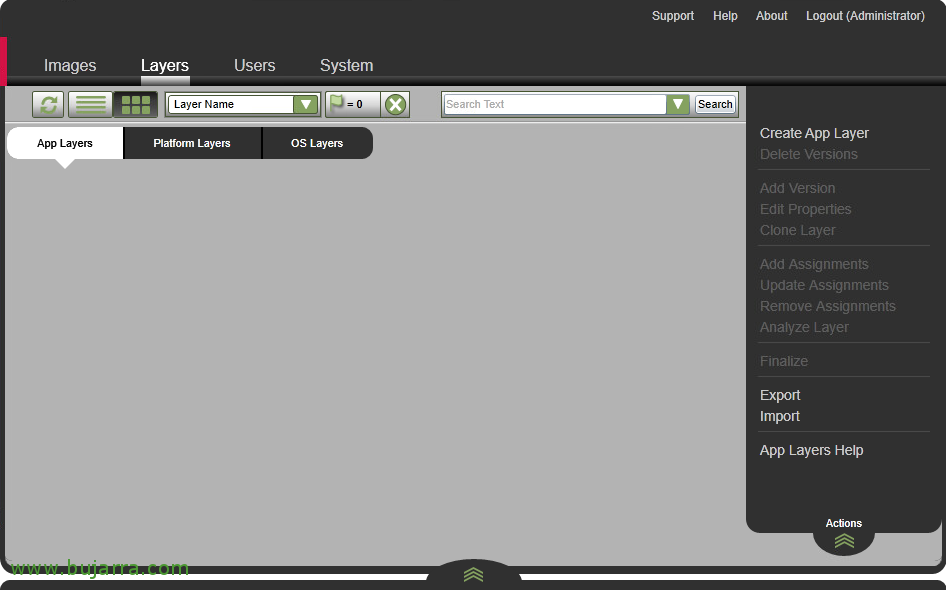
We will usually create as many application layers per app as we want to deliver. Although we can also install apps together, Copy files to disk, make changes to the registry...
We will then associate these application layers with the images that we display for our users to work with.
From "Layers" > "App Layers" > "Create App Layer".

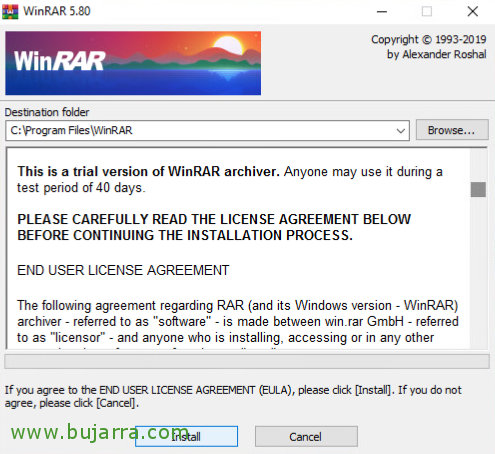
We give a name to the application layer, A description and versioning. We will use this layer in this example to deploy WinRAR 5.80 x64.
We continue with the assistant,

Select the OS layer we want to use to create the application layer. In this case we will use the Windows OS layer 2019.
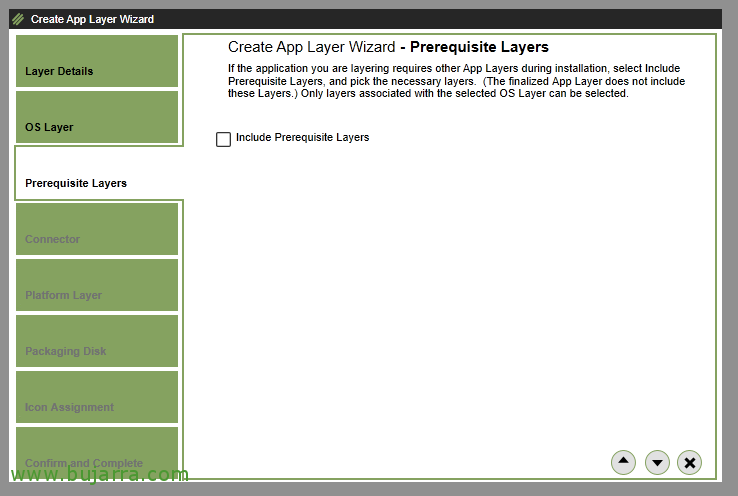
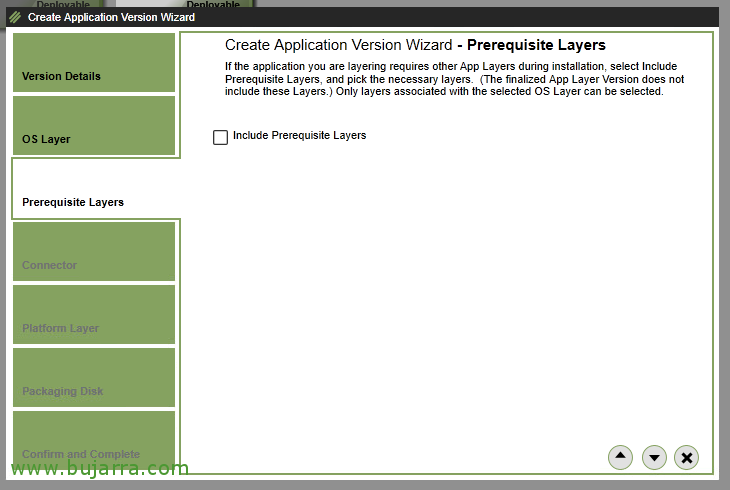
We may require some additional layer to this application layer, Not the case, Continue.

We select the connector that we will use to deploy the VM where we will create this layer of the application. As until now, we will continue to use the connector against VMware vSphere.

If we are changing hypervisors we will indicate it, since we will have to install the corresponding tools, Not the case, and it will be rare for us to have different, But the possibility exists.
We continue with the assistant,
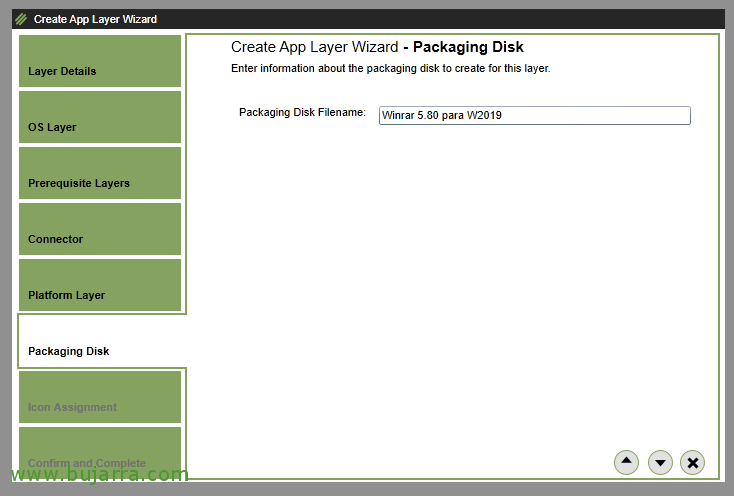
We give the vDisk a name,
We follow,
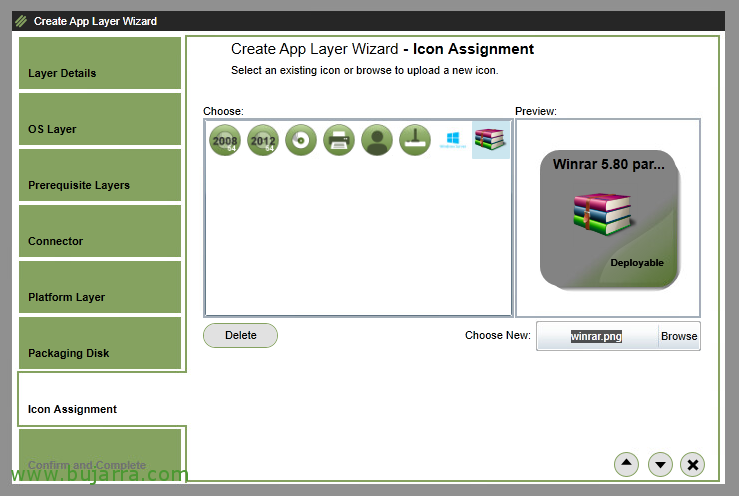
We can associate an icon by uploading a PNG or JPG file. We'll do it to make it cooler.
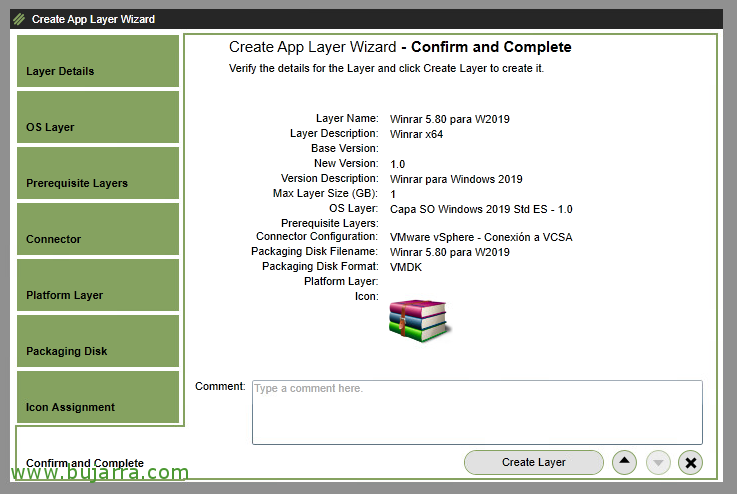
And to finish, as usual, Let's review the final summary, if everything is correct click on "Create Layer".
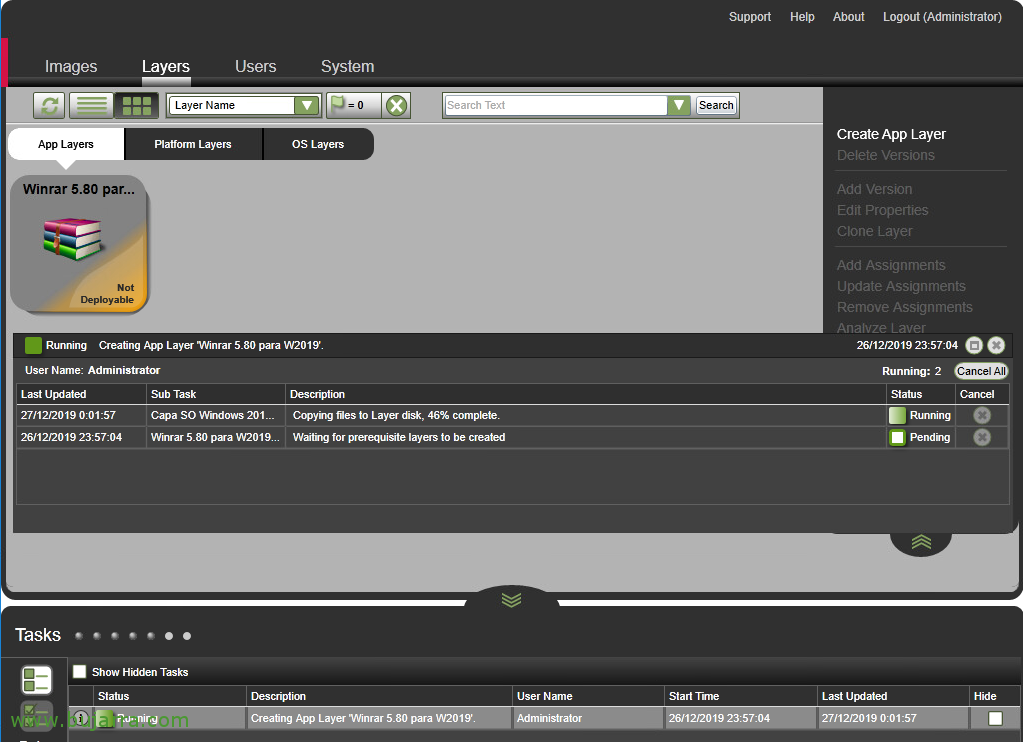
We wait while you prepare the machine on the selected hypervisor...

Now he warns us that we can make the appropriate changes to the machine, It will give us the name and we will have to connect by console to make the modifications.
We will install the apps we are interested in and restart if necessary. The app layer won't be domain-bound, if the app we are going to install requires it, We can attach this machine to the domain, proceed and before finishing remove it from the domain again.
What I said, We can make any changes we need, Not just install apps.

Once we have finished, we will have to click on the "Shutdown For Finalize" icon.

And we confirm that the app layer has already been finalized and indicates that it is available to publish.
Creating Images
The time has come, we are going to create the Father Image that we need so that our users can perform their work.
We will create a template for each type of machine we need, we will be able to associate the OS layers and applications that we are interested in.
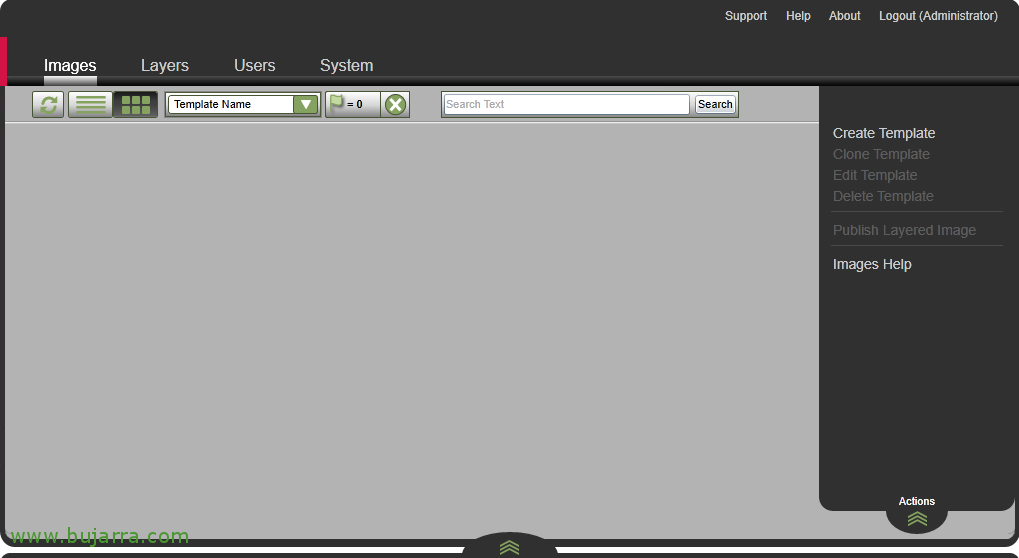
Let's go to "Images" > "Create Template"
In this case this Image will be for users of a Citrix farm to work with a Windows OS 2019 and multiple layers of applications they need to work.
We indicate a name, a description and indicate an icon to the template.
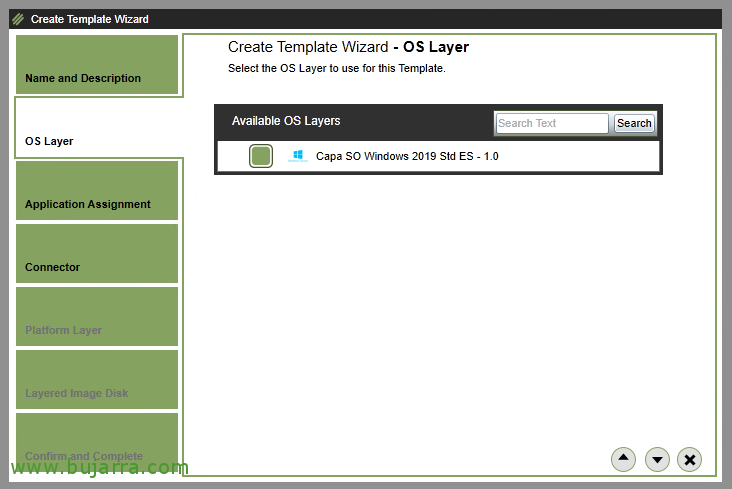
Select the one we are interested in from the list of OS layers,
Continue,
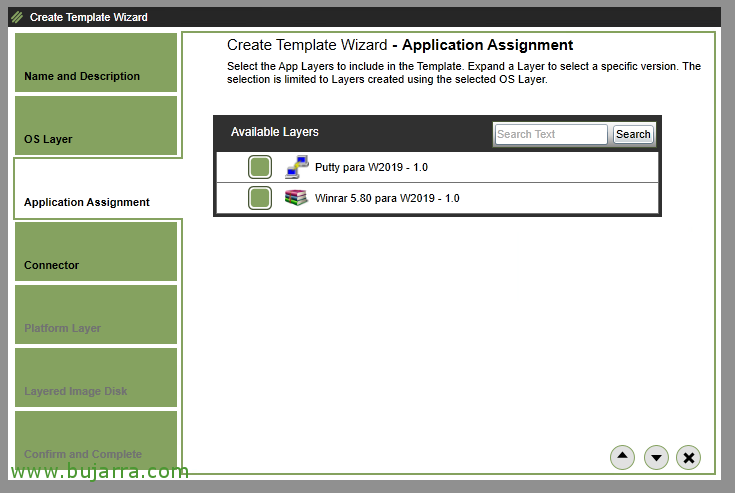
At the application layers, we will be able to associate the applications that interest us, This will make these apps available in the template we're creating.
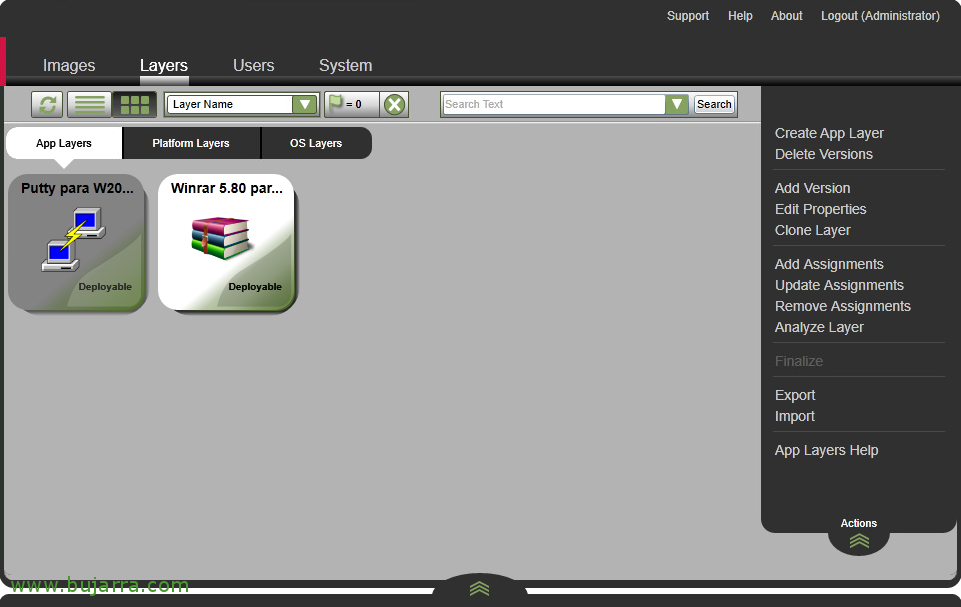
I have two sample app layers that we'll link, one the WinRAR and the other the Putty.
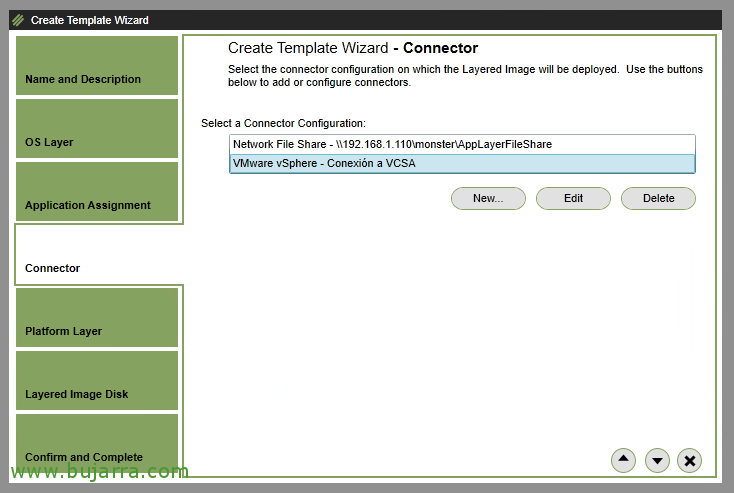
Select the connector of our hypervisor to deploy the Template.
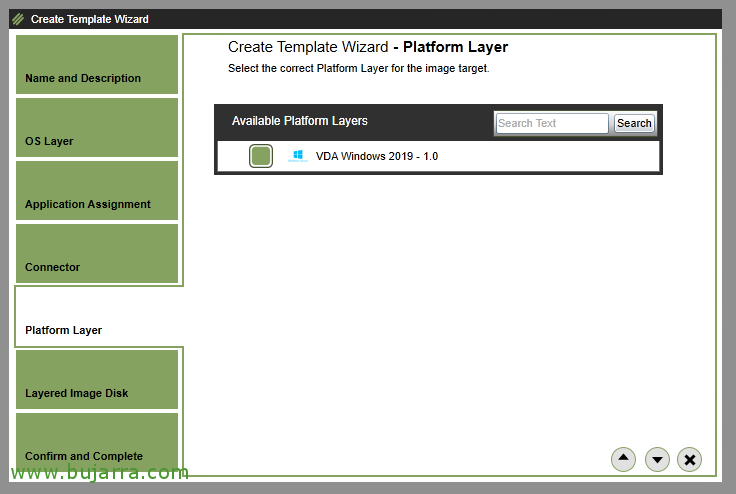
Select the Platform layer that interests us. In this case I have the VDA layer with the necessary software to accept Citrix connections.
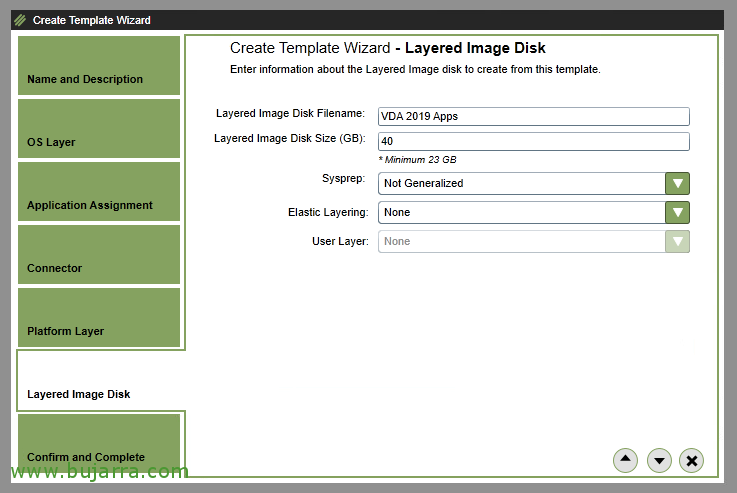
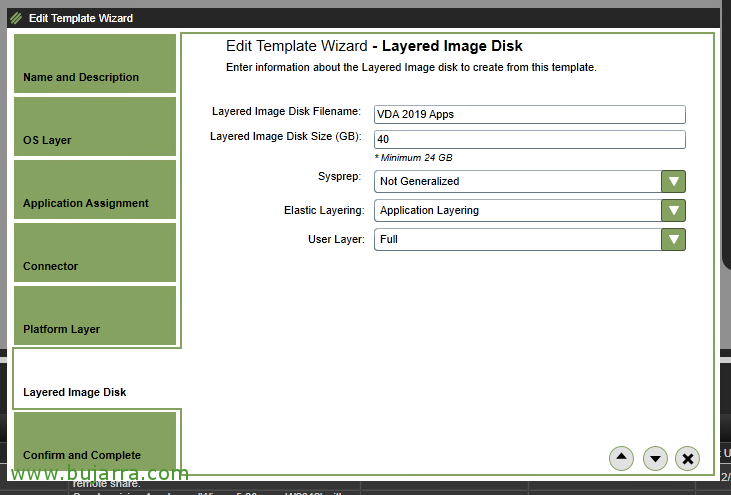
We give the vDisk a name and indicate the maximum size for your hard drive. Sysprep will not be required to generalize the machine, and for now we will not allow Elastic Layering so that users have their layers as well, where they will save their customizations, since for now we are not going to let them make changes, Regardless of what goes on your profile.
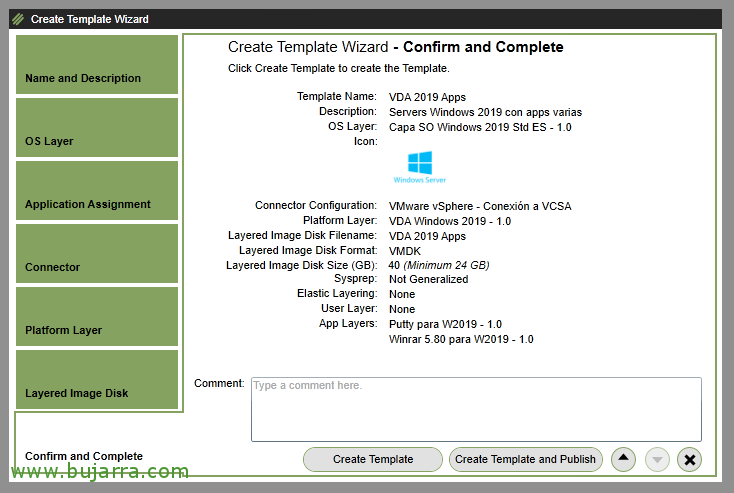
We confirm in the wizard that everything is correct, click on "Create Template and Publish",
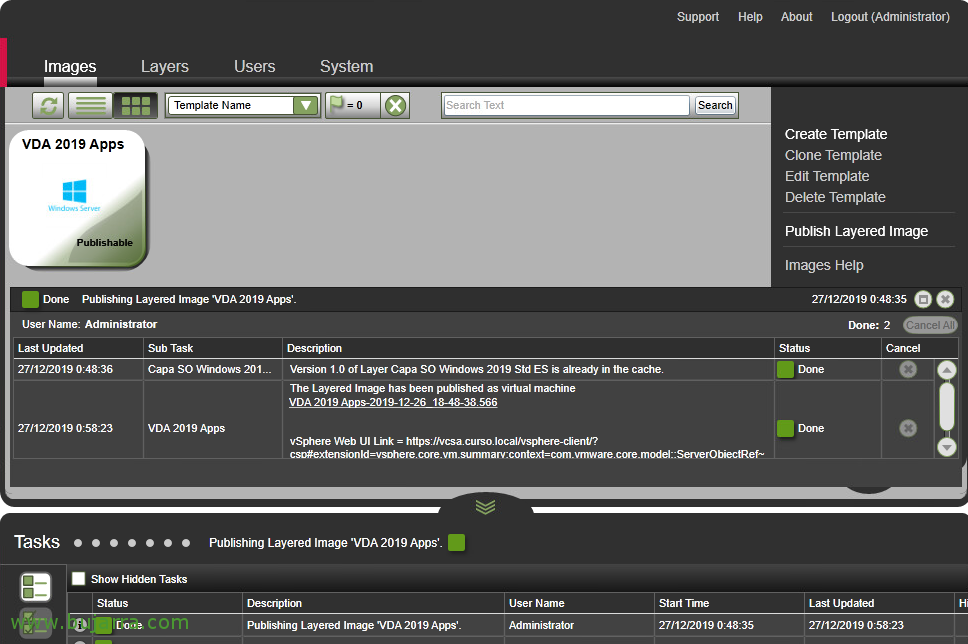
And we wait until it finishes and creates the Image template that we're creating.
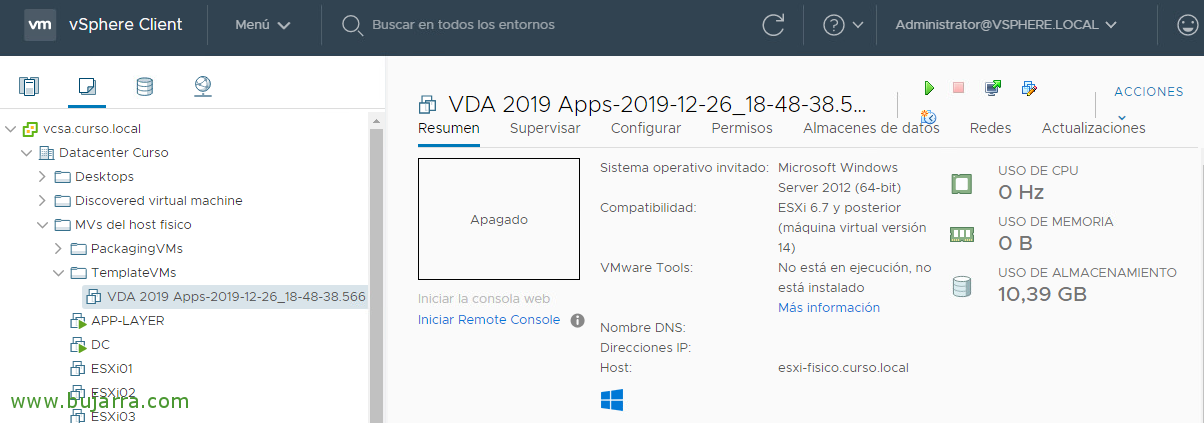
We will finally be able to see in our hypervisor the machine that has created us, This will be the image we use to create the rest of the similar machines we need to meet the demand of our users.

We can create a Catalog from Citrix Studio, selecting the Master Image that we have just created and using MCS create as many machines as we need. Or with PVS or the technology we use in each case.
Therefore we will proceed as we know.

And this would be the final result of the example we have been making, a Windows OS machine 2019, that has RDHS installed, with VDA installed and correctly registered against our Delivery Controllers. Waiting for users to connect and be able to work with the applications that we have associated with this Image. That if we have noticed, I associated two layers of app, One with a Putty, and another with WinRAR.
Associating Layers to Users
If we want, instead of associating app layers to Master Templates, We may link them to users or groups of users. In order for the app to follow the user wherever they go.
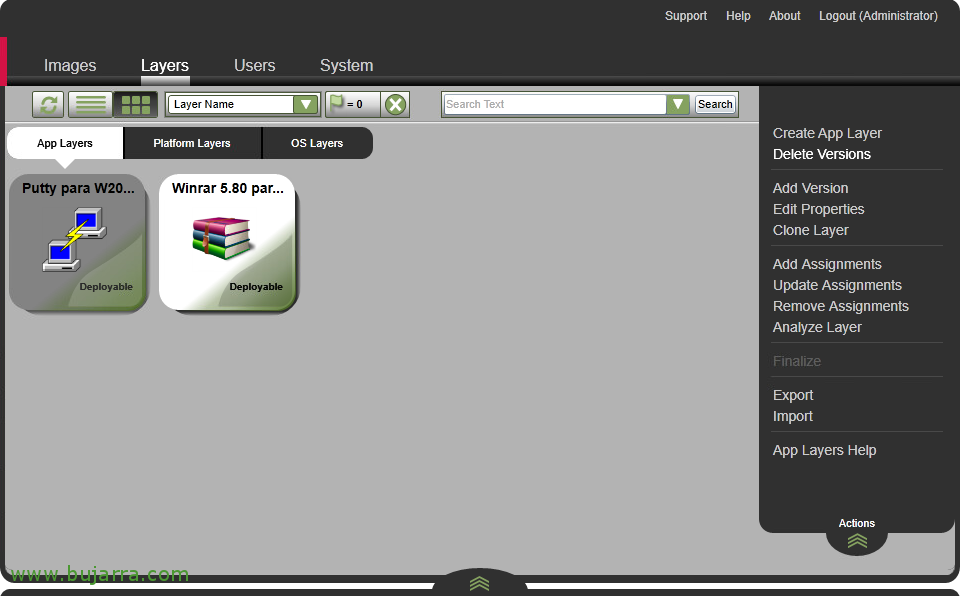
Stop that, in "Layers" > "App Layers", We select our application layer > "Add Assignments".
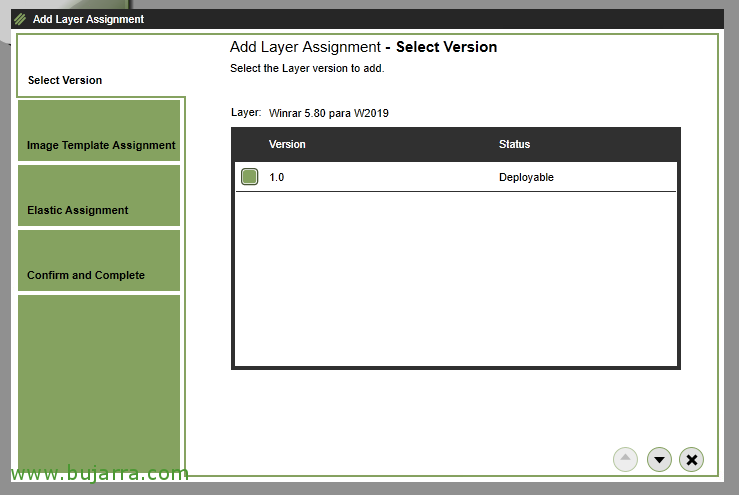
Select the version of the app for which we want to assign users. For now, We only have one version 1.0, So it's that version.
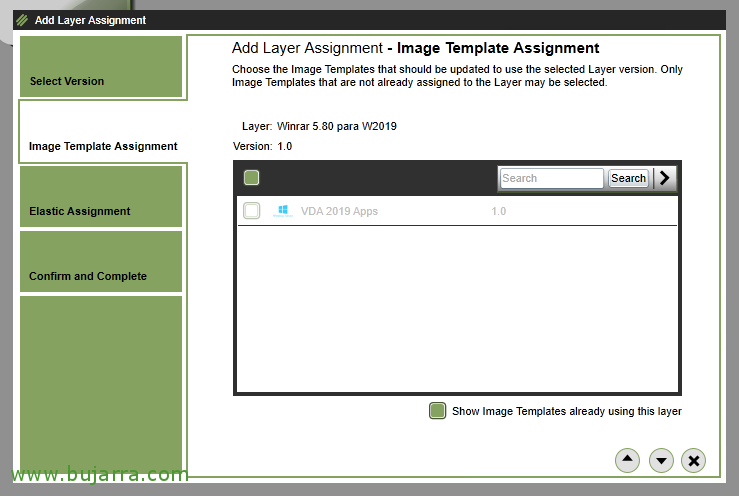
Select the master template to which we will assign the.
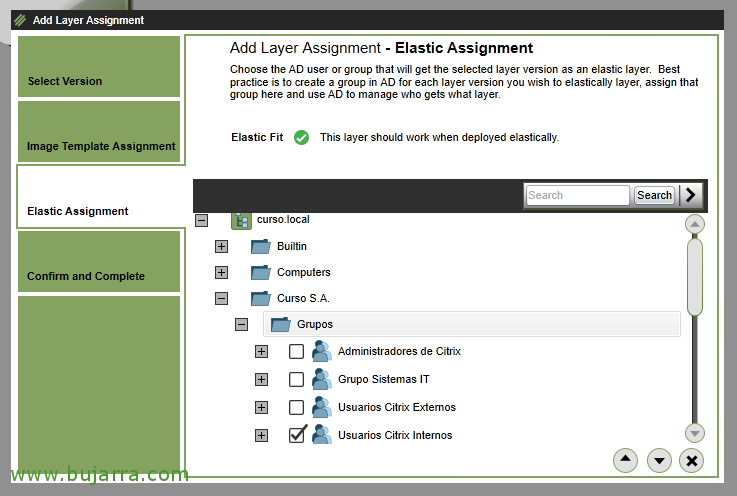
And this will be where we will look for the user or users of our Active Directory to whom we will associate this app layer.
Normally we will use Groups and not Users to associate the layers.
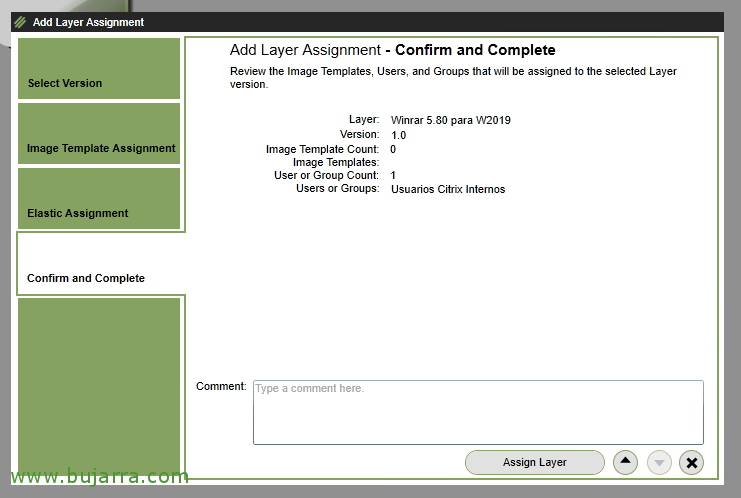
If everything is correct, click on "Assign Layer"
Remember that we will have to unlink the app layers in the master template, and enable Elastic Layering and the type of User layer we'll need.
Thus, depending on which user logs into the machine, will carry different app layers, even the changes you make on that machine will go in vDisk of the User layer.
| User with 1 Apps layer | User with 2 App Layers | |
 |
|
Creating a new version of an application layer

If we need to present any change in any layer of applications, we can create a version, Making the changes (upgrade normally) and present this new version to the Master Images. This way users will enjoy the new features that we apply to them.
To do this,, from "Layers" > "App Layers" > We select the app > "Add Version".
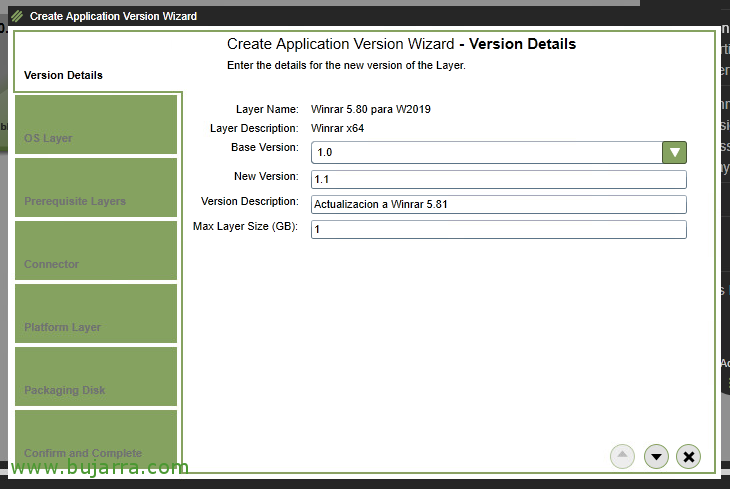
We specify which version we will update from, and what the new version will be.
In this example we will update the 1.0 to the 1.1 of WinRAR. And with 1GB of disk it will be enough to store the changes it makes.
What I will do is apply a language pack to it, in this case the Basque language.

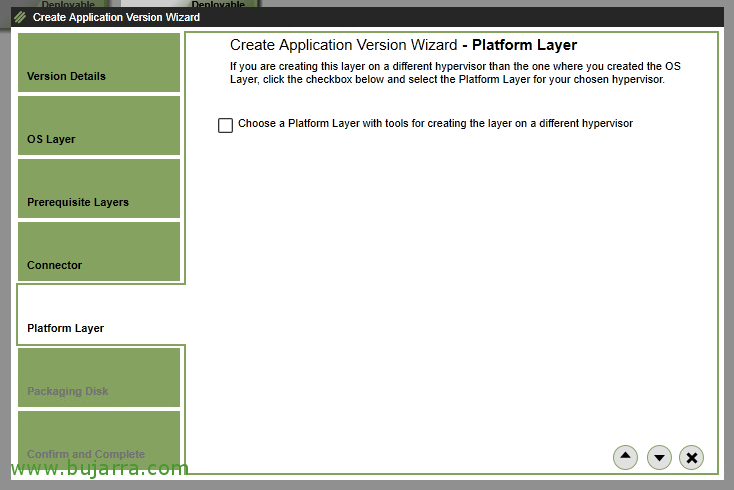
By continuing with the wizard, select which OS layer we are going to work on to create this new version.
No need for a previous layer as a prerequisite, We continue with the wizard.
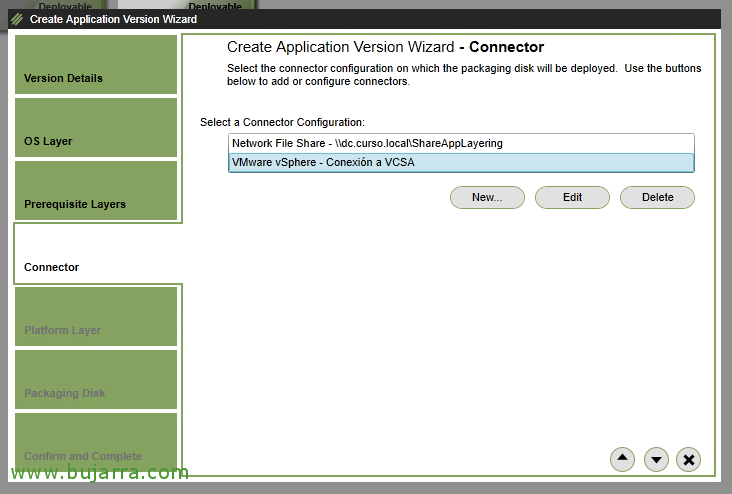
We select the connector to use to deploy and package this new version, as until now, we continue to use our VMware vSphere connector.
We're not going to change hypervisors, We continue to use VMware ESXi, therefore we will proceed with the wizard.
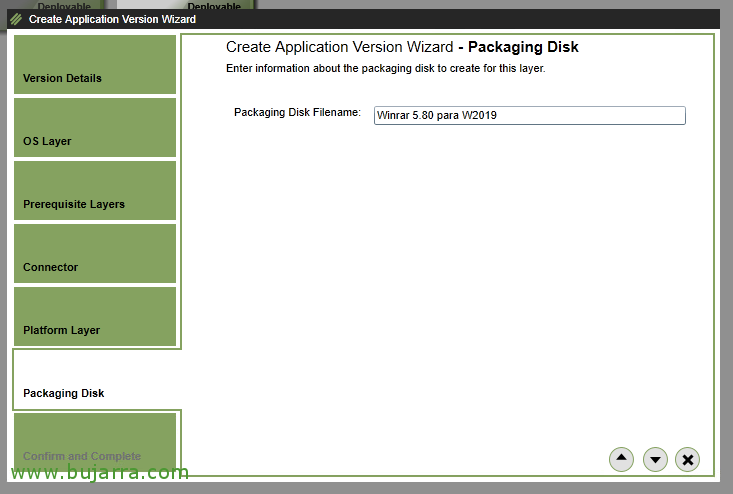
We give a name to the vDisk that will create.
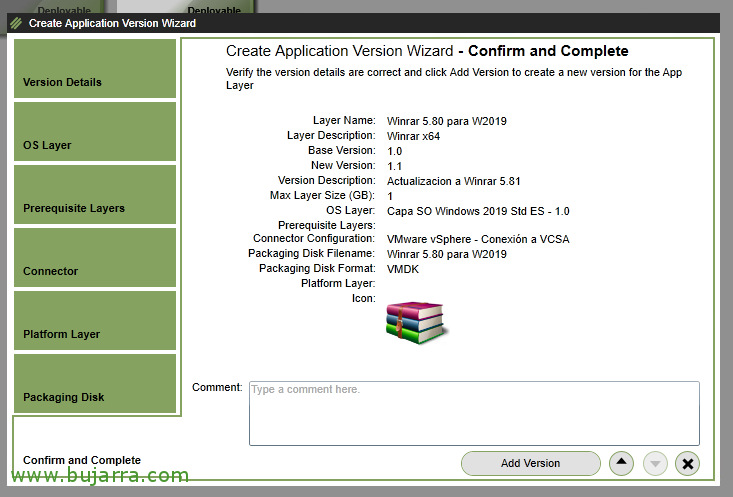
And if everything is correct, we review the summary and confirm with "Add Version".
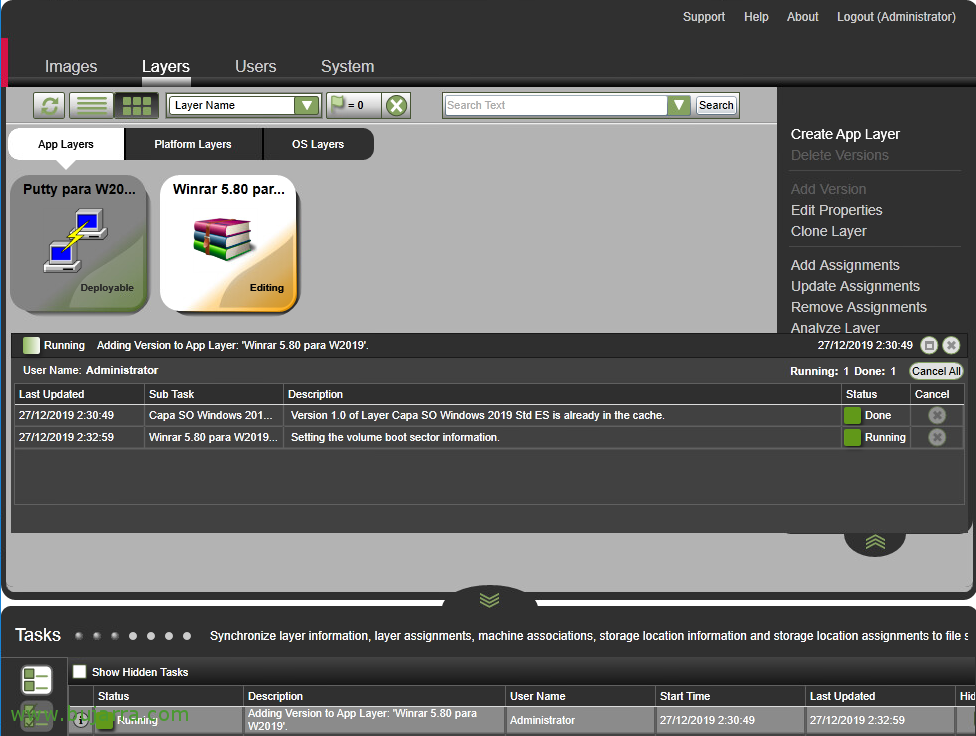
As usual, We must wait while the machine is ready where we will apply the changes that interest us.
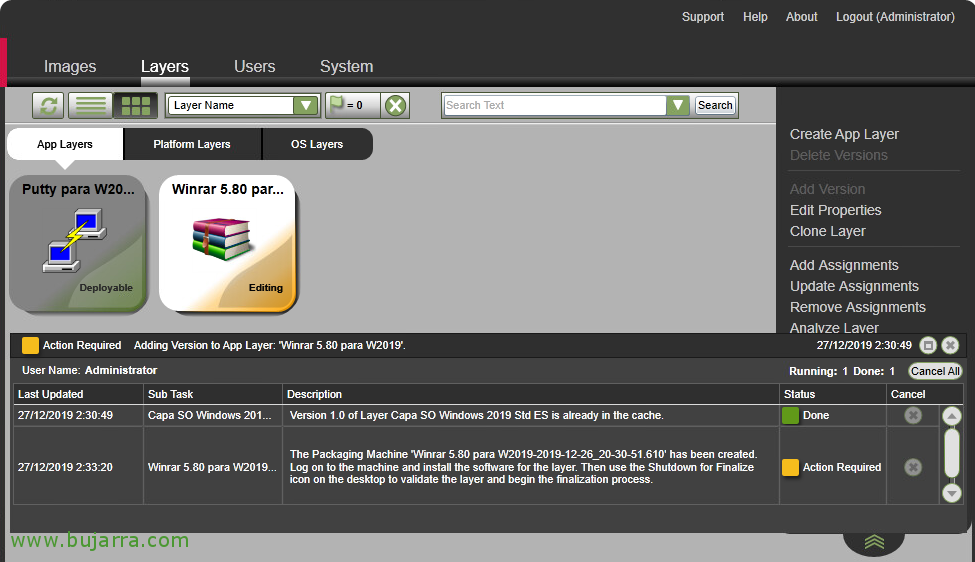
Once the application layer is editable, it will tell us, it will tell us the name of the MV that it will have created and in which we will have to enter the console to make the appropriate changes.
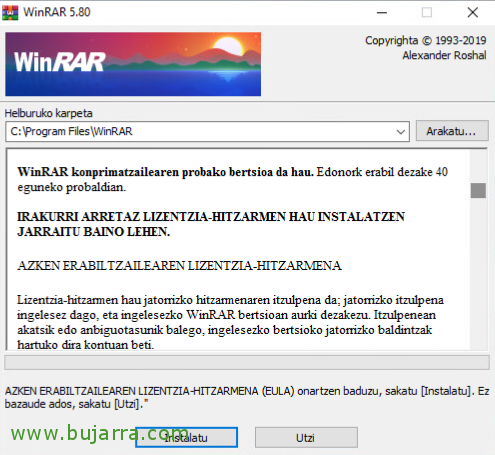
So what I said, We make the changes we need, be to update the application, make modifications... or as in this example put a language pack.

After the changes are completed, as usual, click on "Shutdown For Finalize".
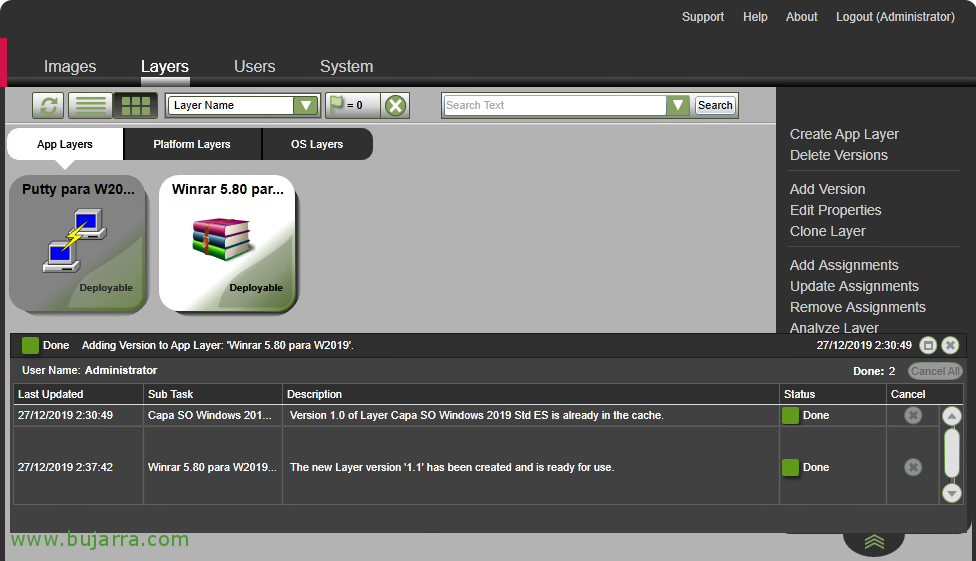
And we'll see in Tasks that the task of creating this new layer with its new version is finished.

If we want to associate this new version of the application layer with the Master Images that we have, About them, from "Images" > "Edit Template", We will.
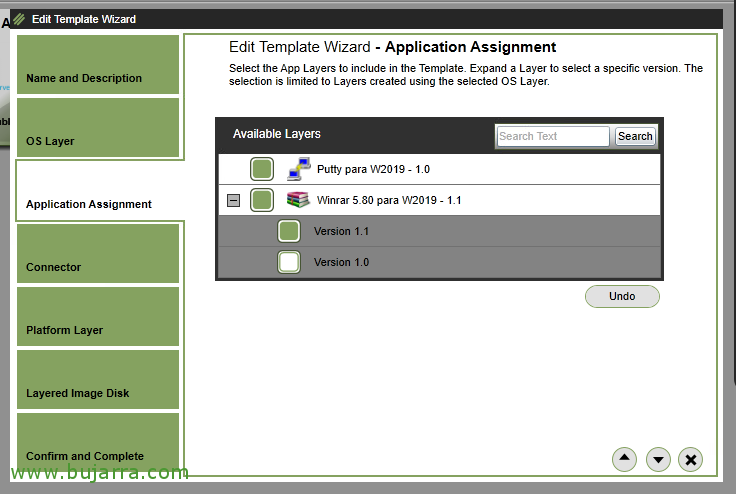
Under the Application Assignment section, We will see the applications and what version they have associated with them. In this example, we must mark that from now on it uses the version 1.1 of WinRAR.
We finalize the wizard by displaying the changes made.
Once the new version of the application layer is validated and users do not complain, we can delete the versions that we no longer use and do not have associated with them in the Image templates.
To do this,, About the app layer, let's go to "Delete Versions".
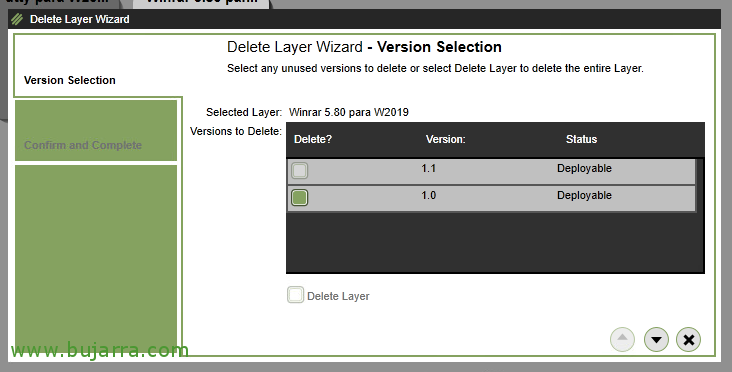
We must select the version that we are no longer using and we want to delete.
We continue the wizard,
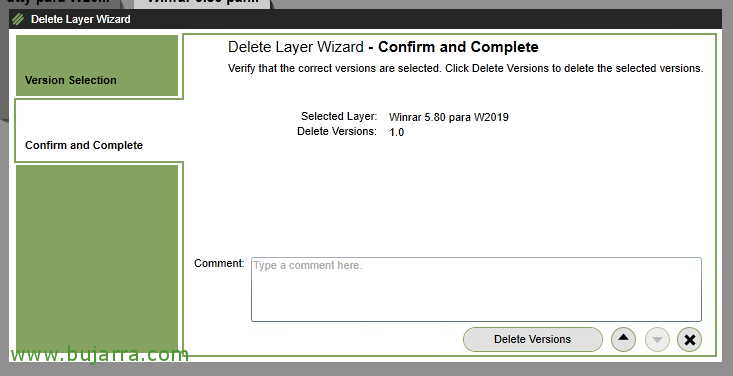
And we confirm the removal of the version from "Delete Versions".
I hope you found this piece of post interesting by seeing many of the possibilities with Citrix App Layering, where we have seen how to create an image with the software we need isolated in other layers and managed separately. We have finally published this Server / Desktops to users using Citrix Virtual Apps and Desktops.


