Installation of a Zimbra server and integration with Active Directory

Already at the beginning of the 2010 we saw how VMware acquired Zimbra from Yahoo to integrate it into its new services infrastructure; Zimbra Collaboration Suite (ZCS) It's a complete suite, both messaging and open-source-based collaboration, There is a free version (ZCS Open Source Edition) and also the paid version (ZCS Network Edition Starter with Standard or Pro Option). Day by day it takes over more of the market thanks to its scalability, reliability and above all because it is combined with already consolidated open source technologies and the support of the community!
Comparison between the different editions: http://www.zimbra.com/products/compare_products.html
In this document we will do a basic installation on an Ubuntu server, we will integrate it with our Microsoft Active Directory for authentication and in future documents we will see more possibilities of VMware Zimbra!
First of all, you have a ready-made Linux server, up-to-date, with fixed IP addressing, registered on the DNS server… We must modify /etc/hosts including the internal name & public of the server itself. Can be installed on: Red Hat Enterprise Linux 6 64bit, Red Hat Enterprise Linux 5 64bit/32bit, Red Hat Enterprise Linux 4 64bit/32bit, Ubuntu 10.04 64bit LTS, Ubuntu 8.04 64bit/32bit LTS, SUSE Linux Enterprise Server 11 64bit, SUSE Linux Enterprise Server 10 64bit/32bit, Debian 5 64bit/32bit, Fedora 13 64bit, Fedora 11 64bit/32bit

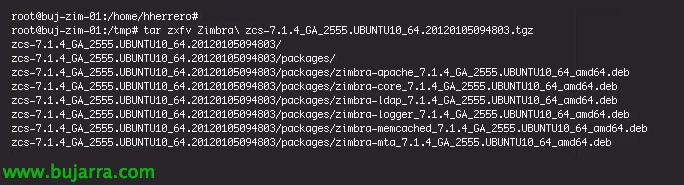
We get off: http://www.zimbra.com/downloads/os-downloads.html package for our S.O., we unzip it with 'tar zxfv zcs-XXXXX.tgz'. We must have Zimbra's requirements previously installed, in this case I have an Ubuntu 10.04 Server & I'll install them with: 'apt-get install systat sqlite3 libperl5.10 perl libperl5.10 libstdc++6 libexpat1 libgmp3c2 libpcre3 libidn11 sudo netcat NPTL'.

Once decompressed, We start the installation with './install.sh', we will confirm 'Y’ that we have read the license agreement.

We will install the Zimbra packages we need, In our case we will do a standard installation so we will leave the ones that come by default marked,
Core Shoring: It is the Zimbra base that brings the basic configuration files, Libraries & utilities.
LDAP Shoring: By default it uses OpenLDAP for user management, integrates seamlessly with any LDAP directory (such as Microsoft Active Directory).
Zimbra Logger: Adds the possibility of having logs, Reports/Statistics and Message Tracking in the Admin Console.
Zimbra MTA: Mail Transport Agent, would be the mail router, based on Postfix.
SNMP Shoring: For monitoring, generate/send SNMP traps.
Zimbra Store: To use email store for mailboxes in a MySQL database.
Apache Shoring: Apache will integrate with Zimbra.
Zimbra Spell: You will use Aspell as a spell check program in the WebClient.
Default to using SpamAssassin as an anti-spam filter, ClamAV as an antivirus and Amavis as a content filter.

It will give us a DNS error during installation, where we must configure it appropriately with the MX name of our domain.

We will have to assign a password to the user 'admin', To do this, in the menu we select '3',

In the Zimbra Store we will modify the parameter '4’ and enter the password for the user 'admin'’ that we want.

'r’ to go back,

And we click on 'a’ To apply the settings, 'yes’ to generate a configuration file & 'and’ to modify the settings. It will also ask us if we want to notify Zimbra of our installation & ready.

We will now be able to access the Zimbra administration console via the web with any browser pointing to: https://IP_ZIMBRA:7071, We will authenticate as 'admin’ and the PWD set at the facility,

In our case, the first thing we want is to integrate it with our Microsoft Active Directory, for this, in the 'Settings' part’ we'll go to 'Domains'’ > 'domain.eso’ and click on 'Configure authentication', we will get an assistant to configure it.

GOOD, in the Authentication Setup Wizard, we will need to set the AD domain, as well as at least one LDAP server, as well as a host that is global catalog and its port, if you prefer it can be an SSL connection, “Following”,

We indicate a user & Password to test authentication, “Test”,

And that's it! “Following”,

“End”,

Under 'Directions'’ > 'Accounts’ We will be able to create our user mailboxes,

We will create the user's account with the same account name as in Active Directory so that we do not have to link them to an external LDAP account, “Following”,

“Accept”,

And we can try it directly by entering through http://IP_ZIMBRA access to the Zimbra Web Client from any browser, we will authenticate with our LDAP account and we will be able to access by default an AJAX or HTML interface for older computers.

This interface is fully manageable, we will be able to manage our email in a simple way, Contacts, Calendars, Tags, Search, add functionalities thanks to the Zimlets… in future documents we will see other possibilities of Zimbra!