Installing and Configuring XenClient Enterprise Synchronizer
This document shows how we will deploy the centralized Citrix XenClient solution, How we'll create virtual desktops and assign them to different users; as well as how we will integrate our XenClient devices and configure thanks to a series of directives. We will download XenClient Enterprise Synchronizer and install it on a Hyper-V server or in an appliance format for XenServer.
With the Citrix Enterprise Synchronizer solution, We will have a small virtualization layer on the client computers (based on Xen's 64bit Open Source technology), to which we will deploy well in a central and managed way (XenClient Enterprise) the virtual machines we want this user to run, these corporate VM's will be Linux or Windows, we can also assign machines shared with the rest of the users (so when you turn off the VM, the changes in the system will not remain, except for those in your profile) or assign user-owned virtual machines where all changes will remain once the computer is shut down.
These virtual machines will be stored on the central server named Synchronizer, where we can configure a series of scheduled backups. The MV's will have different versions that we will publish, which we can keep updated, or install applications for them... you can always roll them back if necessary. Users when they log in to their XenClient computers with their user, the VMs assigned to them will appear, Start(n) those that are set up automatically, these images will be downloaded from the Synchronizer to the XC team occupying only the space used in the VM, it will stay synchronized as long as it has a connection with the Synchronizer both to download new versions of the VM, to upload the changes made (in the case of proprietary VMs).
The management of each hypervisor can be carried out centrally and configured based on a series of policies that we can apply by users, Groups or devices. We may allow the user to install their OS.. (p. e.g. Personal Machines) or directly assign one for when your physical equipment starts up, he does not even realize that he is working on a VC. XenClient, thanks to Intel VT-d and paravirtual drivers it will provide us with a better feeling of the devices giving us greater performance when pulling them, as with the graphics and being able to take advantage of the HDX 3D Pro when viewing quality images or videos.
XenClient also integrates seamlessly with the rest of Citrix products, both XenApp and XenDesktop, so that it is not even necessary to install applications in the VMs and they can share the apps between the different VMs, all of this would be easily configured locally or with policies. Additionally, it has a VM called Connector by default, being a ZeroClient machine, a small Linux that has a Google Chrome, an RDP client and can run such XenApp/XenDesktop applications/desktops.
Let's start first with the XenClient Enterprise Synchronizer installation wizard,
We accept the license,
If it is the first installation, we must install a central server, we will be able to share the load if we have many desks or if we have remote delegations,
We indicate the name of this server Synchronizer & A brief description,
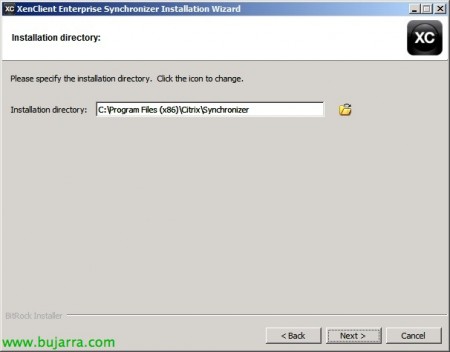
Select the installation path, default '%ProgramFilesx86%CitrixSynchronizer',
We select Tomcat options,
Installation path: '%ProgramFilesx86%Apache Software FoundationTomcat 6.0’
Synchronizer UI port: 8443TCP
Client Engine Port: 443TCP
We configure the data for the self-signed certificate,
We will need to enter the credentials of a Hyper-V administrator,
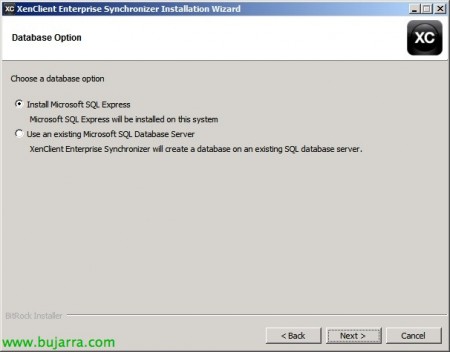
If it is a small installation, we can opt for a local SQL Express installation, in case you want to centralize and install with remote servers, logically we will create the database on a database server (SQL Server),
We indicate the credentials of the user 'sa’ of said server,
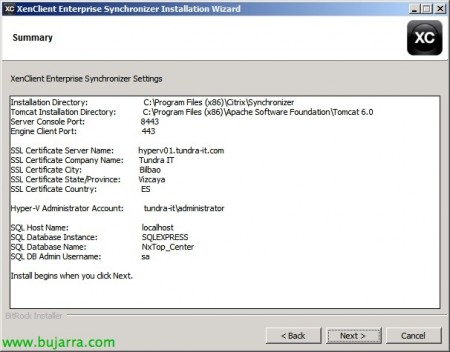
We confirm the installation summary and continue,
… wait a few minutes while installing…
List, Completed installation.
We will have to restart this server, as it is a Hyper-V server we will check that we do not stop the service of the VM's that run on it.
We open the XenClient Enterprise Management Console, We connect with a browser to: https://DIRECCIÓN_IP_SYNCHRONIZER:8443/MgmtConsole/, We enter as an administrator.
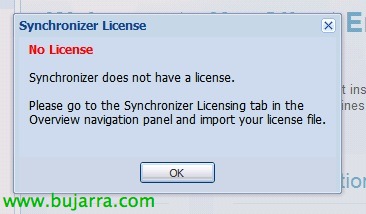
If it is the first time we enter it will give us a couple of warnings, the first one indicating that there is no license and that we must license it. Another alert will go off if we have not previously configured a network on our HyperV server that is called 'External Network', we must do it or modify the name in the Synchronizer properties.
This would be the center panel of Synchronizer, On the left we will have the configuration menus where we will create & We will configure the virtual machines to be deployed, We will publish them, we will assign them to local or Active Directory users/groups and where we will configure certain policies either by devices (XC engine), Users/groups or desktops!
Well, The first thing will be to import the license we have, for this, from the 'Overview view'’ > 'Synchronizer Actions’ > 'Import License…’ & We look for the .lic file.
In 'Software Library’ will be where we import exported MV images, ISO images to install the OS. or software as well as updates for the XC engine. Click on 'Import'…’ ISO to upload our first CD of an operating system.
We give it a name and a description and select the ISO that we will have previously left in '%ProgramFiles'(x86)%CitrixSynchroizerFileImport’
The next thing will be to create the virtual machines that we will then publish to the users, for this from 'Virtual Machines’ > Virtual Machine Actions’ > 'Create…’
We give the virtual machine a name, A description, we select your S.O., We indicate a team name & we select the newly imported ISO. “Next”,
We can perform an unattended installation if we install a Windows with a volume license, so we check 'Automatically install Virtual Machine’ and we fill in a name an organization, The local administrator's password, a product key and time zone. “Next”,
We will indicate the hardware specifications, Number of processors, Minimum RAM, and disc sizes (System Disk, User disk and local disk):
System Disk (C:)
Changes to the system will be tracked from the start of the session, These values will be used before the system disk values. They are not persistent for shared machines and they will be persistent for custom machines. It is the OS and applications disk provided by XenClient, will load the latest version released by XC on startup.
User Disk (Or:)
Tracking changes to the user disk from login. A copy of the user's data will be made upon logout, Disk changes will be persistent. They are documents of the user's profile, imagery...
Local Disk (L:)
They will be stored on each user's XenClient machine, are temporary files, de Outlook, caches…
By continuing with the wizard we can indicate policies to this virtual machine, will be backup-level policies, caducity, blockade, S.O. profile, USB's filter or Windows settings. “Next”,
We will indicate if we want it to be a shared machine (Shared) or personalized (Custom), We will select the type of network adapter and we will have it ready! Click on “Finish”,
We will be able to observe how the virtual machine installs it, We will proceed with its installation and leave it configured as we want, Even with apps installed, entered in the domain if we want to assign it later users/groups of a domain…
The next thing will be to set up a domain in the Synchronizer, so in the 'Users’ Click on “Create Domain…”
We indicate a server from our Active Directory, we indicate the LDAP port and we will indicate if we want it to be a secure connection through LDAPS, we will also indicate a user for LDAP queries and with permissions to create computer accounts in the A.D. “Finish”,
We confirm that all the data is correct and prove that it is so from “Test Active Directory”,
“OK”,
Once the connection is valid, we will synchronize our Active Directory with the Synchronizer by pressing “Sync Domain…”, A background task will be created where you will synchronize the users/groups/teams and their belongings, we will confirm that this task ends without errors, so we will have the AD synchronized.
We confirm that we see the Active Directory data once the synchronization task is complete.
In the menu 'Policies’ We will have all the configurations that we can create to later apply them, so much backup, how to use XenServer engine…
After installing the OS. we must take into account that we will install the HyperV Integration Services, for this we must connect the ISO from “Attach ISO…”,
And we selected 'Hyper-V Integration Services'.
Once we have the virtual machine ready, we will turn it off and we will have to publish it, by clicking on “Version / Publish”
We will indicate a reason when publishing it, where later in the generated versions we will see what was the reason for this publication or its status, if we have updated your S.O., Installed more apps, Made some configuration… In this case, being my first MV, I'll publish a new version and distribute it to all the users I'll assign next. We will have several options when it comes to publishing a virtual desktop:
Create a non-deployable checkpoint version of the Virtual Machine: To create a checkpoint for this VM but not publish it, to be able to return to this version in case of need after any modification we make.
Publish a deployable version, byt do not deploy at this time: To deploy a specific version but not publish it for testing first if necessary.
Publish a new version for staged deployment: To publish a version to specified users.
Publish a new version and deploy to all assigned users.: To release this version to all users who are already assigned to that VM
About a user/group, we will be able to assign the VM's that we want them to use…
And of course, We can manually replace configurations directly by user, for example of: Activity Center, Hot Keys, Launcher, Network, Connect, Power, Subtract or Support, in this case, for example, we will enable VNC for a remote control of the user if we need to help you.
If we want to use XenClient with a centralized environment where we will deploy the images from a Synchronizer, we will have to register this XC against one of these servers.
We will have three options: Register the computer or a user using their credentials, register it on behalf of another user (since we do not know the credentials of the end user) or register it without associating a user with it. If you do not have a Synchronizer, We will be able to create local users to protect the computer and have to validate ourselves when starting it. “Next”,
In this case, We will register this equipment and assign it a user but without knowing its credentials & “Register”,
The computer will be logged out and we will have to authenticate with a user from the Active Directory to be able to work with this XenClient engine,
Once we log in, We will have access to all the machines that have been associated with us and if we have been given permissions we can also create our own if necessary. First, the machines will be in the 'Ready to Download Update' state’ to be downloaded from the Synchronizer server, will go to the 'Downloading Update' status’ and after downloading they will be ready for installation 'Ready to install Update', will be processed in order 'Installing Update', and then they will be ready 'Ready'; when we start them, they must first load the custom data 'Starting' – Loading your changes’ & 'Running'. We will be able to move between the different MV's with the CTR key and the cursors.
And that's it! we already have the VM's ready and we can configure so that by default a specific VM starts and the user does not have to find out more. And of course, at the MV 'Connect’ we can configure either manually or with a directive the data of the Citrix client 'Citrix Receiver’ to run XenApp applications independently of the other virtual machines.


