Integrating our Xiaomi Mi Robot Vacuum Cleaner into Home Assistant

If we are lucky enough to have the best vacuum cleaner on the market, that is, a Xiaomi Mi Robot Vacuum and you want to continue integrating everything into Home Assistant to have your smart home controlled from a single point, This is your post. You will see that in 5 minutes you have it mounted and you can control the vacuum cleaner, as well as to know any detail from Hassio. And at the end we will know how to learn areas, like cooking, and send him to automatically inhale after lunchtime those crumbs that we have dropped, ¡ah! And in silence because it's nap time.
Sincerely, The only 'complicated' thing’ it can be to locate the security token that we have on our vacuum cleaner, if we have Android we have it sucked, since normally in the logs it is stored from the Mi Home app, on iOS it stores it in a small SQLite database that we can also open in a jiffy, I leave you Instructions in detail for each case.
Once we have the Token, the next thing will be to know the IP address that our vacuum cleaner has, we can simply from any router or DHCP server always assign you an IP based on your MAC address. With these two things we have it! We edit our file 'configuration.yaml’ and we add the following code:
vacuum:
- Platform: xiaomi_miio host: DIRECCIÓN_IP token: CODIGO_TOKEN
Save the file and restart Hassio, as usual, since “Configuration” > “Server Control” > “Server Management” > “Reboot”.
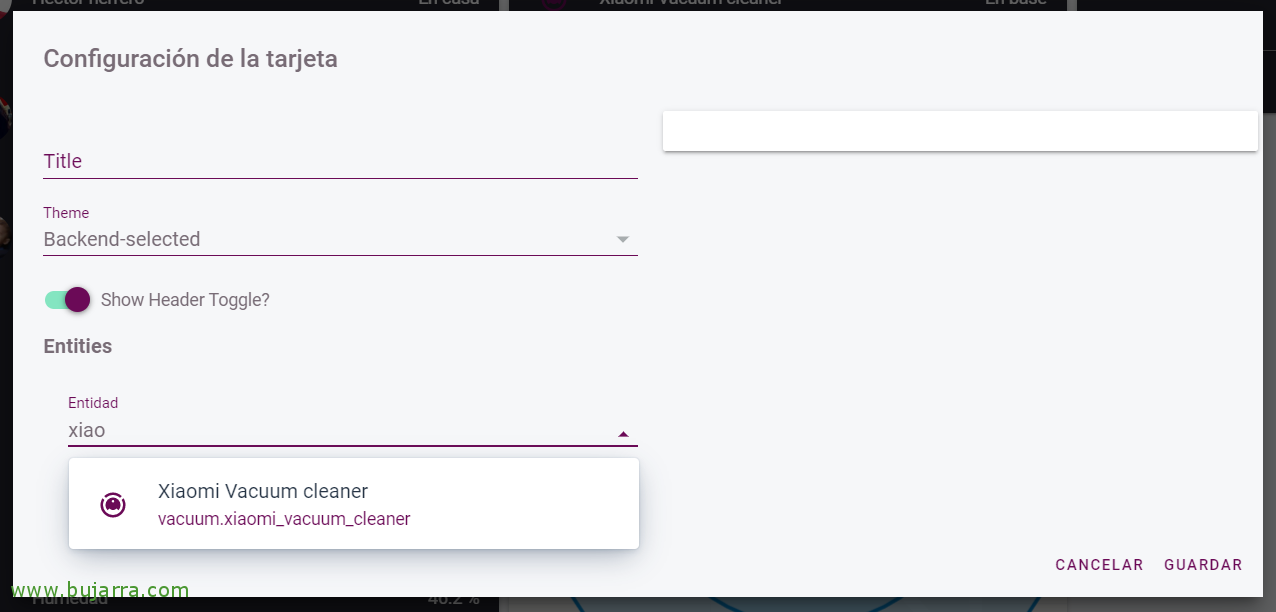
Once Home Assistant is restarted, we can add an 'Entities' panel from the editor, search for the entity that will have created us with our Xiaomi vacuum cleaner, and we keep.
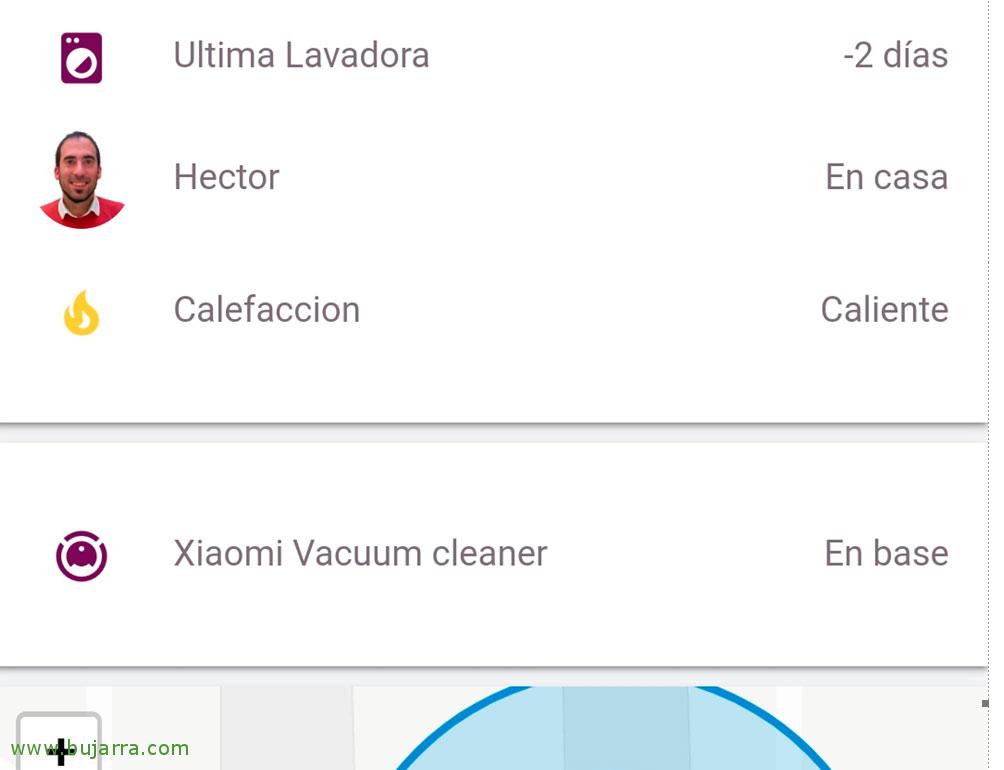
We will see a fairly simple but fully functional panel, Of course, we can customize it and make it much more attractive, But in my opinion, That's enough. Apart from the fact that this already tells us the current state of the vacuum cleaner, if we click on the Panel…
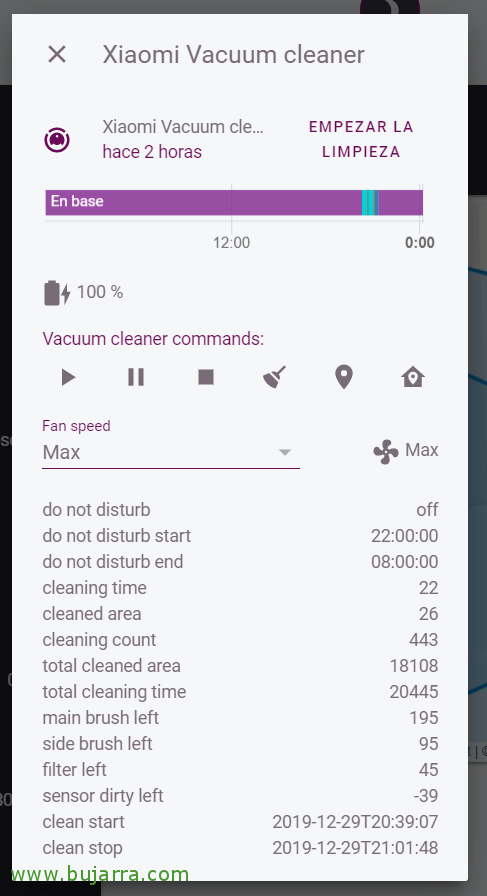
We will be able to manage the Xiaomi vacuum cleaner from here! We can start a vacuum now, Stop, look for where it is in case we have lost it at home or send it to the charging station, apart from setting the suction power, A blast. Now if you feel like doing some automation… For example… once a day, When no one is home, Let him start vacuuming! So when we get home we will have everything tidy and clean! If you need more info, This is the website official with more data.
Zones in Home Assistant for the vacuum cleaner
The simplest thing will be, install the FloleVac app on our mobiles, and log in with our Xiaomi username and password, we will be careful and choose the 'Europe' server. And review in the Settings of the application that the local IP of the printer corresponds to what it should be. With this we try to go to 'Control’ or 'State'’ Let's see if we see the data from the printer and we can handle it, If everything is correct, then click on 'Map’ and we'll see the complete map that you scanned on your last pass, If we don't have a map, Make sure in 'Settings'’ have 'Europe’ as a server.

To take a zone, for example the kitchen, Click on “Zonal Cleaning”, and adjust the box to the area we like the most, We leave it there and press 1 time in “Cleaning” and then followed another, But this time a long press, We'll see how it will put us “Copied to clipboard”. Those will be the coordinates of our area, We'll write them down carefully somewhere, example of the Kitchen 19994,21253,22544,25953,1
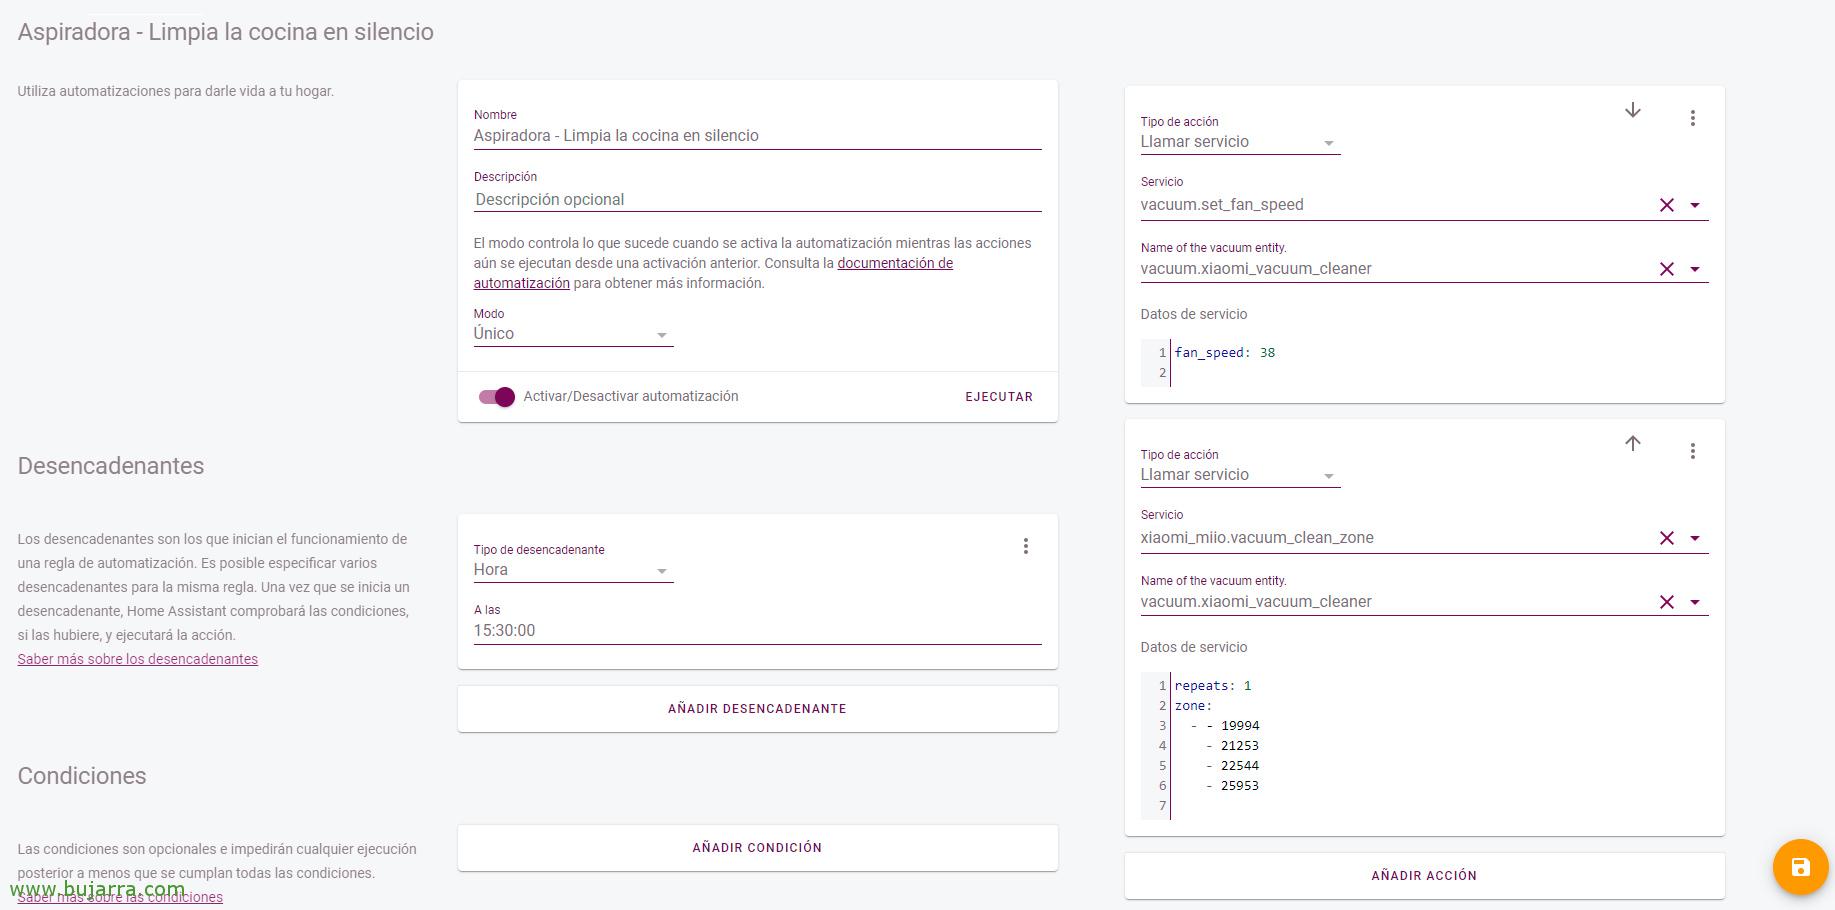
So as always, If we want to give it life, We will be able to create automations, This is an example as we see, at 15:30h the vacuum cleaner will come out in silence (38 of 100 Calling you with the vacuum.set_fan_speed service, If we want to put turbo, would be with the value 90). And with the xiaomi_miio.vacuum_clean_zone service we tell you how many passes we want it to make and over which areas. And we paste the appropriate coordinates.
What I said, as usual, I don't get tired: Thank you for sharing on social media!!!