Installation, Configuring and Managing Symantec EndPoint Protection

This document describes which is the latest product as of January ’08 Symantec on a corporate antivirus. It is the substitute for the 10.2, assuming it's the Symantec Corporate Edition version 11. Here we will see how the server component is installed, How we'll deploy antivirus to clients, how we'll configure them with policies and how we'll back up the entire AV server state.
Installing the Symantec Endpoint Antivirus Server – HERE
Configuring and Using the Symantec Endpoint Protection Manager – HERE
Using the Antivirus Client Migration and Distribution Wizard – HERE
Database Backup and Restore – HERE
Installing the Symantec Endpoint Antivirus Server,
Details the installation of a single Endpoint server in your organization.

If we put in the Symantec Endpoint Protection CD, We must select “Install Symantec Endpoint Protection” to install the Antivirus client manually. Or directly for what interests us, To install the anti-virus server. Before we have to install your prerequisites: IIS.

We select the first option, “Install Symantec Endpoint Protection Manager” To install the server and management console,

We get an installation wizard for the Symantec Endpoint Protection Manager, Click on “Next”,

We accept the license agreement & “Next”,

Select the installation directory of the Antivirus server, The default path is: “C:Symantec Endpoint Protection Manager Program FilesSymantec” & “Next”,
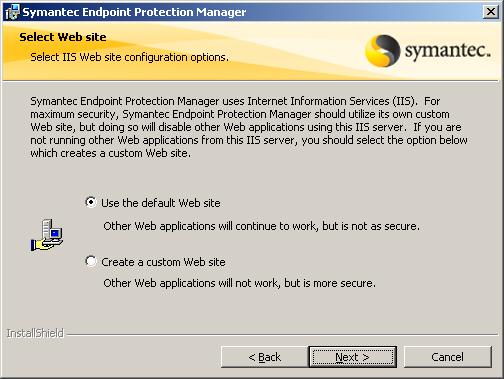
Ask us which IIS website to use, if the default site we have or if we create a site for that purpose. If we have a website already hosted and we want to continue maintaining it, we will have to create a site in IIS for Endpoint. It is recommended to dial “Use the default Web site”, Continue “Next”,

Ready to install the AV server now, “Install”,

… We wait while you install…
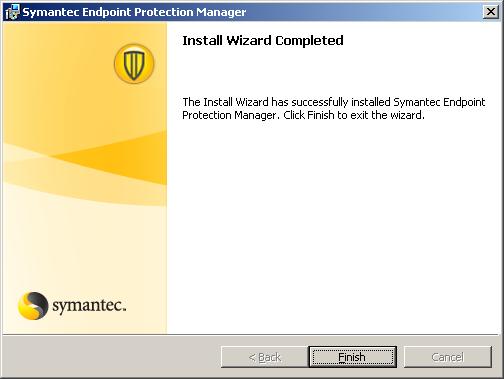
Simple installation, Now we press “Finish” To start a server configuration wizard.

GOOD, if it is the first server on our network, Select “Install my first site” to install the first server. If we already have a server on the network, we can install a second Antivirus server on the network so that the requests are balanced between the two from “Install a management server to an exisiting site”. We check the first option and “Next”,

We put the name of the server we want to install the server components, In my case I am doing the installation locally, We select the port, Default will be 8443TCP and the installation path for the data. “Next”,

We indicate the name of the site for the organization of the VA, something descriptive so that when we see it we know what it is about. “Next”,

We need to create a password for when we need to recover data or for the connection between the server and the clients to be encrypted, “Next”,

We need to store the data in a database, We have two possibilities: The first, if our organization is small, we can use a database that Endpoint brings “Embedded database” and the assistant will install it for us. Or we can use a SQL server that we have on the network to store it on it, It is the most reliable option if we can have one, Marking “Microsoft SQL Server”. In this case I will opt for the first option, “Next”,

We need to enter a password for the user 'admin'’ to be able to connect to the administration console. “Next”,

… We wait while the database is created…

GOOD, it already confirms that the administration server has been perfectly configured. Now it asks us if we want to run the migration and distribution wizard now, I will say that “No” since I prefer to configure the server well first, Migrate and distribute later. “Finish”.
Configuring and Using the Symantec Endpoint Protection Manager,
This part explains how to configure and use the Symantec Corporate Antivirus Management Console, as well as configuration through policies and viewing reports.

GOOD, first of all, open the Symantec Endpoint Protection Manager management console with its console: “Symantec Endpoint Protection Manager Console”, it will ask us for a user, will be 'admin’ with the password we set for you during installation. We will connect to the AV server using the port 8443 by clicking on “Log On”.

This is the main aspect of the console from the “Home”, From here we will see the state of several aspects, how our infections in positions and the work that has been carried out in them, The risks we have had, if we have computers without antivirus or with problems…
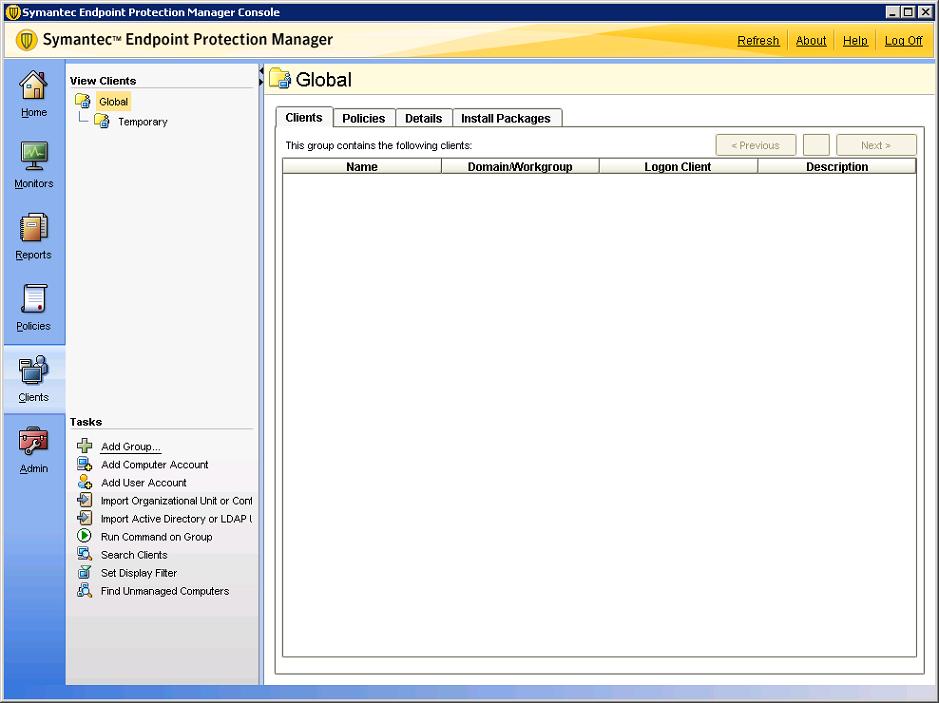
The first thing to do is to create a group to organize our stalls, from the “Clients” Click on “Add Group…”

We indicate a name for the group where we will enter the positions of my organization and then apply some antivirus policies/policies to them, Antispyware, firewall… “OK”

If we are going to “Clients” and our group in “Install Packages” We can add a type of installation for our customers, right button and “Add…”

Here we can select the package that we are going to install, and what features we will install from it, If complete installation…

And we can also notify users of the installation with a message, since “Notify”,

On the “Admin” on the left panel, in “Administrators” we have those who are the administrators of the Endpoint console, We can create some more administrators to give to other people in our organization to help us manage the tool.
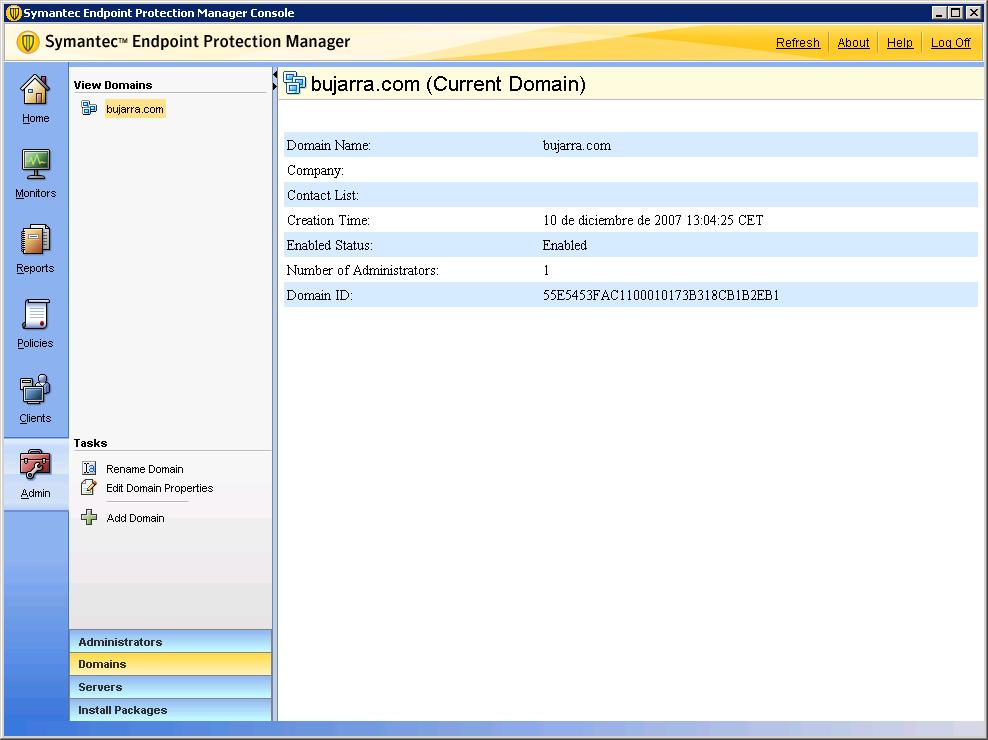
On the “Admin” in the “Domains”, we have the domains for which this Endpoint is configured.

We are still in the “Admin” in the part of “Servers” is where we will see the servers of our site or organization, where we can configure site options or add another replication server to share the load.

In “Admin” > “Install Packages” > “Client Install Packages” is where we will see all the packages that we can distribute to our customers, I currently have two that are the ones that come by default, but we can add new or directly updated packages here to later distribute them.

In “Admin” > “Install Packages” > “Client Install Settings” is where we will configure several options to the antivirus clients, we have a default setting called “Default Client Installation Settings”, but I will create a new one to see all the options and I will select the ones that interest me the most for my organization from “Add Client Install Settings…”

We give it a name and then we will apply it to the BUJARRA group. We select the type of installation, so that users do not notice it will be a silent installation. We can mark that the post is reset once the installation is finished. We can select the installation directory, I'll leave it at the default. If we want to enable the installation LOG and if that in which file, And especially if we are interested in creating program shortcuts in the Start menu. “OK”.

In “Admin” > “Install packages” we have “Client Install Feature Sets” which is what things will be installed on the client PCs when we distribute the antivirus client, In my case, I'll create a new type from “Add Client Install Feature Set…”

From here I will select the type of installation for my clients, we give it a name and then we will apply it to our previously created group, in my case called BUJARRA. We indicate what we want it to have, in my case “Antivirus and Antispyware Protection”, “Antivirus Email Protection” and only the client we use which is “Microsoft Outlook Scanner”, Since we don't use the other email clients, I won't install them. He also marked the “Proactive Threat Protection” > “Proactive Threat Scan” or also called Proactive Threat Analysis, What it does is show scores based on good and bad behaviors of 'unknown' applications, It is capable of analyzing the behavior of applications and communications only to detect and block attacks before they occur without the need to use signature files. But I won't score “Network Threat Protection” Why am I not primarily interested in my case, Similar to the above but for network resources, Browsers, Searching for threats on the network, One more level of protection, “OK”.

GOOD, Now we'll see a pretty interesting part that brings, What is policy configuration, we can create as many as we want and of the type that interests us, then we will apply them to the groups of teams that we are interested in, I am going to create one of each type to see all its possibilities and then I will assign them to my group BUJARRA. So first we're going to “Policies” > “Antivirus and Spyware” and create a new one in “Add and Antivirus and Antispyware Policy…”

We have several sections to configure, In the first one “Overview” We will indicate the name and description of the policy and whether we want to enable it or not, and to which group we will assign it, so we can already indicate our group to Global (all) or none.
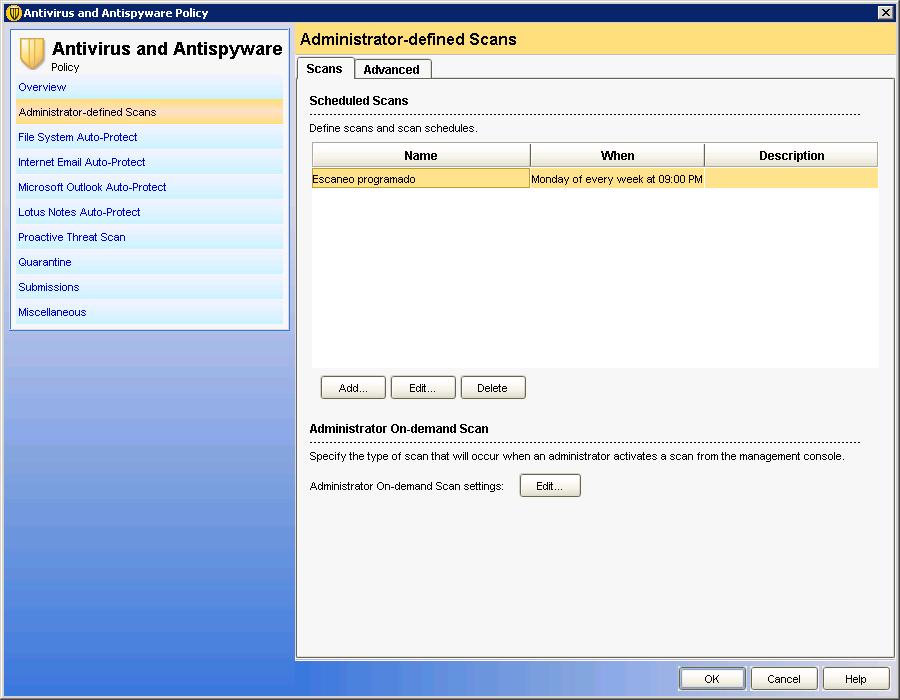
In “Administrator-defined Scans” We can schedule scheduled scans at the stations to whom this policy applies.

In “File System Auto-Protect” is the real-time analysis of the files, if we want it to be enabled at all times, We can lock it with the padlock, configure what type of files will be scanned and which will be excluded.

In “Internet Email Auto-Protect” We will enable generic email scans, indicating whether it is enabled or not and what type of files.

In “Microsoft Outlook Auto-Protect” We will enable whoever has this component installed if we want to force them to use it, From here we will configure your scan options, whether it is enabled or not, if it scans all files, including tablets and up to what level…

In “Lotus Notes Auto-Protect” Same as the previous one but for another email client and to configure this or the previous one it is clear that the component must be installed, If not, this doesn't work.

In “Proactive Threat Scan” If we have installed this component on the clients, if we want to enable it to search for worms/Trojans on computers, as well as keyloggers and others.

In “Quarantine” It is where we will configure when a virus is detected that we will do with it, whether to take it to the user's local quarentena folder or what to do, up there we have the possibilities.

In “Submissions” it is where we will enable or not to send information about what happens in the posts to the server.

In “Miscellaneous” we have various configurations about the Windows Security Center and its integration so that it gives notifications or not, among other options, as well as enable logs or notifications. We give “OK” to store it.

Now it will ask us if we are interested in assigning the policy we have just created, If we do not assign it to any group, we can do it later, But if not, The changes we have set here will not be applied to anyone, In my case I will say “Yes”.
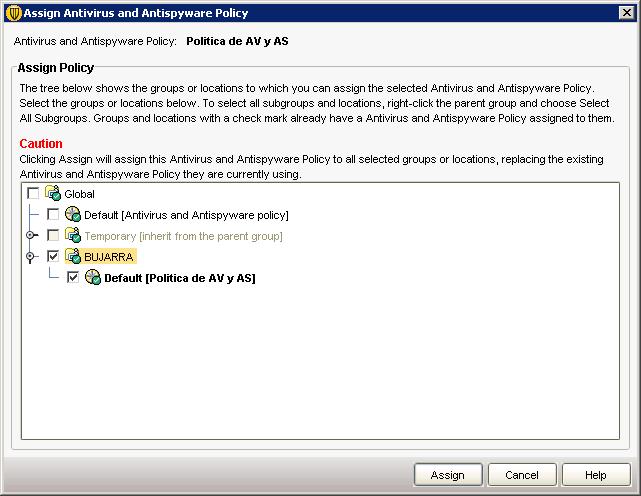
GOOD, When assigning a policy, we have to indicate which group we will assign it to, So we selected one, we mark the check on your side and “Assign”.

We have more directives, in this case those of the “Firewall”, We create a new one from “Add a Firewall Policy”,

We give you a name in “Policy Name” and a description. Of course we enable it by dialing “Enable this policy”,

In the “Rules” it is where we can create rules for the firewall we want to configure. First we will see if they are enabled or not, then his name, Severity, the application if it would affect any in particular. Or the same for the Host, We can set it to be in a time range, as well as the services/ports that we are interested in applying to the rule, if we want to prohibit them from entering us with a certain port on the PC, which adapter would be applied to, if we want to enable it with the screensaver, if the rule what it does is block or allow and of course if we want to log in.

In “Smart Traffic Filtering” we can enable common traffic in a network such as DNS queries (“Enable SmartDNS”) / WINS(“Enable Smart WINS”), or DHCP traffic(“Enable Smart DHCP”).

On the “Traffic and Stealth Settings” We can configure other traffic filtering options, How to enable NetBIOS traffic, or reverse DNS, antiMAC spoofing… We give “OK” to store it.

“Yes” to assign it to an existing pool.
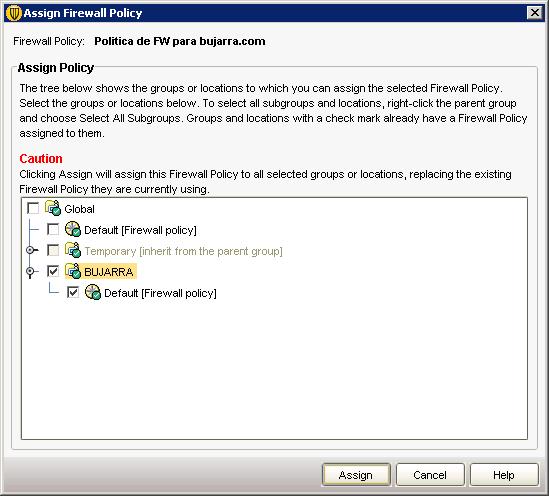
We mark the group to which we want to apply the FW policy and “Assign”,

We create an intrusion prevention policy from “Intrusion Prevention” > “Add an Intrusion Prevention Policy…”

In “Overview” We give you a name & description, We enable it,

In “Settings” is where we will enable it to automatically detect and block attacks on the network (“Enable Intrusion Prevention”). As well as DoS attacks (“Enable denial of service detection”) or port scans (“Enable port scan detection”). We may exclude if we are interested in certain computers so that this directive does not apply to them. And even if we are interested in it, we can block the IP from which the attack is being carried out, Marking “Automatically block an attacker's IP address” and indicating the number of seconds we want to block it.

In “Exceptions” We can customize one that we think shouldn't be, since “Add…”, We record the directive from “OK”.

We apply the policy if we are interested in it now, since “Yes”
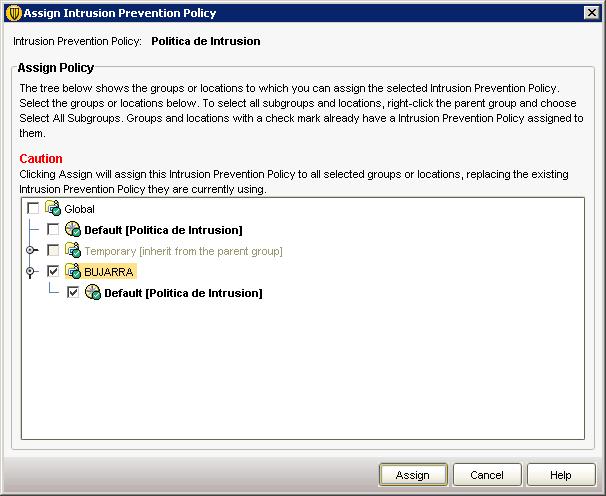
We mark the group of computers to whom we want to apply this intrusion prevention policy (IPS) and “Assign”,

Policies can also control the use of apps and devices, since “Application and Device Control” > “Add an Application and Device Control Policy…”
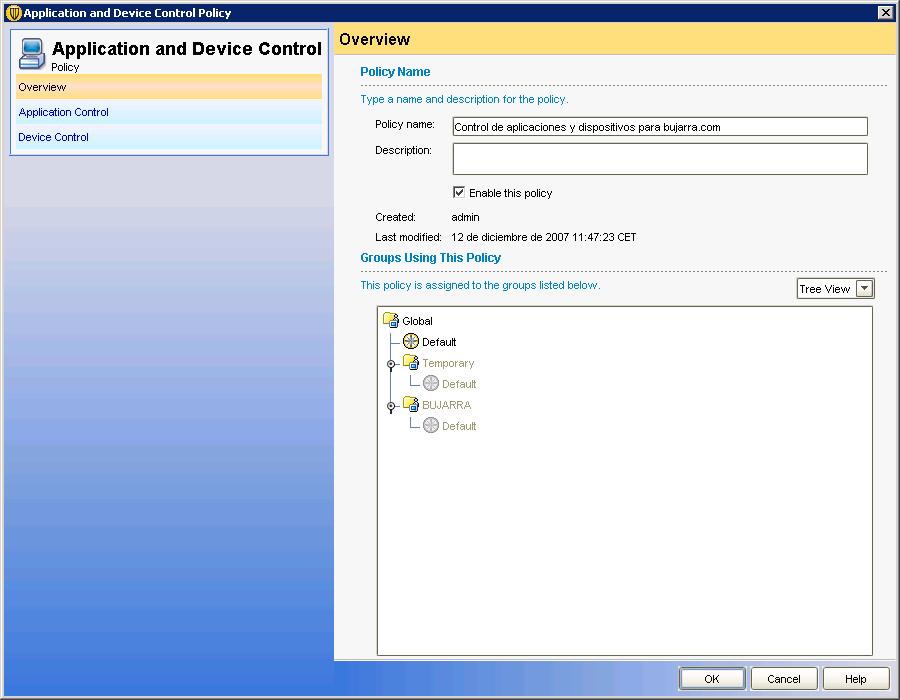
As in the previous ones, we indicate the name of the policy…

Well here (“Application Control”) we can block the applications that interest us, or directly edit some existing, How to lock and make all external drives read-only, or that no external drive software is running… or we can add an application ourselves and indicate the type we want it to be, if only of tests (Test) or directly for production, in addition to generating a LOG.

In “Device Control” We can customize different hardware devices to create some rules for them, How to Directly Ban USB Devices… “OK” to store it.
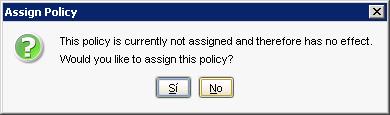
Let's follow the directive, “Yes”
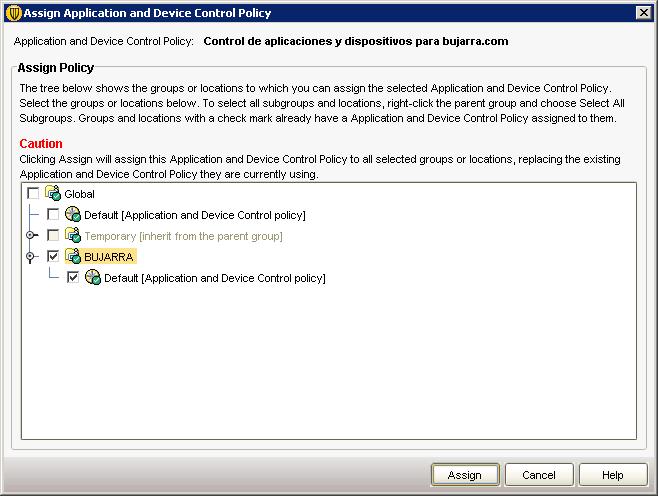
We indicate the group where we have to apply the policy… and “Assign”,

More, we can set up a policy to customize Live Update updates, by clicking on “LiveUpdate” and creating a new policy in “Add a LiveUpdate Settings Policy…”

Same as all the previous ones, We indicate a name, Description and we enable it,

In “Server Settings” we can configure here who the LiveUpdate server is, if we have one in our network or our supplier tells us which one to use.

In “Schedule” It is where we will schedule the schedule with which we want the positions to be updated to whom this directive applies.
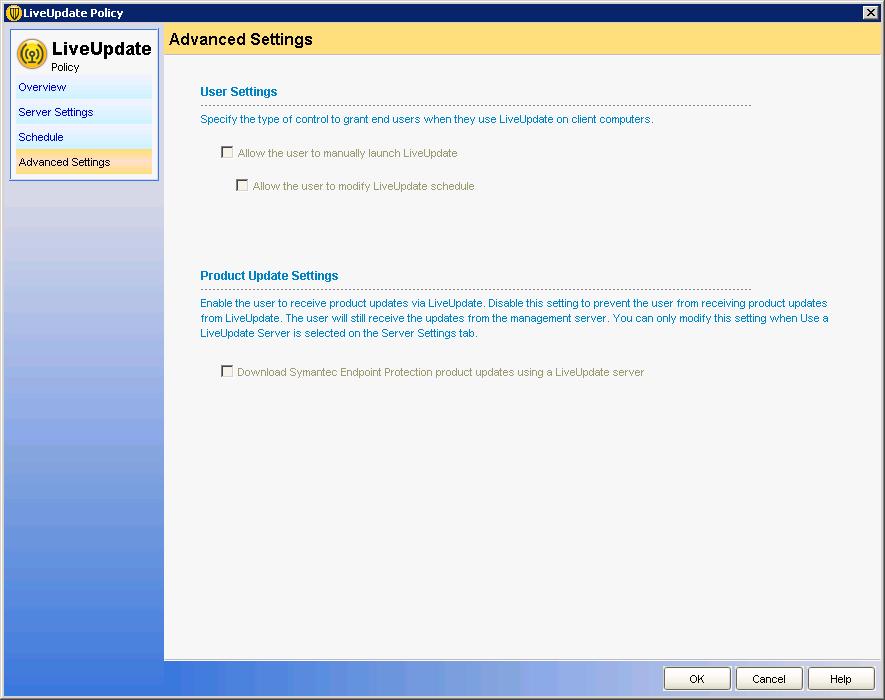
In “Advanced Settings” We can customize if we want users to update their signature updates on the posts regardless of the server. “OK”

We enforce the LiveUpdate update policy… “Yes”,
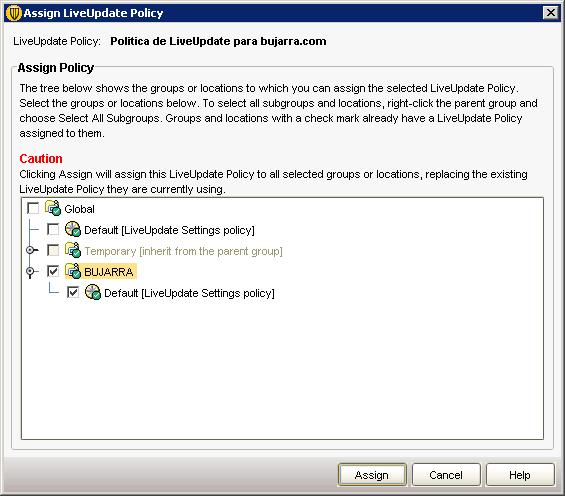
We indicate the group of equipment that we want to be applied to and “Assign”,

And the last type of policies that we can configure is the exception policy, since “Centralized Exceptions” in “Add a Centralized Exception”. From here we can enable different exceptions to directories or files.
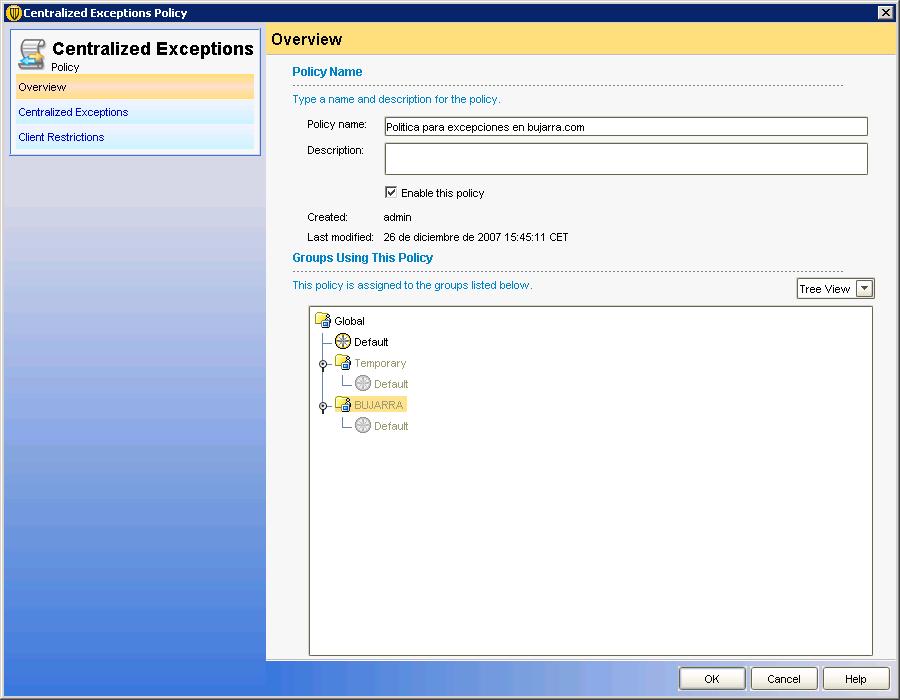
Same as all the previous ones, We indicate a name, a description and enable the policy to use.

In “Centralized Exceptions” we can add different types of files or directories so that they are excluded from being inspected by the Antivirus, as well as indicate file or directory variables.

In “Client Restrictions” We can customize whether we want users to be able to add their own exclusions and if so, which ones they could exclude. “OK” to store it.

We indicate that “Yes” to assign the policy.
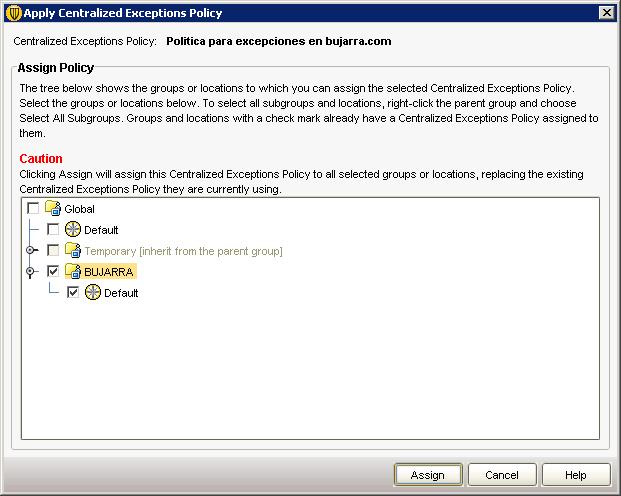
We assign the exclusion policy to the group we are interested in, in my case “BUJARRA” & “Assign”
So far the explanation of using the Symantec Endpoint console is over.
Using the Antivirus Client Migration and Distribution Wizard,
In this part we will see how to migrate our antivirus clients from an old version to this one., or directly distribute the antivirus client on computers in our network.
For all this, there is the “Migration and Deployment Wizard”, We open it,

An assistant jumps out telling us about the possibilities of this, the above or migrate the versions of the clients or new installations in them. “Next”,

We select what interests us, if you distribute the antivirus client on our network “Deploy the client” through a clean, new installation. Or migrate old versions from “Migrate from a previous version of Symantec Antivirus”. “Next”,

If we want to migrate them to a specific new group. I have them installed using an existing client in a group (“Select and existing client install package to deploy”) since at BUJARRA we have created an AV package before and we have configured it. “Finish”,

We select our AV client to install, the AV package and the maximum number of concurrent installations, “Following”,

It examines our domain and shows us all the equipment in it, Clicking on “Add >” for those of us who are interested in installing the AV client & “End”,

… We wait while you copy and install…

GOOD, Click on “Close”, are already installed.

We can see an installation LOG if we are interested in the installation.

However, we have another way to distribute antivirus clients in our organization, from the console, If we're going to “Clients” > “Find Unmanaged Computers” it will look for computers in an IP range that do not have the AV client installed.

We select an IP range to search for computers in it without the antivirus client and enter a user with permissions to install it on them, Click on “Search Now” To search for equipment…
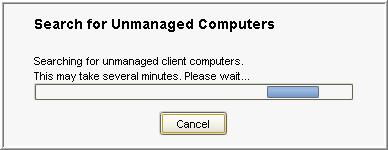
… we wait while you look for devices without the AV…

It will show us a list of computers without the antivirus client, Now we can select the package that we will install for you, the installation configurations and features we have configured before, as well as which group to put them so that the policies are applied to them, Click on “Start Installation” to install in the selected.
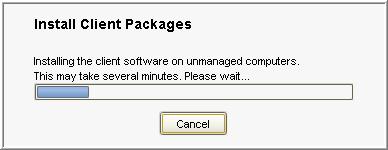
And now all you have to do is wait for the antivirus client to be installed on computers without it.
And finally we will see how we can make backups of the Symantec Endpoint database in case at any given time the database is corrupted or the server goes down directly.

For this, We have a console called: “Database Back Up and Restore”,

If we had this tool, Once in this menu we will see directly the operations that we can do, Let's back up, Click on “Back Up”.

We are sure that we will make a copy: “Yes”,

… We wait while you export the data…

“OK”, confirms that the DB is already copied.
With this we have seen the main new features of this totally new antivirus that Symantec brings, How to install the server, Configure, Perform backups, Update, have it well managed and how to maintain our organization posts with the antivirus client.
www.bujarra.com – Héctor Herrero – Nh*****@*****ra.com – v 1.0