Setting up an HP Lefthand array
In this document you will see certain generic configurations that allow these HP SAN arrays called HP Lefthand, this case is carried out by means of virtual arrays under a VMware environment, as they allow you to work perfectly in a much more flexible laboratory environment. HP has several models of physical Lefthand arrays, all with the same system, but with different capacities, Disc Models, Ethernet Mouths… would be the HP LeftHand P4500 and HP LeftHand P4300 series. But also for production environments there is the HP LeftHand P4000 Virtual SAN Appliance or VSA.
In this document we will see the main characteristics of the cabins, such as storage clustering (gives greater performance and capacity), Network RAID (Increased data availability), Thin provisioning (Reduces costs and improves disk capacity utilization), iSCSI (Ethernet network technology) Snapshots and Replication using Remote Copy (para replicación local o remota, para mejorar la protección y disponibilidad de los datos).
Este es el escenario que se montará siguiendo los pasos de este documento, se montarán cuatro cabinas SAN HP Lefthand, se creará un clúster del tipo multisite, crearemos una LUN, configuraremos network RAID para ver la replicación en que sentidos va y lo que supone, presentaremos las LUN’es a un host. Se verá como crear un snapshot de dicha LUN para usarlo como respaldo o volcarlo en otra LUN, o para usar SmartClone… lo que necesitamos son como en todo entorno iSCSI una red privada donde estarán las cabinas y las patas ethernet de los host que se quieran conectar a ellas, los clientes/puestos no deben estar conectados a esta red. The network should be at least 1Gb to be supported, and ideally, it would be good to have a 10Gb iSCS network!
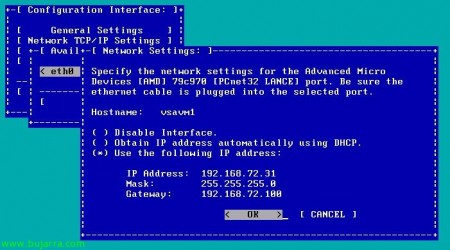
Well, we start the first array, they don't have much configuration, just adding a management IP address will be enough. So we start it, and when it asks for the login, we enter 'start'.
We press Enter here on the “Login”,
And we go to “Network TCP/IP Settings” > “eth0”, Select “Use the following IP address” and we specify the IP address for this array. “OK”,
“OK” to save your changes,
“OK”, and with this, we finish the minimal configuration on the HP Lefthand arrays.
Now what we need to do is connect to manage the arrays, for this, we will use the management console called “HP LeftHand Centralized Management Console” or “HP LeftHand CMC”.
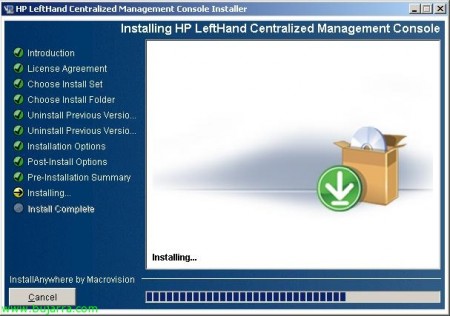
Instalando HP LeftHand Centralized Management Console,
La debemos instalar en un equipo Windows que tenga conexión a la red iSCSI, ya que la gestión es sobre la red privada iSCSI.
La instalación es un simple asistente, lo seguimos y tendremos la consola instalada para poder gestionar nuestras cabinas de forma independiente o a nivel general mediante los Management Group. “Next” To start the wizard,
We accept the license agreement “I accept the terms of the license Agreement”, “Next”,
Seleccionamos instalación personalizada marcando “Custom” & “Next”,
Select “Application” para instalar la consola, optionally “SNMP Support” para poder auditar con SNMP las cabinas y “Documentation” Stop that, documentation & ayuda. “Next”
Select the installation path, Default: “C:Archivos de programaLefthand NetworksUI”, “Next”,
Si queremos icono…
Si queremos abrir la consola al finalizar la intalación,
Un resumen de la instalación y pulsamos “Install” para comenzar por fín la instalación de la consola de administración,
… wait a few seconds while installing…
List!
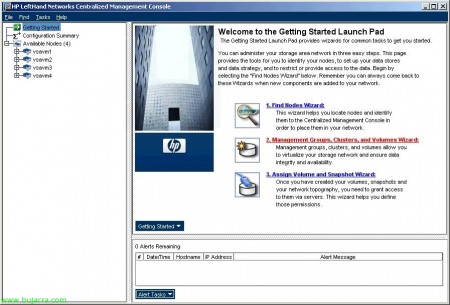
Open the console “HP LeftHand Centralized Management Console”
Si es la primera vez que abrimos esta consola, tenemos que configurarla, This is, agregar las cabinas de almacenamiento, crear un grupo o varios grupos de administración, crear un clúster, o crear alguna LUN. Todo ello podemos hacerlo mediante asistentes. Así que primero tenemos que agregar las cabinas desde “1. Find Nodes Wizard”
“Next” To start the wizard,
Podemos buscar las cabinas por dirección IP fija, nombre o directamente que nos haga un broadcast en la red para buscarlas, yo escojo la primera opción, más comodo.
Since “Add…” agrego el rango IP donde estan mis cabinas, y marco la opción de “Auto Discover” para que la próxima vez que abra la consola automáticamente me guarde estas cabinas en la consola, Pressed “Finish”,
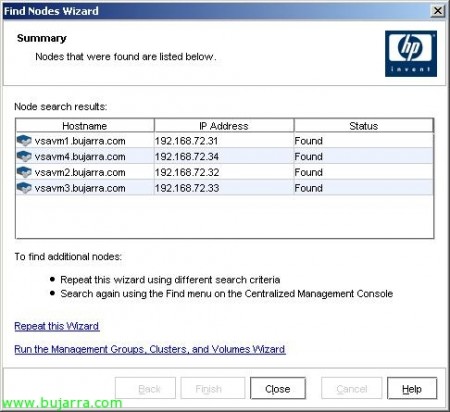
GOOD, nos detecta cuatro cabinas, con sus nombres, IP’s… Click on “Close” para cerrar el asistente.
Click on “2. Management Groups, Clusters and Volumes Wizard” para crear, primero un grupo administrativo para gestionar las cabinas, second, crearemos un clúster entre las que nos interese y del tipo que nos interese. And finally (optional) crearemos las LUN’s.
“Next” To start the wizard,
Creamos un grupo de administración para nuestro entorno desde “New Management Group” & “Next”,
Indicamos al grupo un nombre y seleccionamos las cabinas que queremos que pertenezcan a este grupo administrativo, en principio lo interesante es agregar todas las cabinas para poder trabajar con ellas,
We create a username and password to protect this administrative group, so that only we or someone we authorize can manage it, “Next”,
We set the group's time, it will be interesting to use an NTP server that we have on the network (A firewall, a domain controller…), in my case I configure it manually using the second option, “Next”,
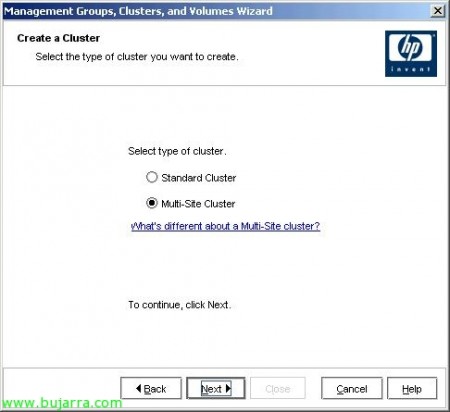
GOOD, Here we need to configure the type of cluster we want; if we are only going to have one site, one location, we will select a “Standard Cluster”, instead, if we are going to have at least two sites, physically separated, we will select a “Multi-Site Cluster”. In this document we will create a multi-site cluster,
We give the cluster a name and select the arrays (or storage nodes) that we want to participate in the load balancing with our organization's information, Initially we select all of them,
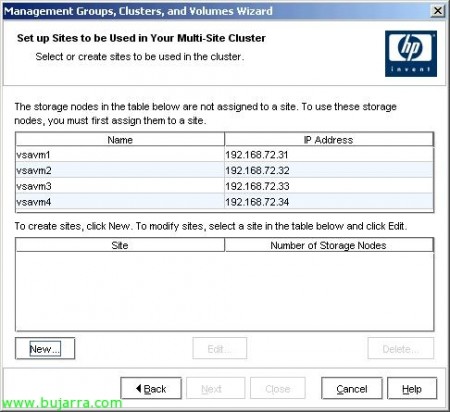
But now we need to configure (if we have them) the sites, or physical locations, for proper management, So we click on “New…” to create sites,
In my case I will create two sites and associate the cabinets of one site by adding them with their location. Eye, it is necessary to have the same cabinets in one site as in the other sites, and of course the same model.
GOOD, it no longer shows available cabinets and shows us the sites we have configured, “Next”,
We need to add from “Add…” an IP address (Virtual IP) for the cluster, which is where our iSCSI initiators will connect,
We specify an IP address and a subnet mask, “OK”,
The wizard also asks us if we want to create a volume now, A LUN, This is optional, but I prefer to do it later since I don't even know the space I have! So I mark “Skip Volume Creation” & “Finish”,
… we wait a bit while it creates the management group, join all the cabinets, create the cluster…
Once finished, Click on “Close” to be able to manage this new environment.
Here we already have the Management Group, with the cluster, the nodes, and all the configuration that we could manipulate,
If we want a team to connect to our volumes or our LUNs, we first have to register the initiator of that system, for this, We are going to “Servers” and right-click “New Server…”
With this I will make it possible for this system to access the LUNs that I specify later, it is a type of alias, we indicate its name, description, if we give it access via iSCSI or not, if we want to use load balancing (which not all initiators support), if we want to use CHAP or not, and the initiator name or Initiator Node Name. The iSCSI initiator name can be obtained from the properties of the host that will connect to the arrays. “OK”,
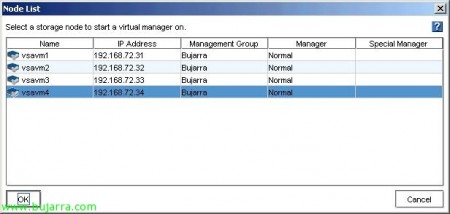
The HP Lefthand arrays, require Managers to ensure that all arrays have their data correctly replicated, to communicate the arrays with the storage,or to be able to support the failure of different nodes… With quorum number = n; Number of managers = n + 1. A Manager is a process that controls the environment, associated with a management group. It is advisable that the number of Managers be odd, This is,in the configuration I currently have, I have four cabins with the manager running in each of them, I will need to start one more manager, and I have the option (less recommended) to use a Virtual Manager (which would run under one of the cabins) and would only start manually after one of the nodes crashes, so that the quorum is not lost. Otherwise, we have the option to use a Failover Manager, which should be separate from the cabins (advisable) in a third site (or at least separated from the cabin network), which would start automatically in case of a node failure. This runs on a virtual machine either in VMWare ESX or in one of VMware Server.
This way we ensure that if one node fails, or two; there are 3 manager’s levantados y se pueda seguir trabajando en la situación actual de nuestra organización ya que sigue habiendo quorum.
Y seleccionaríamos qué nodo queremos que tenga el Virtual Manager.
Well, vamos a crear un volumen, A LUN, para poder presentarlo posteriormente a los iniciadores iSCSI y que se pueda trabajar con el alamcenamiento compartido de nuestras cabinas. Since “Volumes and Snapshots” Right-click “New Volume…”
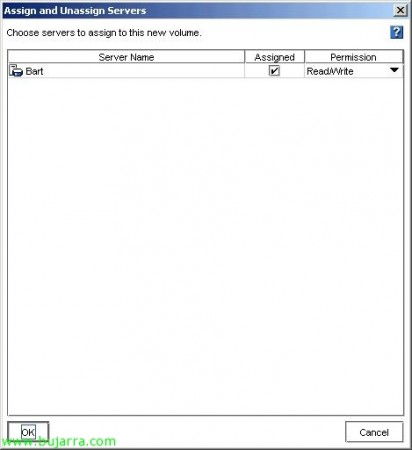
On the “Basic”, indicamos el nombre del volumen, A description, un tamaño que le querramos dar y a que servidores se lo queremos presentar desde “Assign and Unassign Servers…”. Se recomienda crear un volumen con el tamaño que se necesite, ya que luego se podrá redimensionar y hacerlo más pequeño o más grande es muy sencillo.
Seleccionamos el servidor que queremos que vea este disco, Mark “Assigned” y seleccionamos los permisos que queremos que tenga, para un acceso completo indicamos “Read/Write”, “OK”,
On the “Advanced” indicamos importante el tipo de replicación que queremos que tenga esta LUN entre los nodos o cabinas que es una de las características de este tipo de cabinas (ver la imagen inferior para más detalle). Además de configurar la prioridad de la replicación entre las cabinas “Availability” o disponibilidad y “Redundancy” o redundancia. Y el tipo de LUN, si primaria o remota
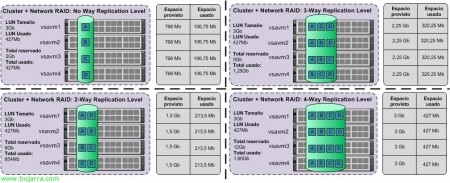
El tipo de replicación indica cuantas veces los datos van a estar copiados, This is, 2-Way indica que la información estará duplicada, 3-Way la info estará triplicada y 4-Way estará cuatriplicada. Now, depende de los nodos que tengamos para seguir los patrones de escritura, para eso es mejor buscar nuestro caso concreto. Como veremos, al tener mayor nivel de replicación, más hueco estará reservado, más nos ocupará nuestra información pero mucho más protegidos estaremos.
Este sería el aspecto de la LUN recientemente creada.
Sobre un volumen, podremos crear snapshots o instantáneas, para quedarnos en un punto fijo y poder volver atrás en un momento dado, perdiendo la información que se haya escrito posteriormente. O directamente para apoyarnos en ellos para hacer copias de serguridad (remotas), también podremos presentar estos snapshots a equipos si fuera de nuestro interés. Para crear un snapshot manual botón derecho en el volumen “New Snapshot…”
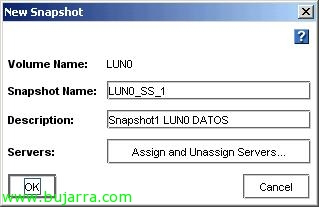
Indicamos el nombre del snapshot, por defecto usa la terminología de dos SS para indicar que es un snapshot. “OK”.
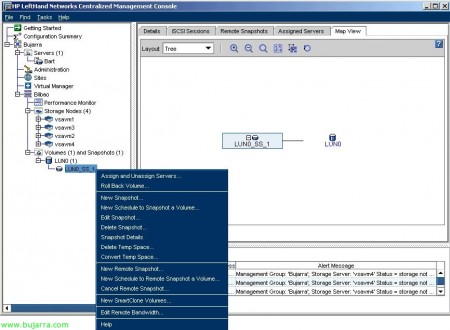
Y estas serían las opciones que tenemos sobre un snapshot, la interesante el Roll back 😉
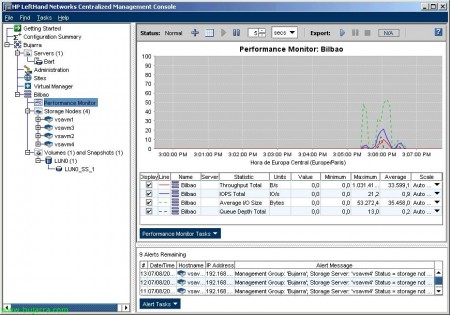
Podemos ver el rendimiento de las cabinas, o de cualquier elemento de nuestra organización desde “Performance Monitor” pudiendo agregar o quitar contadores a nuestra gráfica.
O por ejemplo, since “Use Summary” tenemos una gráfica donde podemos ver los usos reales de nuestros datos, los datos reservados (o aprovisionados), los mismos pero de snapshots, lo que no está usado, el tamaño total, o si usaríamos Thin Provisioning en vez de Full en la LUN que tengo veríamos diferente información.
What I said, podemos hacer snapshots de forma remota, This is, to be able to put them in a volume, for this, over the volume with right-click “New Remote Snapshot…”
We need to follow the steps it asks for, first, Click on “New Snapshot…” to create the snapshot,
Same as before, first we create a snapshot, we give it a name, “OK”,
And now we must specify a remote volume by opening the dropdown, If we don't have it, one will need to be created from “New Remote Volume…”
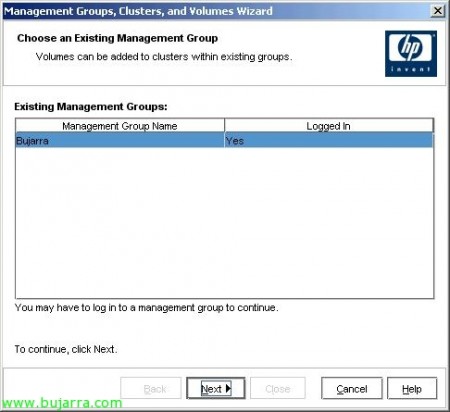
“Next” to select the management group,
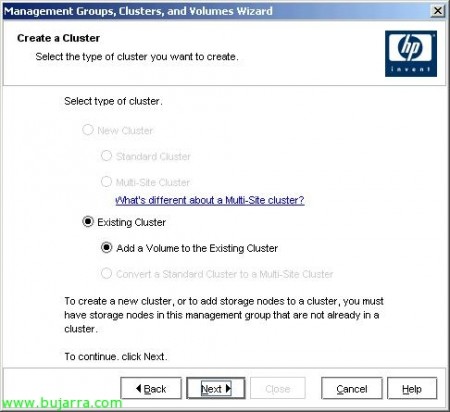
From the existing cluster (“Existing Cluster” & “Add a Volume to the Existing Cluster”), “Next”,
From this cluster, which it discovers automatically, “Next”,
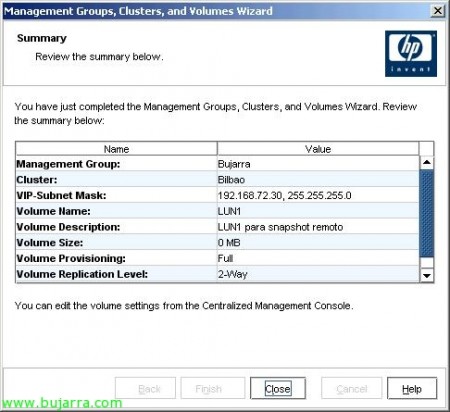
We give this volume a name, as well as if we want its content to be replicated or not, “Finish”,
We confirm and “Close”,
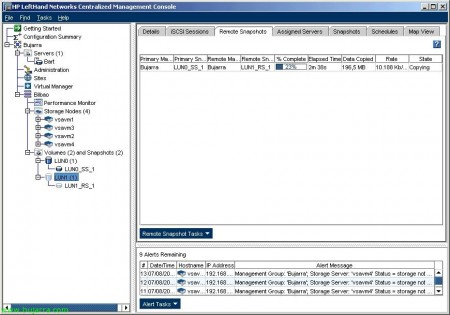
And now, We give “OK” and it will create a snapshot of the source volume and mount/copy it as if it were another volume.
Tras un buen rato de copias y réplicas de información, veremos que ya tendríamos dos volumenes con la misma información,
Podemos usar otra de las características de las cabinas HP Lefthand para crear volumenes de SmartClone, esto es para ahorrar espacio en nuestras cabinas. Un ejemplo práctico, si queremos tener equipos (servidores x ejemplo) con un mismo sistema base, creamos una LUN para ello, instalamos el sistema operativo en ella y las configuraciones necesarias, esto ocupará un espacio (2Gb por ejemplo), si vamos a tener 10 servidores utilizando 2Gb para la misma información ya estamos malgastando 20Gb. La idea es crear un volumen con dicha configuración y crear SmartClone, para que cada servidor use sólo la información que necesite utilizando ese disco base; and each server stores its information on its own specific LUN, without having to duplicate information unnecessarily.
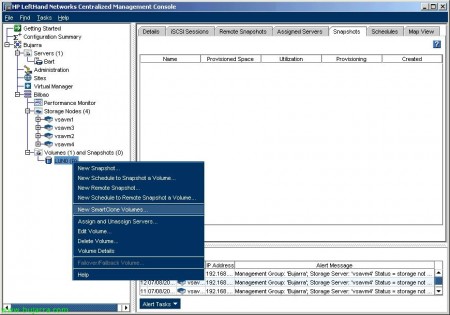
Well, for this, on a volume that already contains the information we want other machines to use, Right Button “New SmartClone Volumes…”
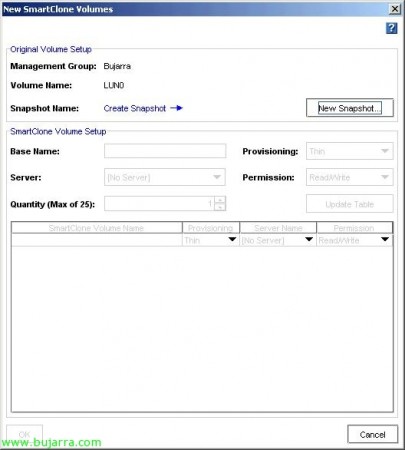
First, we must take a snapshot “New Snapshot…”
Idem, “OK”,
We indicate the name we want this base volume to have, the type of provisioning we will apply to the volumes we are going to create, for these environments it is recommended to use “Thin”, and not “Full” so that it only occupies the space that is actually used (and thus we can create more volumes than the space we actually have available, very risky but possible, it can be done). We select the servers (iSCSI initiators) that we want to have access to each SmartClone and set permissions (the graphical example is not appropriate, since I didn't have more equipment to make the sample). We “OK”,
And if we go back to the previous graph, See (in my case) we are using or are going to use more space than we have available! (that is Thin Provisioning). Full Provisioning would reserve all the space we assign to a LUN, even if it's not used.
And well, we can navigate through all the tabs we need in the console, and we can also get information about our hardware, the status of its connections…
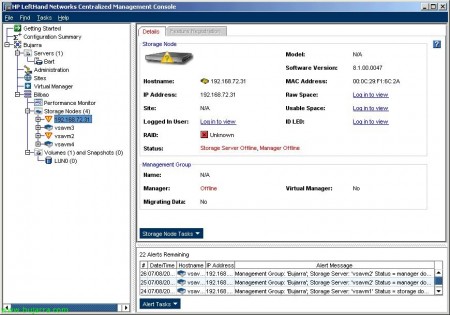
And if a storage array goes down and we have the Virtual Manager running (or the Fault Manager) we will be able to see how we can handle the simultaneous failure of two nodes at the same time.
To connect to this storage, usaremos si fuera posible el iniciador iSCSI que proporciona HP Lefthand, ya que permite un mejor balanceo de las conexiones, aunque sólo está para Windows, HP MPIO Lefthand DSM Dynamic Load Balancing, haría un balanceo dinamico de las conexiones obteniendo datos de diferentes cabinas. Sin embargo con un iniciador iSCSI tradicional como el de Microsoft iSCSI Initiator, redireccionará preguntando al clúster por el host más liberado y llevándole (Virtual IP Static Load Balancing).


