

Unattended installation of Presentation Server 4.x

To perform an unattended installation of Citrix Presentation Server 4.x or XenApp we need to create a response file and run the Citrix installer, it is something quite simple and that we can use to automate Citrix installations and avoid installing it with a CD.

If we look at, inside the folder “Support” > “Install” on the Citrix Presentation Server CD we have a template of the response file “UnattendedTemplate.txt” that we'll use to create our own template.
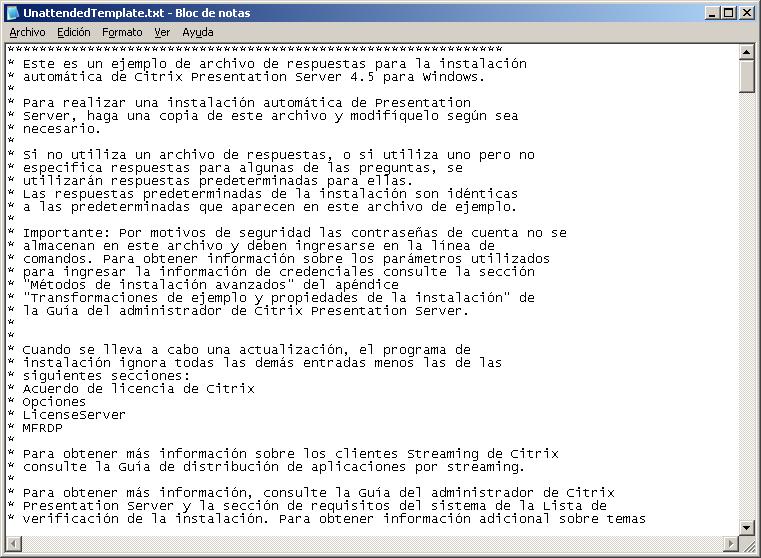
UnattendedTemplate.txt
**************************************************************
* Here's an example of a response file for installation
* Citrix Presentation Server 4.5 for Windows.
*
* To perform an automatic installation of Presentation
* Server, Make a copy of this file and modify it as desired
* necessary.
*
* If you don't use a response file, or if you use one but not
* Specify answers for some of the questions, herself
* they will use default responses for them.
* The default installation responses are identical
* to the default ones listed in this sample file.
*
* Important: For security reasons, account passwords are not
* stored in this file and must be entered in the
* Commands. To obtain information about the parameters used
* To enter credential information, see the
* “Advanced installation methods” from the appendix
* “Sample Transformations and Facility Properties” of
* the Citrix Presentation Server Administrator's Guide.
*
*
* When an update takes place, The
* installation ignores all other entries except for the
* Next Sections:
* Citrix License Agreement
* Options
* LicenseServer
* MFRDP
*
* For more information about Citrix Streaming clients
* see the Streaming App Distribution Guide.
*
* For more information, see the Citrix Administrator's Guide
* Presentation Server and the System Requirements section of the Presentation Server
* Verification of the installation. For additional information on topics
* of licenses, see the Citrix Licensing Getting Started Guide.
*
***************************************************************
***************************************************************
* Citrix License Agreement
*
* This section specifies that the end-user's acceptance of the
* Citrix License Agreement. This value should be set to “Yes” to indicate
* that the Citrix End User License Agreement is accepted.
*
* Automatic installation will fail if any value is used that is not
* Be “Yes”.
***************************************************************
[Citrix License Agreement]
AcceptLicense=No
***************************************************************
* Data Warehouse Configuration
* This section specifies whether a new community will be created or joined by a
* Existing Community and How to Connect to the Data Warehouse.
* There are several options:
* 1. To create a community using an Access database:
* – Set CreateFarm to Yes
* – Set LocalDBType to Access
* – Set DirectConnect to No
* – Complete the Community Parameters section
*
* 2. To create a community using a SQL Server Express database:
* – Set CreateFarm to Yes
* – Set LocalDBType to SQL
* – Set DirectConnect to No
* – Complete the Community Parameters section
*
* 3. To create a community using an Oracle database,
* Microsoft SQL Server or IBM DB2:
* – Set CreateFarm to Yes
* – Set DirectConnect to Yes
* – Complete the Direct Connect Parameters section
* – Complete the Community Parameters section
*
* 4. To join a community using an Oracle database, SQL Server or DB2:
* – Set CreateFarm to No
* – Set DirectConnect to Yes
* – Complete the Direct Connect Parameters section
*
* 5. To join a community by connecting to a database
* Access or SQL Server Express that is located on another server
* (Indirect connection):
* – Set CreateFarm to No
* – Set DirectConnect to No
* – Complete the Indirect Connection Parameters section
*
* Specify the name of the Zone in which the
* server. If a zone name is not specified, The
* Default zone name to the first server in the community. Yes
* A zone name is not specified for servers that join
* A community, Servers join the area where it is located
* The Community.
*
* If an Oracle database is used, SQL Server or
* DB2 file must be manually created. DSN within the
* ODBC Data Source Manager in the “File DSN” before
* to run the automatic installation process.
*
* IMPORTANT: Read the Citrix Presentation Administrator's Guide
* Server for information about store configuration
* of data, About supported databases, The configuration of
* a DSN file, the movement of servers within the
* communities and the renaming of the zones.
***************************************************************
[Data Store Configuration]
CreateFarm=Yes
LocalDBType=Access
DirectConnect=No
; Leave this parameter blank to use the default zone name
ZoneName=
***************************************************************
* Direct Connection Parameters
*
* This section determines the parameters for a database
* Oracle, SQL Server or DB2.
* This section is only used if the DirectConnect value is Yes
* in the datastore settings section.
* In this section you must specify:
* 1. The path to the DSN file for this database.
* – If a community is being created, see the Guide to
* Citrix Presentation Server administrator for details
* about creating a DSN file that can be used here.
* – If the server is joining a community, It must be
* specify the path of the DSN file that was created on the server where
* the community was created, or the path of a copy of it. To obtain
* More details, see the Citrix Administrator's Guide
* Presentation Server.
* Note: The use of passwords in the
* Security responses. You must use the
* The command line CTX_ODBC_PASSWORD to specify the
* password that authenticates you with this database.
*
* If Windows NT authentication is used, you must include
* the domain along with the username with the format
* domain
ombre_de_usuario.
* This command is described in the Citrix Presentation Server Administrator's Guide.
*
* Note: Use of full domain names is not supported.
***************************************************************
[Direct Connect Settings]
DSNFilePath=
UserName=
* To specify the password, Use the line parameter
* of commands CTX_ODBC_PASSWORD.
* Note: The next section was for MSDE in Citrix
* Presentation Server 4.0.
* Now use other parameters.
**************************************************************
* SQL Server Express Parameters
*
* This section specifies which SQL Server Express parameters
* Use when connecting to the database.
* Use this section if you set up CreateFarm in Yes and LocalDBType in SQL
* In this section you must specify:
* 1. Name that the Sequel Server Express instance should use
* when connecting to the data warehouse. The default is
* CITRIX_METAFRAME.
*
***************************************************************
[SQL Server Express Settings]
InstanceName=CITRIX_METAFRAME
**************************************************************
* Indirect connection parameters
*
* This section specifies the parameters required to connect
* indirectly with an Access database that is located at
* Other server.
* This section is only used if CreateFarm is NO AND ALSO
* DirectConnect is No.
* In this section you must specify:
* 1. The name of the server with which you want to set the
* Indirect connection and the port number to be used.
* 2. Username and domain of an administrator account
* that can access the first server in the community (or to
* a Presentation Server).
*
* Note: The use of passwords in the
* Security responses. You must use the
* command line CTX_INDIRECT_JOIN_PASSWORD to specify
* the password that authenticates you to indirectly join the
* community.
* This command is described in the Citrix Administrator's Guide
* Presentation Server.
*
* Note: When you use the indirect connection parameters, you must specify
* Domain name and username, since both fields are
* Necessary.
* Use of full domain names is not supported.
***************************************************************
[Indirect Connect Settings]
IndirectServerName=
IndirectServerPort=2512
UserName=
DomainName=
* To specify the password, Use the parameter in the
* CTX_INDIRECT_JOIN_PASSWORD commands.
***************************************************************
* Community Parameters
*
* This section specifies the parameters for creating a community.
* This section is only used if the CreateFarm value is Yes in
* The Data Warehouse Settings section.
*
* In this section you must specify:
*
* 1. The name of the community being created.
* 2. The Windows NT user name (username and
* domain) who will act as the administrator of the community.
* This user can designate other users as
* community administrators using Presentation
* Server Console.
*
***************************************************************
[Farm Settings]
FarmName=Farm
FarmAdministratorUsername=Administrator
FarmAdministratorDomain=
***************************************************************
* Imitation limitations
*
* This section specifies whether the imitation will be activated. If activated
* The imitation, This section applies the restrictions to the same.
***************************************************************
[Shadowing Restrictions]
AllowShadowing=Yes
ProhibitRemoteControl=No
ProhibitNotificationOff=No
ProhibitLoggingOff=No
**************************************************************
* Citrix XML Service
*
* This section allows you to specify XML backup.
* The default port of XML Service is the 80. Herself
* You can share the default port 80 with IIS (If it is
* installed) or a port can be dedicated to the XML service.
* If ExtendIIS is set to No, The specified port is
* used for the Citrix XML service, And it is ignored
* EnableVirtualScripts. If ExtendIIS is set to No and is
* IIS installed (or a service that already uses the 80), Citrix XML
* Service takes the default secondary port 8080. If
* set ExtendIIS to Yes, DedicatedPortNumber is ignored and
* use EnableVirtualScripts to decide whether to create the
* of virtual execution files only if
* VirtualScriptsDirectory does not exist on the system. If it exists,
* EnableVirtualScripts has no effect on installation.
* If ExtendIIS is not set to Yes and IIS is not available,
* The dedicated port number is used.
* If you don't set ExtendIIS to Yes and IIS exists and
* VirtualScriptsDirectory does not yet exist on the system but
* EnableVirtualScripts is set to No, Installation will fail.
* If you don't use the default port 80, all ICA Clients
* Citrix servers that use HTTP server location over TCP/IP and
* NFuse Web servers must be configured to query the
* server on the specified port number.
* If ExtendIIS is set to Yes and the
* installation on Windows Server 2003 x64 Edition, The parameter
* automatic (command line) will be ignored and ExtendIIS will be
* will set to No.
***************************************************************
[Citrix XML Service]
ExtendIIS=No
; This parameter is only used if ExtendIIS is No
DedicatedPortNumber=80
; This parameter is only used if ExtendIIS is Yes
EnableVirtualScripts=Yes
**************************************************************
* Options
* This section contains additional installation options without
* supervision.
*
* – RebootOnFinish –
* RebootOnFinish specifies whether the setup program
* restart the server when the installation is finished.
* If you set RebootOnFinish to No, Restart the server
* manually before using Citrix Presentation Server.
* – LogLevel
* –
* LogLevel specifies the detail of Windows information
* Installer in the log file.
* To turn off Windows Installer log creation,
* set LogLevel to No.
* To configure the Windows Installer registry, set
* LogLevel in one of the following values:
* Everything (The same as using the voicewarmup options)
* V Detailed explanation
* or lack of disk space
* i informative messages
* c command-line parameters
* e error messages
* w warning messages
* to action execution messages
* r Informative messages of the action in execution
* m Out of memory errors
* or user request messages
* p values properties
* + Add to an existing record
* ! Pass each line to the register
* x Additional Debugging Information: only for
* Windows 2003; if you use option x with Windows 2000
* A usage error is generated.
*
* Logfile specify the path of the log file for the
* installation.
*
* – UILevel
* – UILevel specifies how much UI will be seen during the
Automatic installation. The default is
BASIC_UI_NO_MODAL. The UILevel value can be set to
Next values:
*
* NO_UI
* BASIC_UI
* BASIC_UI_NO_MODAL
* BASIC_UI_MODAL
* REDUCED_UI
*
* NO_UI is equivalent to the q option of msiexec. The installation does not
* Displays the user interface.
*
* BASIC_UI is equivalent to the msiexec qb option. The
* Installation shows the basic UI, but hide the buttons
* cancellation.
*
* BASIC_UI_NO_MODAL is equivalent to the QB option- From Msiexec. The
* Setup does not display modal dialog box.
*
* BASIC_UI_MODAL is equivalent to Msiexec's Qb+ option. The program
* installation does not display the user interface except for a
* modal dialog at the end of installation.
*
* REDUCED_UI is equivalent to the Msiexec QR option. The
* Installation shows a reduced user interface without a box
* modal dialog at the end of installation.
*
* – IgnoreMCM
* – IgnoreMCM specifies whether Setup will display a
* error message if you detect a Citrix Conferencing installation
* Pre-version manager 3.0.
*
* If IgnoreMCM is set to No, The Setup Program
* generates an error message and terminates if it detects a version that is not
* Citrix Conferencing Manager Supported.
*
* Set IgnoreMCM to Yes, if you don't want the
* Installation generates an error message and terminates if it detects one
* Unsupported version of Citrix Conferencing Manager.
* Versions of Citrix Conferencing Manager prior to the
* version 3.0 are not supported on Presentation Server. Before
* upgrade to Presentation Server, update Conferencing Manager to
* The version 3.0 or 4.0. For more information, see the Guide
* Citrix Conferencing Manager administrator.
*
* – RemoveWITurnkey
*
* – The preferred method of updating the Web Interface of
* Citrix is first update Access Suite Console 4.5 and the Interface
* Web 4.5 and then install Presentation Server 4.5.
*
* RemoveWITurnkey determines whether the setup program will display
* an error message after detecting during the update that the
* Web interface was installed on the system in the previous installation.
* Backed Securities:
* Yes Remove the Web Interface if it is detected in the
* system.
* Do not exit the installation if the Interface is detected
* Web in the system (default).
*
* If RemoveWITurnkey is No and Setup detects a
* version of the Web Interface that is not supported installed on the
* system, it will exit the installation with an error message.
*
* If you want to ignore the error message, set RemoveWITurnkey
* in Yes. Please note that at the end of the update the Interface
* Web will no longer be installed on the system.
*
* If you want to specify a different installation location
* (INSTALLDIR) you will need to configure InstallLocation=”Destination Route”,
* For example: InstallLocation=”C:Program Archivesabc abc”
* If you don't configure InstallLocation, The product will be installed in the
* Default Location: Program FilesCitrix.
***************************************************************
[Options]
RebootOnFinish=Yes
LogLevel=*v
LogFile=c:msi.log
UILevel= BASIC_UI_NO_MODAL
IgnoreMCM=No
RemoveWITurnkey=No
**************************************************************
* Presentation Server
* ServerType specifies the edition of Presentation Server to install.
* Backed Securities:
* Enterprise (for Enterprise Edition)
* Advanced (for Advanced Edition)
* Standard (for Standard Edition)
*
***************************************************************
[PresentationServer]
ServerType=Enterprise
**************************************************************
* Citrix License Server
* This section describes the parameters of the
* Citrix.
* If CreateFarm is Yes, The backed securities of
* LicenseServerChoice are:
*
* – “Point”
* – “DontKnow”
*
* If CreateFarm is No, The backed securities of
* LicenseServerChoice are:
*
* – “Point”
* – “UseFarmSettings”
* – “DontKnow”
*
* If you set LicenseServerChoice to “Point” You need to set up
* LicenseServerName with the name of the license server or its
* IP address.
*
* If you want to configure a different port for the license server,
* you must configure LicenseServerPortDefault=No and LicenseServerPort. By
* example: LicenseServerPortDefault=No LicenseServerPort=27009
*
***************************************************************
[LicenseServer]
LicenseServerChoice=Point
LicenseServerName=localhost
LicenseServerPortDefault=Yes
LicenseServerPort=27000
***************************************************************
* MFRDP (Remote Desktop Protocol)
* Set DisableRDPPrompForPassword as “Yes” if you wish
* enable Terminal Services to accept credentials
* directly from the Remote Desktop Connections Client.
* If you set DisableRDPPrompForPassword to “No”, Users
* They will always have to enter their credentials when they log in
* using Remote Desktop Protocol.
*
***************************************************************
[MFRDP]
DisableRDPPromptForPassword=Yes
***************************************************************
* IMA encryption
*
* If EncryptionEnable is set to 1 The program of
* facility that enables IMA encryption for the community during the
* Installation with Farm Creation.
* This option is only valid for installations with the creation of
* community. If you need to enable encryption to join the
* community, Use the console. The default is 0.
* Set KeyType as “generate”, “file” or “existing” for
* indicate how the IMA encryption will receive the parameters. The value
* default is “file”.
* Configure NewKeyPath with the full path where you want it to be
* generate the key. This option is only available when using
* KeyType=generate.
* Configure KeyPath with the location of an existing key that is
* Charge. This option is only available when using
* KeyType=file.
* KeyPath attributes, NewKeyPath and KeyType are useful only
* when used together. If one option is configured and not the other, the
* Encryption key will not be loaded.
*
***************************************************************
[IMAncryption]
EncryptionEnable=0
KeyType=file
NewKeyPath=
KeyPath=
With the contents of that file, We create our own archive of responses, this would be mine for example:

Or in text format:
InstalacionDesatendidaBUJARRA.ini
[Citrix License Agreement]
AcceptLicense=Yes
[Data Store Configuration]
CreateFarm=No
DirectConnect=Yes
ZoneName=10.10.0.0
[Direct Connect Settings]
DSNFilePath=N:MFSQL.dsn
UserName=sa
[Shadowing Restrictions]
AllowShadowing=Yes
ProhibitRemoteControl=No
ProhibitNotificationOff=No
ProhibitLoggingOff=No
[Citrix XML Service]
ExtendIIS=No
DedicatedPortNumber=81
EnableVirtualScripts=Yes
[Options]
RebootOnFinish=Yes
LogLevel=*v
LogFile=c:msi.log
UILevel= BASIC_UI_NO_MODAL
IgnoreMCM=No
RemoveWITurnkey=No
[PresentationServer]
ServerType=Enterprise
[LicenseServer]
LicenseServerChoice=UseFarmSettings
[MFRDP]
DisableRDPPromptForPassword=Yes
[IMAncryption]
EncryptionEnable=0
We will also need a DSN file out there, either on the CD itself or in a UNC path that we will then access from the response file in the parameter “DSNFilePath”:
Contents of my MFSQL.dsn
[ODBC]
DRIVER=SQL Server
UID=sa
DATABASE=CITRIX
WSID=SRVCTX02
APP=ODBC for Citrix
SERVER=SRVBD01
And this file is optional, is simply so that you can install the Presentation Server prerequisites, what is the .NET Framework 2.0, Microsoft Visual J# 1.5.0.09 and Java Runtime Environment Version 1.4.2_06:
N:SupportDotNet20dotnetfx.exe /q
N:SupportJSharp20vjredist.exe /q
N:SupportJRE1.5jre-1_5_0_09-windows-i586-p.exe /passive

The command to unattend Citrix Presentation Server 4.x or XenApp is as follows: N:SupportInstallUnattendedInstall.exe “RUTA_ARCHIVO_MPS.MSI” “ARCHIVO_DE_RESPUESTAS” CTX_ODBC_PASSWORD=CONTRASEÑA_PARA_EL_ODBC. This allows security so that no user's password is in any text file.

… wait a few minutes while you install Presentation Server…
The server will restart and we will have everything installed, ready!!!
www.bujarra.com – Héctor Herrero – Nh*****@*****ra.com – v 1.0


