Putting Hyperion on Raspberry Pi

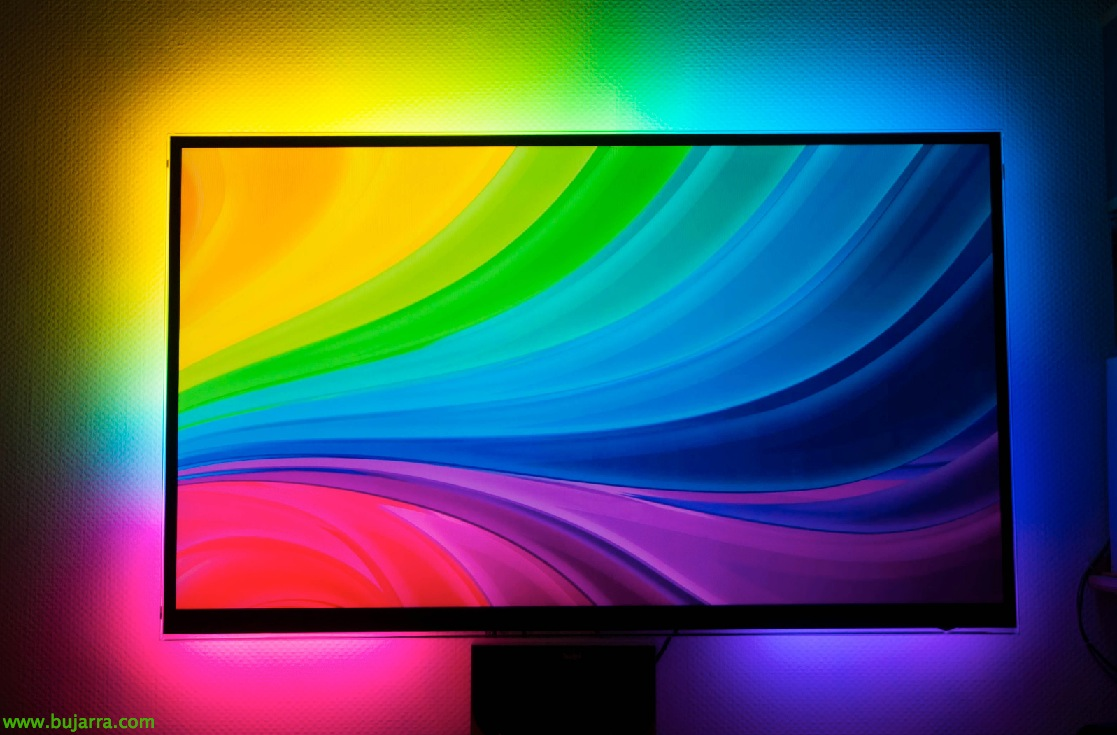
We're going to make a series of posts that bring the world of Raspberry Pi a little closer to our homes, to our day to day, that makes our lives easier or different!! In this case we will see how easy it is to put an Ambilight system on our home TV. A backlighting system for our TV, where it will cost more to assemble than to set up!

For all those who want to make a multimedia system, to order movies, Series, Photos, music… you will know XBMC that you can install on your Windows, Mac, Linux, ios, Androids… there are quite a few distributions with XBMC for Raspberry and an eternal debate about which one is better, Faster, etc… This document will be based on Raspbmc, assuming we already have it installed on our Raspberry Pi. Apart from all that, never forget all the Add-ons that can be put on it, which are the pear!
Ok, to see Hyperion in operation and know what we want to achieve (In case you don't know it), it will be enough to watch a video similar to this one:
HTTP://www.youtube.com/watch?v=wjH8EctJJBI
Although there is a video where you can see the effects better with the Avatar movie and you can see how the flames of fire come out of the TV!!! O_o
Until now I have personally been using Boblight, but it consumes much more resources than Hyperion, Hyperion also comes with a HyperConn tool that will allow us to configure it graphically very easily! indicating the number of LEDs we have, How we have them, Smoother Motion Type…
Well, to the point! What we need to buy:
– Leds! How many? It will depend on your TV, usually for a 42″ a strip of 50 LEDs that will cost around 27€ (eBay example), in my case I purchased with the WS2801 chip (They can also be LPD6803, LPD8806 or Lightberry!).
– We will also need a transformer to put external power supply, a 5V and 2A will suffice (eBay example) for 1€ approx.
– Last, a pair of 'DC Power Connector CCTV' type connectors’ male & female since we will cut the connector to the previous transformer and we will put this one that fits with the LEDs (eBay example) for 1€ approx.
– Optionally we will need 3 jumper cables to connect them to the Raspberry in a 'good' way, Usually male-female (eBay example).

For assembly we have several options, Everyone can assemble it as they want, you can put a cardboard behind the TV and with zip ties tie each LED to its position, or do with some small pipes of 1cm in diameter on the perimeter of the TV and drill each position of the LEDs and then put them there, This is the most expensive part, since you have to roll up your sleeves and get to it, But in a while it's ready!

As for the connection, it is very simple, in this image of Adafruit you can basically see where the cables go.
| Description | Cable color | Pin No. | Pin Description |
| Ground | Blue | Pin 6 | Earth |
| Clock | Green | Pin 23 | SCLK |
| Date | White | Pin 19 | MOSI |
| 5V | Red | Pin 2 | 5v |

If you need help and want to know the function of each RPi GPIO, Good image!

Images of 'brendan’ (@_nadnerb), where we see the transformer wire cut and the male connector added, To know which side is positive or negative, all that remains is to measure it with a polymeter (or luck, Try first one way and if not turn on with everything installed…).

We see the jumper cables connected to the end of the LED strip…

How the assembly would look on the raspberry…
GOOD, Once everything has been assembled, all that remains is the installation and configuration, Too simple, Before you go any further, you should check that we have Bobligth disabled (In the Add-on “Raspbmc settings” > “System Configuration” > “Service Management”). Steps to install Hyperion:
[SourceCode]Sudo apt-get update sudo apt-get install libqtcore4 libqtgui4 libqt4-network libusb-1.0-0 libprotobuf7 ca-certificates wget -N https://raw.github.com/tvdzwan/hyperion/master/bin/install_hyperion.sh sudo sh ./install_hyperion.sh[/SourceCode]
After this last command we must already have Hyperion installed and if we have XBMC open we will try to open a video, photo… and we will see the effects instantly. Command to test and put all red LEDs:
[SourceCode]hyperion-remote --priority 50 --Color Red --Duration 5000[/SourceCode]
Well, Now we do want to customize the movements a little, give it more shine, intensity… we will be able to use HyperCon, which is nothing more than a Java application that will generate the configuration file (hyperion.config.json) which we will place in '/etc'.

On the “Hardware” we can change if we are interested in the position of the LEDs, number of them, etc… another interesting option to change would be 'Blackborder Threshold [%]’, just so that it doesn't take the edge of the image.

In the 'Process' tab’ we could enable 'Smoothing'’ that will smooth out the color transitions of the LEDs. The 'HSV Value gain' could be raised’ a 1,75, 2, 3… is the intensity of the LEDs!

And finally in the 'Eternal' tab’ we will indicate where we want the LEDs to act, Yes only in videos… as well as choosing the effect we want the LEDs to make when the RPI restarts and its duration.
And little else!! Enjoy!! You'll see how cool it looks and what atmosphere it gives to the house… We will continue with other Raspberry documents in the coming days… If you have other XBMC distributions you can see in the official doc how to apply this installation (for example in OpenELEC….), More info on his Official Website!