Using VMWare Converter

This procedure explains how to virtualize a physical server or PC on a virtual machine so that you can work with VMWare images. I usually use it when I have to work on a physical server for a long time and not have to stop end users, or in case a server goes down, have an exact replica and be able to pick it up when you need it. It details how to install the VMWare Converter and how to make an exact copy of a computer (it could also be made from a LAN team) and the best thing is that it can be done hot, Without having to stop anyone. Then, the virtual machine will be turned on with VMWare Workstation (HERE your procedure).

First, you need to get the VMWare Converter, which is free and downloadable from its official website (www.vmware.com), we download it and install it wherever we want, I'm going to virtualize my laptop, so for example, I install it on the laptop (although it's not necessary for it). An assistant will come up, We give “Next”,

We accept the license and click next “Next”,

We select the path where it will be installed, by default that place, Continue, “Next”,

Typical Installation, “Next”,

“Install”

…

“Finish” and then it will open the program for us.

Vale, already, this is the program, now it's as simple as virtualizing the machine itself, for this, we have to click on “Import Machine”. And as it clearly states, we can virtualize a physical machine, or one from Microsoft Virtual PC/Server, or with Symantec's SystemRecovery, or directly with Ghost, it would virtualize that image…

Vale, First things first, choose the SOURCE, for that we click on “Following”,
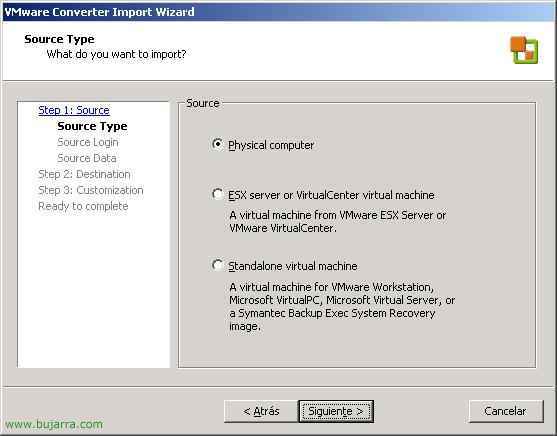
What kind of source will it be, In my case a physical machine, For that we select the first option “Physical computer”, Click on “Following”,

We can virtualize a remote machine if we enter its IP or name above with the credentials we provide below, I will virtualize this same one, From local is not necessary, Mark “This local machine” and “Following”,

We select which disks/partitions we want to copy, in my case, I only have one volume (C:) So I check it, It's always best to check everything, ¿No? Click on “Following”,

Now it will ask us where to save this VMWare image, Click on “Following”,

What type of VMWare image we are going to convert it to, In my case the free one, I will use the Workstation version, If we have an ESX server that would be ideal to work with finally, Buuut that's not my case. “Following”,

Vale, I am going to export it to a USB disk that has the letter E: or it could directly be another partition or a network drive, or UNC path… we select the version of VMWare, we give a name to the virtual machine to distinguish it and “Following”.

Regarding the size of the hard disk, we can tell it to grow automatically (advisable) or we can limit its capacity and set a fixed size; and if we are interested instead of creating a huge VMWare file (depending on the size of the physical, its operating system, its data…) we can separate it into 2GB files. “Following”

It detects how many network connections we have, one, we can add more (as indicated above, Normal 1 or 2). We say that when the virtual machine starts it will connect (“Connect at Power On” > “Yes”), “Following”
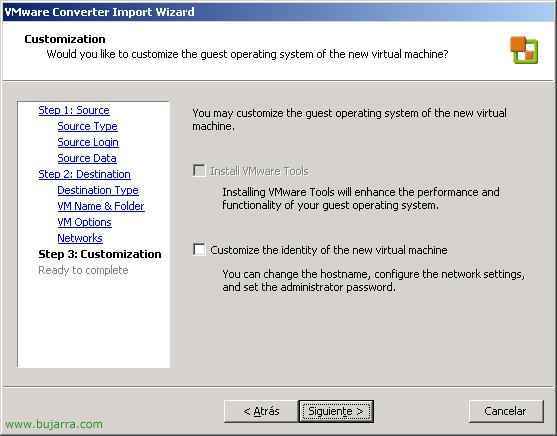
Si marcamos este check nos cambiará las configuraciones ya del equipo, no sería exactamente el mismo ya que nos permite cambiarle el nombre, el SID, la configuración de la red, las contraseñas del administrador o root… Así que lo normal es NO marcarlo, “Following”,

We check that everything is okay and “End”

Now, simplemente queda esperar a que acabe de virtualizar, en mi caso va por el 14%, tardará dependiendo del tamaño total…

Una vez finalizada (cuando en “Status” ponga “Completed”) ya podemos llevarla a otro sitio y levantarla, comprobaremos que es exáctamente igual.

Vemos que nos ha creado un disco de 10Gb que son los datos que tiene ocupado mi disco de mi portátil/PC/servidor, ahora simplemente movemos el directorio a donde nos interese y lo arrancaremos.

Está es mi maquina virtual de mi portátil físico, tiene todo igual, in case it is a server, it will function the same, yes indeed, it is advisable to put it on a server/PC with sufficient RAM, depending on how much this virtual machine will consume.