2X ThinClient Server

With this 2X product (www.2x.com) we can set up a Thinclient structure in our organization, we can use PC's and convert them into thin clients or have them. This is intended to have a Citrix server community or a Terminal Server community (under Linux as well), to which ThinClient would connect via the LAN (by PXES, CD with image, or a mini installation on the HD), The interesting thing is to save the license of the stalls, so that they do not have to install a Windows and that all the applications they use are those of the terminal servers (Citrix – AQI or TS – Terminal Server – RDP). PCs download this Linux mini-distribution from the network (with a TFTPd server) either they are installed on the hard drive or they boot it from CD-ROM and they would have access to these applications, whether from Terminal Server or Citrix, without further complications and without an OS. for a fee.

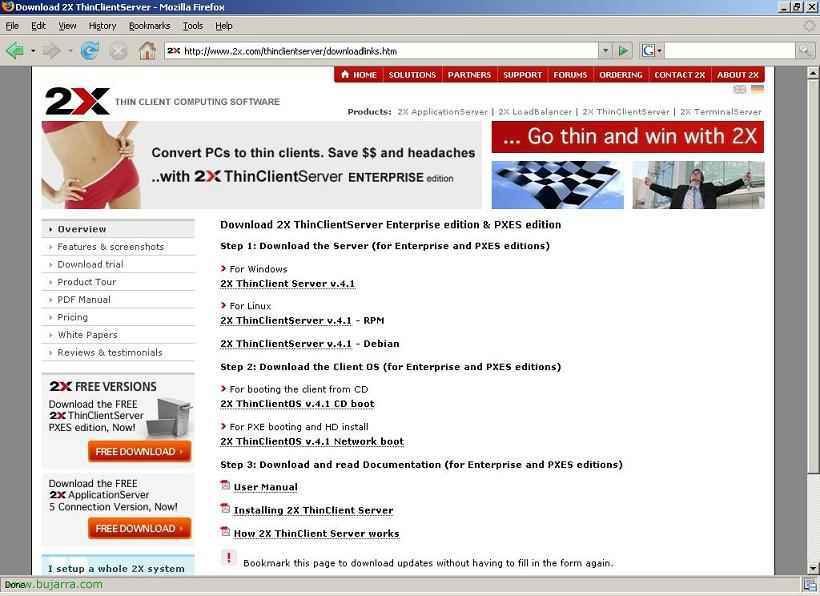
The first thing is to get hold of the server program, for this we open the following URL: HTTP://www.2x.com/thinclientserver/downloadlinks.htm, and we download the server (this procedure explains how to do it with Windows, it can also be mounted on a Linux) by clicking on “For Windows” > “2X ThinClient Server v.4.1” and then we will get off the customer to supply it to our customers.. If we want our customers to boot their computers using PXES/OS network booting. We will go down “2X ThinClientOS v.4.1 Network boot” (The case of this document). Otherwise, we can download the CD image and install it on the hard drive of the PC (but for that it is no longer so ThinClient and needs a hard drive.

Well, we go to our server where we will install the version of ThinClient Server, We run the installer and it will open an easy wizard that we must follow, “Following”,

We accept the license “I Agree”,

We choose the installation path, “Next”,

We select the IP with which it will accept connections for the administrative interface, the normal thing is to leave it in “Auto” so that it accepts from all interfaces. “Next”,

If you are the first server, We must select “Create Farm”, if it is a secondary server to make redundancy we would select the other option, “Next”,

Here we are creating a user to manage the database, and then we'll use it to manage everything from the web console, Pressed “Install” to start the installation now,

… We wait a few seconds for you to install it…

GOOD, Now to finish correctly, We have to click on “Set” and configure the entire environment required to work with 2X ThinClientServer, Once everything is configured perfectly, we can click on “Confirm…”, So now we see how to set everything up and then it's over with the installation wizard.

It will open the console of the 2X, by default by connecting to the IP of this server from a browser to the port 980 We could connect from another host. Enter the user's password and confirm it, is to create an administrator account. “OK”.

Select what the type of origin will be for users, whether they are local users of this server or are users of the Active Directory, for when we want to manage user accounts. In my case I have an Active Directory, So I marked “Active Directory” & “OK”. Here it is important to select well, because if we later want to change the option we will NOT be able to, we will have to uninstall the 2X ThinClientServer and reinstall it.

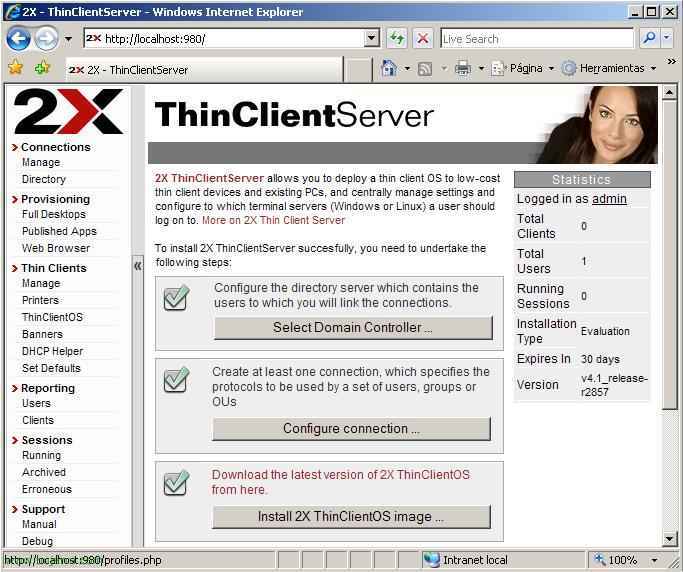
This is the console's home screen, To be able to continue with the installation we must at least configure the options that are marked with the blade  .
.

To set it in order, Let's go to the menu “Connections” > “Directory”, That's where we can add the domains to manage them, Click on “Add Domain”.

We enter the data it asks us for, the domain name, the IP or name of a domain controller, a user with permission to access the domain and a password to access Active Directory. “OK”.

We see that the domain is well created, since in “State” Puts “Success”.

GOOD, Now let's publish an app, since I'm going to use published Citrix applications and not Terminal Server desktops, we will do it from “Provisioning” > “Published Apps” and clicking on “Add Published”.

We have several tabs, in that of “General” we fill in the name of the application published by Citrix, in “Protocol Type” we indicate that it is “ICA” and in “Primary Address” we enter the IP address of a Citrix server, in “Secondary Address” we could put another Citrix server's, and in “Port” We put the XML port. In the other tabs we can configure more options if you want. “OK”.

Now, we're going to put the operating system in so PXES customers can boot it, for this, We are going to “Thin Clients” > “ThinClientOS” > “New ThinCLientOS Image”.

And from the browse button we look for the file with the OS. of the ThinClient (the one we had to get off at the beginning). “OK”.

We see that he has uploaded it correctly, The operating system “ThinClientOS-v4.1_release-r2857”.

Now let's manage the connections, First we must create one from “Connections” > “Manage” > “Add Connection”.

In “Connection Name” We give this connection a name, in “Users” We will select the users we want to use this connection, For example, we added a user from the domain and now we have to say what these users have access to.

To do this,, from the “Published Apps” We will mark the application we have created before to give the NHEOBUG user permission to some application. “OK”.

We can already see that the connection is well created.
We see now on the main page that where we had the axpas we now have the checks that everything is fine, We can now finish the installation wizard.
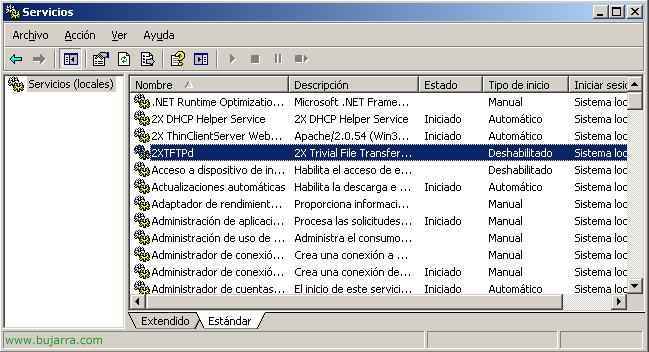
GOOD, what is the configuration of the 2X ThinClientServer is now finished, now you will have to configure the boot for the ThinClients, we will use a TFTPD server, not the one that comes with 2X because I personally don't like it, I prefer this one: Tftpd32 (HTTP://tftpd32.jounin.net). So first, Let's go to the Services Console (“Beginning” > “Execute” > “services.msc”) and we stop and disable the “2LOL”.

We install the “Tftpd32”, is an assistant, “Next”

The path x TFTPD defect, We install it from “Install”

… “Close”

We open the program and we are going to “Settings”

In “Base Directory” we have to put the path where the network image of the “2X ThinClientOS v.4.1 Network boot” Decompressed. If we have a DHCP server on the network, uncheck the “DHCP Server” So they don't hit each other. “OK”

And now we would go to our DHCP server to tell it that when some PC/ThinClient boots over the network; other than assigning it an IP address, You will also need to assign a startup file. We open the DHCP console and we're going to “Field” > Right-click on “Scope Options” > “Configure options…”

We look for the option “066 Serv hostname. Starting” and in “Value of the chain” we put the IP address of the TFTPD server which is the one that will distribute the image of the “2X ThinClientOS v.4.1 Network boot”.

And now in the “067 Startup File Name” Put “Pxelinux.0” which is the boot name of the image of the “2X ThinClientOS v.4.1 Network boot”, Accept.

And now we can try to boot a ThinClient, if you have PXES enabled, we will see that first your MAC requests an IP address, he gives it to him and begins to start the PXELINUX.

And we already see in thin clients how 2X starts, Now when we log in we will have the published applications to which we have access.
www.bujarra.com – Héctor Herrero – Nh*****@*****ra.com – v 1.0