Citrix Provisioning Services 7.1 with Citrix XenDesktop 7.1 – Part 1

We started a series of three articles on how to deploy Citrix Provisioning Services by integrating it with Citrix XenDesktop, a way of provisioning OS to virtual desktops that we will introduce to users. In this first article we will look at the installation of PVS Console, PVS Server and perform the PVS configuration wizard!
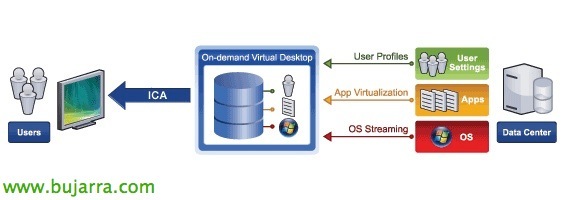
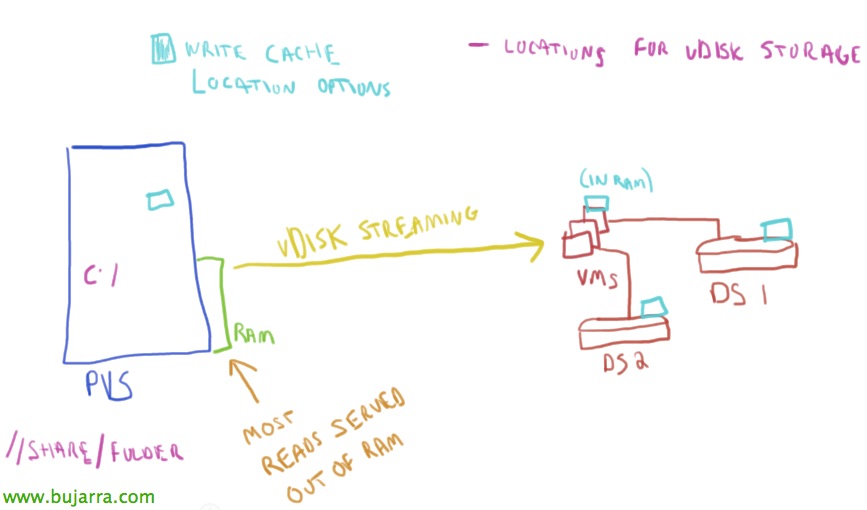
With Citrix Provisioning Services we can distribute servers or desktops / physical or virtual network, called on-demand equipment provisioning. This provisioning or streaming will allow us to dynamically and accelerate the generation of new virtual desktops or servers at the desired time. Together with XenDesktop we will be able to manage virtual desktops as in VMware View with VMware Composer, distribute disk images that are obtained from a master virtual desktop with the Provisioning Services Agent to our users. As a summary, We will be able to provision and reprovision computers in real time from the same shared disk image.
In This old video We check how we can get hold of 150 New equipment on the fly, We will distribute them over the network and we will be able to start light equipment, thinclients, FatClients, raspberry's or directly integrate it with XenDesktop and provide computers on the fly. These computers don't have to have a hard drive, a CD drive... simply have a network card and boot with PXE from the BIOS.
First of all, we will install a Provisioning Services server to later generate a series of virtual desktops, but first we will install the Provisioning Services agent on a master computer from which we will obtain the image of its disk (Dynamic) with the operating system and applications installed & Configured. Once we have this disk, we will distribute it through PXE over the network and the computers we want will boot that image (ideal for XenDesktop integrations). Additionally, we will be able to assign users a Personal vDisk that will allow them to install applications and change the configuration of their desktops! Or we can also distribute centralized applications to these desktops by installing Citrix Receiver on the VDAs and assigning published applications to users!
Installing the Provisioning Services Consoles,
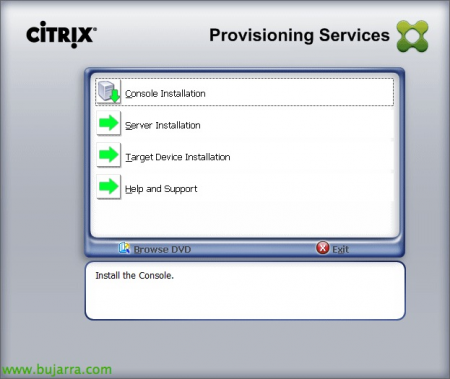
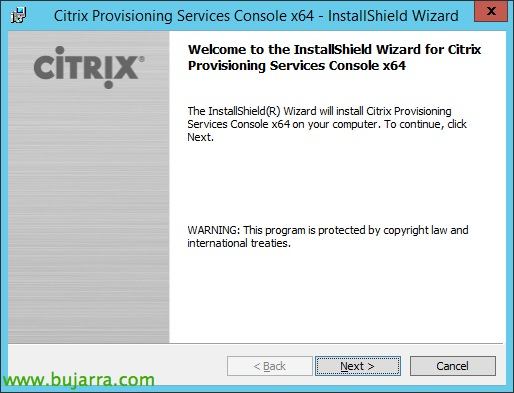
Well, in this deployment we will use Citrix Provisioning Services 7.1 and Citrix XenDesktop 7.1 that have Windows support 2012 R2, Windows 8.1 and interesting option in PS cache in RAM. We must already have a XenDesktop installation correctly installed and configured (we can see it in this document). We will first start with the installation of the management consoles for PVS, from the author of the ISO downloaded from the MyCitrix website we will select “Console Installation”, we will have it available if we have an Enterprise or higher edition.
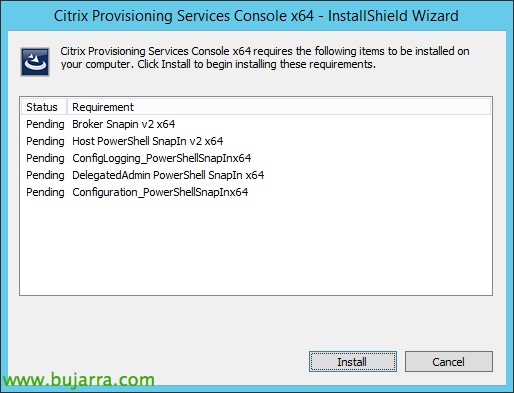
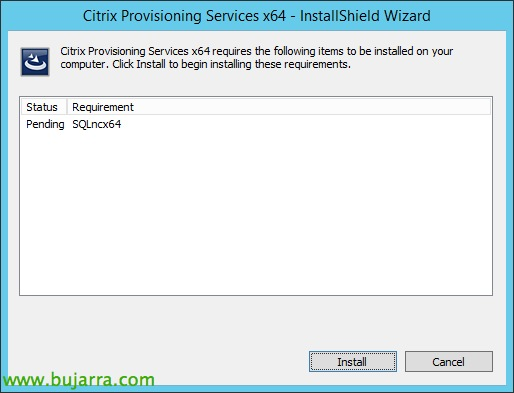
We must install some components before installing the PVS console, Click on “Install”,
“Next”,
We accept the license agreement,
We indicate a name & enterprise, “Next”,

PVS Console Default Path: %ProgramFiles%CitrixProvisioning Services Console, "Next",

We will select full or custom installation,
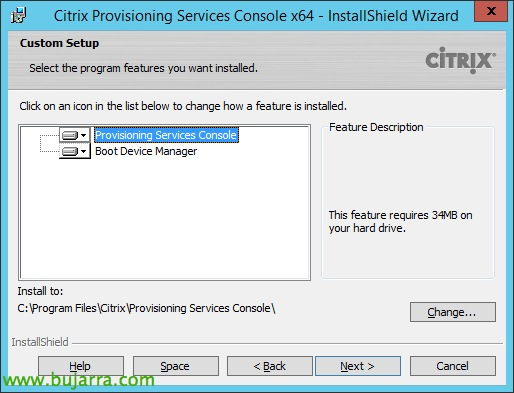
We will install 'Provisioning Services Console’ to be able to manage the environment and also 'Boot Device Manager'’ if we want to customize the startup of the desktops using DHCP alternatives that we have, PXE or TFTP boot.
Pressed “Install” to begin your installation!
After a couple of minutes we will have the necessary consoles to manage PVS, this can be done on the server itself or on any Windows 7 u 8.
Provisioning Services Server Installation,
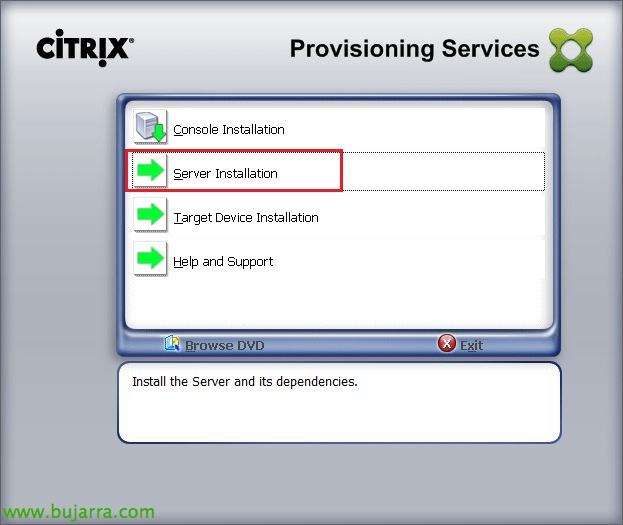
We continue installing the Provisioning server from the DVD that we will have downloaded from MyCitrix, in the authorun we select "Server Installation".
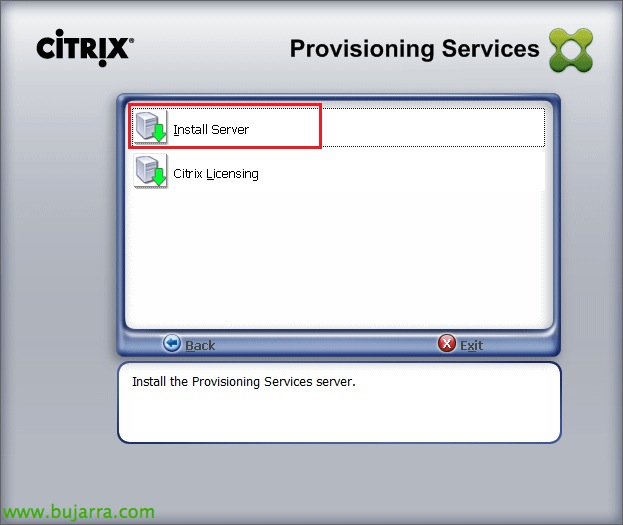
Select “Install Server”, the installation of a Citrix license server is already pre-installed in the XenDesktop environment.
We install the Native SQL client, "Yes",

“Yes”,
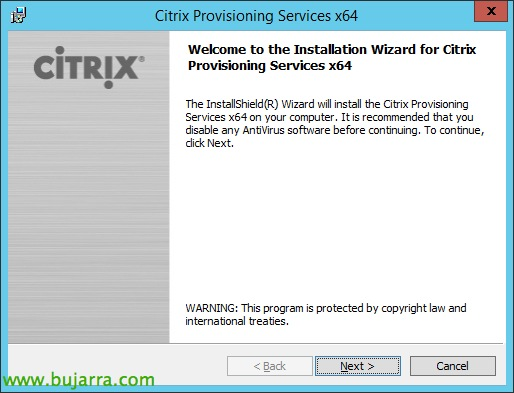
Getting started with the Citrix Provisioning Services installation wizard 7.1, “Next”,
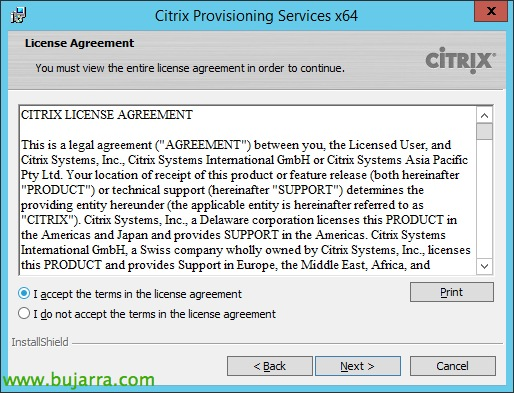
We accept the license agreement,

We indicate our name and organization, "Next",

Provisioning Services Default Path: %ProgramFiles%CitrixProvisioning Services, "Next",

Click on “Install” to begin PVS installation 7.1!

And we finish the installation wizard! now we will start with the basic configuration of the PVS server.
Provisioning Services Configuration Wizard,

Once the installation is complete, the configuration wizard will appear, we can also run it from the Start Menu, “Next”,
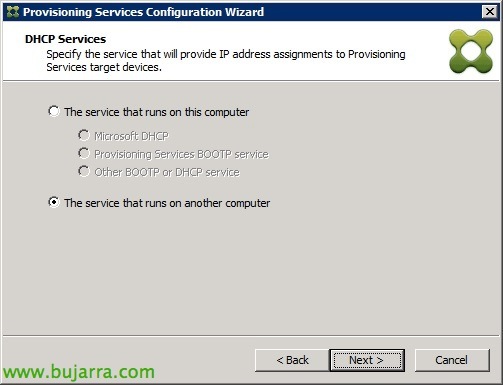
We must select where the DHCP server is running, in this scenario we already have one installed on a DC on the network,
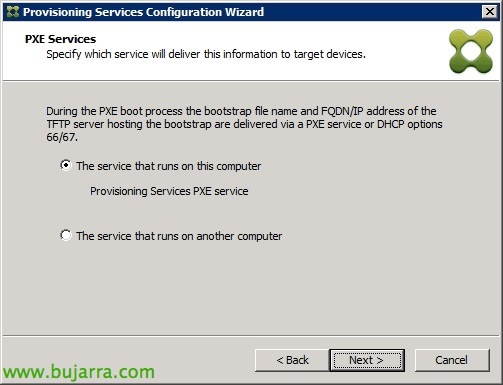
The same, we must indicate where the TFPT services are going to be executed, whether on the same PVS or on another computer for PXE boot of the desktops. We will need to use 'Boot Device Manager'’ if we want bootstrap alternatives to traditional DHCP or TFTP.
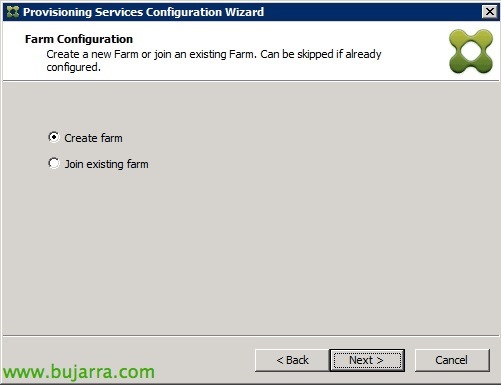
If it is the first PVS server we will create a farm,
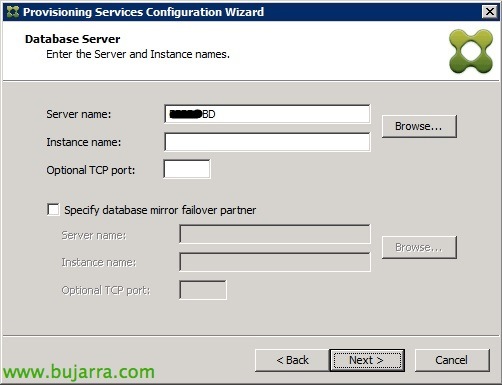
To do this,, we must indicate a SQL Server,
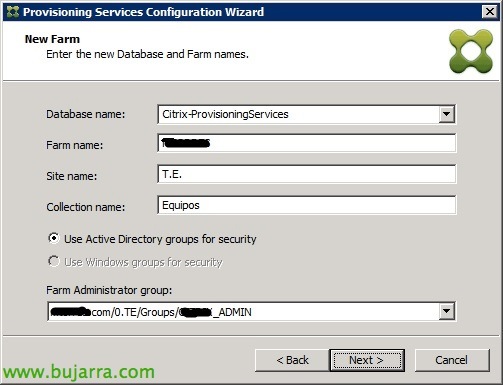
We will also indicate the DB name that we will create, The name of the community, The current site and a name for the desktop collection, in addition to indicating the AD group that will be the PVS administrators.
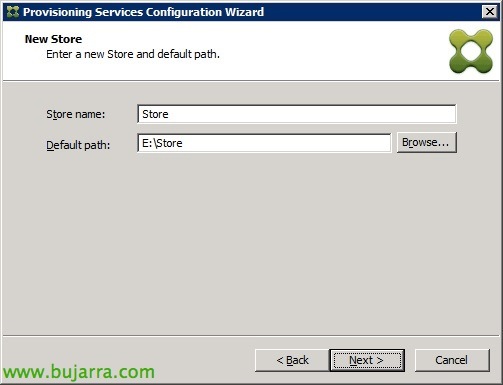
We create a new store and name it that will be where we store our vDisk's with the complete information of the virtual desktop disk of the templates, “Next”. Later we can create another type of storage in another type of system that is better suited to us to have greater performance such as CIFS, NAS, iSCSI or Fibre Channel (SAINT).

We indicate who our Citrix license server is and validate it, “Next”,
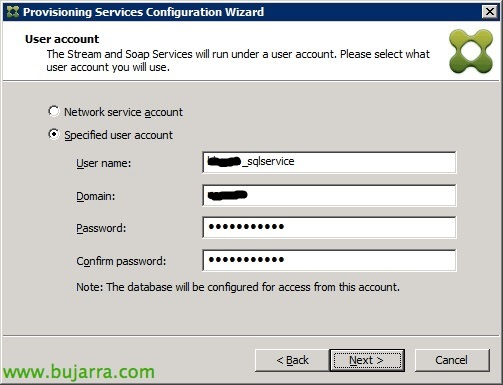
We indicate the service accounts for the Stream and Soap services, this account must be the one that has permission to access the SQL Server DB, “Next”,

We will indicate the days that will pass for PVS to keep the password of the machines account in the updated AD.
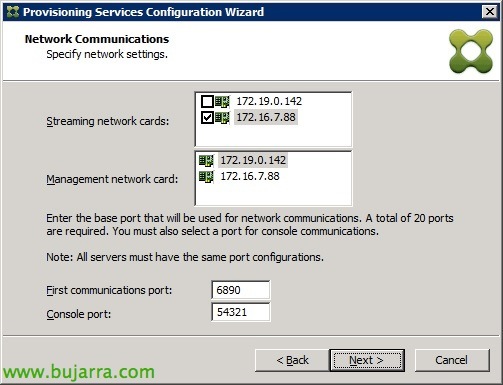
We select the network adapter that will be used to stream the desktops and we will select the other adapter that we will have for management through the console.
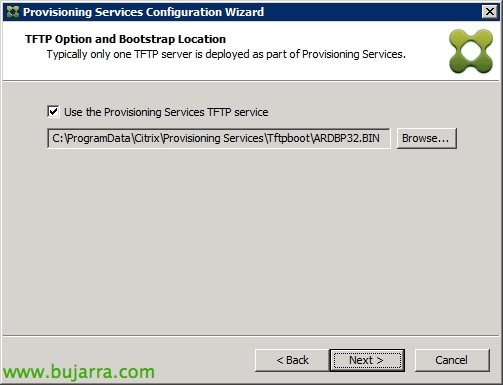
If we have a TFTP server on the network we can use it with the ARDBP32 image. BIN, otherwise, we install the TFTP server that comes with Provisioning Server by checking the check "Use the Provisioning Services TFTP service", with which we will publish the image ARDBP32. BIN and we will deploy the disks to the machines, “Next”,
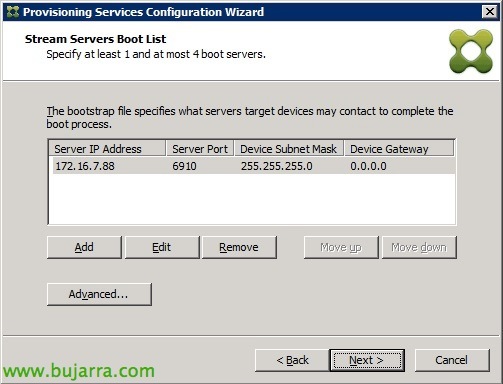
We leave the IP address of our Streaming server, If we have more servers we will put them here, in the advanced options if we check 'Verbose mode' we can get help in case of having problems when deploying.

We check the configuration and if it is correct we give “Finish” & “Automatically Start Services”,
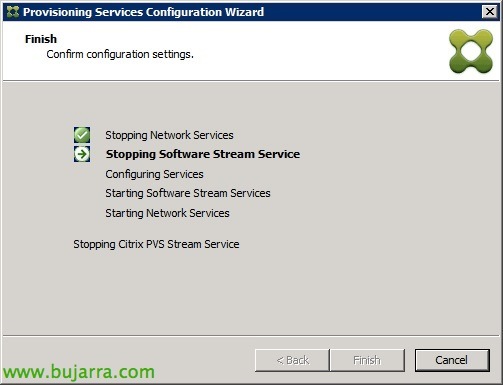
… We wait while you set up and re-incur services…
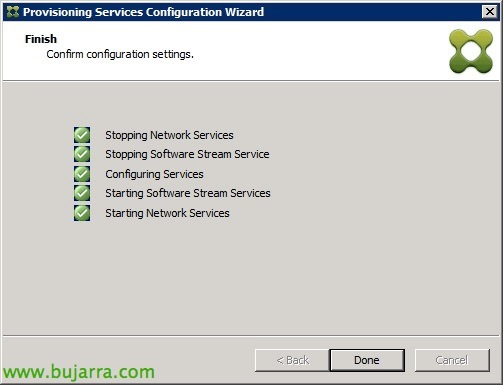
List, we already have the server installed and very basically configured. “Donate”.
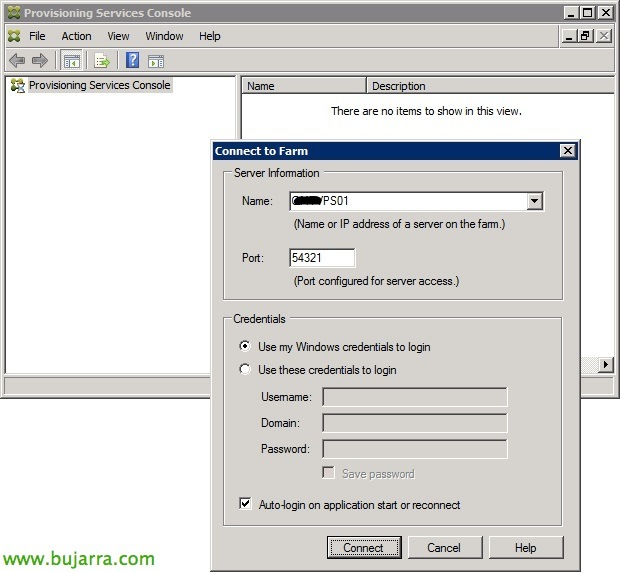
We will connect with the administration console to the PVS server that we have installed, “Connect”,

And before ending and continuing with a part 2 of the document we will have to configure the DHCP server that we have on the network with the following options: 66 and 67 range for desktops, in the first option we will indicate the IP or name of the TFTP server and in the second the boot file 'ARDBP32. BIN'.