Citrix XenDesktop – Configuring NLB in StoreFront

How lately I've been quite a liadete, I'll leave you some quality in return: a post by the great Oscar Mas!!! I would like to show you one of the possible systems that exist, to be able to balance the HTTPS requests that are made to our StoreFront. This functionality is quite simple to implement and can be given to us by NLB (Network Load Balancing) Microsoft's.
We can see several advantages in the implementation of an NLB system, for load distribution among our StoreFront:
- The load is shared among the servers you form in NLB
- Adding Nodes to Our NLB; depending on our needs
- H.A. in the event of a node failure, The other node will take control
We can find more peculiarities, But I think these three are the most significant. The logical scheme of the assembly would be as follows:

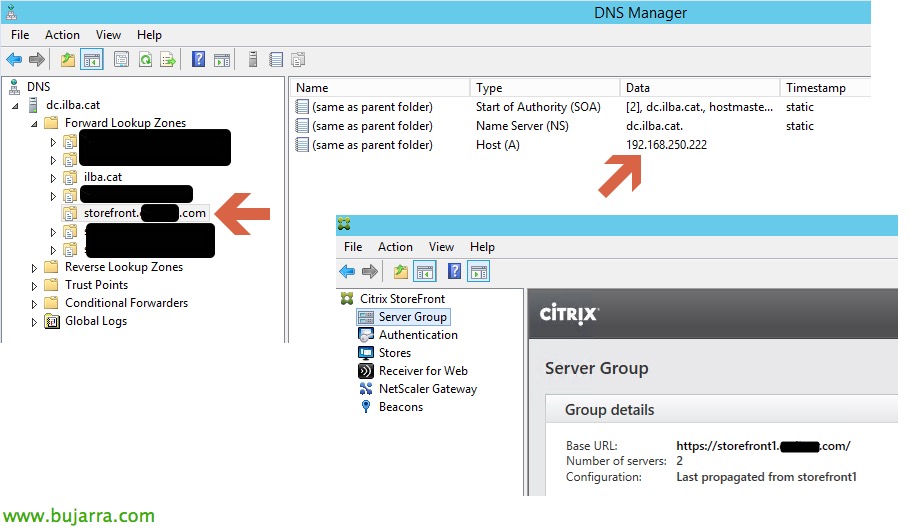
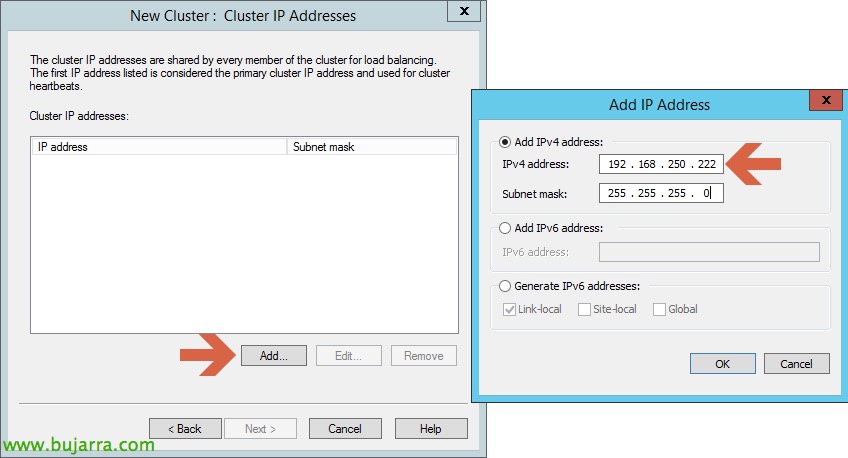
What We Will Do, is that all requests made by our NetScaler (remember that it is Active / Passive), cules are delivered to our StoreFront farm, be balanced via NLB to two StoreFront servers (storefront1.ilba.cat and storefront2.ilba.cat). For the procedure to work properly, we need to create a DNS pointer: storefront.XXX.com, pointing to the IP (192.168.250.222) that we will assign to our NLB
In my case I have created a PinPoint DNS (storefront.XXX.com), since the domain of the certificate that I have put in my StoreFront belongs to the domain XXX.com and it doesn't correspond to my Active Directory domain (ilba.cat)
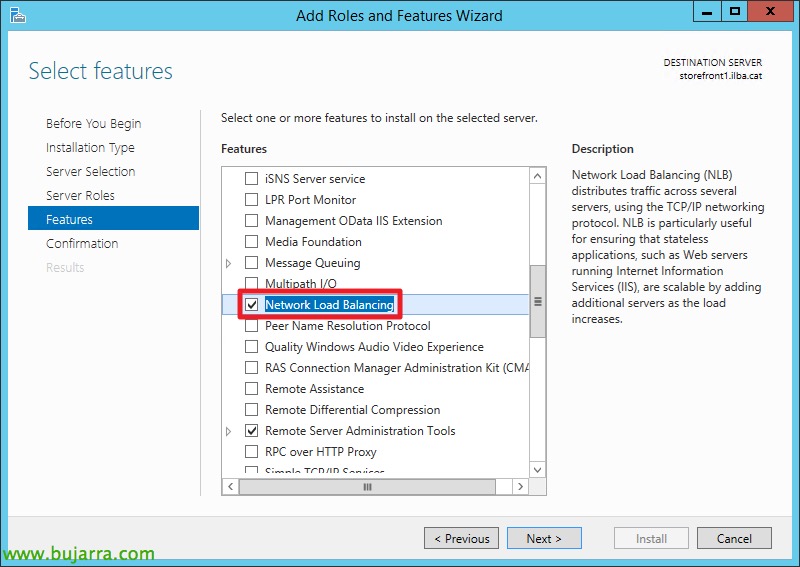
On both servers (storefront1.ilba.cat and storefront2.ilba.cat) We will add the (Feature) NLB. It should be noted that this feature of Windows, it does not force us to restart the server.
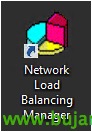
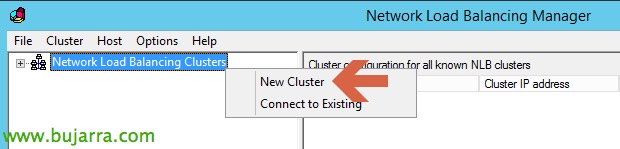
We will open the console of our NLB; To start the setup:
First of all, we will create a new cluster:
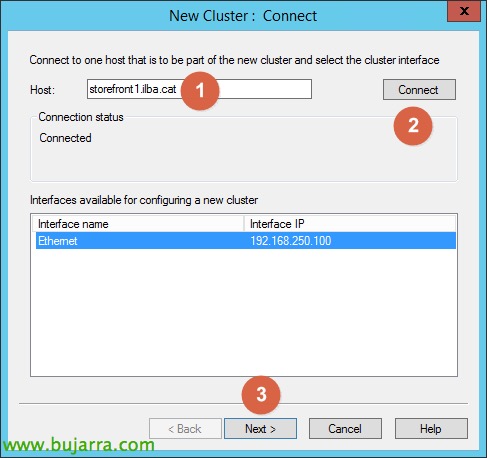
We'll add our first node. First we will add the name of our node in the "Host" field and then we will click on "Connect". In this step, we will verify that it resolves the IP corresponding to our storefront1.ilba.cat server. Then we will click on "Next"
Subsequently, we will configure the IP to which our NLB system will accept requests and we will indicate the Full Internet Name:

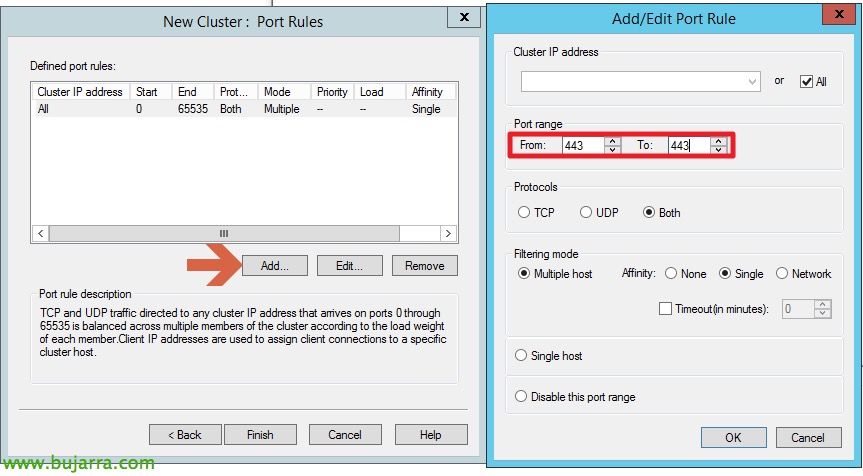
We go ahead and see that by default, NLB system will try to balance connections to all ports (0 a 65535), we will only configure HTTPS access, so we'll click on the Edit button, and we put 443 in the range of ports.
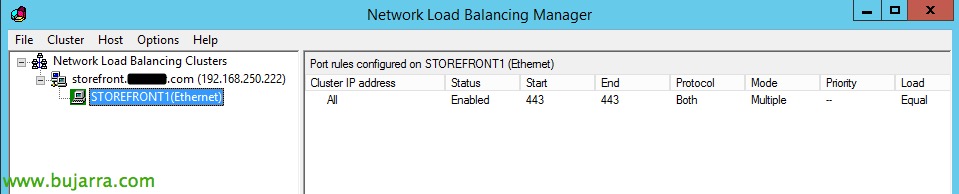
Once finished, we will be able to see that we already have a node in our NLB system:
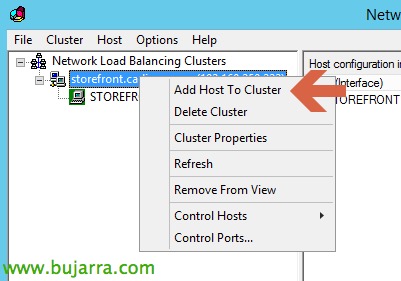
Now we'll add the second node:
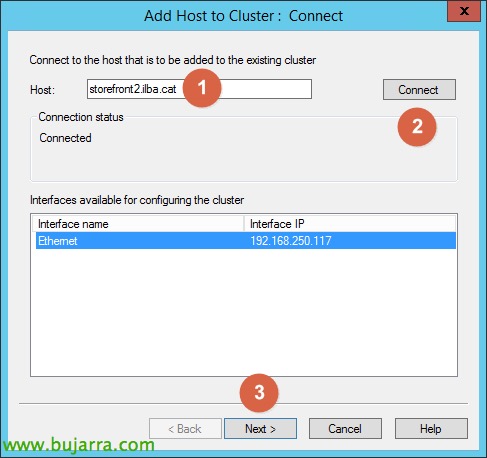
We'll add our second node. First we will add the name of our node in the "Host" field and then we will click on "Connect". In this step, we will verify that it resolves the IP corresponding to our storefront2.ilba.cat server. Then we will click on "Next"
The other options, We will leave them by default and once the wizard is finished we will be able to observe the result: