Configuring DAGs in Exchange 2010

One of the new features and advantages that Exchange offers us 2010 is the possibility of having a high availability system in a simple way, being easy to implement, at any time and above all the simplicity of administration. It is based on the implementation of DAG or Database Availability Group, by mounting a replica of the databases between the different Mailbox servers (or on the same computer if we have all the roles on the same server), so this replaces the old Exchange clusters 2007, SCR and CSF; and therefore now we will simply need two servers and not three or more as required in Exchange 2007!

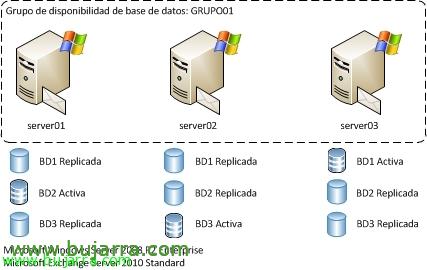
This would be an example of a database availability group, several servers sharing the same databases, logically only one will be mounted and the rest replicated where we specify, eye, for which we will need the Enterprise edition of Windows Server 2008 R2.

The first thing we need is to have (Not required, but yes, highly recommended) two network adapters on the Exchange servers 2010 through which, on one network, the normal traffic will go, client connections, etc… and through the other network dedicated to the cluster and thus the replica of the(s) database(s) of data. We should configure this separate replication network for security and to achieve better performance, on another network or VLAN or switch, we will simply specify the IP address and subnet mask. We will uncheck the option “Registrar en DNS las direcciones de esta conexión” en las propiedades de la red del clúster, además configuraremos el orden correcto de las redes dando prioridad a la red LAN en “Network connections”, menú “Advanced” > “Advanced Settings” > “Advanced Settings” > eyelash “Adaptadores y enlaces” > “Connections”. On the “WINS” We will mark “Deshabilitar NetBIOS sobre TCP/IP”.

Dando por hecho que en este entorno ya disponemos de dos servidores Exchange 2010 instalados, en este documento ambos servidores compartirán todos los roles (Mailbox, concentrador de transporte y acceso de cliente) y por lo tanto en cualquier momento podríamos montar la replicación del grupo de disponibilidad de base de datos (DAG). Getting Started, instalamos las herramientas de administración de clúster, desde una PowerShell ejecutamos:
'Import-Module ServerManager’
‘Add-WindowsFeature RSAT-Clustering’

Necesitaremos un servidor testigo si no tenemos un servidor de transporte de concentradores fuera de estos Exchange, éste puede ser cualquier servidor de la red, deberemos agregar el grupo “Exchange Trusted Subsystem” al grupo administradores local de dicho equipo (si este equipo es un Exchange, omitiremos este paso).

Well, para crear el grupo de disponibilidad de la BD es tan sencillo como abrir la consola de administración de Exchange > “Organization Settings” > “Mailbox” > eyelash “Grupos de disponibilidad de base de datos” > “Nuevo grupo de disponibilidad de la base de datos…”

Indicamos el nombre del grupo, el nombre del servidor testigo y el directorio donde queremos que almacene la información del grupo o si no, nos creará uno en su ubicación predeterminada. “New”.

Perfect! pulsamos finalizar, ya tenemos el grupo creado.

Now we must add to the servers that interest us to this group, To do this, right-click on the newly created group > “Manage database availability group membership…”

We add the Exchange servers we want to this availability group, “Administer”,

GOOD, It has added us to the servers, But it gives me an error since I don't have a DHCP server on the network and the cluster group needs a fixed IP, We can observe the alert from the cluster management consoles.

We resolve this situation by specifying a fixed IP address with the following command in Exchange PowerShell: “Set-DatabaseAvailabilityGroup GROUP_NAME -DatabaseAvailabilityGroupIpAddresses IP_ADDRESS”
We confirm that the alert disappears from the cluster management console.

At the bottom of the group, we can see the networks of the group, and on them, we can edit the properties and indicate which networks will accept client requests and which networks will be used for replication, therefore, We'll set it up.

If we finally want to indicate which database we want to replicate, on the database in question (on the “Database Administration”) right-click or use the actions panel > “Add Mailbox Database Copy…”

With this, we indicate which servers we want to have a replica of this database, we examine and add the servers we want, Pressed “Add” to create and start the replica.

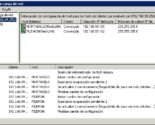
List, we will be able to observe how the traffic begins in the replica network and in the server or servers that we have created it will begin to create and bring the indicated database. “End”.

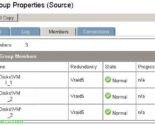
We will be able to observe on a database if there are replicas, in this case we will observe the server that has it mounted and the status in the rest of the mailbox servers.

If we want, We can manually force the database to be activated on a specific Exchange server, or to perform maintenance tasks in the current, to check if it works, etc… on the DB in question > “Move Active Mailbox Database…” or also called switchover.

We indicate which server we want to take it to from “Examine” & “Move”,

After a few seconds we will check that everything is correct! therefore we already have a simple high availability system in our Microsoft Exchange Server installation 2010!