Configuring RPC over HTTP or HTTPS in Exchange 2003 – Connecting Outlook from the outside

This procedure is very useful and safe, serves to enable our Outlook clients 2003 can connect to our MS Exchange server 2003 via web, using the 80 or the 443 (In Safe Mode) using Outlook from the Internet, from your home/hotel/office… so you don't have to use OWA. To do this, we will need to install an AC, One component, Registry Modifications and Nothing More.

We start, the first thing is to install the Certificate Server or 'Certification Authority'. To do this,, Let's go to Home > Panel de Control > Add or Remove Programs > Add or Remove Windows Components. We select 'Certificate Services'’ And we'll jump this screen. It tells us that we will not be able to change the name of the PC or the domain so that this CA continues to work correctly.

We say 'Yes'.

We choose the first and next option.

Here we must put the name of the server Future of Certificate Authority (AC).

Following.

Yes

Wait a minute or so, the MS Windows CD will be required 2003.

After the AC installation is complete, we enter the properties of the 'Default Web Site'. To do this, open the IIS console and right-click on the 'Website', we put ourselves in the 'Directory Security' tab’ and click on 'Server Certificate'’

Create a new certificate and next.

First Choice and Next.

We give a descriptive name and a descriptive name..

Two fields to fill in and Next.

Here we must enter the name that we will access so that the certificate is loaded perfectly; I put www.bujarra.com why it is the way I will access RPC from the internet (HTTP or HTPPS), so the certificate will load perfectly for that 'domain'. If we also want the RPC to be accessed from the LAN using this certificate, we will register this hostname in the DNS server and point to the IP where the IIS server is, In my case I think the 'host’ 'www’ and that points to the PC 'bujarra01’ (MS Exchange/IIS Server).

We fill in the location

We save the file in that path. Following.

Following,

End,

Open an Internet Explorer and access http://servernameCA/certsrv and click on 'Request a certificate'.

Click on 'advanced certificate request’

Click on 'Submit a certificate request by using a base-64-encoded CMC or PKCS #10 file, or submit a renewal request by using a base-64-encoded PKCS #7 file.’

Now we must open the file where we have saved the certificate request, Default: c:certreq.txt. We copy all the text and close it.

We paste the text on the web. And then we select the certificate template, it has to be 'Web Server'’ and we played on 'Submit'.

Select 'Base 64 encoded and 'Download certificate'. We keep the certificate in C:certnew.cer

Go back to the website properties and click on 'Server Certificate'’

Following

We process the certificate pending installation and next.

We choose the latter and the following.

We select the safe harbor (Default 443), following.

Following,
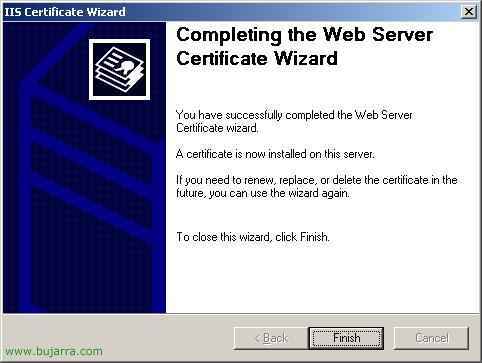
End…

Click this time on the 'Edit' button.

We check the 'Require secure channel' check’ and 'Require 128-bit encryption'’ and OK,

Now we install the “RPC over HTTPS proxy”, for this: “Beginning > Panel de Control > Add or Remove Programs > Add or Remove Windows Components. And we select it within “Network Services”, Accept.

Back to the IIS console, and we are going to “Websites” > “Default website” > Properties in “RPC” > Eyelash “Directory Security” > Click on the Modify button of “Authentication and access control”, and we enable the “Enable anonymous access” and that of “Basic Authentication”, Accept.

Now in the same tab of “Directory Security”, click on the Modify button of “Secure communications” and we enable the “Require secure channel (SSL)” and “Require encryption 128 Bit”, We accept and close.
If we don't have Exchange SP1 or SP2: The record would have to be edited manually,

Vale, Now a little bit of registration: If we don't have this input, create it:
| HKEY_LOCAL_MACHINESystemCurrentControlSetServicesMSExchangeISParametersSystem Value name: Rpc/HTTP Port Value type: REG_DWORD Value data: 0x1771 (Decimal 6001) |

Now it's:
| HKEY_LOCAL_MACHINESystemCurrentControlSetServicesMSExchangeSAParameters Value name: HTTP Port Value type: REG_DWORD Value data: 0x1772 (Decimal 6002) |

You will also have this one for sure… but, Believe it, eh!
| HKEY_LOCAL_MACHINESystemCurrentControlSetServicesMSExchangeSAParameters Value name: Rpc/HTTP NSPI Port Value type: REG_DWORD Value data: 0x1774 (Decimal 6004) |

This one has its crumb, in HKEY_LOCAL_MACHINESOFTWAREMicrosoftRpcRpcProxy, would be to MODIFY an existing call “VALIDPORTS”, the content is removed and the following is put:
|
ServerNETBIOSName:6001-6002;ServerFQDN:6001-6002;ServerNetBIOSName:6004;ServerFQDN:6004
|
In my example, Be: bujarra01:6001-6002;bujarra01.bujarra.com:6001-6002;Bujarra016004;bujarra01.bujarra.com:6004

HKEY_LOCAL_MACHINESYSTEMCurrentControlSetServicesNTDSParameters would be to create a multipe chain with this name: “NSPI interface protocol sequences” and this content, as in the example in the image: ncacn_http:6004 and Accept.
If we have Exchange SP1 or SP2 2003 installed: Simply, if we go to the Exchange console and enable its function, it would be enough,
Open the console “System Center”, we go to the Exchange server properties, and we'll see there's a tab called “RPC-HTTP”, we mark the check of “” and the Exchange server would have to be restarted for the changes to take effect.
Client-side configuration –> Outlook 2003,
Vale, this would have to be done on the PCs that want them to access Outlook in this way, Remember that in the firewall you have to open the port 443 and map it to this Exchange/IIS server.

So we created an Outlook profile to test it (or configure it permanently), You know, Panel de Control > Mail > Add New Profile. We select the first option, “Add a new email account” and Next.

The first option “Microsoft Exchange Server” and Next

We put the public name of the Exchange/IIS server, as we're supposed to be on the internet now’ access your DNS name or public IP, it is understood that this, that the IIS/Exchange server has an Internet connection with a public IP or public name (DNS) and with the port 443 mapped to this server's private IP. Well, As I said, We set server and user, and click on “More configurations..”, if for whatever reason it doesn't open us up at the first time, We give “Retry the connection”, it may be a communications failure. And very importantly we uncheck the check of “Use Cached Exchange Mode”.

In the Connection tab we check the “Connect to the Exchange mailbox using HTTP”, and click on “Exchange proxy settings…”, in the new screen we type again the DNS name or the public IP of the server (in my case again www.bujarra.com), we mark the check of “Connect using SSL only) and both checks for it to connect with HTTP and then with TCP/IP and Accept.

In the Security tab I usually mark that it always asks me for a password to open the Outlook, mostly because when I open Outlook I am not authenticated in the domain and it will ask me for password and also x security issues, optional. With this, the client part would be finalized, Now all that remains is to do tests and make sure everything goes well.
Testing that it works well,
To check that everything is going well and that the Outlook (customer) connects well to the Exchange (server) via HTTPS we can run a command and check how it behaves.

Beginning > Execute: “outlook /rcpdiag” and Accept.

And while opening Outlook we will be able to see the connections that our Outlook is opening, and as long as it says TCP/IP it will be perfect. Of course,, If the speed between the client and the server is poor, hit Retry connection when prompted and everything will be fine.