
Creating a ThinClient on an outdated PC and using it to connect to RDP or ICA

This procedure explains how to get a PC with minimal hardware and without all its components to perfectly boot the software necessary for an employee to work with only their applications.
Another advantage would be economic savings, since it would not be necessary to expand all the company's PCs, but only the hardware of the servers. It's centralized management and if a team fails, just restart it and in a minute a minimal Linux distribution would be downloaded that connects it via ICA to the Metaframe server to run only the published applications.
The bootstrap process is:
1º The client PC boots over the network
2º The DHCP server assigns you an IP address and tells you which TFTP server is
3º Connect to the TFTP server and download the linux distribution + Citrix generated with the pxesconfig.
4º The X's start with the ICA protocol (In this case) and connects to the Metaframe, it only needs to authenticate and depending on the configuration of the Server it will access some applications or others.
So client PCs don't have to have either a hard drive or a CD drive; and they could be computers with a memory of 16 Mb of RAM and a minimum processor.

The first thing is to take a PC and install a linux distribution (I have used Fedora Core 2).
Then you have to download the Citrix client for Linux (From the web www.citrix.com and the Customer Downloads area). Installed via RPM and then configured with ./wfcmgr
[root@pc root]# rpm -UVH ICAClient-7.00-1.i386.rpm
[root@pc root]# /usr/lib/ICAClient/wfcmgr

We will have to configure the connection to the Citrix Metaframe server by creating a new connection and selecting which application to connect to, We will review all the options and modify them.
It is recommended on the server to publish an application that is the 'Program Manager' which is the client application that brings together the most applications. So that when the final PC boots up it doesn't just work with Word, but have all the published applications you can work with there.

Once configured, we run it to check.
I would personally run it from the terminal window, Not from the terminal client. In this way:
[root@pc]# /usr/lib/ICAClient/wfica
We enter the Windows user with permissions.

And we will access the published application indicated above in the Client. In my example my published application is the 'Program Manager' so that you can run more than one application.

We open an application and see that MS Word works perfectly on our linux distribution, this means that it will work for us with PXE's

Now we close everything and we will download the necessary packages to install the PXE's and configure them:
Gtk-Perl (in HTTP://rpmfind.net)
Glade-Perl (in HTTP://rpmfind.net)
Pxes-base (On the PXES website)
Pxesconfig (On the PXES website)
mknbi (in HTTP://rpmfind.net)
TFTP-HPA (or better the TFTP server that brings the distribution)
[root@pc root]# rpm -uvh Gtk-Perl-0.7008-3.i386.rpm
[root@pc root]# rpm -Uvh Glade-Perl-0.60-1.noarch.rpm
[root@pc root]# RPM-UVH TFTP-HPA-0.32-1.i386.rpm
[root@pc root]# rpm -Uvh pxes-base-i586-0.7-1.i386.rpm
[root@pc root]# rpm -uvh pxesconfig-0.7-release.noarch.rpm
[root@pc root]# rpm -uvh mkbni-(View Version).Rpm
Or
[root@pc root]# apt-cache search package
[root@pc root]# apt-get install package
We install the packages on the linux with the "rpm's" downloaded or if we prefer through "apt's". If we add the following entry to our sources.list: HTTP://linux.upsa.es/~ghe/
And we make an apt-update and then look for the previous packages.

Once all packages have been successfully installed, We edit the /etc/fstab file and add the following line:
/tmp/pxes.initrd /tmp/pxes ext2 loop,No, car,user,owner 0 0
We save the file and leave.
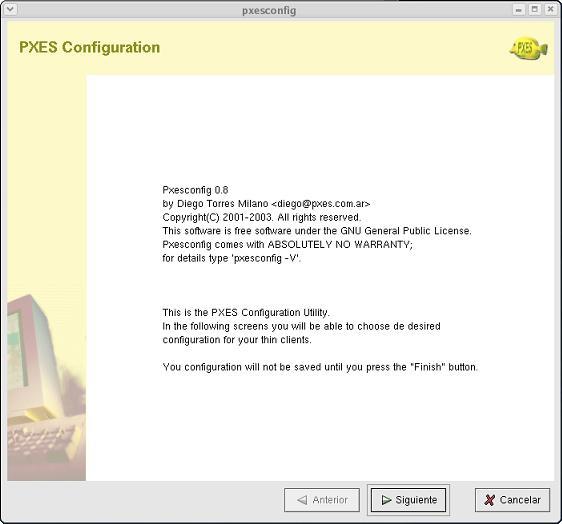
Once all the steps have been carried out, we test if the 'pxesconfig' works, which is the tool to create the final images for the client PC, To do this, in a terminal we write 'Pxesconfig’
[root@pc root]# Pxesconfig
Click on Next

We must create a 'RAM Disk' new, So we marked the check.
We will also check the 'network bootable image' check to indicate that the boot will be over the network. We will need to download the file with the extension 'NBI' in the download area of the PXES website (HTTP://pxes-sourceforge.net)
Click on Next, Check that we leave the screen as in the image on the left.

Select the language of our keyboard (in my case 'is')
Check that the network card appears in the list or else we put 'Autodetect'.
Following

On this screen we will mark what interests us, the fewer things the better, Everything is optional.

On this screen it is important to only mark a session, in our case it's just 'Citrix ICA'. If we choose more than one, we will get a mini linux distribution with the client to choose.

We select the X's, if possible XFree86 4.3.0 And the same with the graphics card adapter, 'Autodetect'.
We select the screen configuration we like the most and the same with the colors.
Following.

This screen will load the previously configured options of the Citrix Client, with its two configuration files, appsrv.ini and wfclient.ini
To check that everything is OK, click on 'refresh' and it should take the name of the Metaframe server.
Following.

Select the options we want here.
It is interesting to enable the client PC to behave as a telnet server or to be able to access different terminals, All of this is for good remote management.
Following.

Ended up.
It will take a few minutes to generate the images.

It will leave all the images in the TFTP server folder, Default: /tftpboot/pxes

The images generated in the previous step in the linux must be copied to the Metaframe server to the hard disk at the location:
C:TFTPPXES

After placing these images we must install a TFTP server in the Metaframe. We will use 'Tftpd32' that we download for free from your website:HTTP://tftpd32.jounin.net, we unzip it into C:TFTP and we run it.
We configure the 'Settings' tab by modifying the directory on which we will work, What will it be: 'C: Son of a
We will disable the DHCP option, it is preferable that the DHCP server be the Windows DHCP.

And we also configure it to work minimized in the toolbar.

As the last configuration step is to install the DHCP server on the Metraframe server, Normal will be set but with an exception, In the options of the field we have to include two new options:
066 will be the IP of the TFTP server (himself)
067 The file name is: Pxelinux.0

The last thing of all is to change the boot order in the BIOS on end computers, and that have the network card as their main boot.
To do this, you need to have a recent BIOS (If necessary, it is updated from the manufacturer's website)
Have a network card with PXE boot (anyone nowadays).
For more information contact Diego Torres Milano or on his website: HTTP://pxes.sourceforge.net


