Installing VMware vCenter 5 and VMware vSphere Client 5

As we mentioned before, little by little we will be showing the new features of VMware vSphere 5, but first we must meet the requirements of these, in this document we will look at the installation of VMware vCenter Server & vCenter Client as well as its requirements,
Operating System Requirements for vCenter (.NET Framework required 3.5 SP1):
– Windows Server 2003 Standard, Enterprise, Datacenter, x64 SP2.
– Windows Server 2003 R2 Standard, Enterprise, Datacenter, x64 SP1.
– Windows Server 2008, Standard, Enterprise, Datacenter, x64 SP2.
– Windows Server 2008 R2, Standard, Enterprise, Datacenter, x64.
Each vCenter server needs its own database, can be local (with SQL Express) or remote (on a DB server). If we opt for SQL 2008 R2 Express we will need Windows Installer version 4.5. Supported database types in vCenter 5: IBM DB2 9.5 (required Fix pack 5, recommended Fix pack 7), IBM DB2 9.7 (required Fix pack 2, Recommended Fix pack 3a), Microsoft SQL Server 2008 R2 Express (Local/remote DB up to 5hosts & 50Mvs), Microsoft SQL Server 2005 (x86 & x64, required SP3, recommended SP4), Microsoft SQL Server 2008 (x86 & x64, required SP1, recommended SP2), Microsoft SQL Server 2008 R2, Oracle 10g R2, Oracle 11g (R1 11.1.0.7 or R2 11.2.0.1 with patch 5). After the connection to the vCenter DB we must create a 64-bit DSN. With vCenter Server 5 we will be able to manage ESX hosts(i) 3.5 next to ESX(i) 4.x in the same cluster.
Medium deployment up to 50 hosts and 500 MV Powered On:
| Product | Cores | Memory | Disk |
| vCenter Server | 2 | 4GB | 5GB |
| vCenter Client | 1 | 200MB | 1,5GB |
Deploy up to 300 hosts and 3.000 MV Powered On:
| Product | Cores | Memory | Disk |
| vCenter Server | 4 | 8GB | 10GB |
| vCenter Client | 1 | 500MB | 1,5GB |
Deploy up to 1000 hosts and 10.000 MV Powered On:
| Product | Cores | Memory | Disk |
| vCenter Server | 8 | 16GB | 10GB |
| vCenter Client | 2 | 500MB | 1,5GB |
Description of Required Ports:
| Port | Description |
| 80TCP | HTTP required, redirects to 443 |
| 389TCP | LDAP |
| 443TCP | HTTPS |
| 636TCP | For vCenter Server Linked Mode |
| 902UDP | On hosts for heartbeat and vCenter management |
| 902TCP | Port required between client and hosts for the VMs console. |
| 8080TCP | VMware VirtualCenter Management Web Services HTTP |
| 8443TCP | VMware VirtualCenter Management Web Services HTTPS. |
| 60099TCP | Web Service change service notification port |
| 10443TCP | vCenter Inventory Service HTTPS |
| 10109TCP | vCenter Inventory Service Service Administration |
| 10111TCP | vCenter Inventory Service Linked Mode Communication |
Installing VMware vCenter Server,

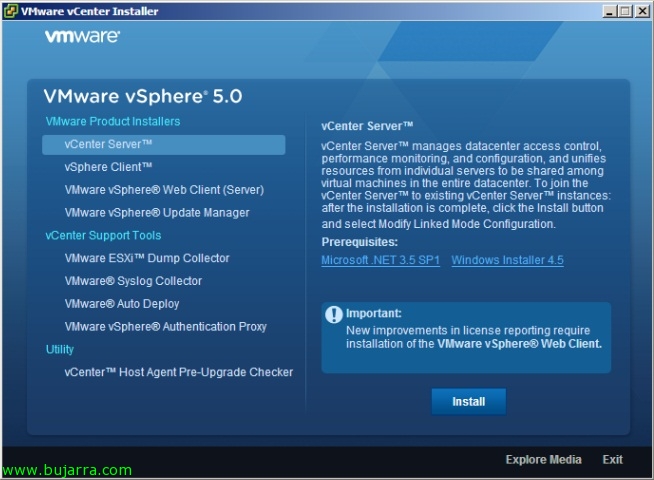
By meeting the requirements, we can start with the installation of vSphere 5, in the DVD author we select “vCenter Server”,

We select the language for the installation, We have: Chinese, English, French, German, Japanese and Korean.

The installation wizard hardly varies from the previous version, “Next” Getting Started,

We accept patents,

We accept the license agreement,

We enter name, vCenter Organization and Serial Number, if we do not indicate it, we will have 60 Evaluation days.

We must indicate if we will use a local database (SQL Server 2008 Express) or a remote database on a database server (most common), for this we will need to previously generate a 64-bit DSN that points against the correct database with the correct credentials.

We indicate the account with which we will start the vCenter service & the team's FQDN, “Next”,

Default vCenter Server Installation Path '%ProgramFiles%VMwareInfrastructure', Inventory Service's default path '%ProgramFiles%VMwareInfrastructure',

We will indicate if it will be a separate installation (standalone) or linked mode to join multiple vCenters, “Next”,

We confirm the vCenter Server ports,

We confirm the Inventory Service ports,

We indicate the configuration of our inventory, We will indicate the approximate number that we will have both hosts and virtual machines,

“Install” to begin installation,

… Wait a few minutes…

“Finish”, now all that remains is to install the vSphere Client and connect to the vCenter server.
Installing the VMware vSphere Client,

Installing the vSphere Client 5 you have no more complication than to continue the assistant.
![]()
Although it will always be more interesting to deploy it over the network to the administrators we consider in a massive way by installing it with the command: 'start /wait VMware-viclient.exe /q /s /w /l1033 /v” /qr /l*v “DIRECTORIOARCHIVO_LOG””‘