

Citrix XenDesktop Installation and Configuration 7

Citrix has introduced its new unified solution for the distribution of virtual desktops and applications, we already saw it in the Excalibur project and it has finally become a reality! From a single product we can easily manage our entire environment, you have the detailed news on the Tundra IT website,
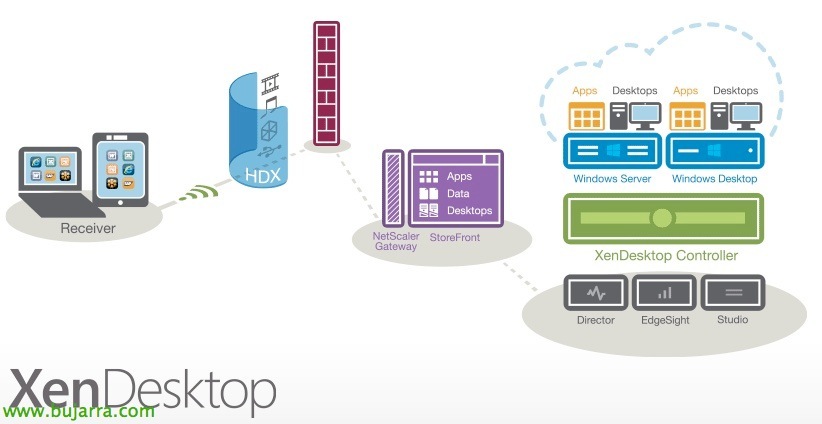
As we can see apart from all the great novelties it brings at the level of protocol and other multimedia, we see that the installation will be simplified and from now on we will deploy XenDesktop Controller to manage the environment of the desktops or servers through the agent and the publication of applications or desktops in a unified way.

XenApp comparison detail 6.5 and DenDesktop 5.6 against the new XenDesktop architecture 7.
In this scenario we will perform a fairly simple installation, in which we will deploy a single XenDesktop Controller 7, on the same server we will install StoreFront as the Receiver access server and the License server; in addition to the management consoles, The normal thing will be to separate by roles and leave the services distributed on different servers. Then we will publish applications and desktops for both servers and virtual desktops! In this scenario, only the connectivity of the environment will be local, since to provide secure remote access we would have to deploy a NetScaler and configure the AccessGateway part (one and two). Eye, XenDesktop 7 only compatible with Windows 2012 Server, so we will not be able to install the Controller on previous Windows and if we want to update we will have to migrate the entire server infrastructure.
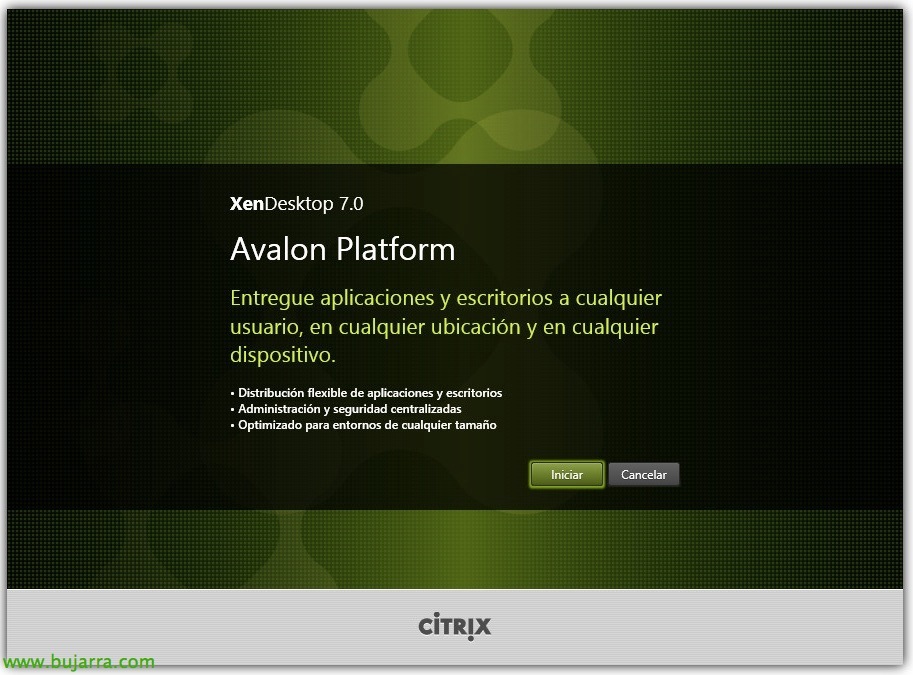
We start with the installation after downloading it from the web MyCitrix, “Initiate”,

We will install the components that interest us separately, In this case we start by “Delivery Controller”

We accept the license agreement & “Following”,

We must indicate the components that we are interested in installing, in this case it will be 'Delivery Controller’ to distribute apps & Desktops; the 'Studio console'’ for administration; the 'Director' console’ to monitor performance issues and troubleshooting; also the license server (If this role can be installed on another server); and StoreFront’ to provide access to my customers with Receiver.
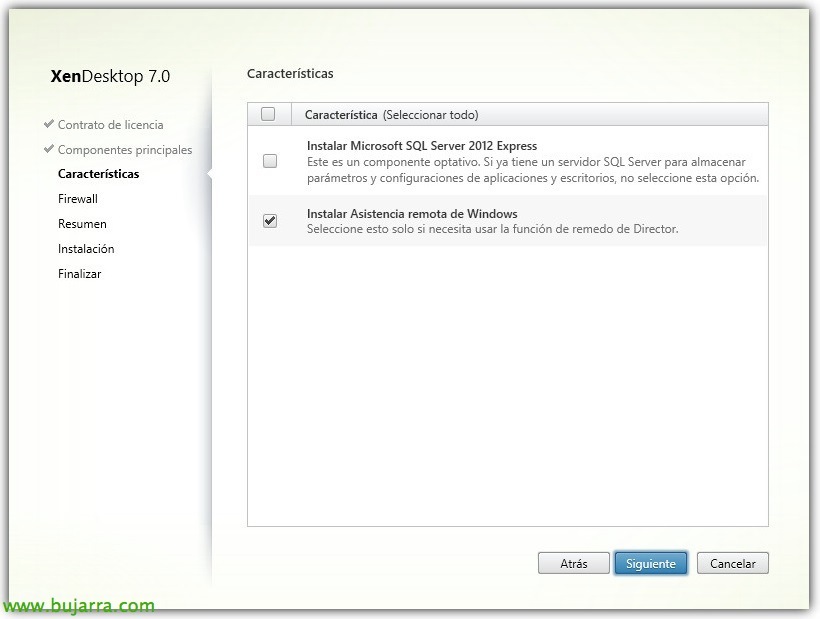
We will need a SQL database, so we will need a database server or else, we will install a SQL Server 2012 Express on local. In addition, if we are interested in being able to imitate the connections of our users, we will check 'Install Windows Remote Assistance', “Following”,
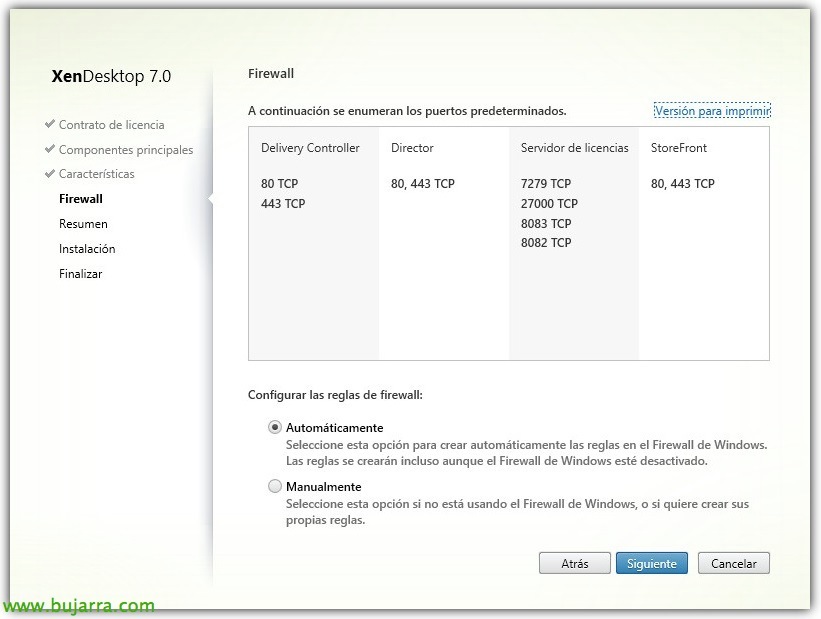
It will tell us the ports that we must open in the local firewall, in this case the controller will need the 80tcp and 443tcp open, the Director console will need the 80tcp and 443tcp open; In the case of the license server we will need the 7279TCP, 27000TCP, 8083TCP and 8082TCP; in addition to the StoreFront server you will need 80tcp and 443tcp. “Following”,
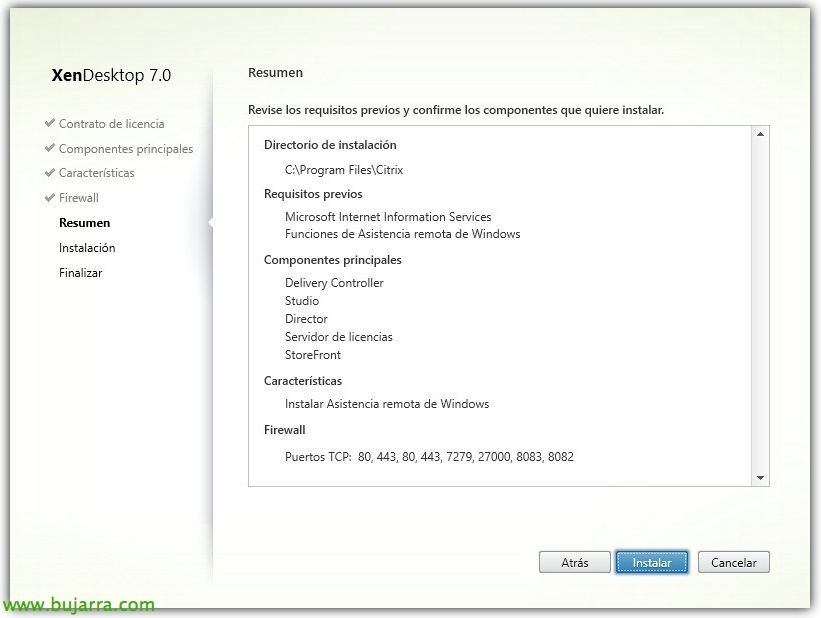
GOOD, We confirm that everything is correct and start the installation “Install”!
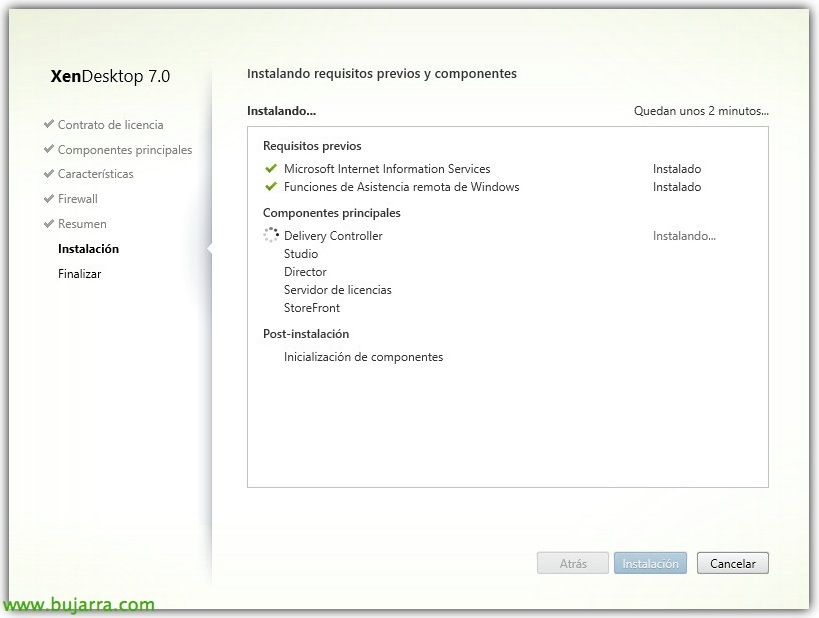
… wait a few minutes while installing…
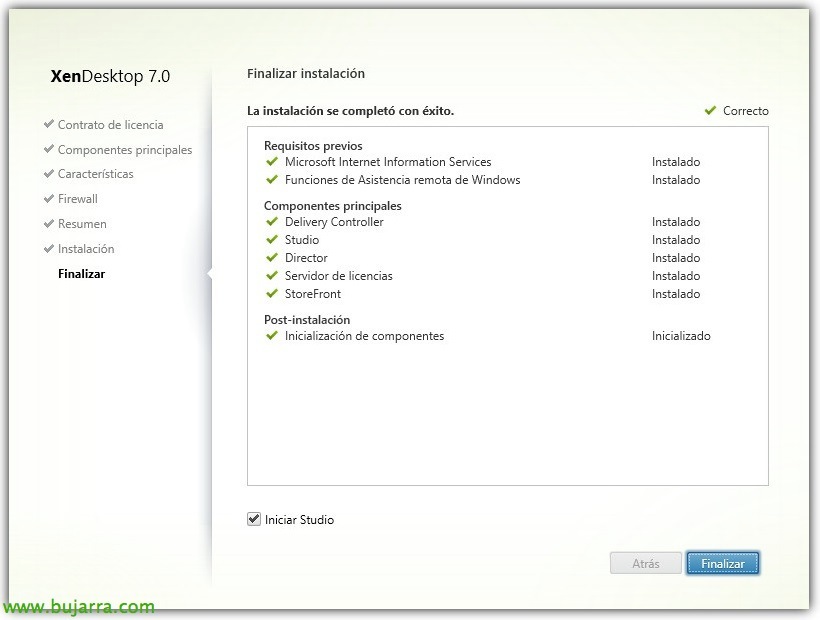
And after the installation and start of services we will open the Studio console to start with the basic configuration!

The first thing will be to create our organization's Site and configure it, Click on “Get started now! Create a site”,
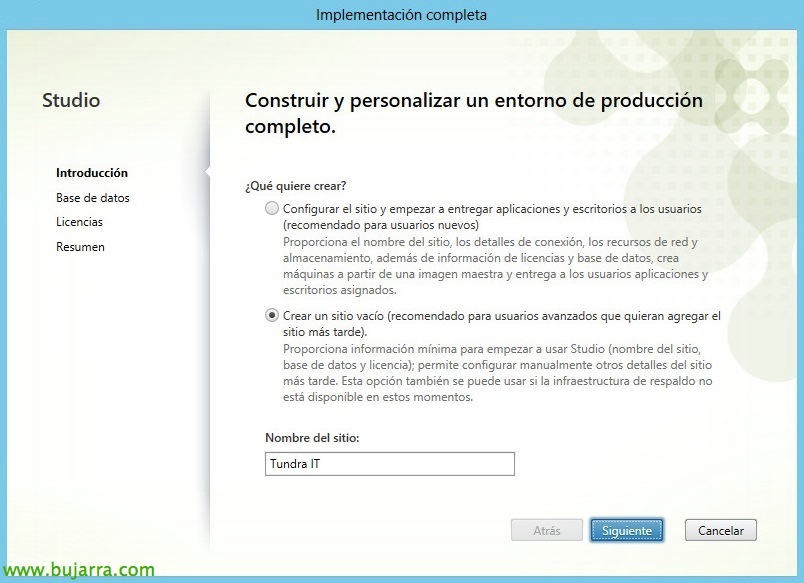
Click on “Create an empty site” and indicate the name of the Site “Following”,
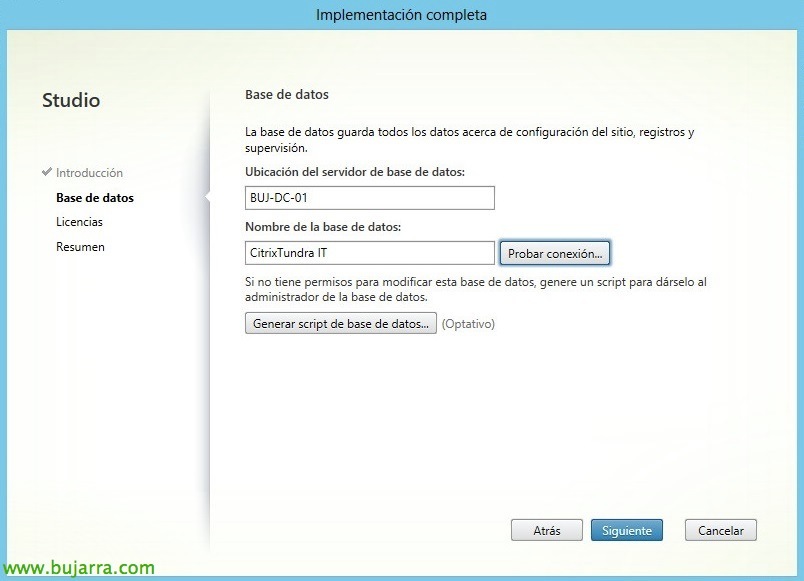
We indicate connectivity to the database, we indicate the database server and indicate a name for the database & “Test Connection…”

It will tell us that the DB does not exist and if we want to create it, “Accept”,
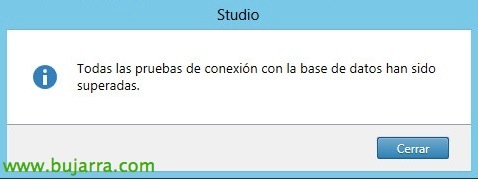
And we confirm that the connectivity is correct,
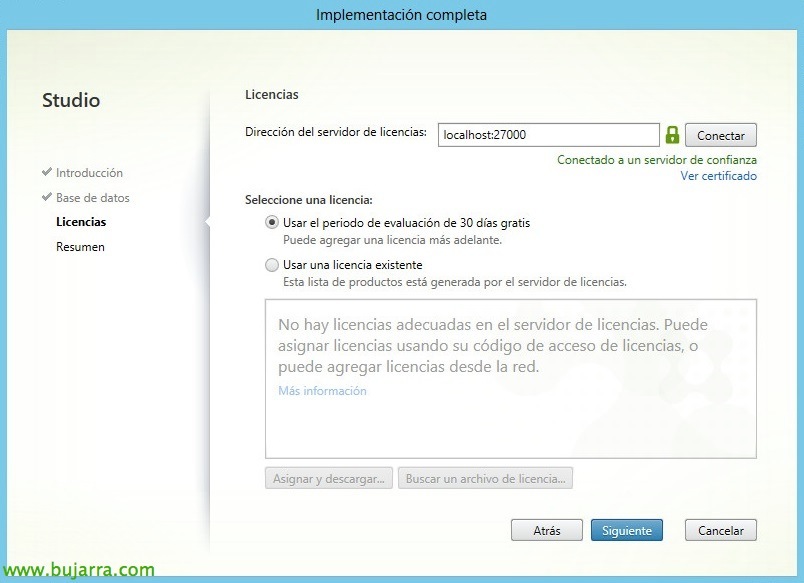
We specify the license server and its port & “Connect” & “Following”,
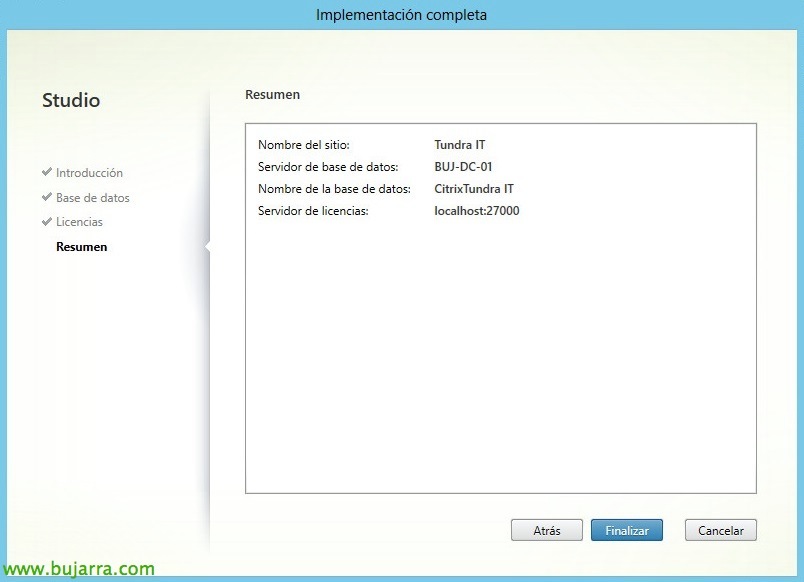
We confirm that everything is correct and click on “End” to create the environment,
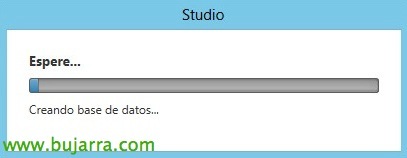
…wait a few seconds while the DB creates us…
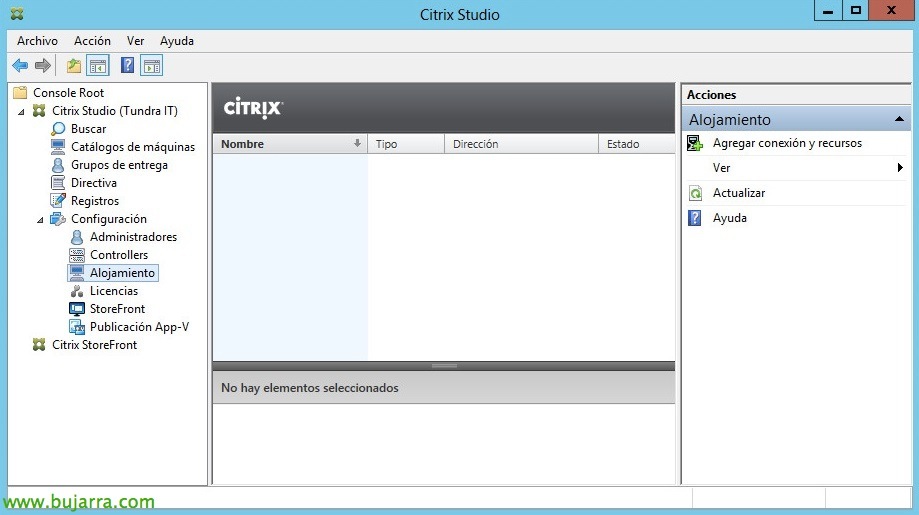
GOOD, before we go ahead and create our machine catalogues, We need to configure the connection to our virtual infrastructure, so from “Accommodation” Click on “Add connection and resources”,

We will indicate our connection type, may be to Microsoft Hyper-V servers, VMware vSphere or Citrix XenServer, in our case we have a vSphere environment, so we introduced the connection to our vCenter, For the connection to be satisfactory, we must trust the certificate that it presents to us, We enter login credentials and enter a login name, just as we will want to create MV's, usually with Studio tools (Machine Creation Services),

In 'Resources’ We must indicate the cluster of hosts that we want to use both to deploy machines and to assign existing ones, in addition to the network that we will have in the new machines.
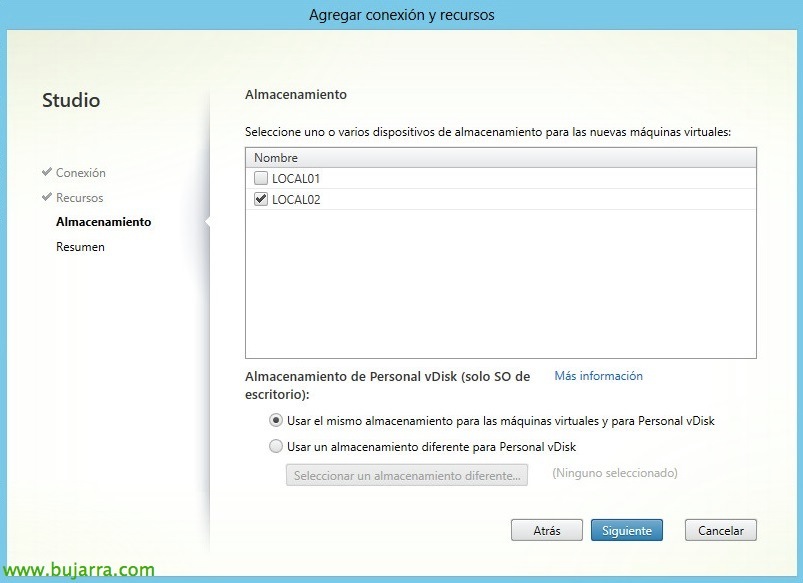
We also indicate the warehouse that we will use to locate the new MV's, and if we want a different one for the Personal vDisks we will indicate it.

We confirm the summary and finalize!
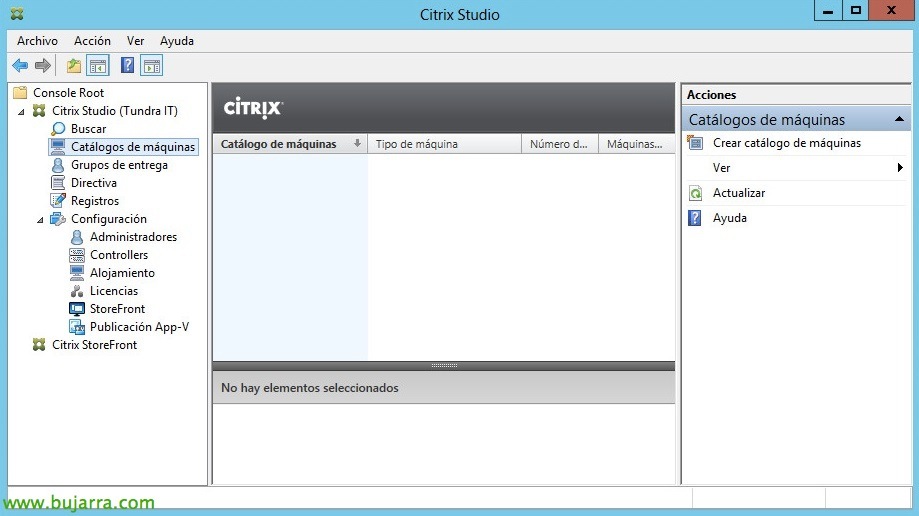
Now we can start configuring and presenting machines, Click on “Machine Catalog” and “Create Machine Catalog”. GOOD, Before you continue, we must deploy the XenDesktop agent or VDA (Virtual Delivery Agent) on the desktops or servers that we are going to add. These catalogs will be a collection of machines (physical or virtual) that we may subsequently assign and publish their resources to users.
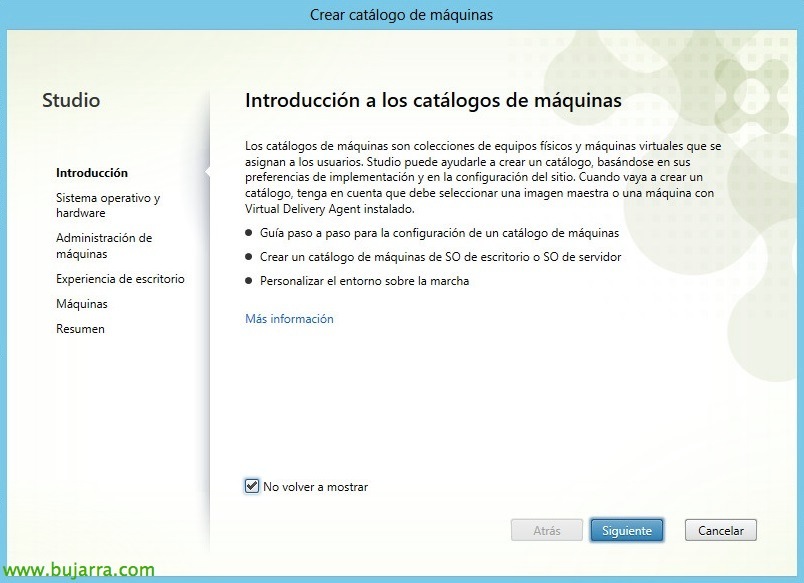
“Following” & “Do not show again”,
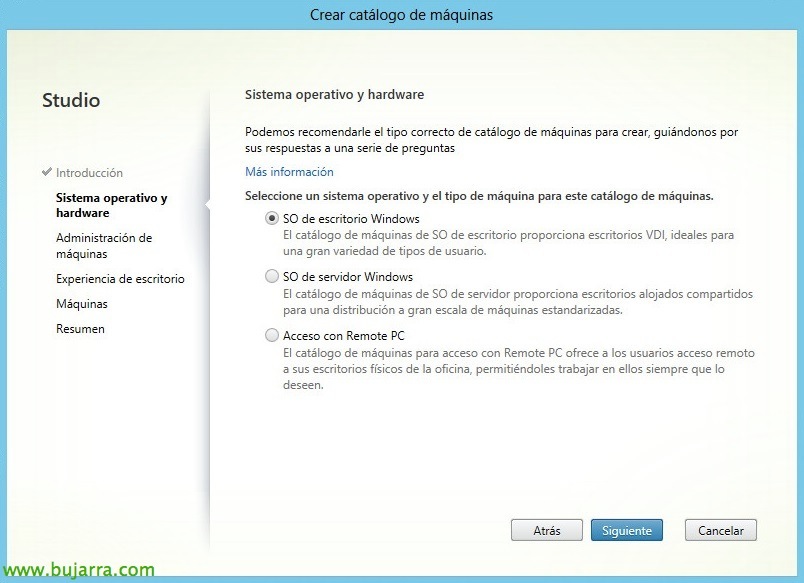
In this first scenario I will add machines with 'Windows Desktop OS', so we will select client OS, we could add servers or users' computers with RemotePC,

We will indicate the type of infrastructure (whether physical or virtual), and the MCS creation and provisioning method (Machine Creation Services), PVS (Provisioning Services) o Other services (when it's not a Citrix technology). In this case, we already have some virtual machines created and with applications installed, which will be the ones we will give access to, both to their desktops and applications.
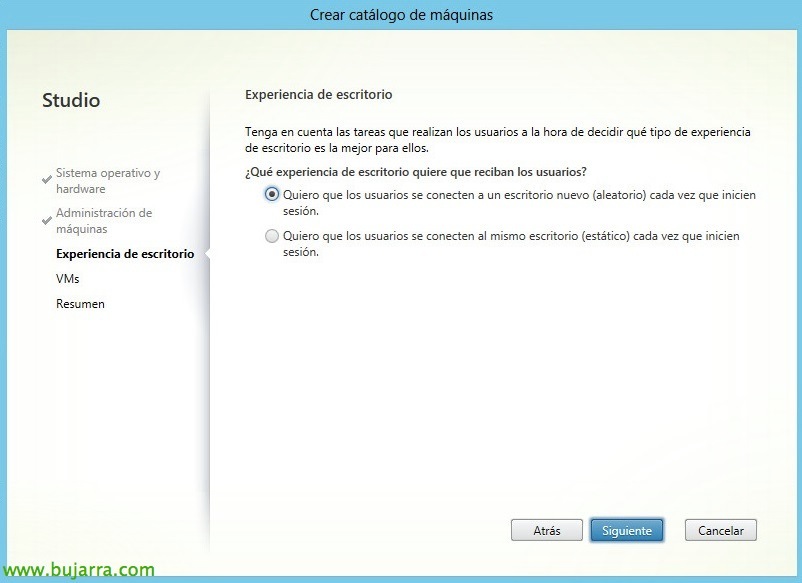
Select whether we want to reserve the desktop and or leave in shuffle mode when users connect, In my case random.

We add all the machines we want to enter in the catalog and associate them with their corresponding AD team account, and we must indicate if they are machines with old agents (version 5.6 or lower) with Windows XP, View or 7.
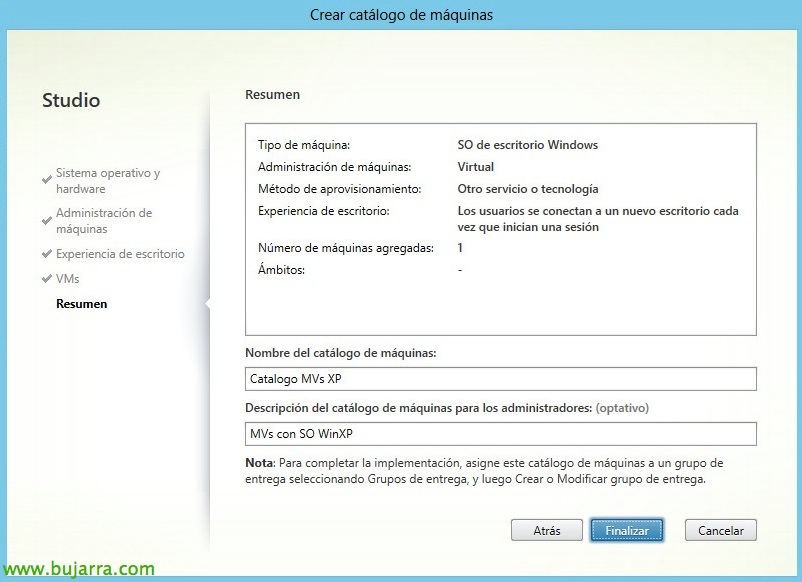
We confirm the creation summary & “End”,
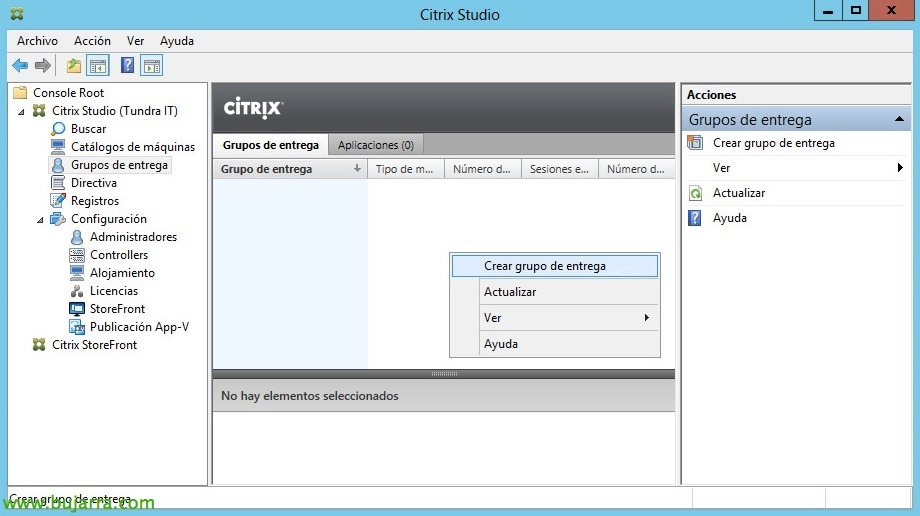
GOOD, Once all the catalogs we need and of whatever types have been created, we have created, We will have to publish your resources, so from “Delivery groups” We will click on “Create Delivery Group”,

It tells us that with this wizard we will be able to publish applications, desktops and associate them with users or groups. “Following”,
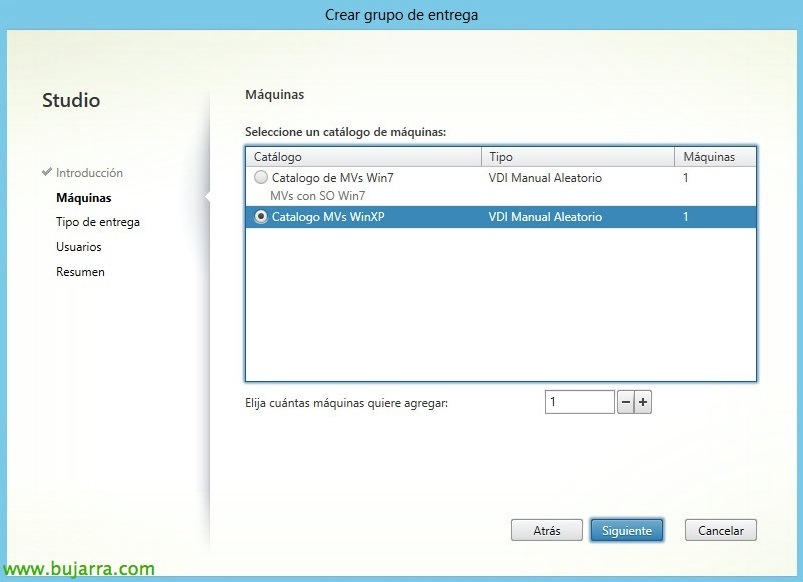
Select the catalogue that we are interested in publishing and the machines that we will use from it, “Following”,

We indicate the resources we want to deliver to users, if you have applications installed and/or access to your desktop, “Following”,

We will need to assign the users who have access to these resources, so we normally select a group of AD users,

It will detect the installed applications and select the one that interests us, we can also add applications manually,
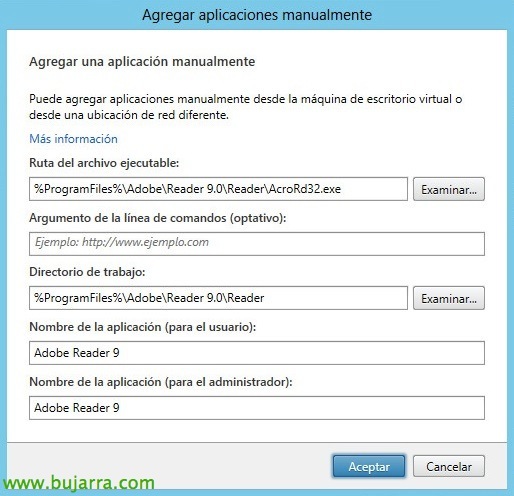
To do this, we will indicate the path of the executable and other required information,

GOOD, We indicate the name of the Delivery Group and the name by which users will see the name of the desktops, plus a description, “End”,
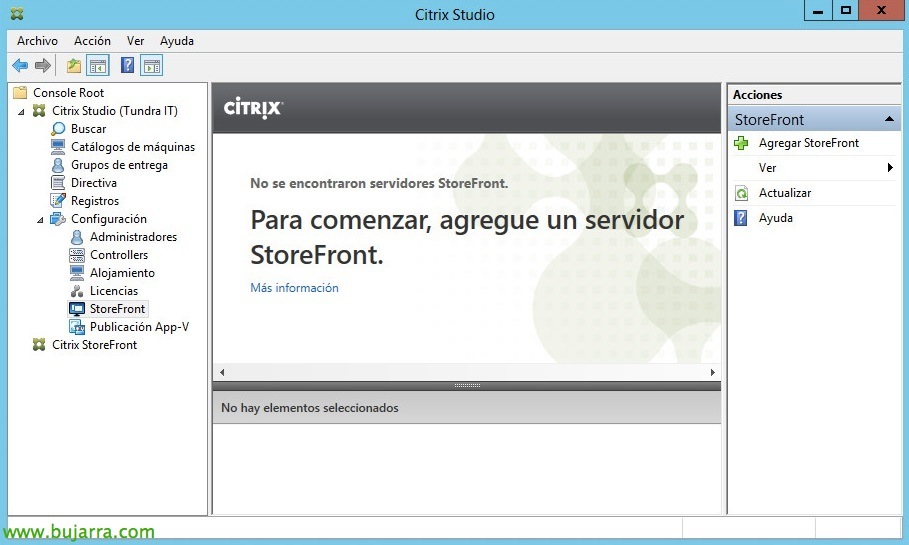
And after publishing some resources we must give access through StoreFront to the Receiver clients, for this, since “Configuration” > “Storefront” > “Add StoreFront” so you can manage and configure your sites,
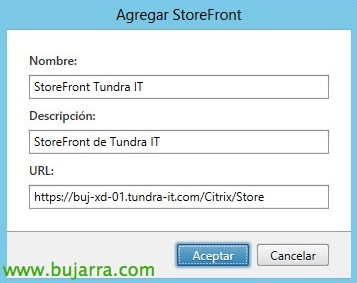
We provide you with a name and URL to access the site & “Accept”,
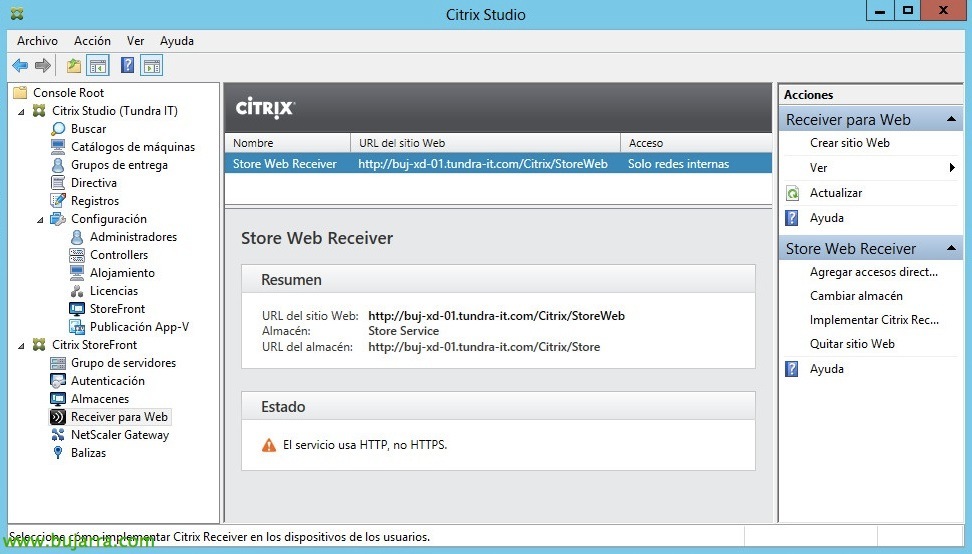
And we can configure the StoreFront server from the Citrix Studio console, indicating the type of access, Authentication… It is also redesigned so its configuration is much simpler!
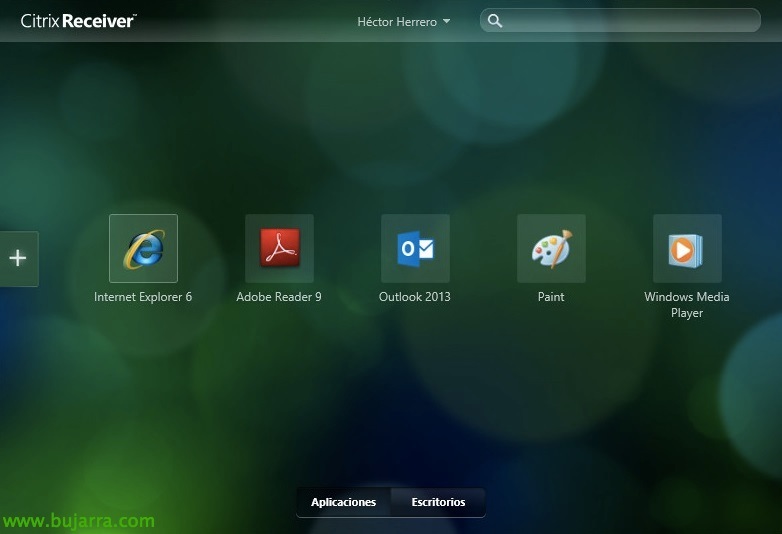
And nothing, once configured we can access it via the web or with our Receiver, After validating ourselves, we must observe the applications to which we have access,
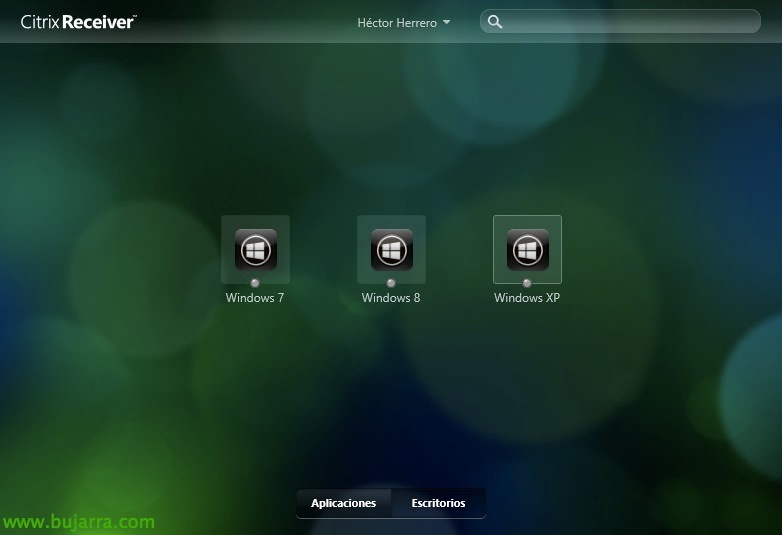
And the desktops assigned to us by the XenDesktop administrator!!! Not a pimp?


