Installing and configuring Microsoft Forefront TMG for secure OWA access
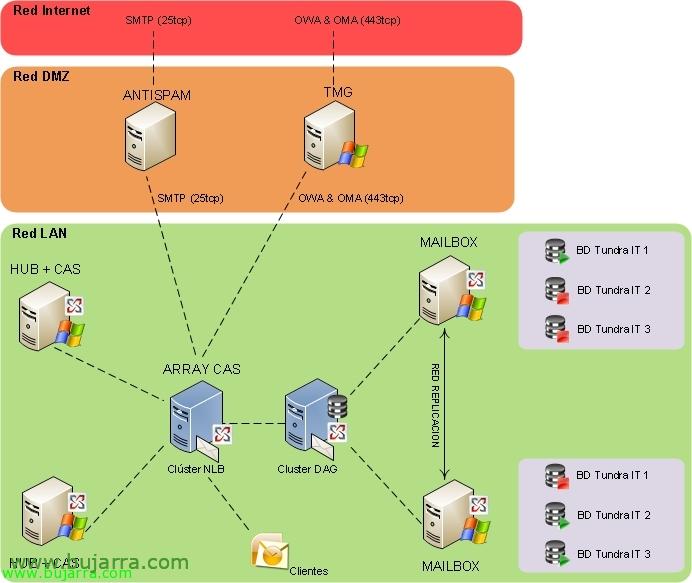
In this document, we'll look at one of the most common installations when deploying a Microsoft Exchange Server installation 2010 e ensure your connectivity from the outside through OWA access (or the necessary services) via a TMG host on the DMZ network. We will perform the installation of Microsoft Forefront TMG (Threat Management Gateway) An old ISA Server on a DMZ computer that will only be connected via HTTPS from the Internet, and the server will only connect to the Exchange server with the HUB role (or CAS array).
In this document we will see a typical situation, we already have a DMZ and we will introduce a host in it on which we will install Microsoft Forefront Threat Management Gateway 2010 With an Ethernet leg in which requests will come in from the outside (Internet network) And he'll move inside (Lan). This document will allow OWA connections (Outlook Web App) from the outside and we will redirect them to the array we have of the Client Access servers (CAS Low Array NLB), if we do not have a cluster of this type we will forward it against our Exchange server with the Client Access role.
Installing Microsoft Forefront TMG 2010,
We have a team ready at the DMZ, to which we have simply installed Windows and set a computer name, DMZ range IP address (without configuring DNS's, Not even to put in control, with the entries in the 'hosts’ Corresponding…). Introducing the Microsoft Forefront Threat Management Gateway DVD 2010 and in the authorun we select “Run the Preparation Tool”
A wizard will start to prepare the local equipment with all the necessary requirements and install them for us, “Following”,
“I accept the license terms” & “Following”
We mark the first option “Forefront TMG Services & Administration” & “Following”,
… That said, we wait a few minutes while it installs and configures the necessary features…
Select “Launch the Forefront TMG Installation Wizard” & “End”,
And the TMG installation wizard would begin, “Following”,
“I agree to the terms of the license agreement” & “Following”,
We indicate the necessary data, as well as the serial number, “Following”,
Select the installation path (default %ProgramFiles%Microsoft Forefront Threat Management Gateway), “Following”,
We will indicate at this time which IP range belongs to the 'internal network', Pressed “Add…”
We add what interests us, or the dedicated adapter or IP range of the DMZ, for this “Add Interval…”,
We indicate the range of the DMZ, Initial IP to End IP, “Accept”,
“Accept”,
“Following”,
We must take into account that the specified services will be restarted (in case we are using them in production),
And ready to start installation!
… We waited a long time…
And we will already have the new ISA installed! We keep the option checked “Start Forefront TMG Administration when the wizard closes” & “End”,
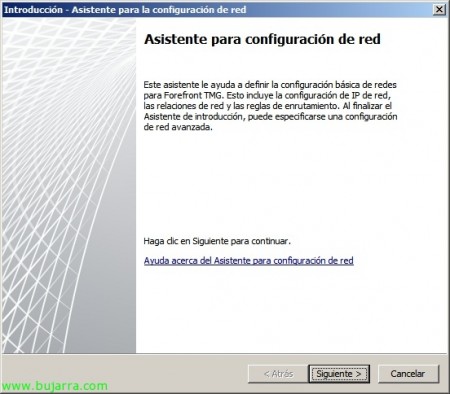
In the getting started wizard we will first configure the network options of our computer, Click on “Configure network options”,
“Following”,
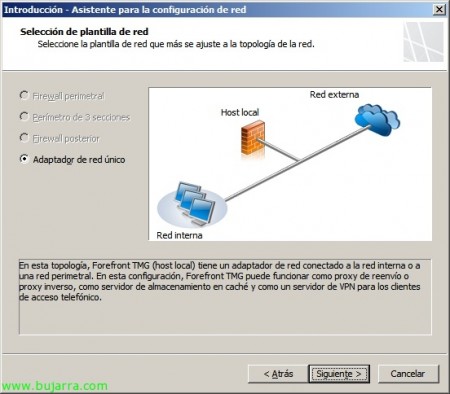
In my current situation I have a net leg so I can only select “Single Network Adapter”, the other options would be to be used in different situations or for other purposes, in my case I will simply carry out the safe transfer of external connections to the interior to use OWA, Outlook Anywhere… “Following”,
It will show us the network adapter of the computer with its network configuration, We check that it is correct “Following”,
List, We confirm with “End”,
Ok, “Configure System Options”
Brief wizard to modify if we consider necessary some server options,
We check that everything is correct & “Following”,
“End”,
Finally we finish with the assistant “Define deployment options”,
“Following”,
We must indicate “Use the Microsoft Update service to check for updates” to keep the Forefront TMG up to date, “Following”,
We configure TMG licensing and update issues, “Following”,
If we want to participate in the improvement and experience program… “No” & “Following”,
If we want to send Microsoft malware usage reports, etc… “None” & “Following”,
At last, ready “End”,
We close the wizard, if we want we can use the assistant for Web access and be able to have connectivity with the TMG or we will configure it later.
Generating a certificate for OWA,
Before configuring TMG we must have a valid certificate for the use of OWA, so we need from Exchange to generate a certificate request, then with a valid CA generate the certificate, import it into the server that we have made the certificate request and assign it to the IIS service. We must export this certificate in PFX format (with private key) and import it into the equipment we need, be it other Exchange servers or in the TMG itself, To do this, it will be essential that we use the local certificates of each computer and not those of the user; so we'll need to open an MMC and add the 'Certificates' plugin’ and 'home team account', from there we can export/import certificates, we will need to do it in 'Personal’ and obviously have the CA certificate (Certificate Authority – Certificate Authority) under 'Trusted Root Certificate Authorities'.
Well, Started, from the Exchange Management Console > “Server Configuration” > “New Exchange Certificate…”
We indicate the name of the certificate, “Following”,
“Following”,
We indicate the service(s) that we want the certificate to have, to do this, we must indicate the domain names that we will need for OWA, ActiveSync, Outlook Anywhere… In my case it will always be the same domain name for everything, We indicate it & “Following”,
We confirm that the domain name is correct & “Following”,
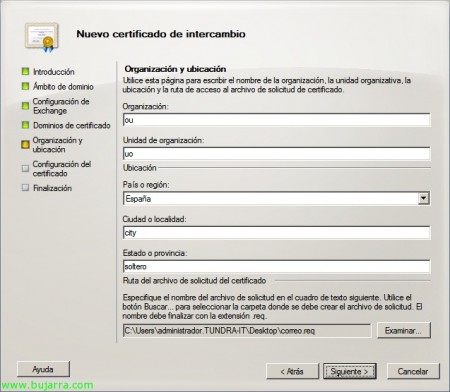
We indicate the certificate data: Organization, Unity of organization, Country or region, City or town, State or province and where we will leave the certificate application. “Following”,
“New” to generate the certificate request,
“End”,
Now we must go to a certificate authority and submit the application that we have just generated, We will obtain a certificate for a ready-to-use web server, we will be able to use public CA's (recommended) or use the Microsoft CA on our network.
Once we have the certificate generated, we import it, Continue where we were on the same server where we made the request, click on the 'Certificate’ > “Complete pending application…”
We select the certificate from “Examine” & “Complete”,
“End”,
Once we have the certificate installed correctly (and we trust in your CA) we must assign it to an Exchange service, in our case it will be for OWA, so we will assign it to the IIS service. About the certificate > “Assign Services to Certificate…”
We indicate the name of the Exchange server that will be affected & “Following”
Indicate “Internet Information Services” & “Following”,
“Assign”,
And that's it!
All this will need to be ready before setting up TMG, once we have it, what has been said above, we must install this certificate on the TMG server (on the team account) and the AC if necessary.
Microsoft Forefront TMG Configuration 2010 to give access to OWA,
In this part of the document we will see how to allow the use of OWA from the outside of our organization to the inside in a secure way, We open the Forefront TMG Management Console, We're going to “Firewall policy” > “Publish Exchange Web Client Access”
We give the rule a name, “Following”,
We indicate the version of Exchange we have in the organization and check “Outlook Web Access”, “Following”,
“Publish a single website or load balance” if we have a single server with the Client Access role or we have a CAS array, “Following”,
We indicate how we want the TMG to connect to the Client Access server, We mark the first option “Use SSL”, “Following”,
We indicate the internal name of the site of our (Our CAS), if it does not resolve the TMG by name we must indicate the IP address of the server that has OWA, “Following”,
We instruct you to accept applications only for the public domain name that we will use to access them from the outside and enter it, “Following”,
We create a web listener to indicate which requests we will hear from abroad, “New…”,
We indicate the name of the website & “Following”,
Mark “Require secure SSL connections with clients” & “Following”,
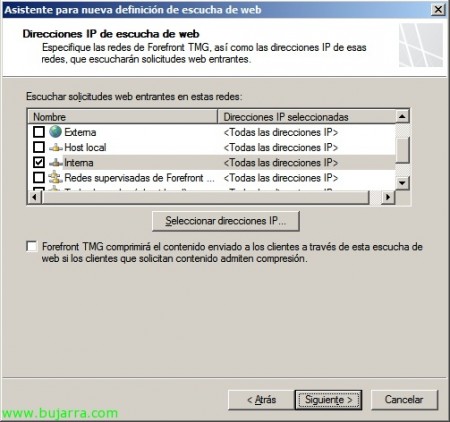
We indicate the listening network we will use (In this case, since I only have one Ethernet adapter, I wouldn't care, so we select 'Internal'). “Following”,
Select the certificate that we have previously generated on the Client Access server “Select Certificate…”
We select the only one we will have & “Select”. If we do not get any certificate here, we must check, that we have the certificate installed on the computer account, that we have your private key and that we know/trust the entire certification path.
We indicate the authentication we need and the way the TMG will validate against our domain controllers (It depends on the way we must allow this traffic from this equipment to the DC of the network), “Following”,
Uncheck SSO (Single Sign On) & “Following”,
“End”,
We continue with the TMG rule, “Following”,
We indicate authentication to be validated with the OWA server, it is recommended to configure 'Basic Authentication'’ which is in plain text but we have already established an SSL session so it would be encrypted. “Following”
We must therefore in the properties of 'owa’ Configure the same authentication method (in the Exchange Management Console > “Server Configuration” > “Client Access” > Eyelash “Outlook Web App”).
We indicate the users to whom the rule will apply, “Following”,
And we end the rule with “End”,
We apply the changes in TMG…
And we will be able to check from the outside if we have the port mappings (at the firewall level) how we will be able to access OWA from the outside through the TMG server securely!
we confirm how the OWA portal indicates that we are 'protected by Microsoft Forefront Threat Management Gateway'.


