Microsoft Windows Server Installation and Configuration 2008 Hyper-V

At last, This document shows how we can use one of the latest new features that Microsoft has released in its new Windows OS 2008. Formerly called Viridian, and better known as Windows Server Virtualization, is Microsoft's hypervisor, the one that allows virtualizations of virtual machines on an x64-bit physical machine. This will allow us to create a virtual environment in our organization and have virtual machines on physical servers, as many as the physical servers support or licenses we have.
We have to take into account that this product is only available for servers based on a 64 Bit, and to install it we need to have a version of Microsoft Windows 2008 that includes Hyper-V, since there are certain editions that do not have it as the license is cheaper.
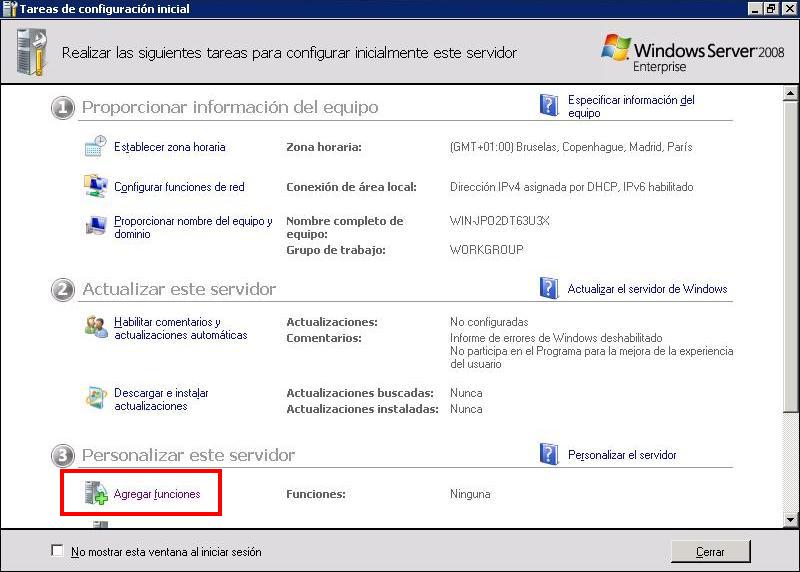
To get this new role and install it, we must add it as a new feature, for this, from the “Initial Configuration Tasks”, we must add this feature from the step 3, “Customize this server” > “Add features”.

In “Server Roles” we must add “Hyper-V” to install the, “Following”,

It gives us a summary of the component we are going to install… “Following”,

It informs us that the VMs need to access the physical network to communicate with the other computers, we have to select a physical network on the server to share it with the virtual machines, we check the network we are interested in and “Following”,

We check in the summary that everything is correct and click on “Install” para agregar está nueva función,

… esperamos mientas nos instala Hyper-V…

Debemos reiniciar el servidor para que continue con la instalación y finalice, So we click on “Close”,
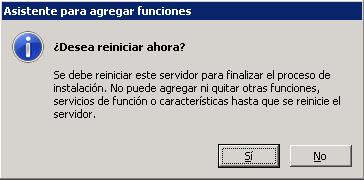
“Yes”, Restart,

Una vez reiniciado el servidor el progreso de instalación continua, Hope…

GOOD, ya nos indica que la instalación es correcta y que podemos usarlo ya. Click on “Close” para abrir la consola de administración.

Abrimos la consola de administración de HyperV, the “Hyper-V Manager”,

La primera vez que la usemos debemos aceptar el acuerdo de uso de licenciamiento, Click on “I have read and agreed this EULA” & “Accept”,

Está sería la consola de administración de máquinas virtuales, en el panel izquierdo tendremos todos los servidores que ejecuten Hyper-V, desde ellos podremos gestionar las máquinas virtuales, podremos crear máquinas virtuales nuevas, importarlas… en este ejemplo crearemos una máquina virtual nueva con Windows 2003. Hyper-V soporta los siguientes sistemas operativos virtualizados: Windows Server 2008 x86/x64, Windows Server 2003 x86/x64, Windows Vista x86 SP1, Windows XP x86 SP3 y SUSE Linux Enterprise Server 10 x86/x64 SP1. Bueno para crear una MV nueva: sobre el servidor que nos interese, Right-click: “New” > “Virtual Machine…”

Nos sale un asistente de configuración, Click on “Next”,

Introducimos el nombre de la MV, será el nombre que se verá desde la consola de administración, normalmente se pone el mismo nombre que tendrá la MV (o el nombre de una plantilla). Y el path donde guardaremos los ficheros de la máquina virtual, which by default will be: “C:ProgramDataMicrosoftWindowsHyper-V”, “Following”,

Asignamos la memoria RAM que queremos que tenga está máquina virtual, para mí con 512Mb de RAM me basta, ya que este nuevo servidor no necesitará más, “Next”,

Seleccionamos el adaptador de red que le queremos asignar a la MV, para que se conecte a la red física (If we are interested), “Next”,

Seleccionamos si queremos crear un disco duro ahora, si lo necesitará, otherwise, podríamos usar uno existente que tengamos por ahí ya con el S.O. instalado o sin disco duro. Yo le asignare un disco duro virtual de 20Gb, “Next”,

En las opciones de instalación, podemos seleccionar si le instalaremos un sistema operativo más adelante o si lo queremos hacer una vez creada la MV y donde estará su CD/DVD de instalación, si en la unidad física del servidor o si lo tenemos en una imagen .iso, podemos instalar el S.O. desde un disquete (montándolo) o instalándolo desde la red mediante PXE por ejemplo, “Next”,

Comprobamos el resumen de creación de la MV, If everything is correct, click on “Finish”, eye, si nos interesa que la MV arranque de forma inmediata pulsamos en “Start the virtual machine after is created”,

Si pulsamos sobre un servidor físico en la parte central nos mostrará las MV que tiene, y sobre ellas, con el botón derecho podremos conectarnos a ellas (a su consola), editar propiedades, arrancarla si está detenida, o si está arrancada reiniciarla o apagarla. Además podremos sacar snapshots de su estado para hacer una copia igualita de ella en su estado actual para usarla en un futuro como backup. Podremos exportar la MV, renombrarla o eliminarla de forma permanente.

Si editamos las propiedades de una máquina virtual, sobre ella con el botón derecho y “Settings” podremos editar todas las posibilidades que nos de a nivel de hardware, podemos agregarle dispositivos de hardware, modify the assigned RAM, the assigned CPUs, the assigned hard drives and add another, COM ports, floppy drives…

If we right-click on a physical server running the Hyper-V role and select “Hyper-V Server Settings…” we can edit certain general parameters for all VMs or options on this physical server.

From here we can change the default directories where virtual machine files or their hard drives are stored, as well as modify certain parameters of the keyboard or saved credentials.
Now all that's left is to start the VM, install an OS. and configure it to run the applications/services it needs to run.
www.bujarra.com – Héctor Herrero – Nh*****@*****ra.com – v 1.0