
Installing and Configuring Symantec Corporate Edition v. 10

This is Symantec's corporate antivirus, personally the best for distribution in companies, Easy to upgrade, Migrate and monitor. This procedure explains how to install antivirus on an MS Windows-based server 2003 and then distribute it to posts keeping it up to date. To start we put the CD in and start installing it.

Select “Install Symantec Antivirus”

“Install Symantec Antivirus”

An antivirus installation wizard will start, Server version, Next,

We accept the license and the following

Server Installation and Next

Complete installation

We indicate a group name where all antivirus will be installed, be they PCs or servers. We indicate a user “Admin” and a password to be able to deselect the group.

It tells us that the group is new, that we are not going to join an existing one, So we confirm the password.

Select the two options and Next.

We start the installation, Click on “Install”,

We waited a few minutes…

End

Once the antivirus is installed on the server, A console must be installed for administration (A mmc), so we go back to the author of the CD and click on “Install Administrator Tools”.

in “Install Symantec System Center”

Following,

We accept the license and following

We check all the options and next,

The path for the console.

Click on “Install” begin with

We waited a few minutes…

and Console installation finished

Must be rebooted, is mandatory, so we call Yes.

Once rebooted, We open the antivirus console, “Beginning” > “Programmes” > “Symantec System Center Console” > “Symantec System Center Console”.

Open the console, The first thing is to unlock the antivirus group that we have created, so about him, Right-click > “Unlock Server Group”.

Enter a username and password and check the options below that interest us and Ok.

The group is unlocked and we see that it marks it with a red cross, We must mark one server as primary, so on the server we are interested in, right button and “Make Server as a Primary Server”
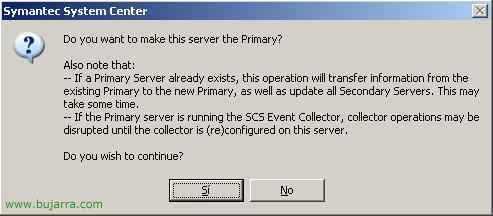
Yes

Then we must update the virus signature file, for this with right click on the primary server > “All tasks” > “Symantec Antivirus” > “Update Virus Defs Now…”

Yes

Accept

We check how to update the virus signature file on the server and how to propagate it on the workstations, Schedules…, for this with right click on the primary server > “All tasks” > “Symantec Antivirus” > “Virus Definition Manager…”

We put the checks in this window as we see fit, I usually put them as they are here, and we hit the “Set” to indicate a schedule,

Button “Schedule” …

We select how often we want the internet updates to be downloaded, normally, I put an hour before people enter the office to work. We press Ok.
.

Now some configuration options for the positions, for this with right click on the primary server > “All tasks” > “Symantec Antivirus” > “Auto-Protect Options Client…”

These options will apply to all client PCs that have antivirus installed, In this tab “File System” are general options, I always force (with the padlock) that the mandatory protection is always in place and that it cannot be deactivated, as well as that all file extensions are always scanned and that if they put a disket or CD in it, that the files are scanned.

On the “Internet E-mail” Idem, We look at all the options that interest us and check them, and we move through the other tabs. Then ok.

Some other customer options… Right-click on the primary server > “All tasks” > “Symantec Antivirus” > “Client Administrator Only Options…”

I usually put the antivirus icon to see on which PC it is installed and for users to see, we look at some other option and accept, With all this, the antivirus version is fully installed and configured. Now only the client part remains.
Installing the Antivirus Client,
This installation will be carried out on the client PCs, they will update and get all the information from the antivirus server. Can be installed from these versions: Windows 98/ME/NT/2000/XP and 2003.

From the PC to install the antivirus, we access the server via the network., to a folder called VPHOME, within this to a CLT-INST call and then to the 32 bits or 16. To install it we run the msi, “Symantec Antivirus.msi”.

An assistant will start… and Next

We accept the license and the following

Complete Installation and Next

Install to get started!

We waited a few minutes…

and Finish. The antivirus client is now installed on a PC, It's simple, you can make it be installed with a BAT file in the positions that interest you, or in more ways.

To check that we have the PCs with the OK antivirus, Let's go to the antivirus server, to the console “Symantec System Center Console” and we see the posts that have the antivirus in them. If any of them have had any virus or any incident, they would be seen on this console. From here we can pass the antivirus to all the PCs, Upgrade them all… is to look at all the options. But with what was done in this procedure everything would work well.


