
Installing and Configuring vSphere Auto Deploy

vSphere Auto Deploy will allow us to massively deploy ESXi hosts 5 via PXE on our network, for this we will need to previously have a custom ESXi image to send to our hosts, that we can generate it with Image Builder. Auto Deploy will be installed on a Windows machine if we don't have VMware vCenter Server Appliance (that is already installed); and finally we will need Host Profiles; since through them we will apply the configurations on the hosts that boot through PXE (or alternatively we can use response files), these servers would not need a hard drive as they load it into RAM. This is totally ultimate in large environments to quickly and massively deploy ESXi hosts, being able to have centralized and non-distributed configuration (manual) on each host, having our ESXi image fully customized at the driver level, update…
VMware vSphere Auto Deploy supports hypervisor deployment based on the image profiles we have previously created with Image Builder, Once we have a profile that we want to associate with a host, we will create a rule to apply the image to that host, once the computer boots up, we will configure it according to our needs and finally we will capture these configurations in a Host Profile that will be used to deploy the following hosts with Auto Deploy.
What I said, if we have a traditional vCenter server on a Windows computer, we must install VMware Auto Deploy on the server itself or another; otherwise, we will skip the installation since VMware vCenter Appliance has the component installed. Auto Deploy supports network booting of hosts using PXE, so we will need to install & Configure a TFTP server (in this case the simple Tftpd32)& a DHCP server that indicates which boot file is and who will give it to you).

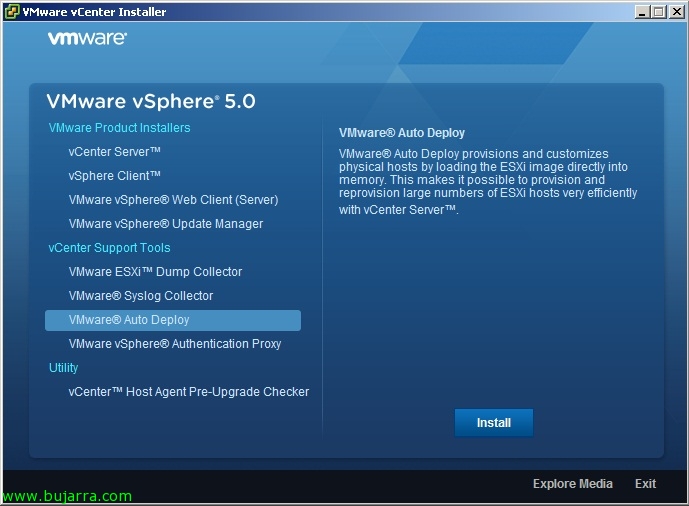
On the VMware vSphere DVD 5.0 > “VMware Auto Deploy” > “Install”,

We select the language of the installation,

We run the vSphere Auto Deploy installation wizard, “Next”,

“Next”,

“I accept the terms in the License Agreement” & “Next”,

Select the path for the installation of Auto Deploy (default '%ProgramFiles x86%VMwareVMware vSphere Auto Deploy') and the repository where the images will be stored…

We enter the data from our vCenter,

Select the Auto Deploy port,

Select the IP or name with which we will show ourselves on the network,

“Install” to begin installation,

…

And that's it, We start setting up!

The first thing will be to enter the VMware vSphere Client and check if we have the Plugin enabled, if when loading we get an error check that the Autodeploy services are started, well on the vCenter Appliance, well on 'Windows'. I comment on it because it is a fairly common mistake -:)

Once in the VMware vSphere Client, In view “Home” We will go to “Auto Deploy” And we got off “Download TFTP Boot Zip”, we download it unzipped in the folder of our TFTP server.

In my case I have the root of my TFTP in C:tftpd64.400VMware; on the DHCP server on our network we will configure the options ‘066 Boot Server Hostname’ & ‘067 Boot File Name’ with the name or IP of our TFTP server and the boot name: 'undionly.kpxe.vmw-hardwired'.

GOOD, now from a vSphere PowerCLI shell we will connect to the vCenter server, with: 'Connect-VIServer SERVIDOR_VCENTER’

In this graph we will see the deployment of the first host, which will be in charge of generating a Host Profile with all its configuration and being able to apply it to the rest of the hosts,

The first thing will be to assign to a host a profile of an ESXi image that we have previously generated with Image Builder, There are other ways to do it, but I understand that this may be the most common, We created a deployment rule affecting the MAC of the first host with: 'New-DeployRule -Name REGLA_HOST_PRIMARIO” -Item “NOMBRE_PERFIL” -Pattern “mac=MAC-FIRST-HOST”‘

We enable it with: 'Add-DeployRule -DeployRule “REGLA_HOST_PRIMARIO’ and we check the rules we have with: 'Get-DeployRule’

At this point we will be able to boot our first ESXi host, we will check on your console how you charge the OS. by network and wait while it has just started, this host will be automatically added to our vCenter, Once ready, we will proceed to configure it to our liking: We'll change your network settings, root password, NTP, iSCSI, Services, FW…
If we look closely, In this start-up we will be able to observe the conditions that we can use to apply the rules such as: Asset, domain, hostname, IPv4, mac, model, OEM, serial, uuid or vendor.

Once we have the primary host configured, generate a Host Profile from the VMware vCenter client based on that host.

Once we have the Host Profile created, we can apply this configuration to the rest of the hosts and each one can start with its configuration (as specified in the Host Profile).

Well, for this, We create a new rule that we will apply to the rest of the hosts, Be a whole network, an IP range or any other condition that we may choose (and we have seen during the boot of the first host), with: 'New-DeployRule -Name “REGLA_HOSTS” -Item “NOMBRE_PERFIL”,”NOMBRE_HOST_PROFILE”,”NOMBRE_CLUSTER” -Pattern “IPv4=192.168.170.150-192.168.170.199” (we could use other parameters in the pattern such as –AllServers…)
We enable the rule with: 'Add-DeployRule -DeployRule “Tundra IT Hosts Rule”‘,

And we will be able to see how our hosts start in the vCenter, we will see that all of them have the same Host Profile applied, as well as the same profile of Imagen!


