Citrix Client Installation and Configuration 10.0

This procedure explains how to install and configure the current Citrix client, version 10. The procedure explains how to set up two 'clients'’ from Citrix, the “Program Neighborhood” and the “Program Neighborhood Agent”.
– Installing the Citrix Client for Windows XP – HERE
– Citrix Client Configuration “Program Neighborhood Agent” – HERE
– Citrix Client Configuration “Program Neighborhood” – HERE
Installing the Citrix Client for Windows XP,

We download the Citrix client from: HTTP://www.citrix.com, We're going to “Download” > “Clients” > “Windows Vista/XP/2003/2000/NT / Citrix Presentation Server Clients – Version 10.0”. We install it and choose our language.

“Following”

We accept the agreement, “I accept the license agreement”, “Following”,

The default installation path in “C:Program FilesCitrixICA Client”, “Following”,

We see a summary of the applications that are going to be installed, It can be just the “Program Neighborhood” or the “Program Neighborhood Agent” or both. “Following” to get started with the installation.

We wait for it to end…

“End”
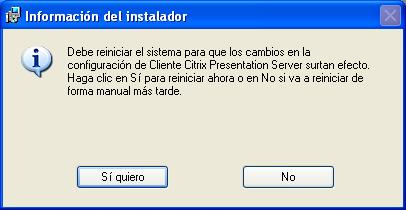
We don't have to restart the computer, So we can say “No”.
How to Set Up the Program Neighborhood Agent,
In order to use the Program Neighborhood Agent, previously we need to create the Program Neighborhood Agent site on a server, We can follow these steps to do it – HERE.

Once restarted, this screen will appear indicating which server we have to connect to, Put: “HTTP://Citrix” and we press “Update”

It will ask us for the credentials of the user with whom we want to connect to our community, We indicate them, user, Password and domain; If we want we can score “Save password” so that it doesn't ask us again every time we restart. “Accept”

And that's it, we will have the icon of the Program Neighborhood Agent in the toolbar  , With a right click we will be able to access the applications to which we have permissions.
How to Set Up the Program Neighborhood,

We will have on the desktop an icon called “Program Neighborhood Agent”, We open it.

Click on “Find a new set of applications”,

Indicate “Local Area Network”, which is where our Citrix community is supposed to be, if we would access it from the internet, we would put “Wide Area Network”. “Following”

If we click on the second 'combo' we will get our Citrix community in a few seconds, Select it and press “Following”,

“Following”, We don't touch anything, We will inherit everything according to the configurations of the published applications.

“End”

We see that it shows us our community as default, If we open it, we will see the applications we have access to.

But before, It is preferable to configure the credentials theme, that does not ask which user to open the applications with, otherwise, that the current user picks, for this, Pressed “Up”, And then “File” > “Application Suite Parameters”

On the “Login Information”, Select “Local User” & “Pass Through Authentication”. This change is made in case the user ever changes their Windows user password, that of the domain, that you don't have to change it also in Citrix, but that he always takes his password that he has at all times. “Accept”.